


Portfolio
A photographic account of some of Old Boston's projects through the years
Victorian Valance ~ Large Parlor Door with Decorative Glass Panels
Antique 1850s Frame Restoration ~ Replication of Historical Crown Moldings
Removal of Paint from 1850s Pocket Doors ~ Victorian Fireplace Restoration 1
Victorian Fireplace Restoration 2 ~ Restoration of 1870s Victorian Chair
Restoration of 1865 Townhouse Stairwell ~ Restoration of 1850s Reception Room
Restoration of Vestibule in 1853 Brownstone ~ Restoration of 1860s Summer Cover
Creation of a Fireplace Mantel ~ Restoration of a Small Room
Restoration of Hunting-motif Crown Moldings ~ Custom-made radiator cover
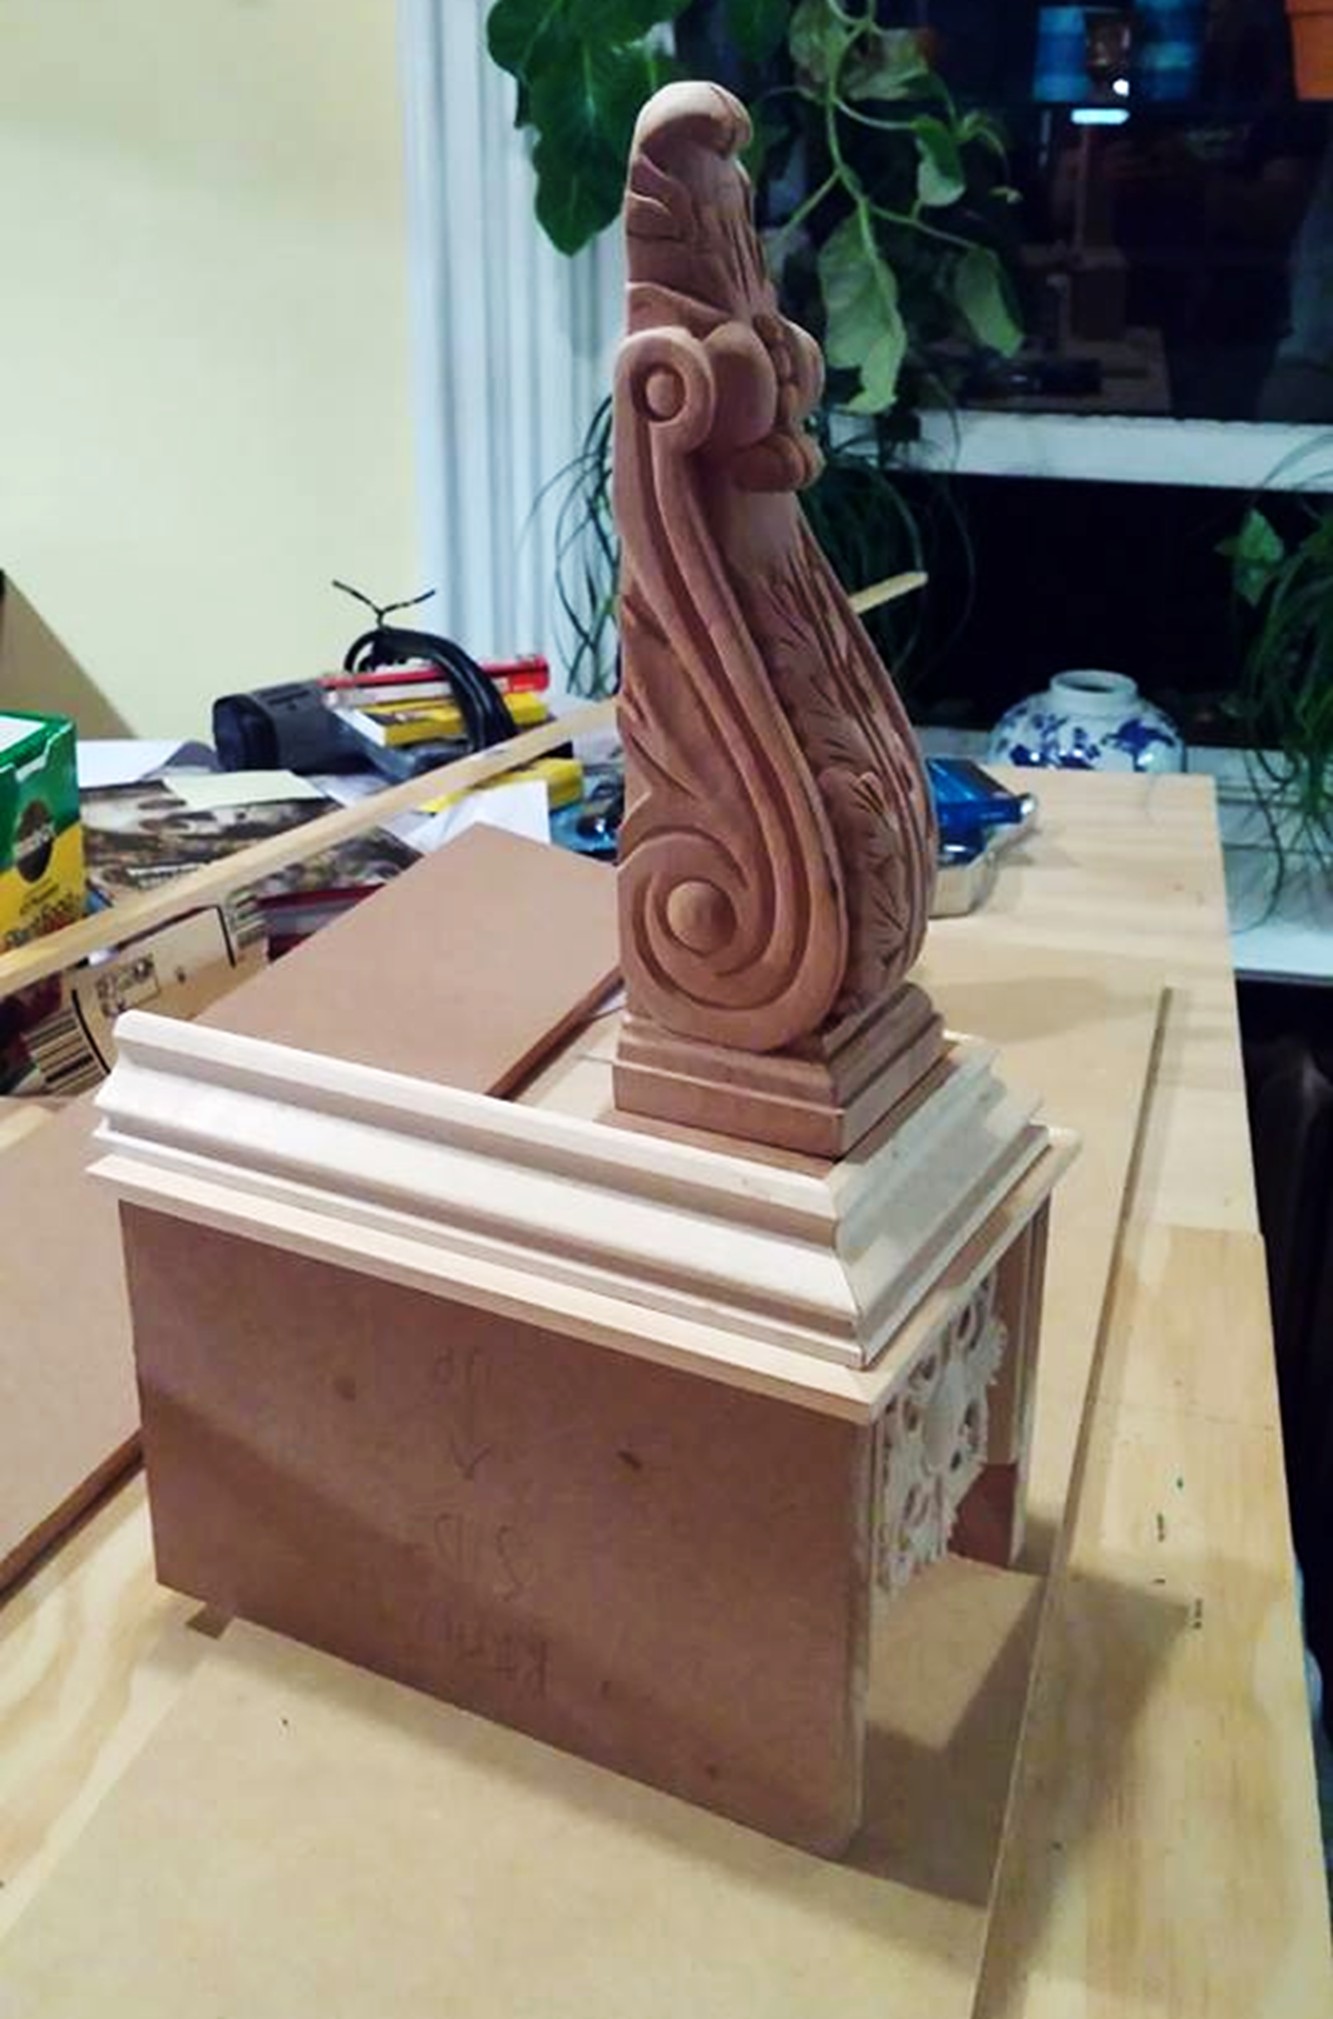
Victorian Valance
Recently commissioned for a South End parlor and drawing inspiration from an original 1860s design, here is a Victorian valance built by the team at Old Boston.
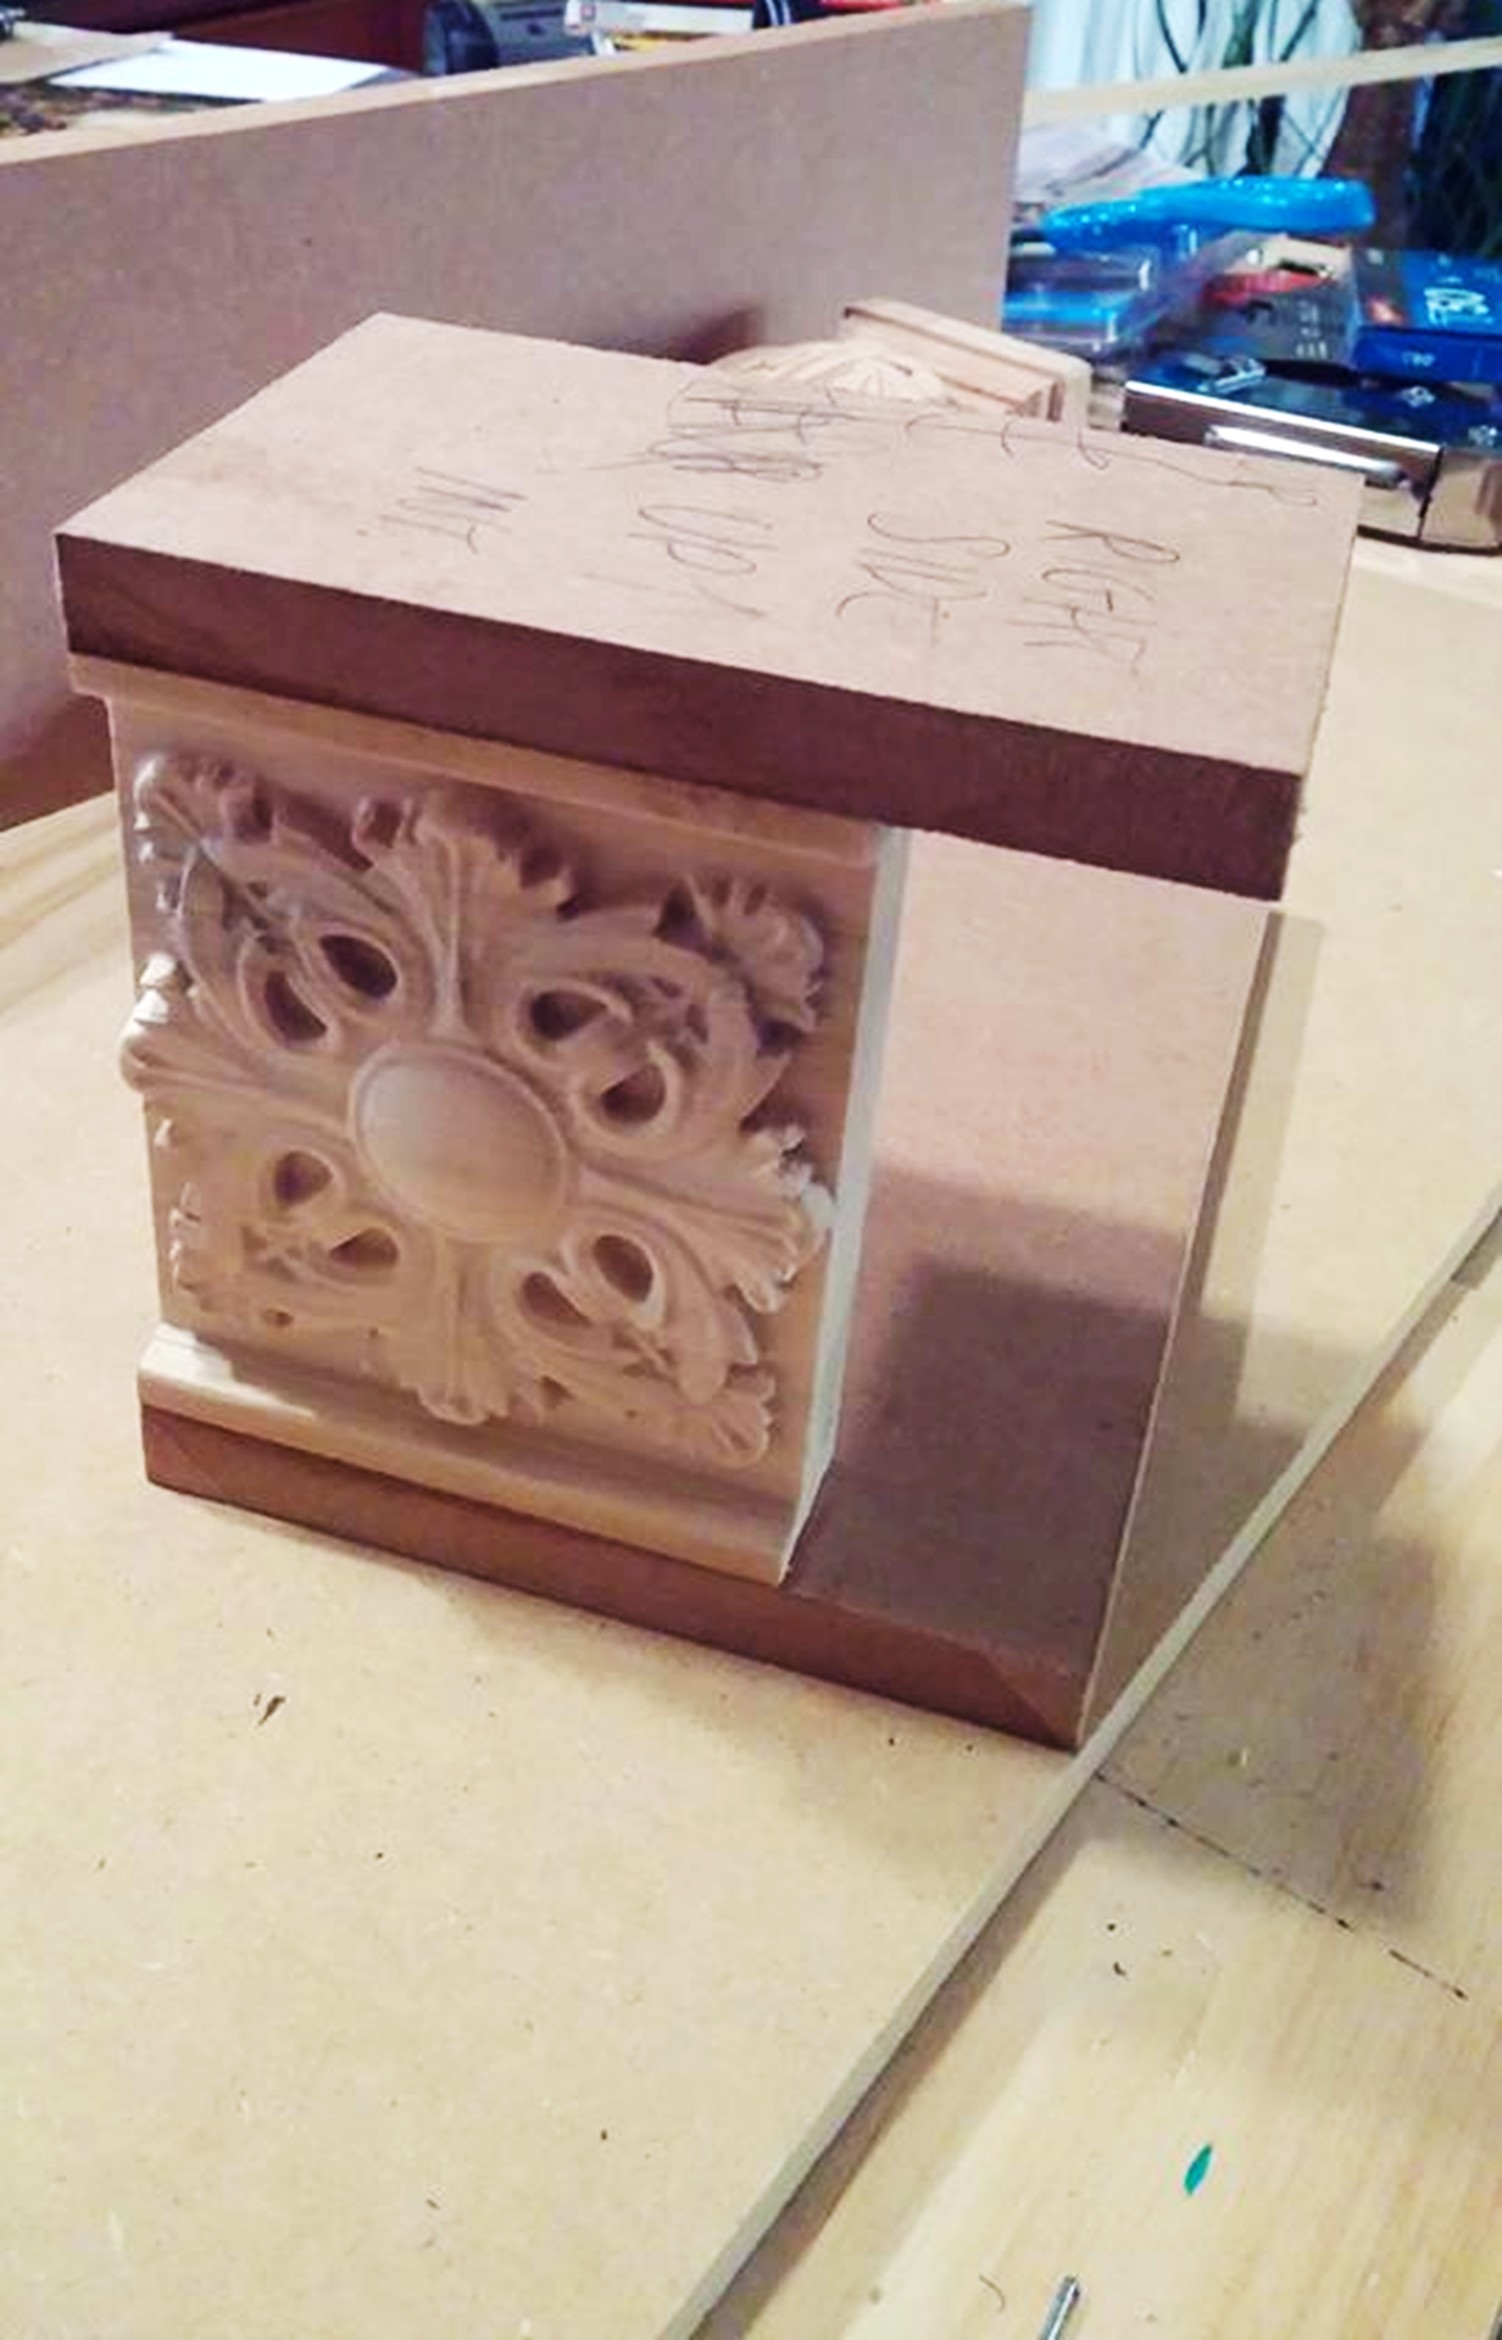
Early stages of construction, showing the assembling of the right-hand corbel
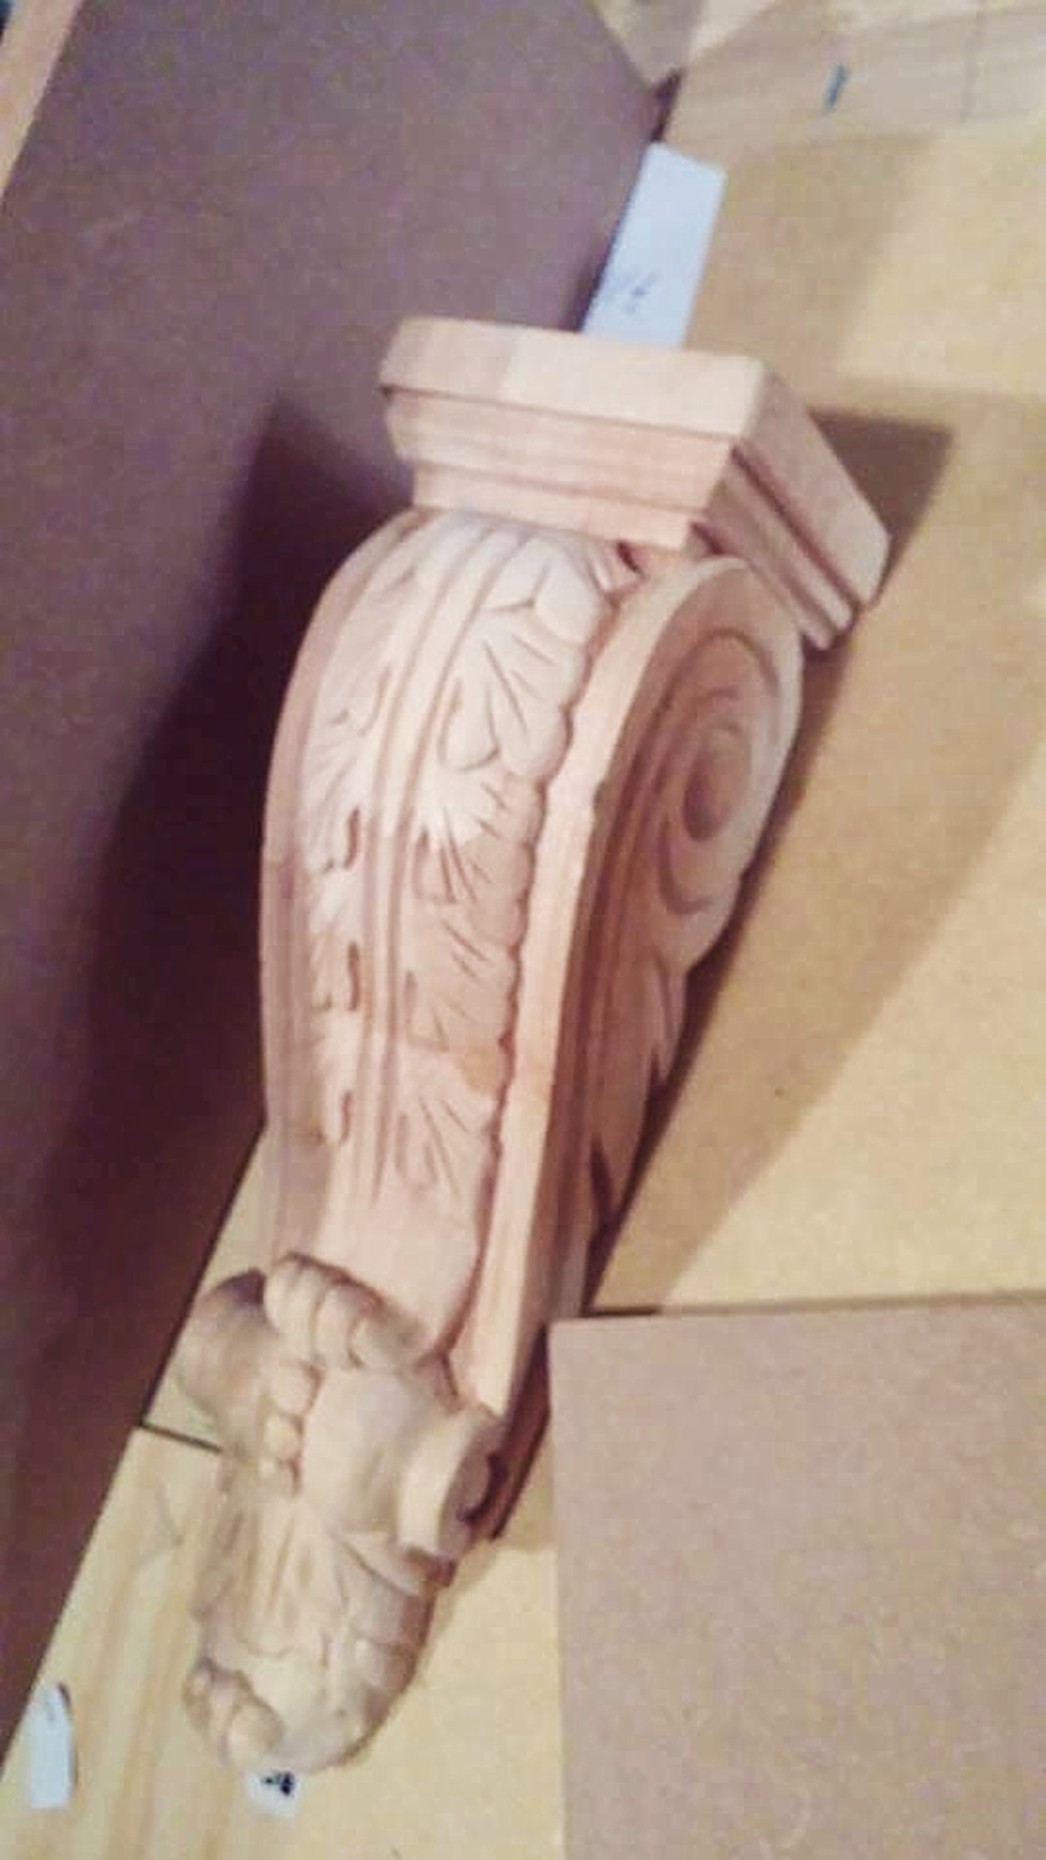
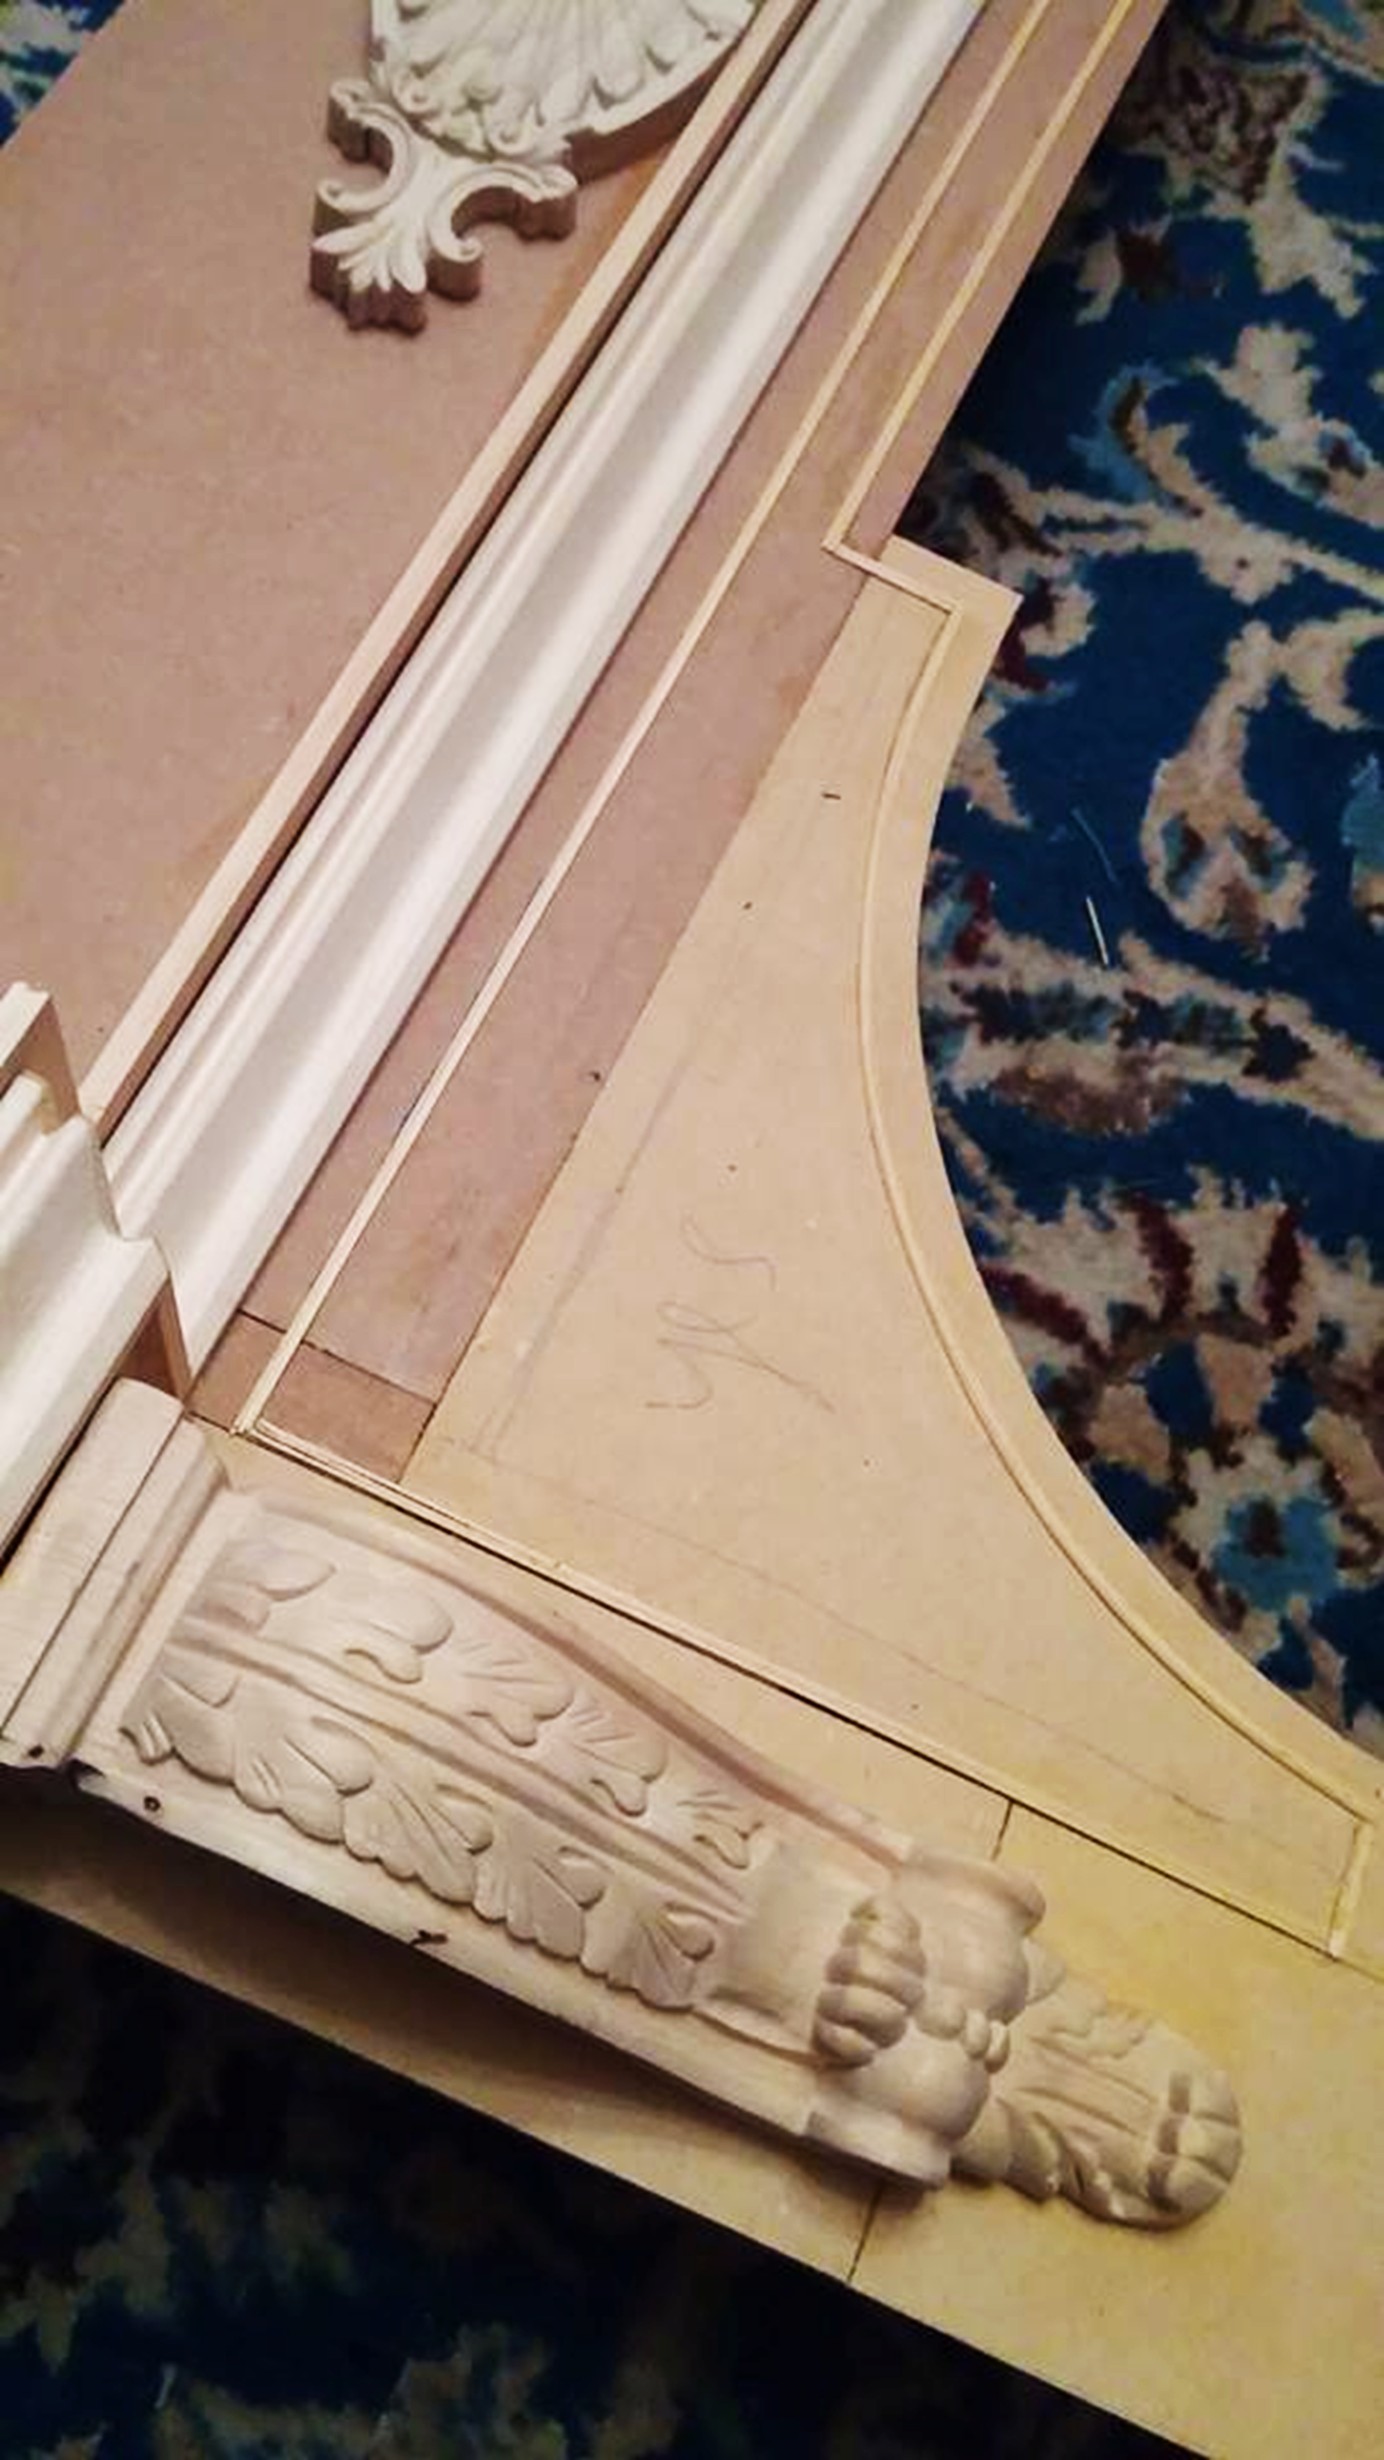
Detail of the left-hand corbel assembled
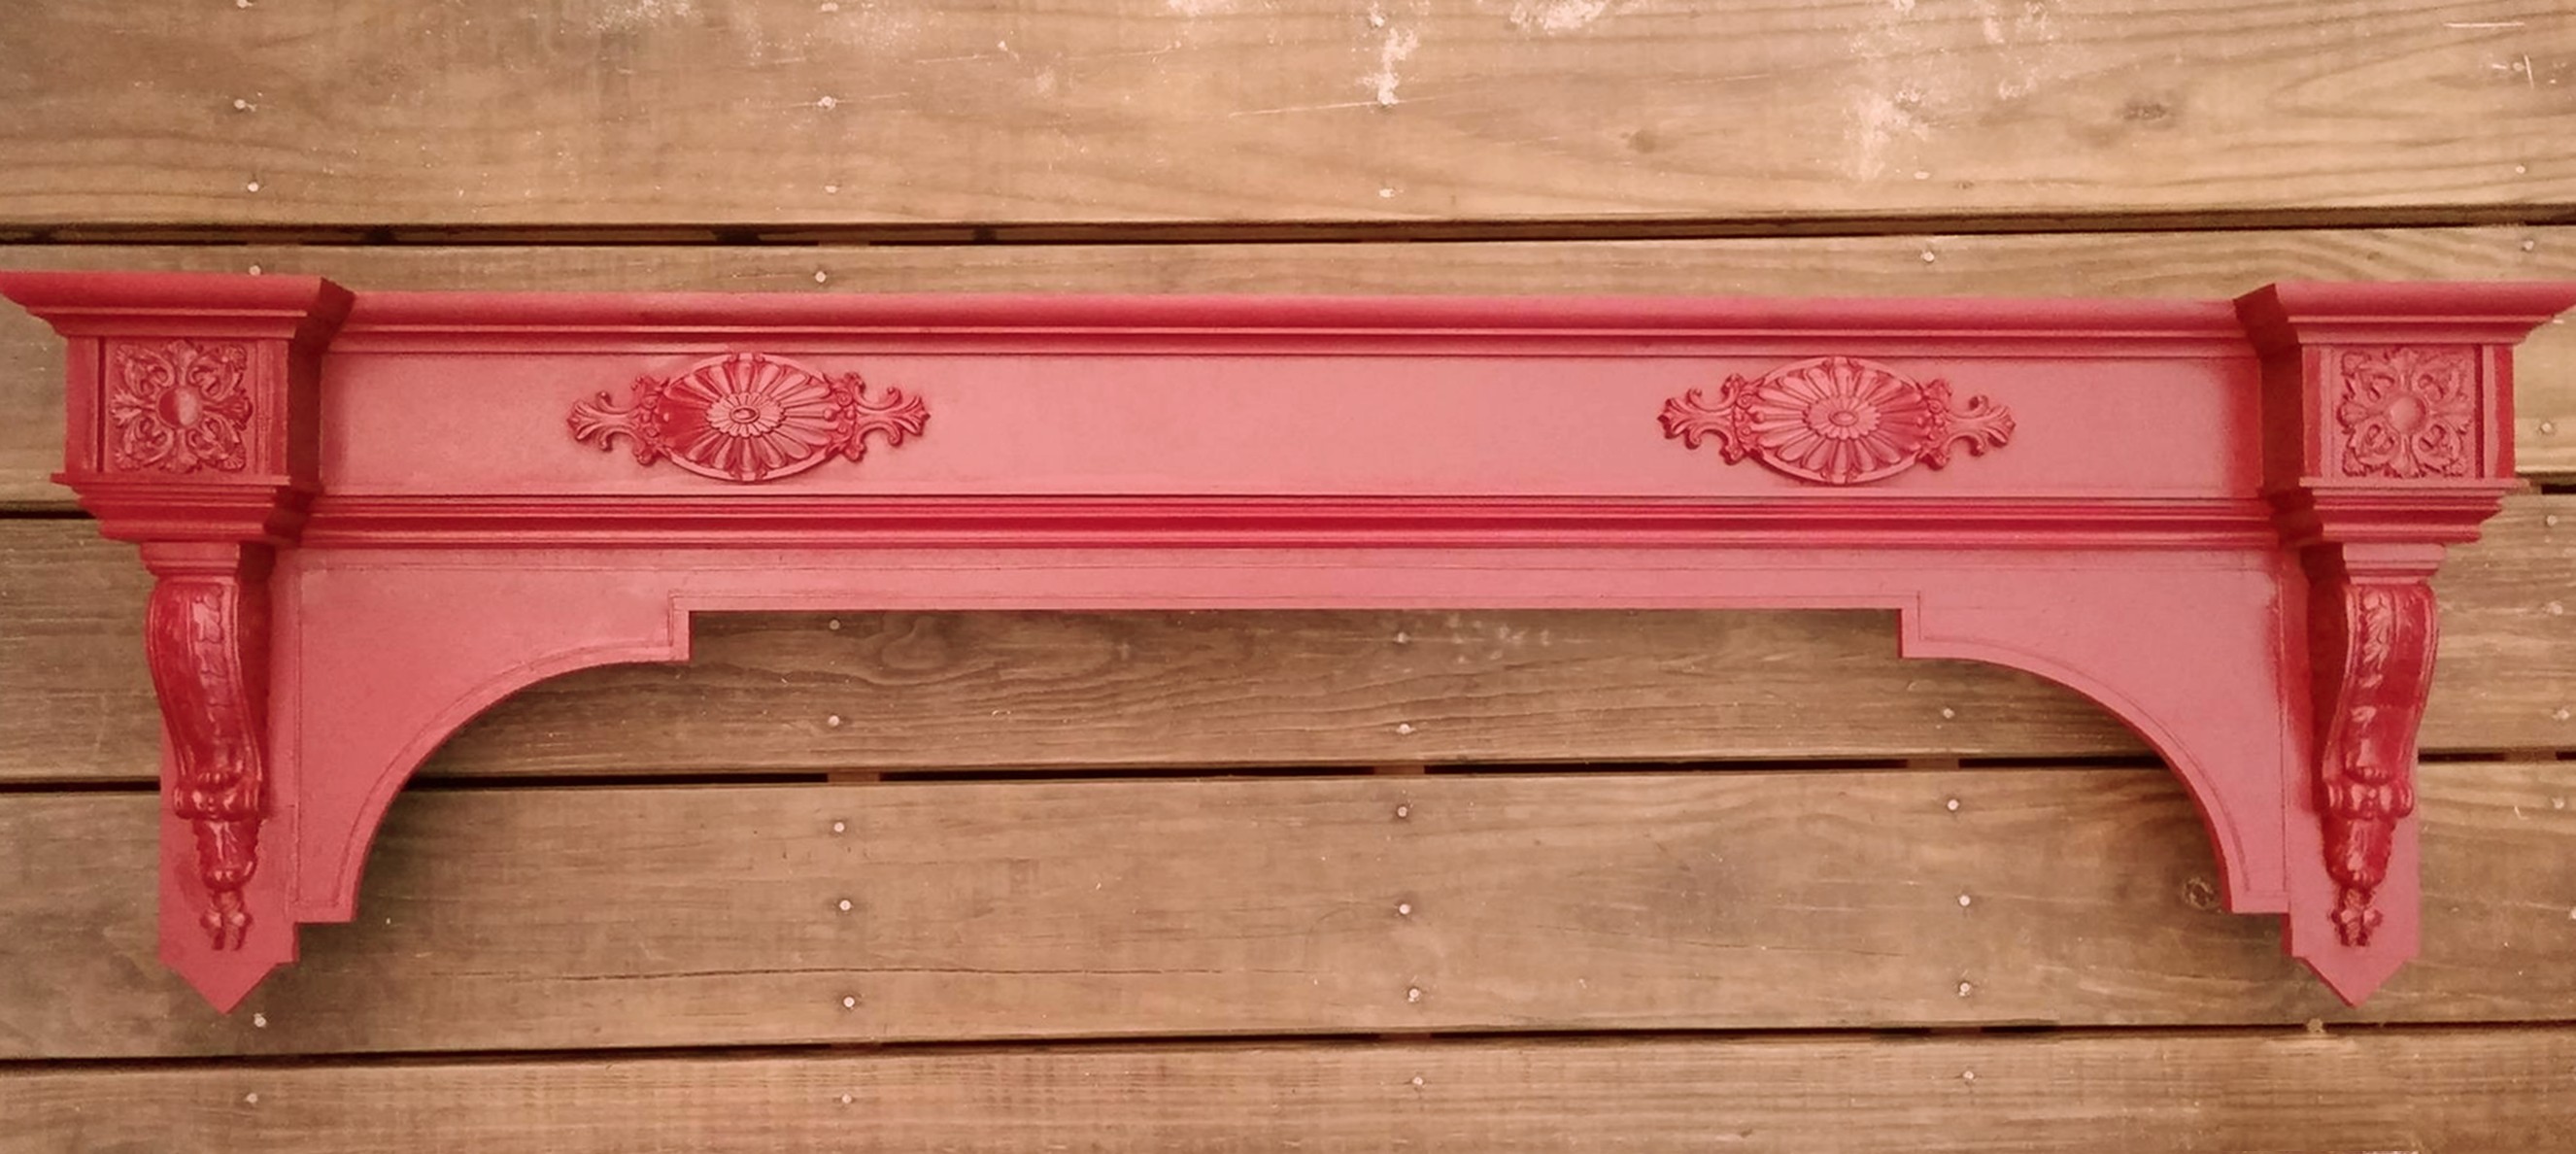
Red oxide undercoat applied
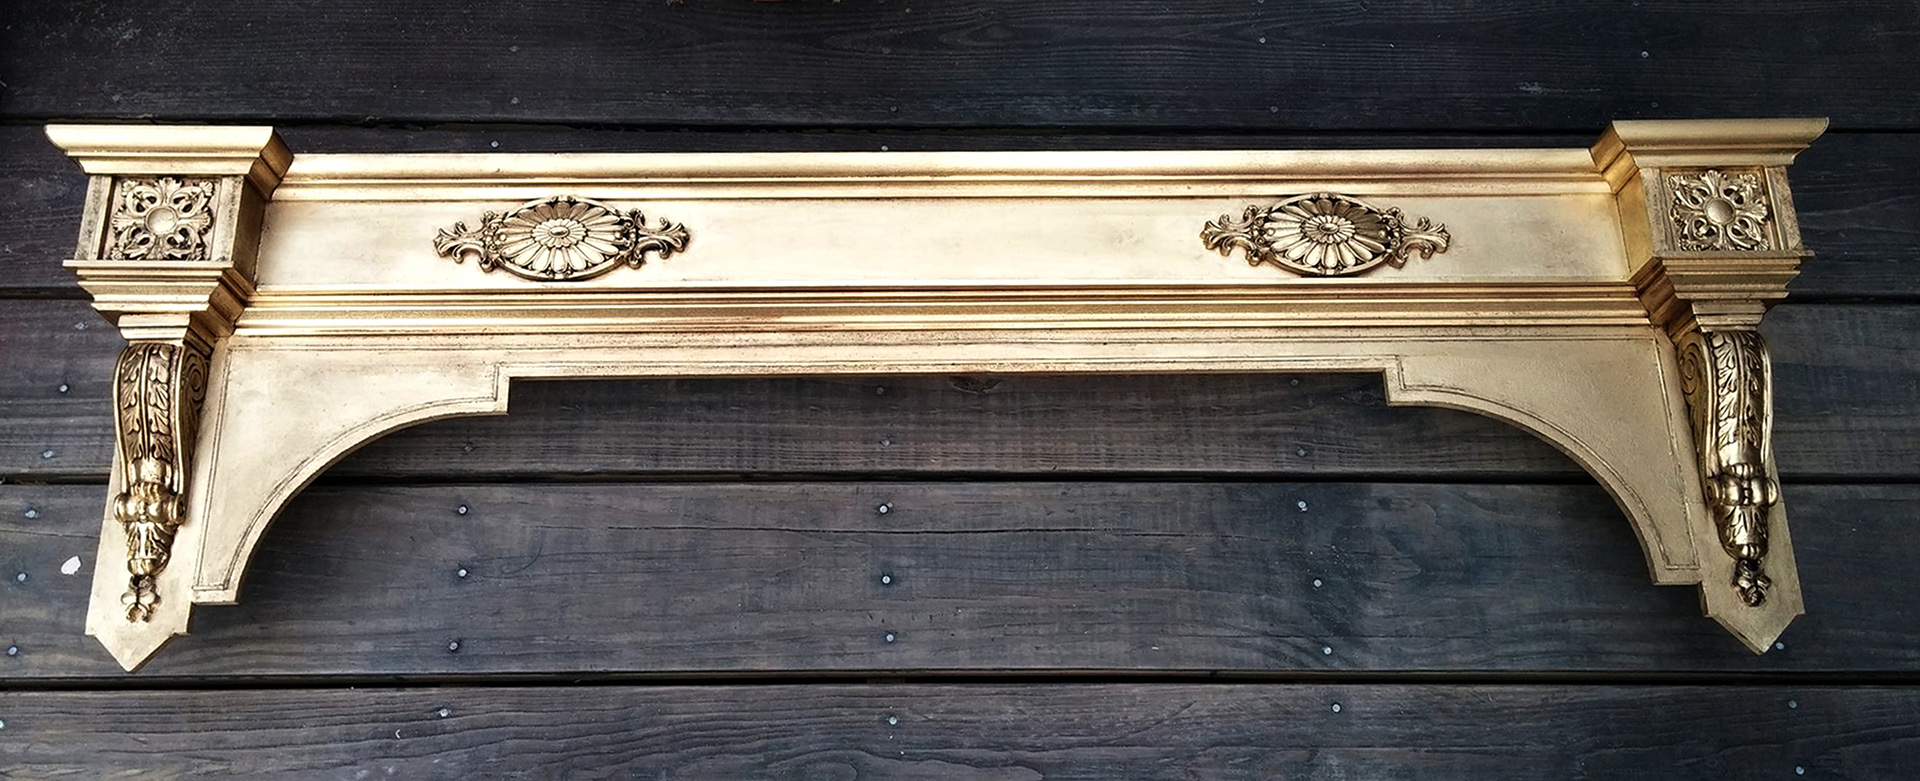
Gold leaf and first coat of antiquing glaze applied
Valance installed, and completed with curtains and fitted lambrequin

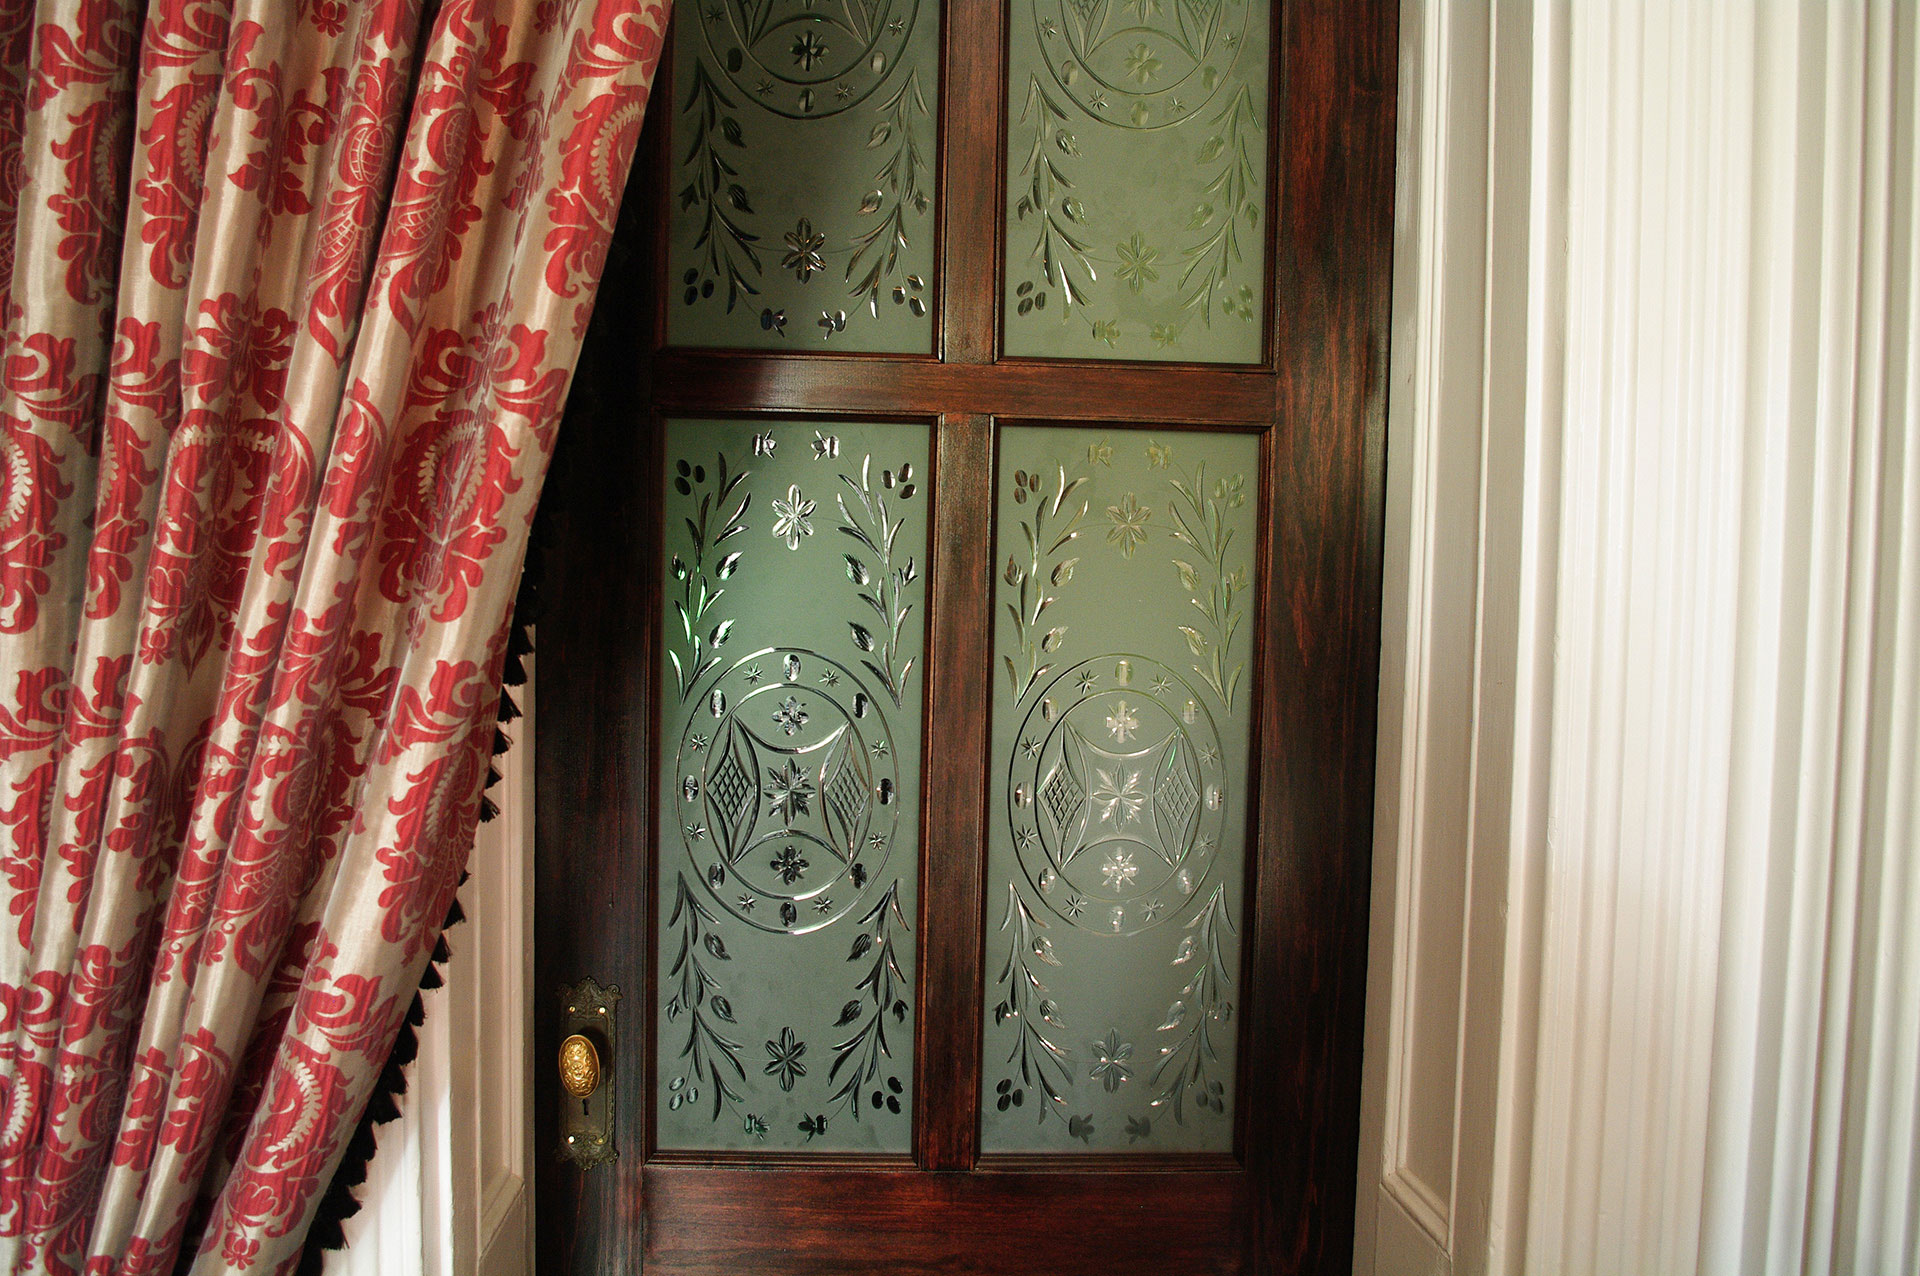
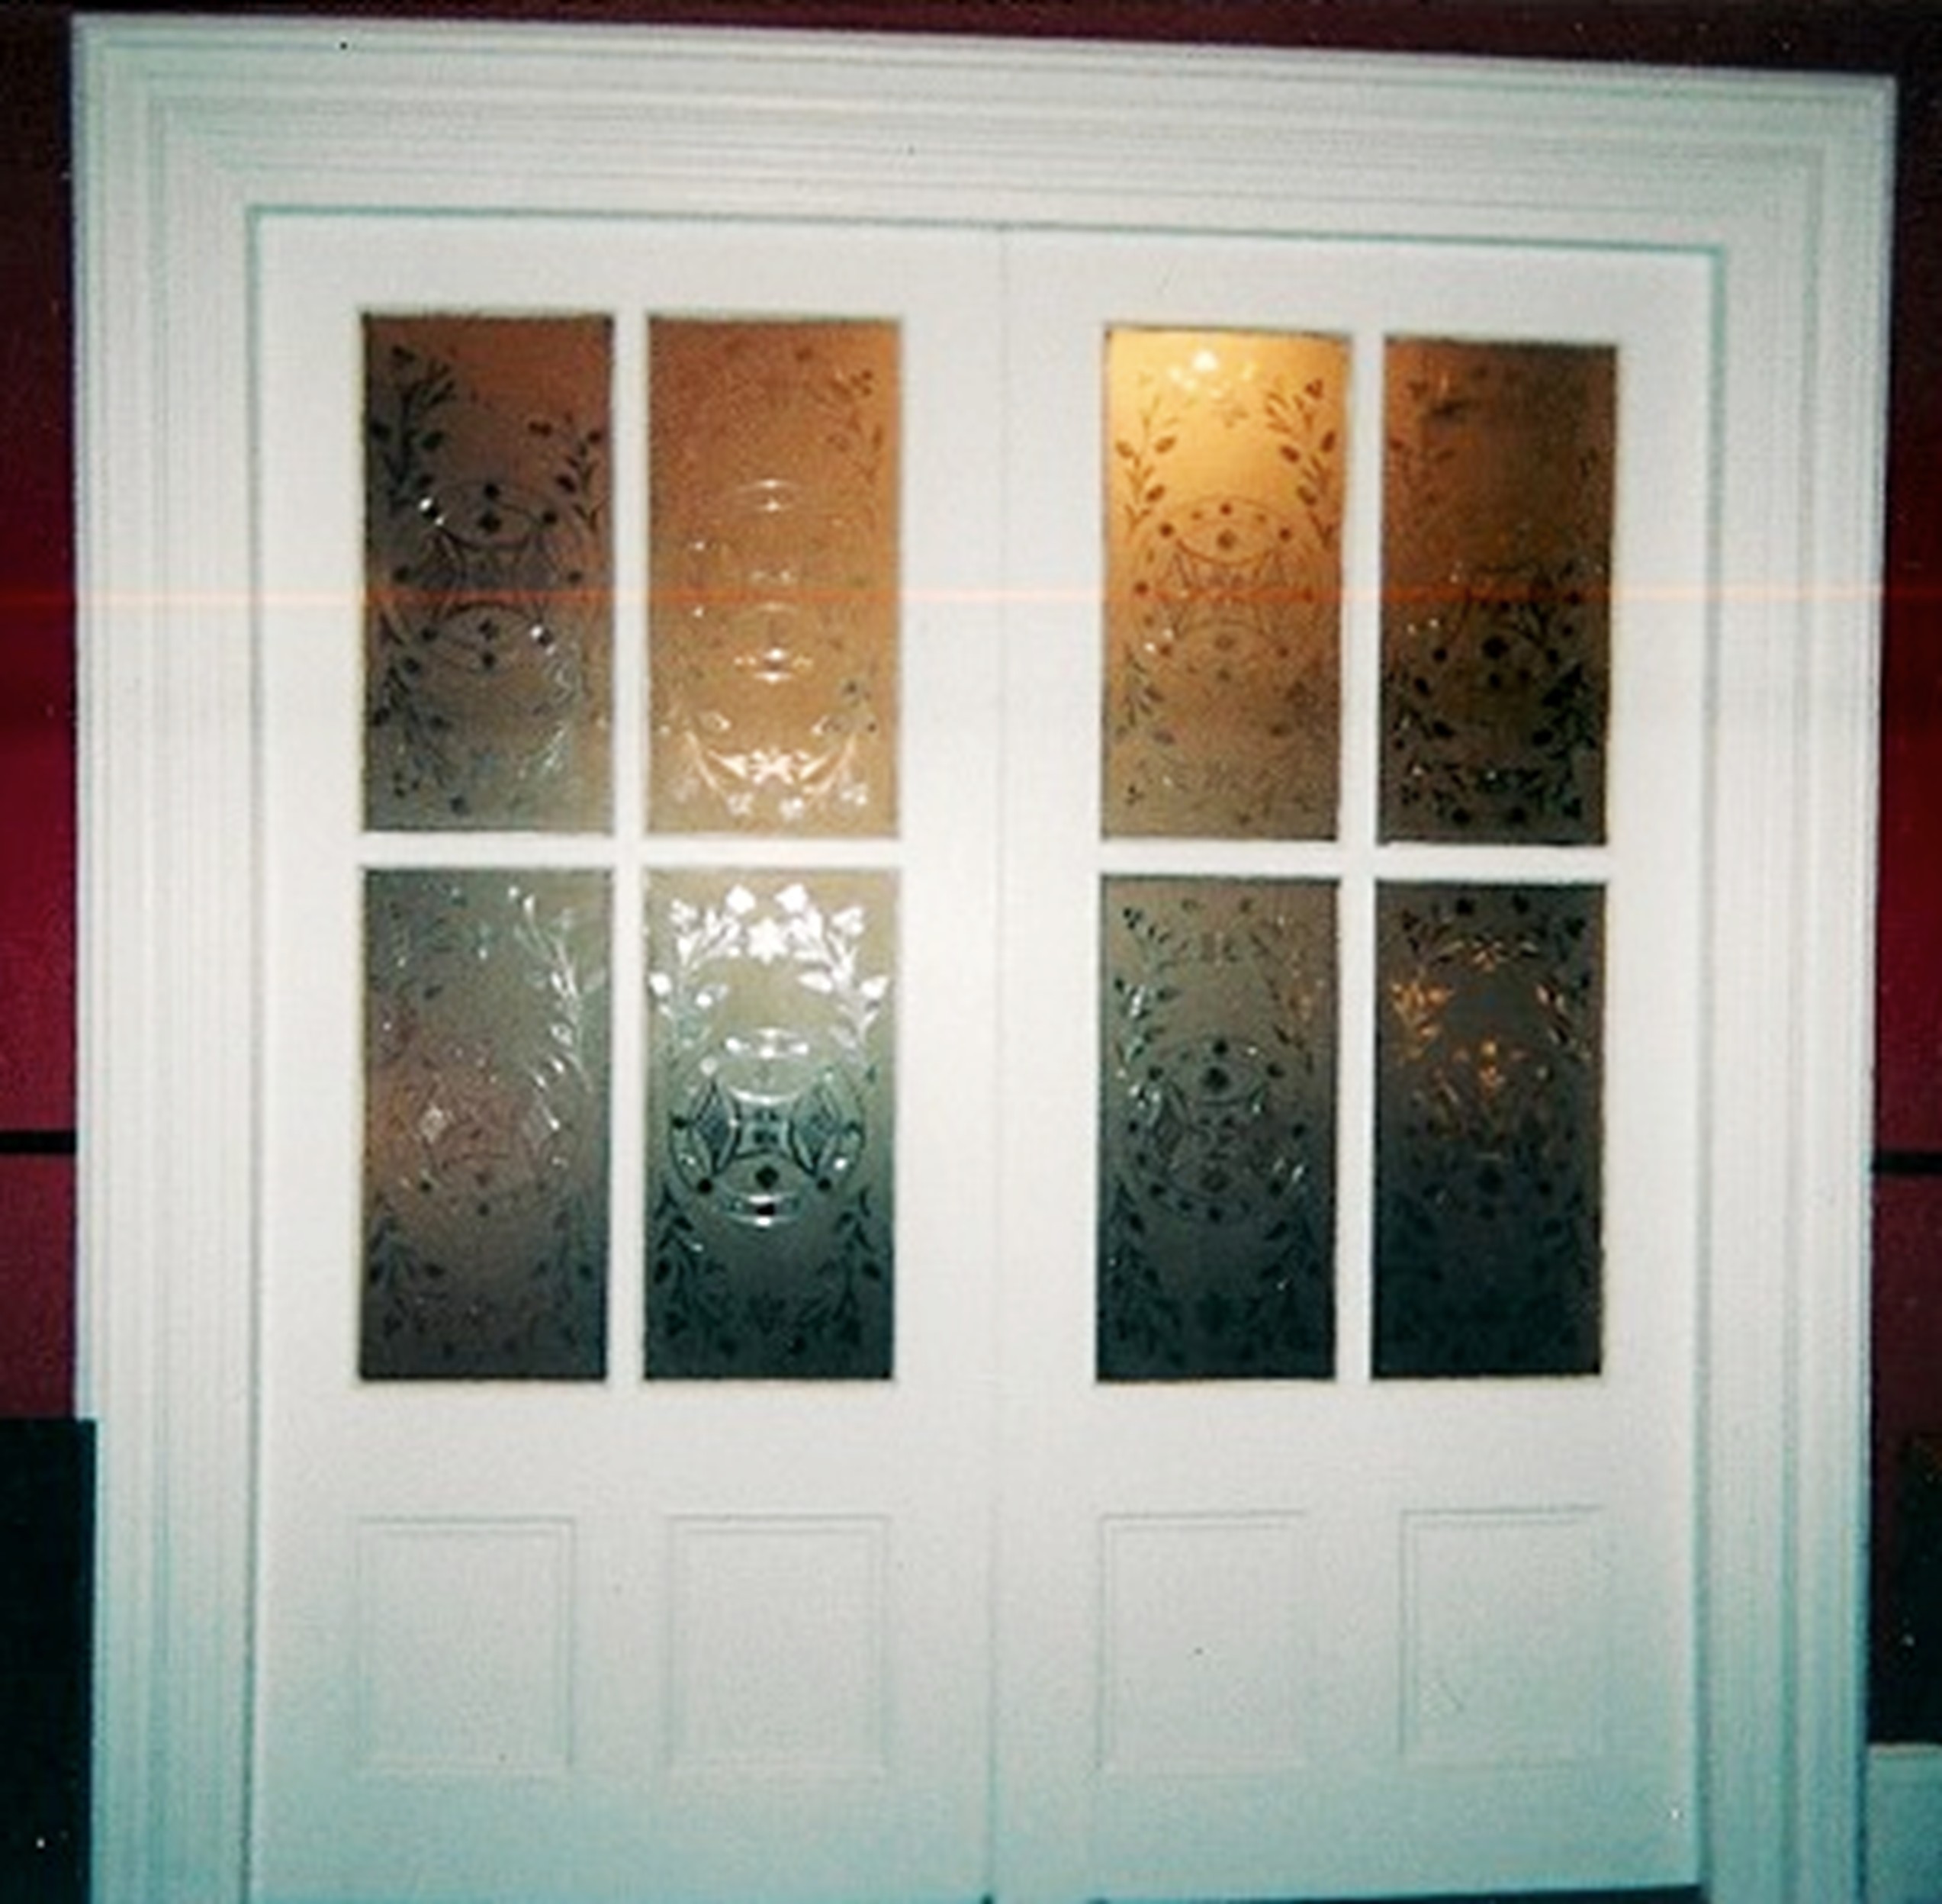
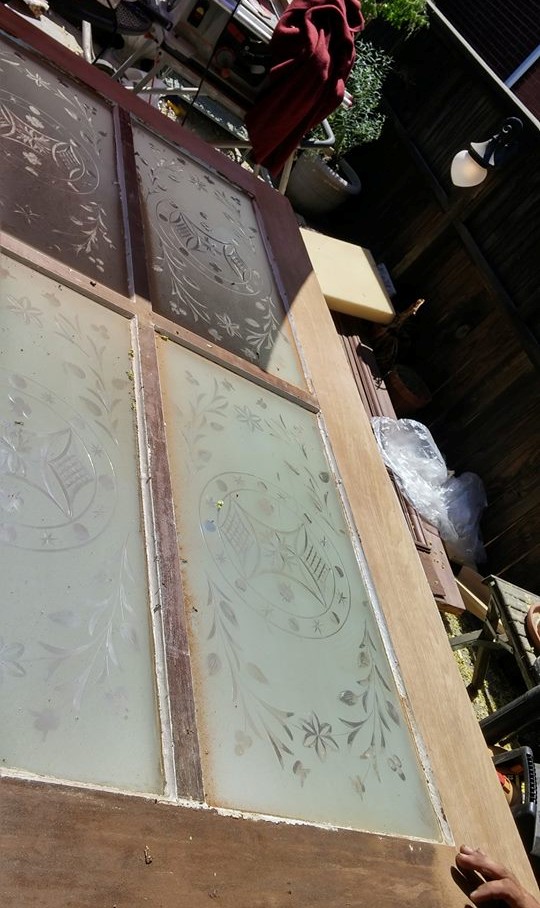
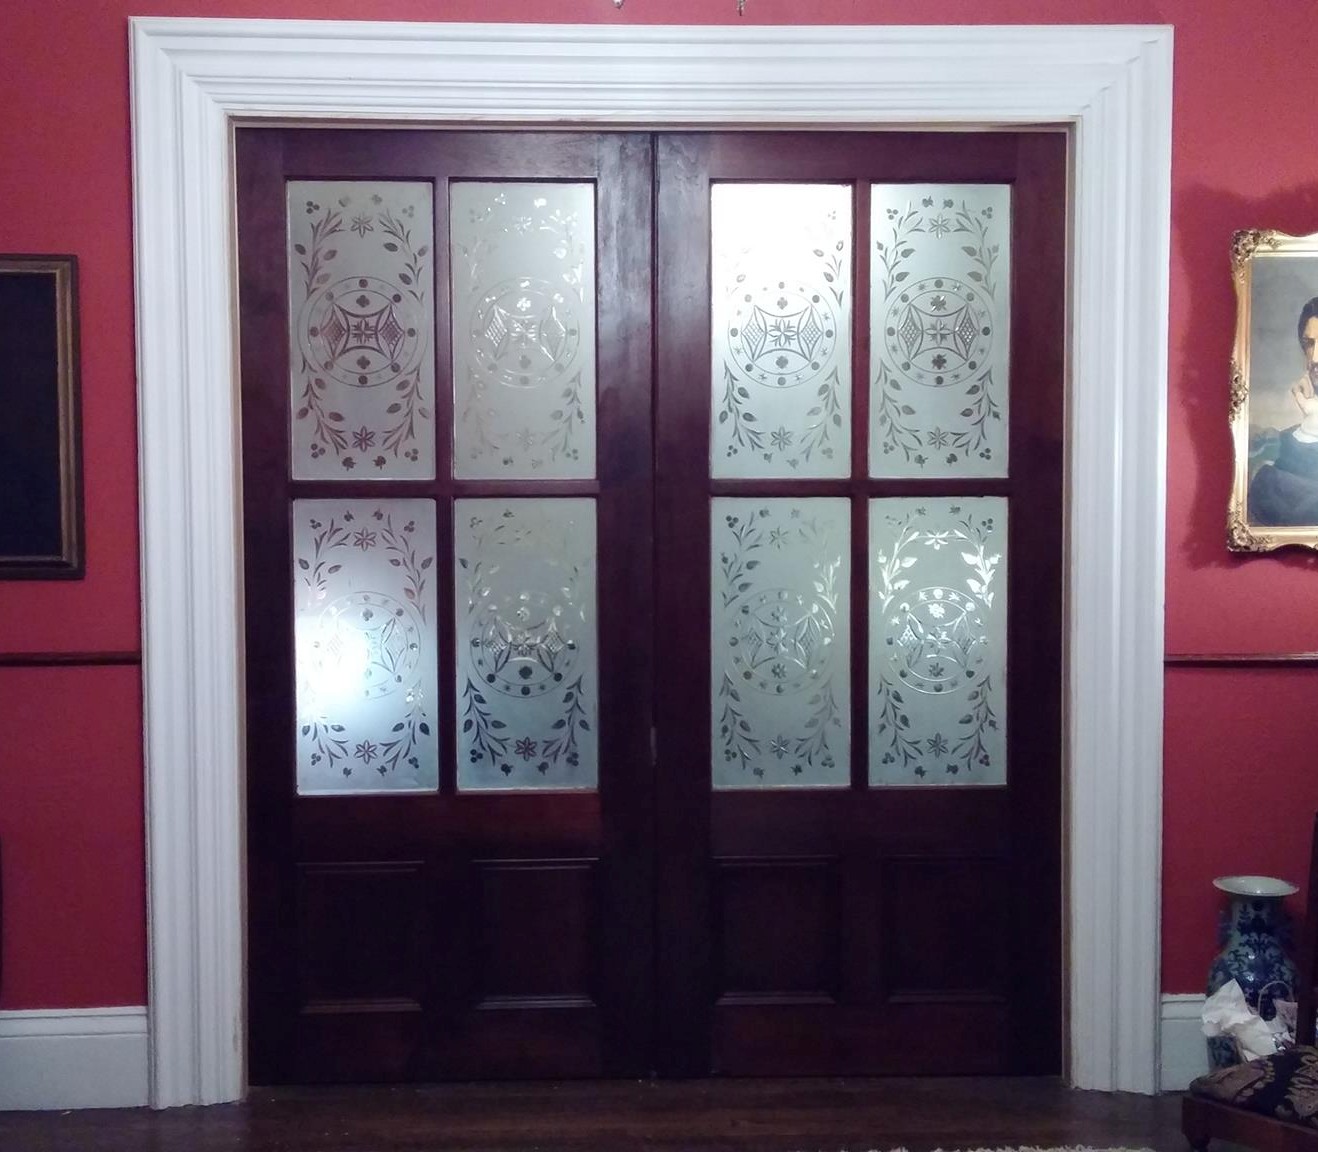
Large Parlor Door with Decorative Glass Panels
The original door that separated the former butler's pantry and the rear parlor of this imposing South End brownstone was removed decades ago. It most likely featured decorative frosted cut-glass panels to match the ones found on the lovely set of pocket doors in the same room. The glass panels allowed the light to filter into the windowless butler's pantry, while at the same time providing privacy from the house help during formal events, parties, and dinners. We replicated the door's design from the other door in the butler's pantry, and commissioned glass artist Andreas Lehmann to create four glass panels that replicate the design found on the pocket doors.
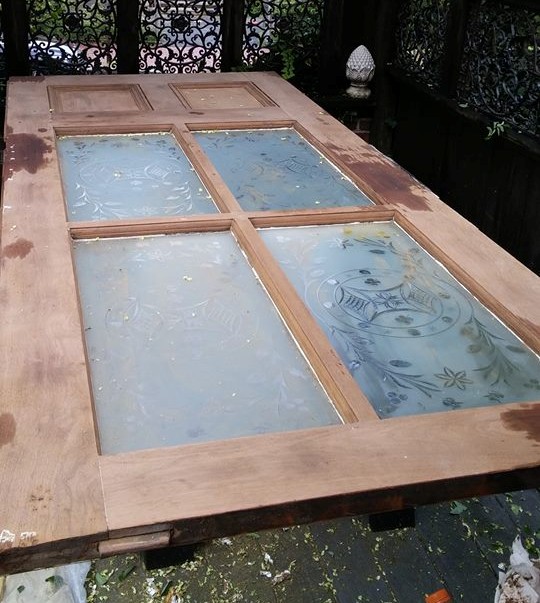
Dry-fitting the frame
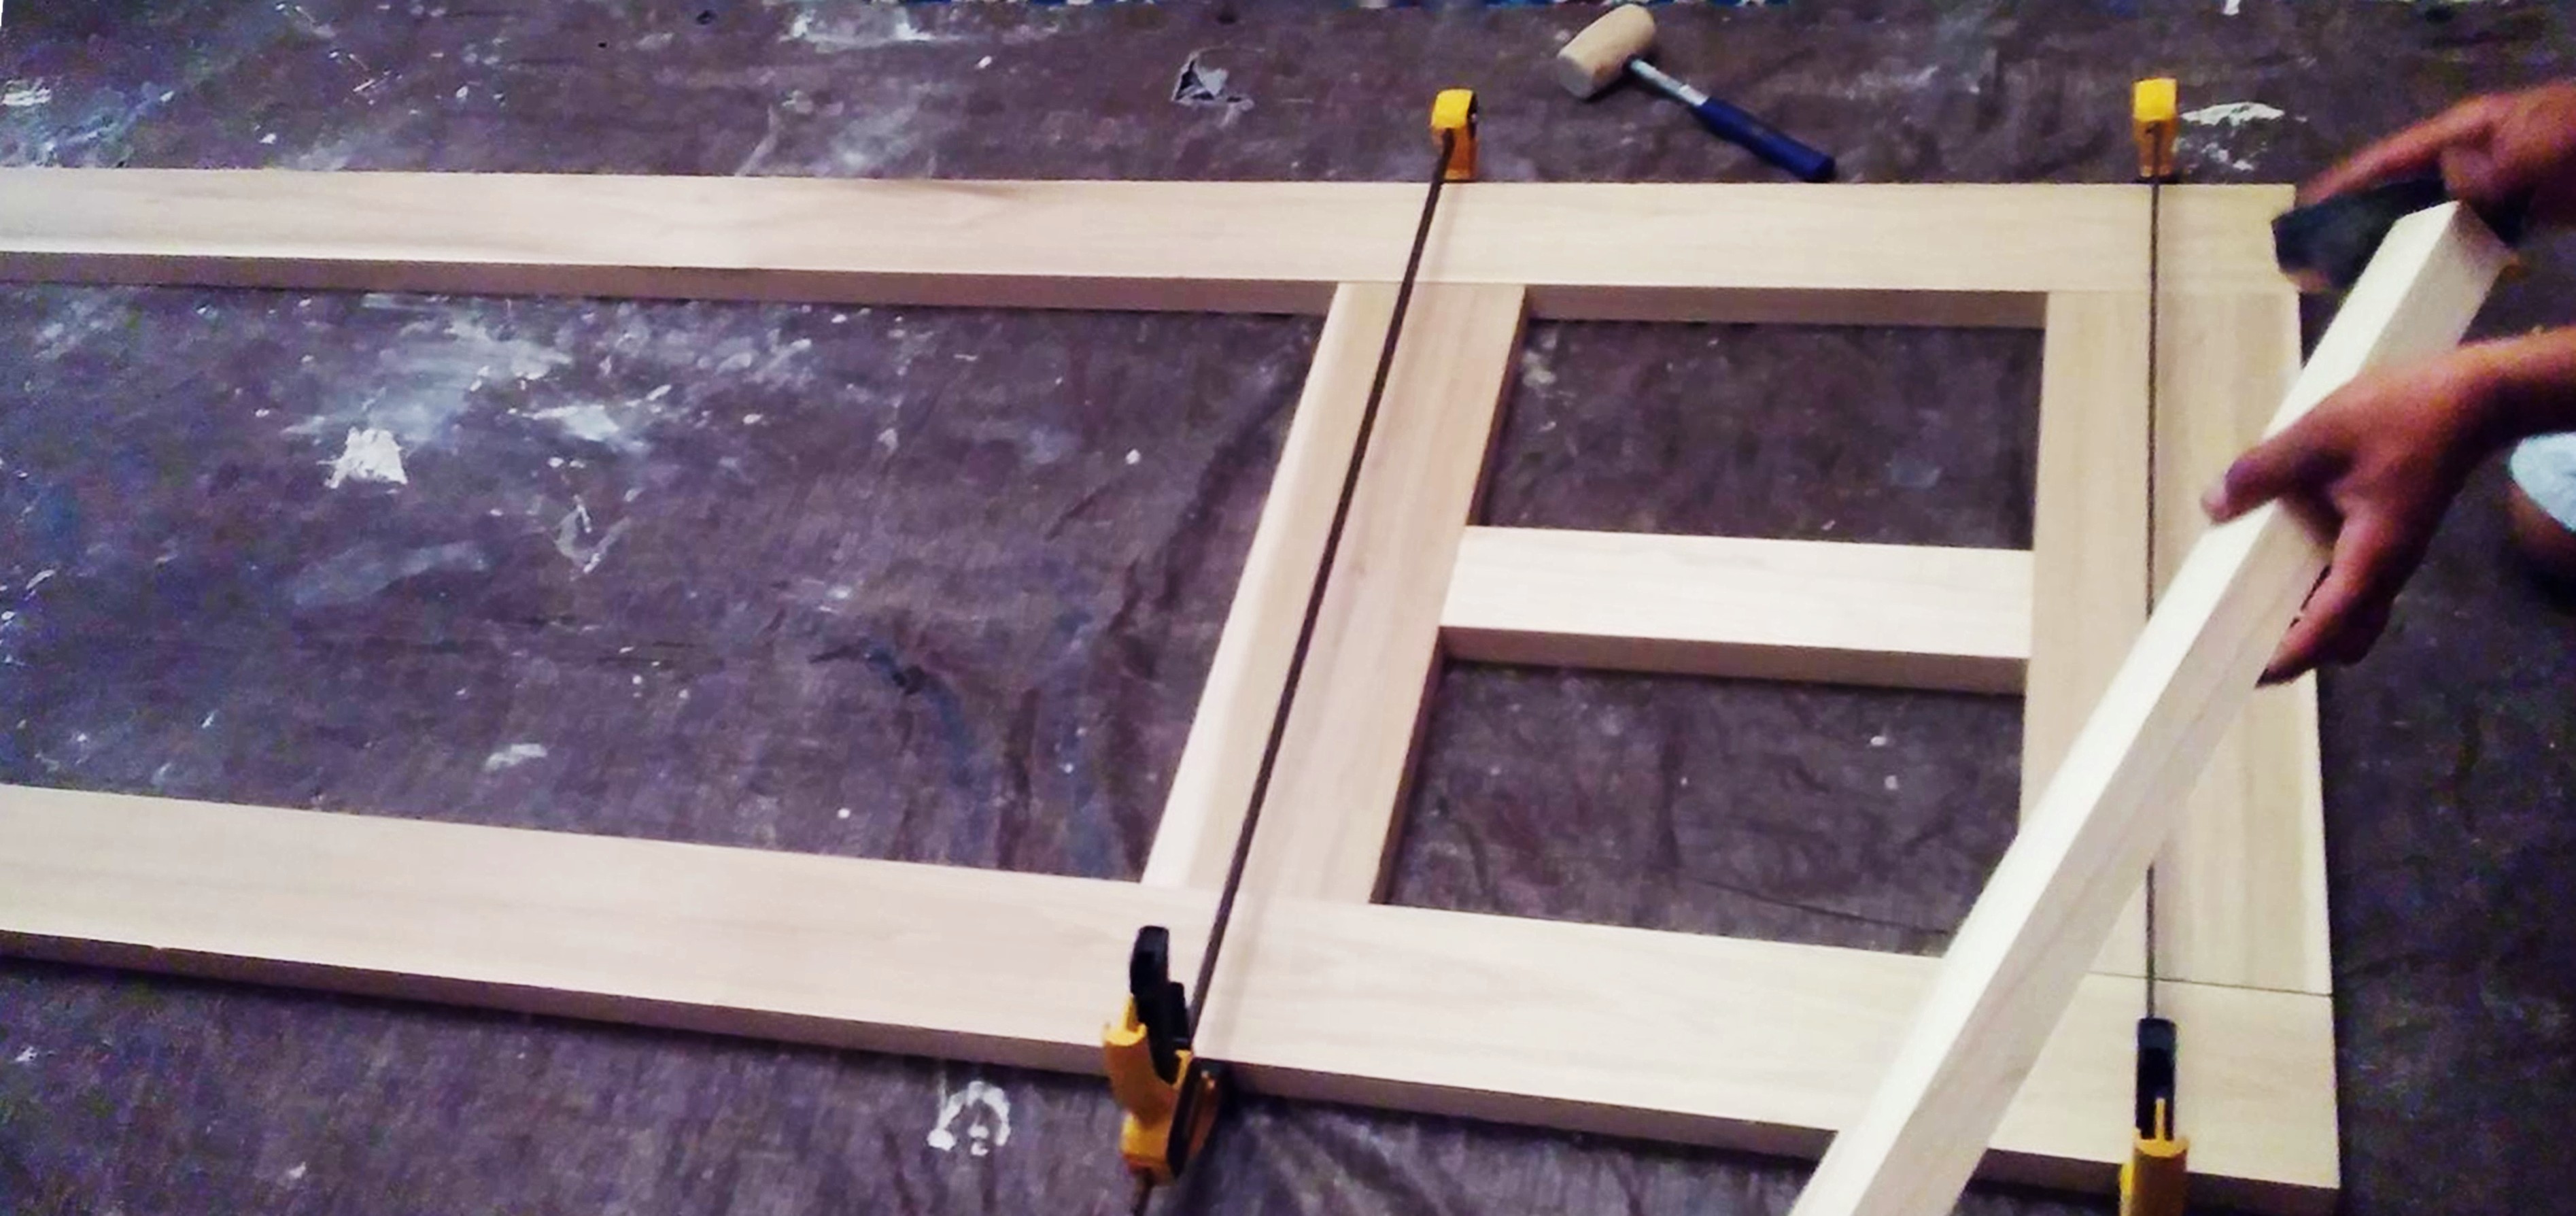
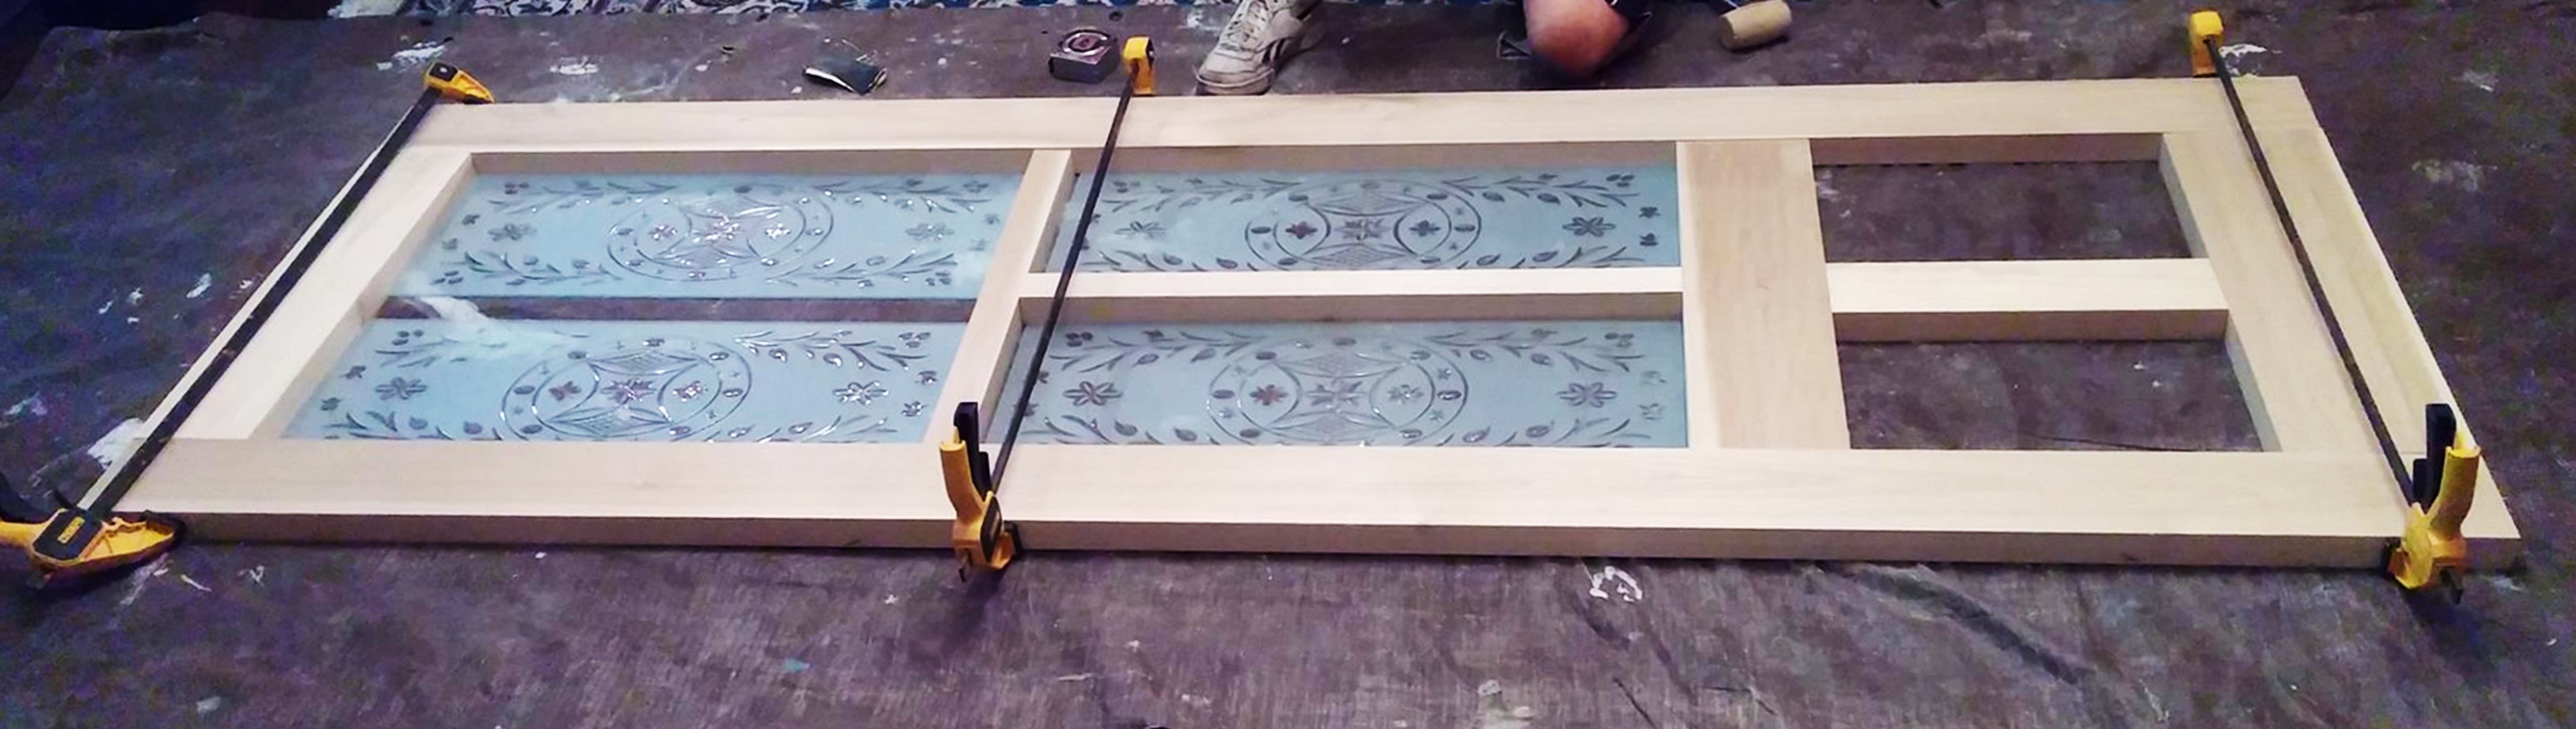
Trying out the glass panels to ensure comfortable fit
Assembling, gluing, and nailing the door
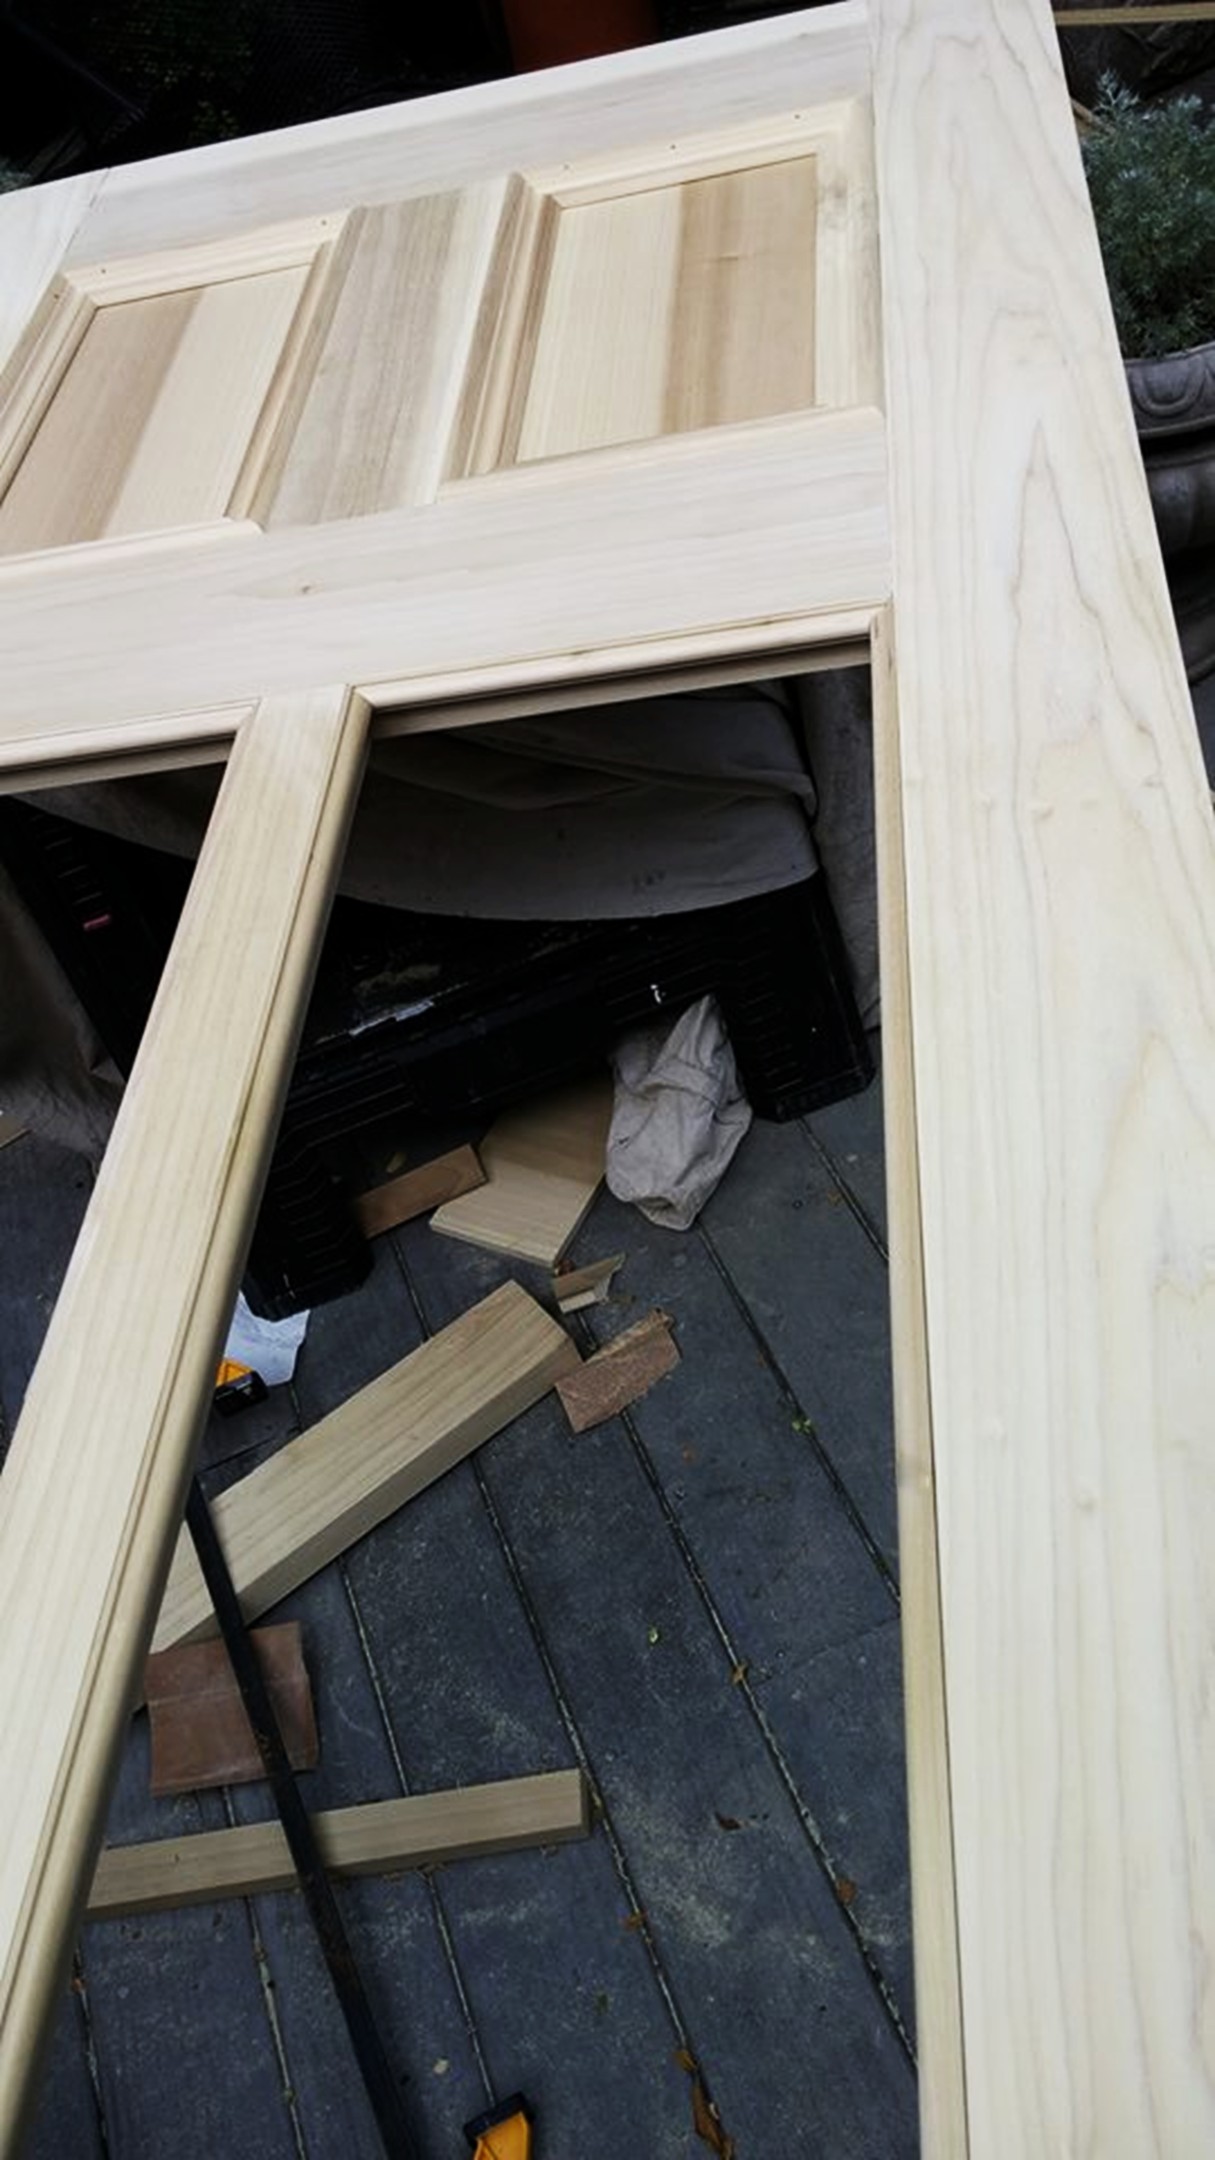
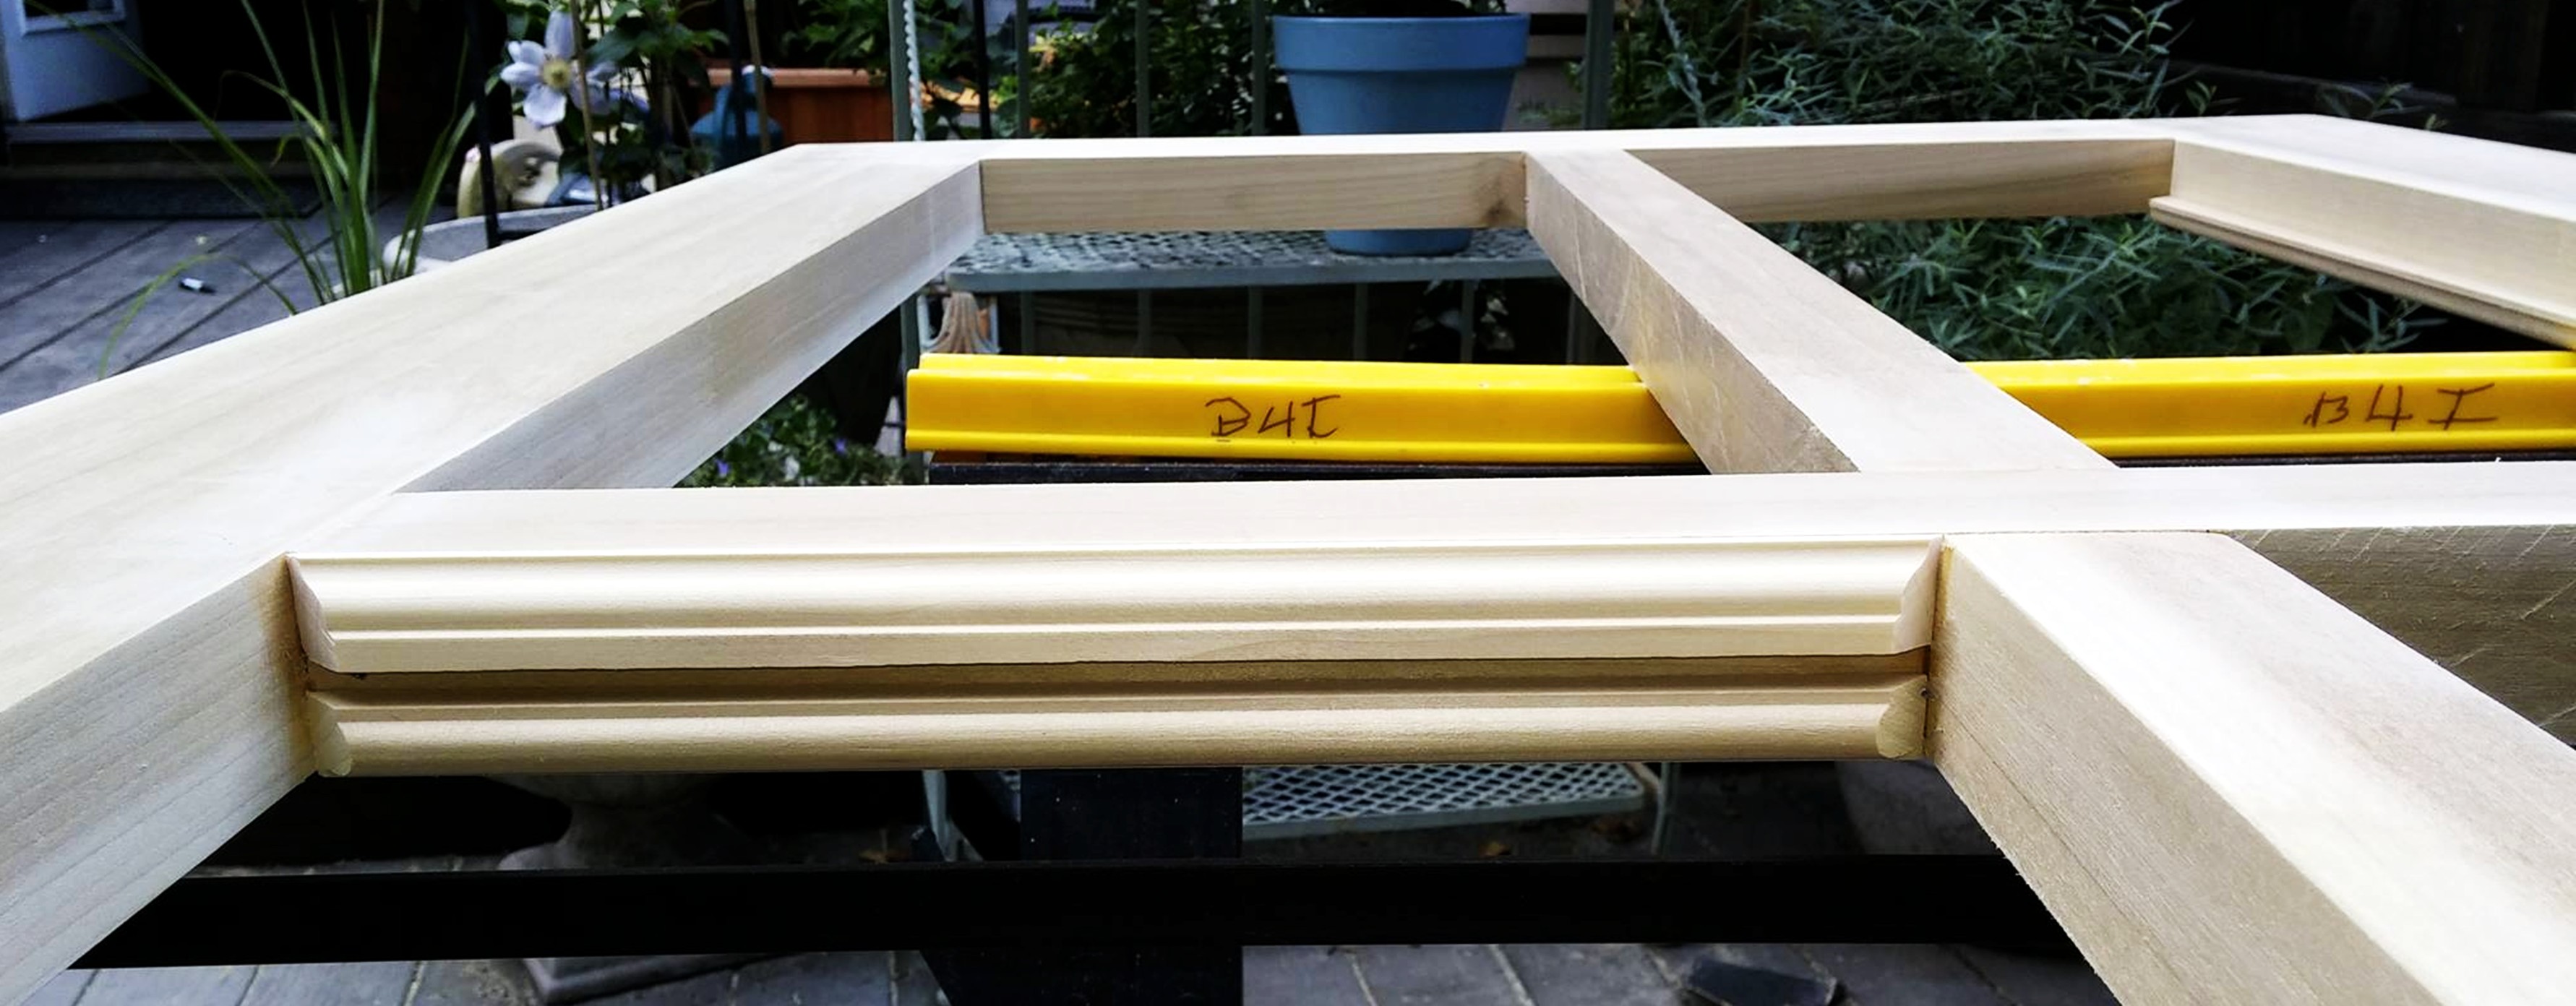
Installing the trim against which the glass panels will sit
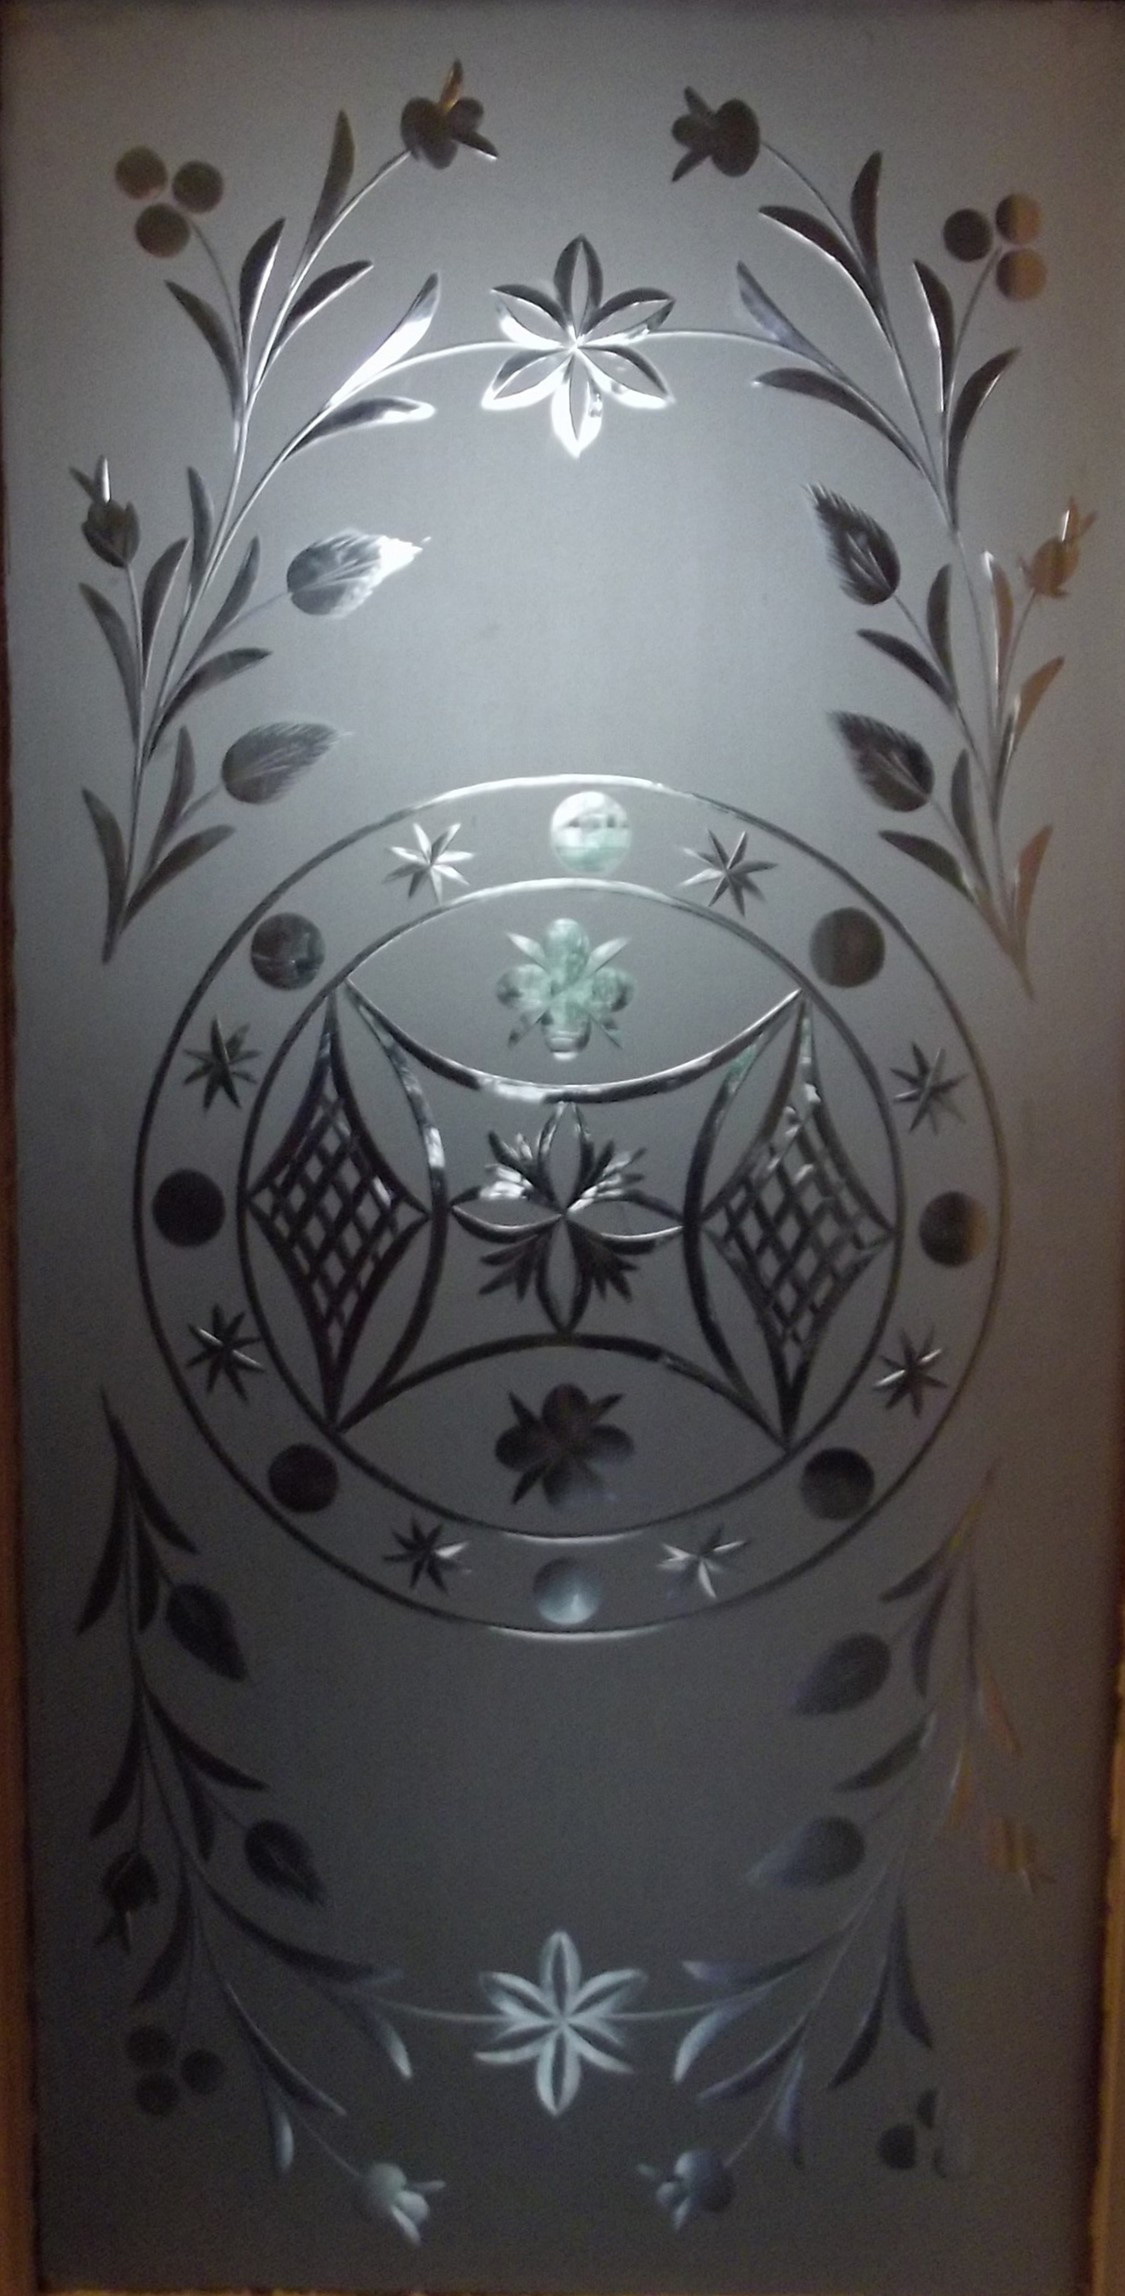
One of the original 1850s frosted wheel-cut glass panels found on the pocket doors to the same back parlor. Glass artist Andreas Lehmann replicated them to perfection
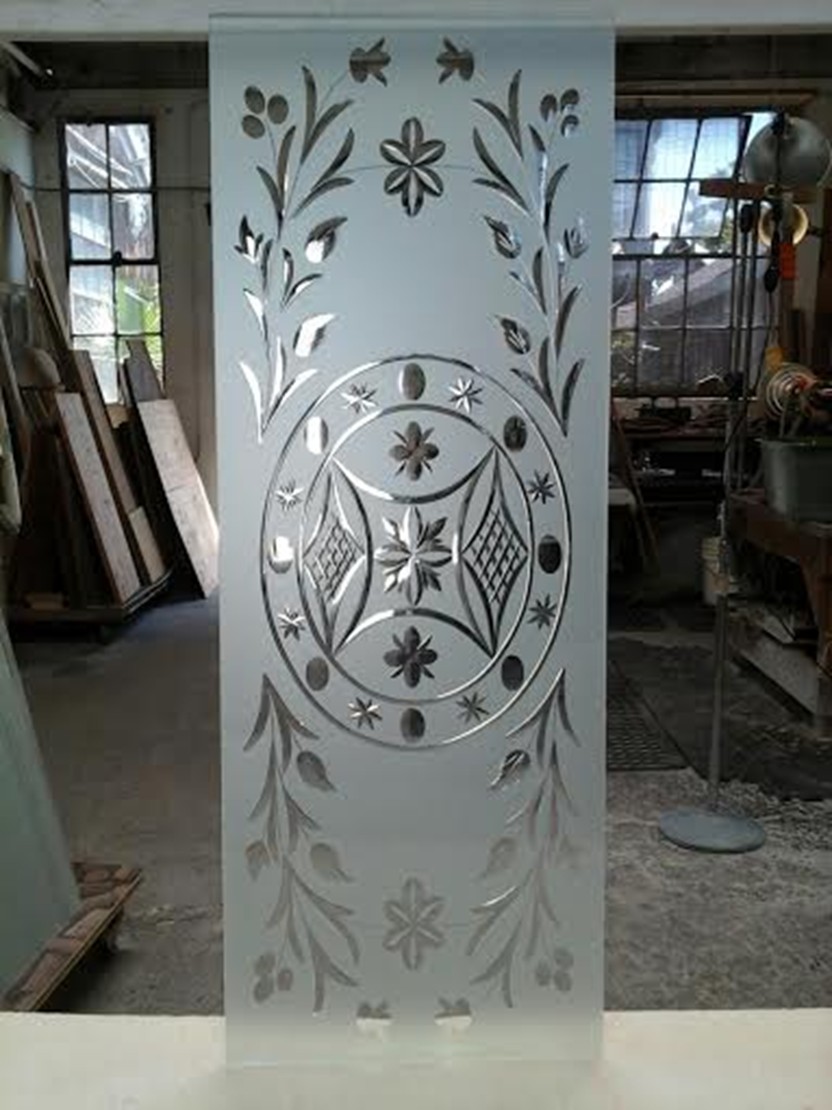
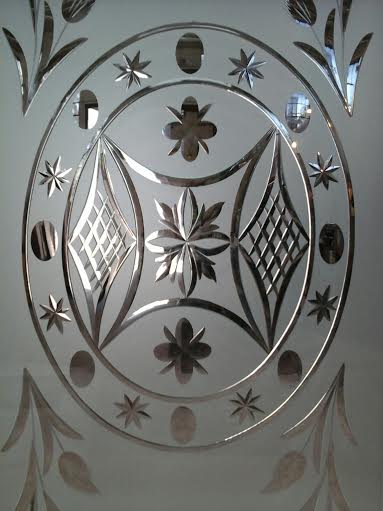
The replicated panels that Andreas Lehmann created for the door
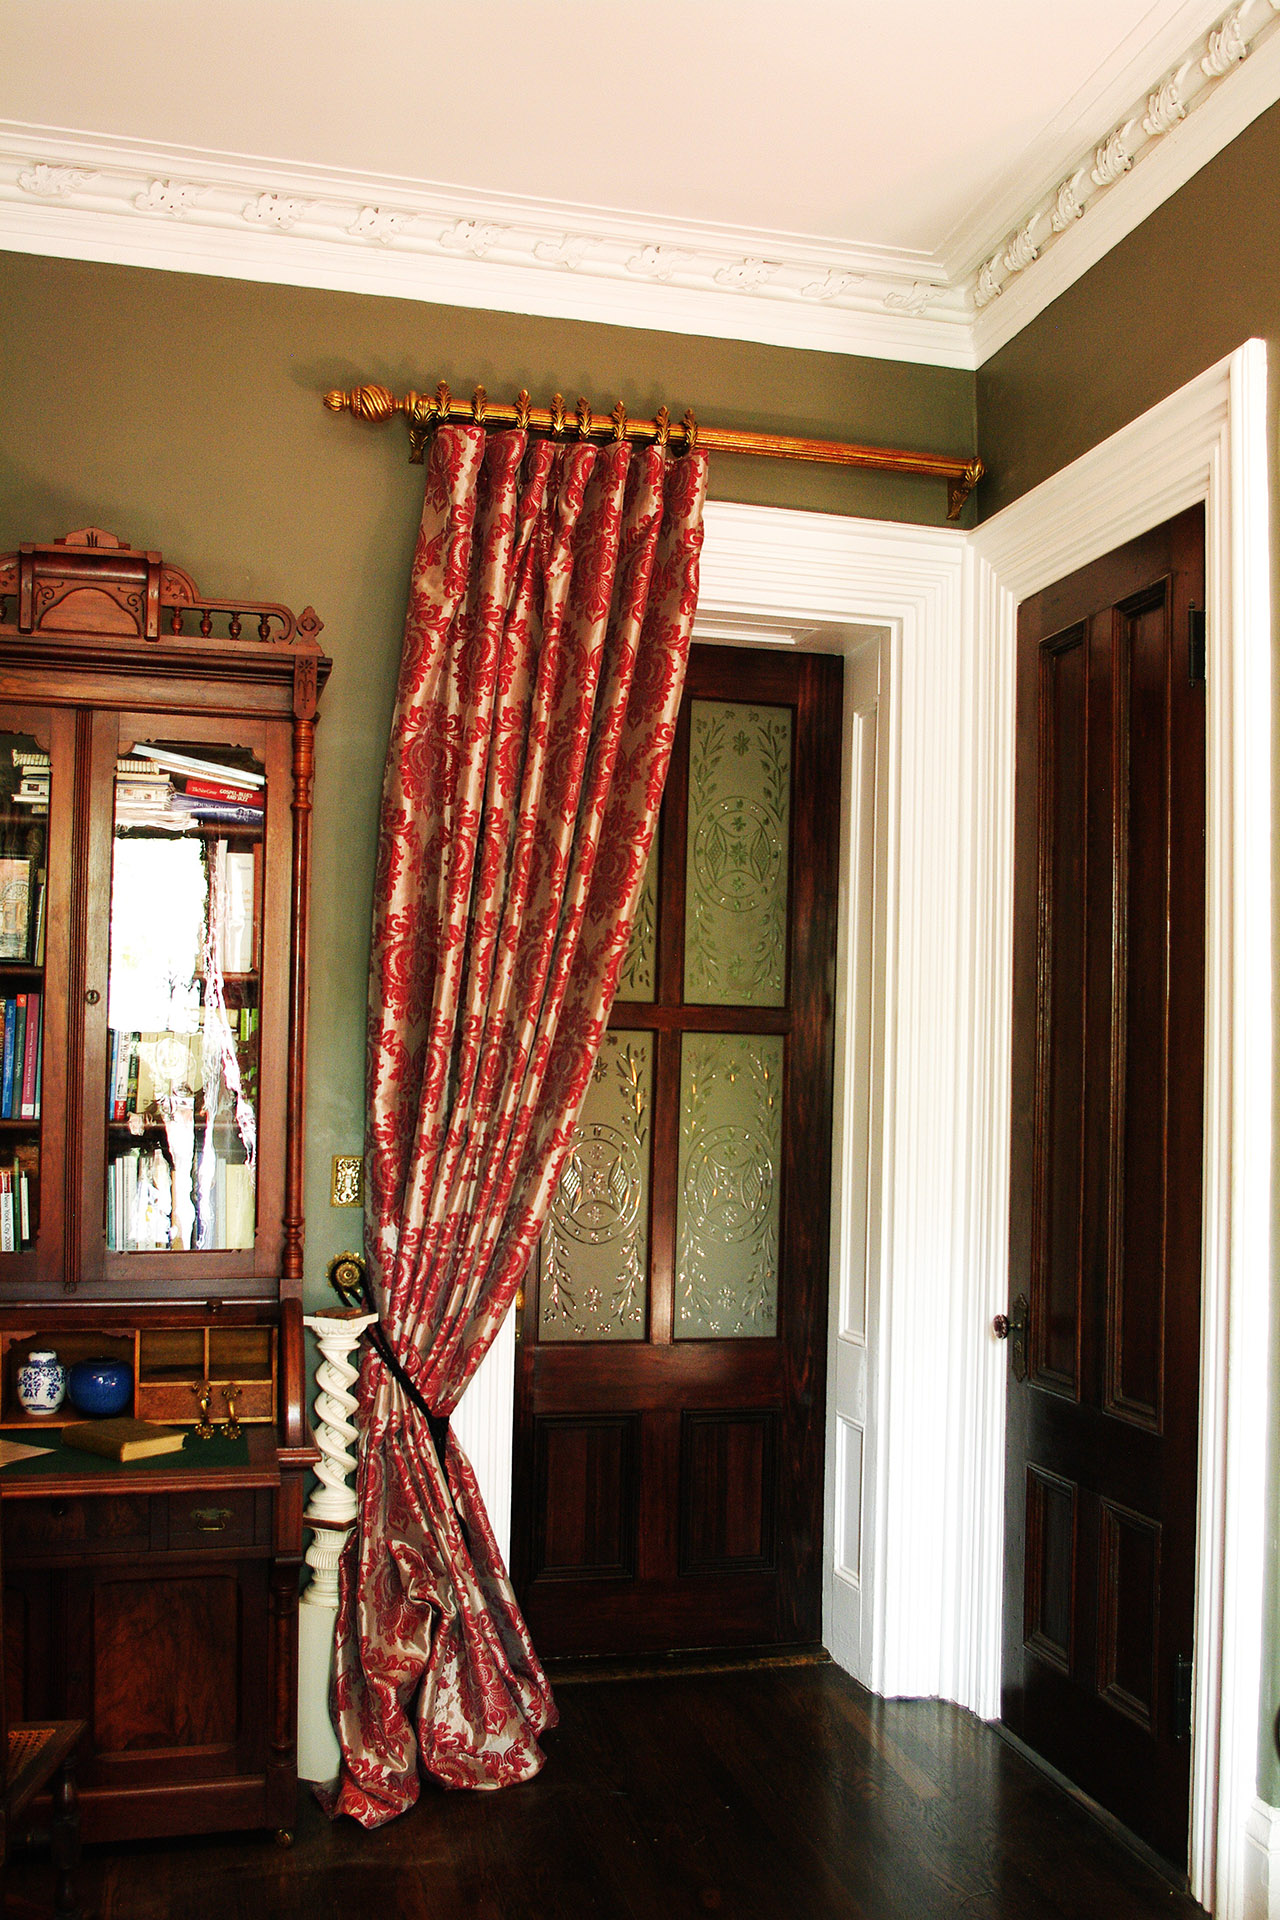
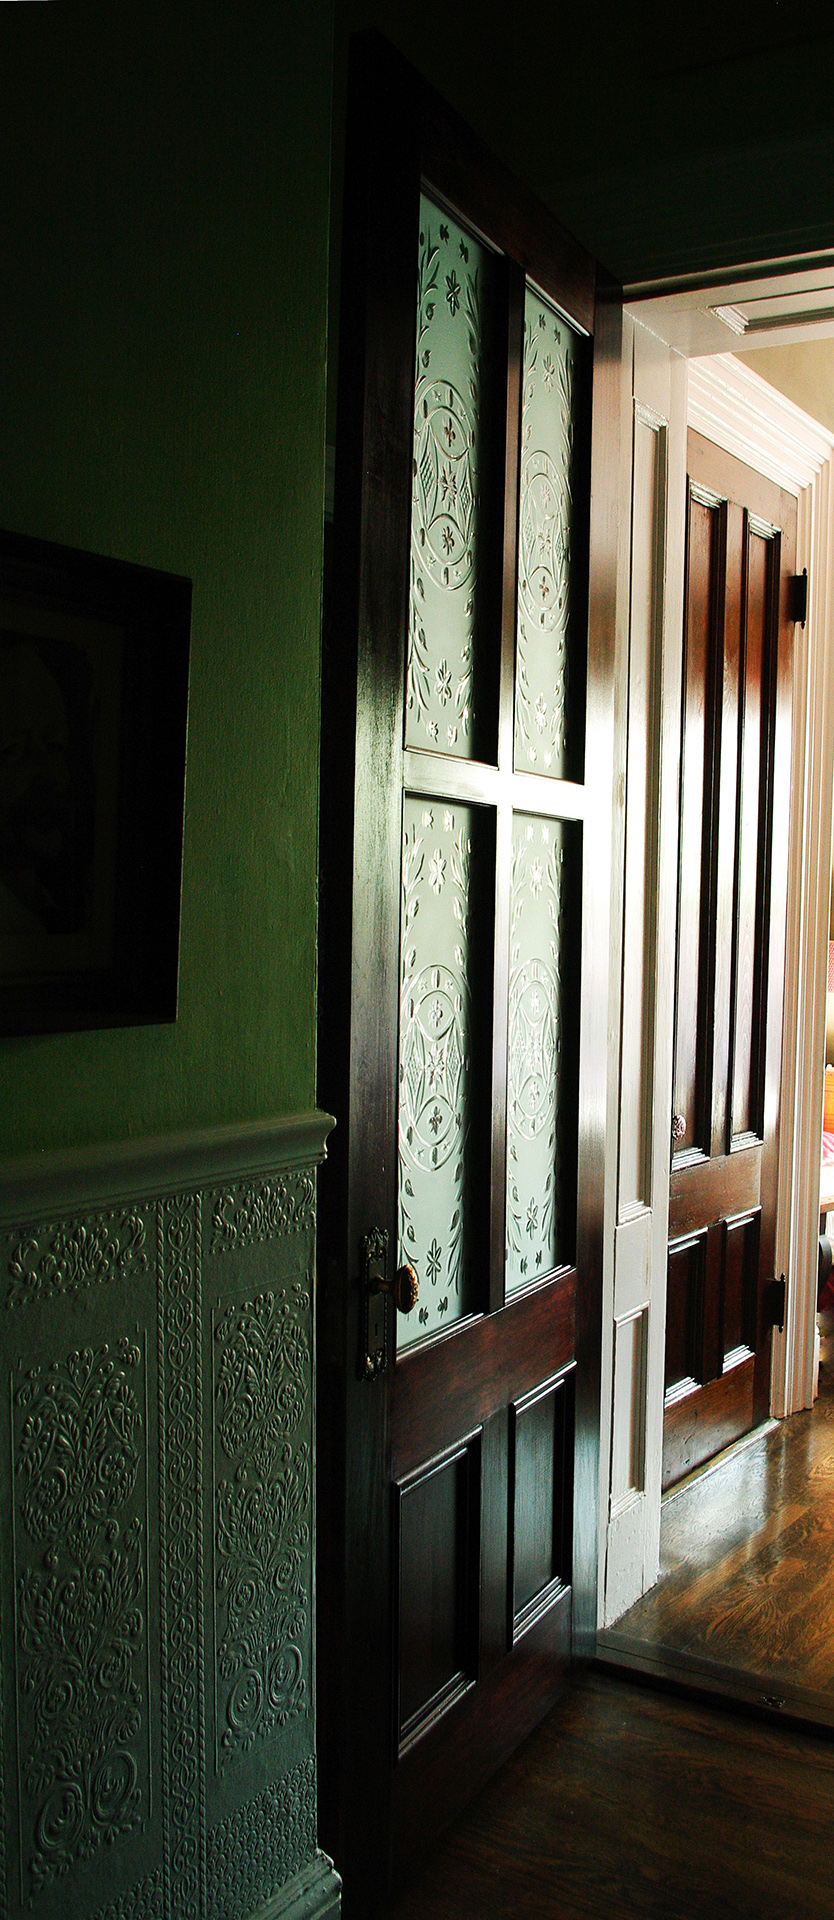
Finally assembled, stained, varnished, and installed with original, salvaged hardware!
The door viewed from the middle of the room
Close-up of the door

Close-up of the glass panels
The door viewed from the former butler's pantry
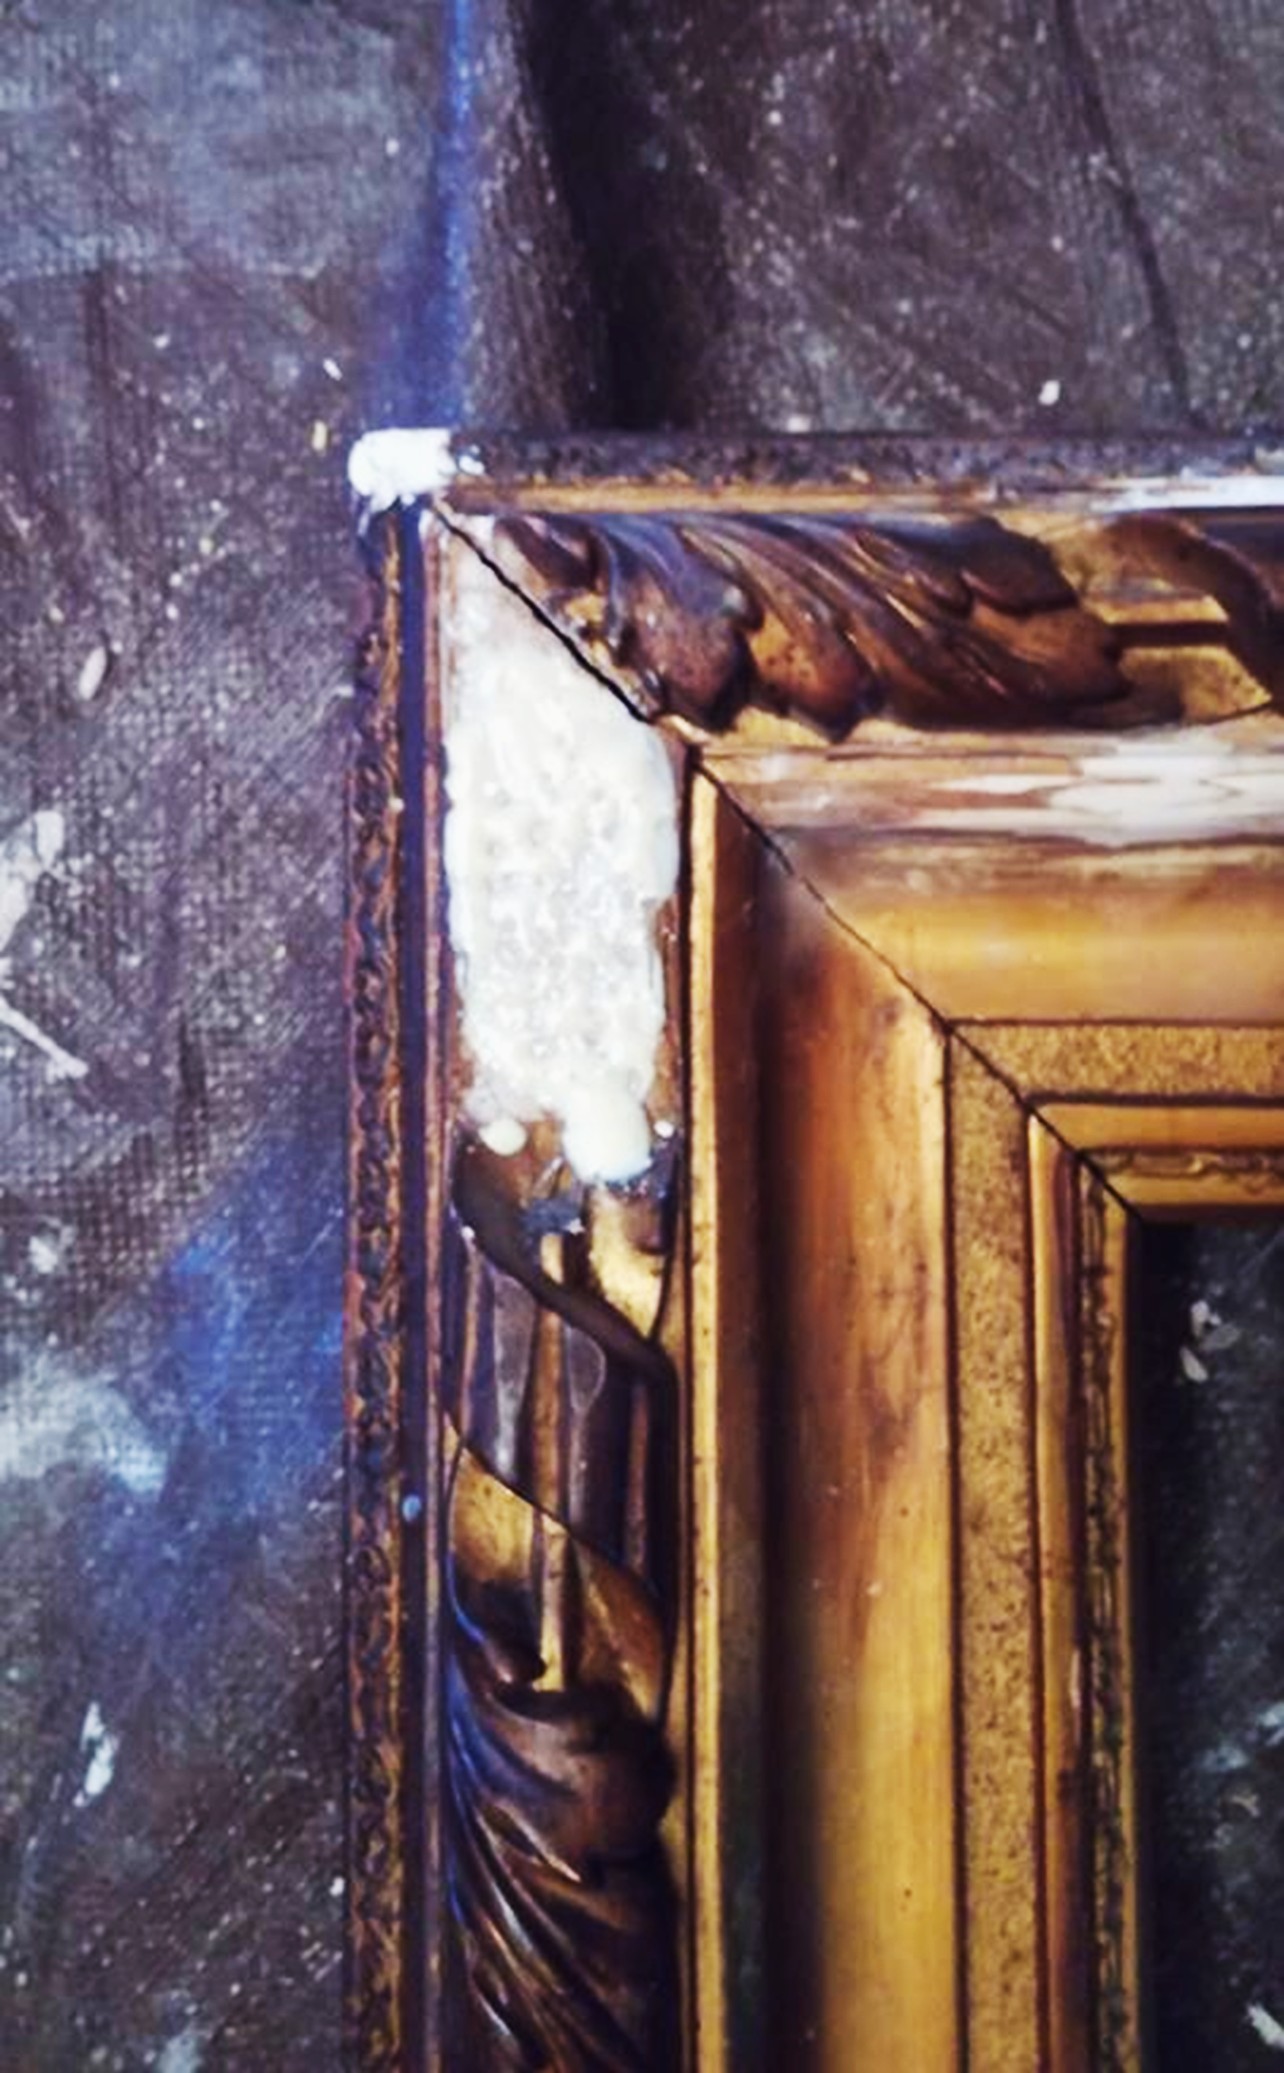
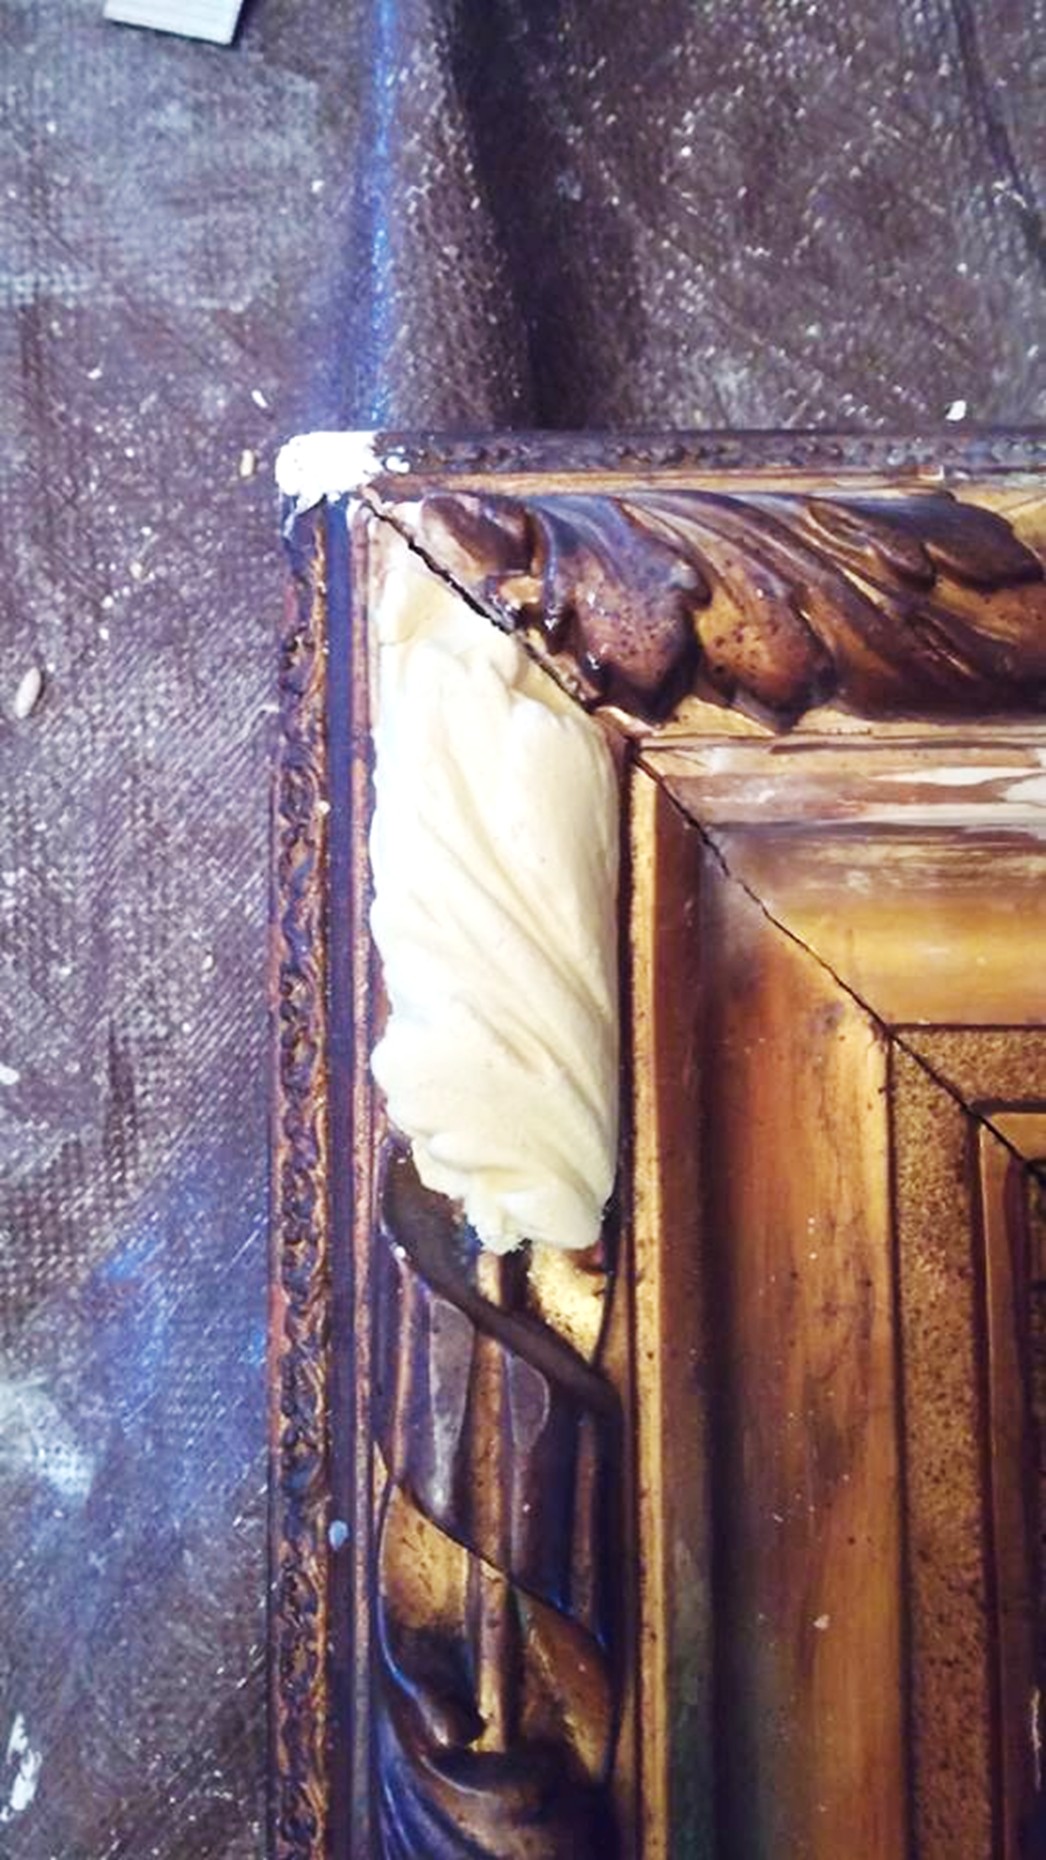
Antique 1850s Frame Restoration
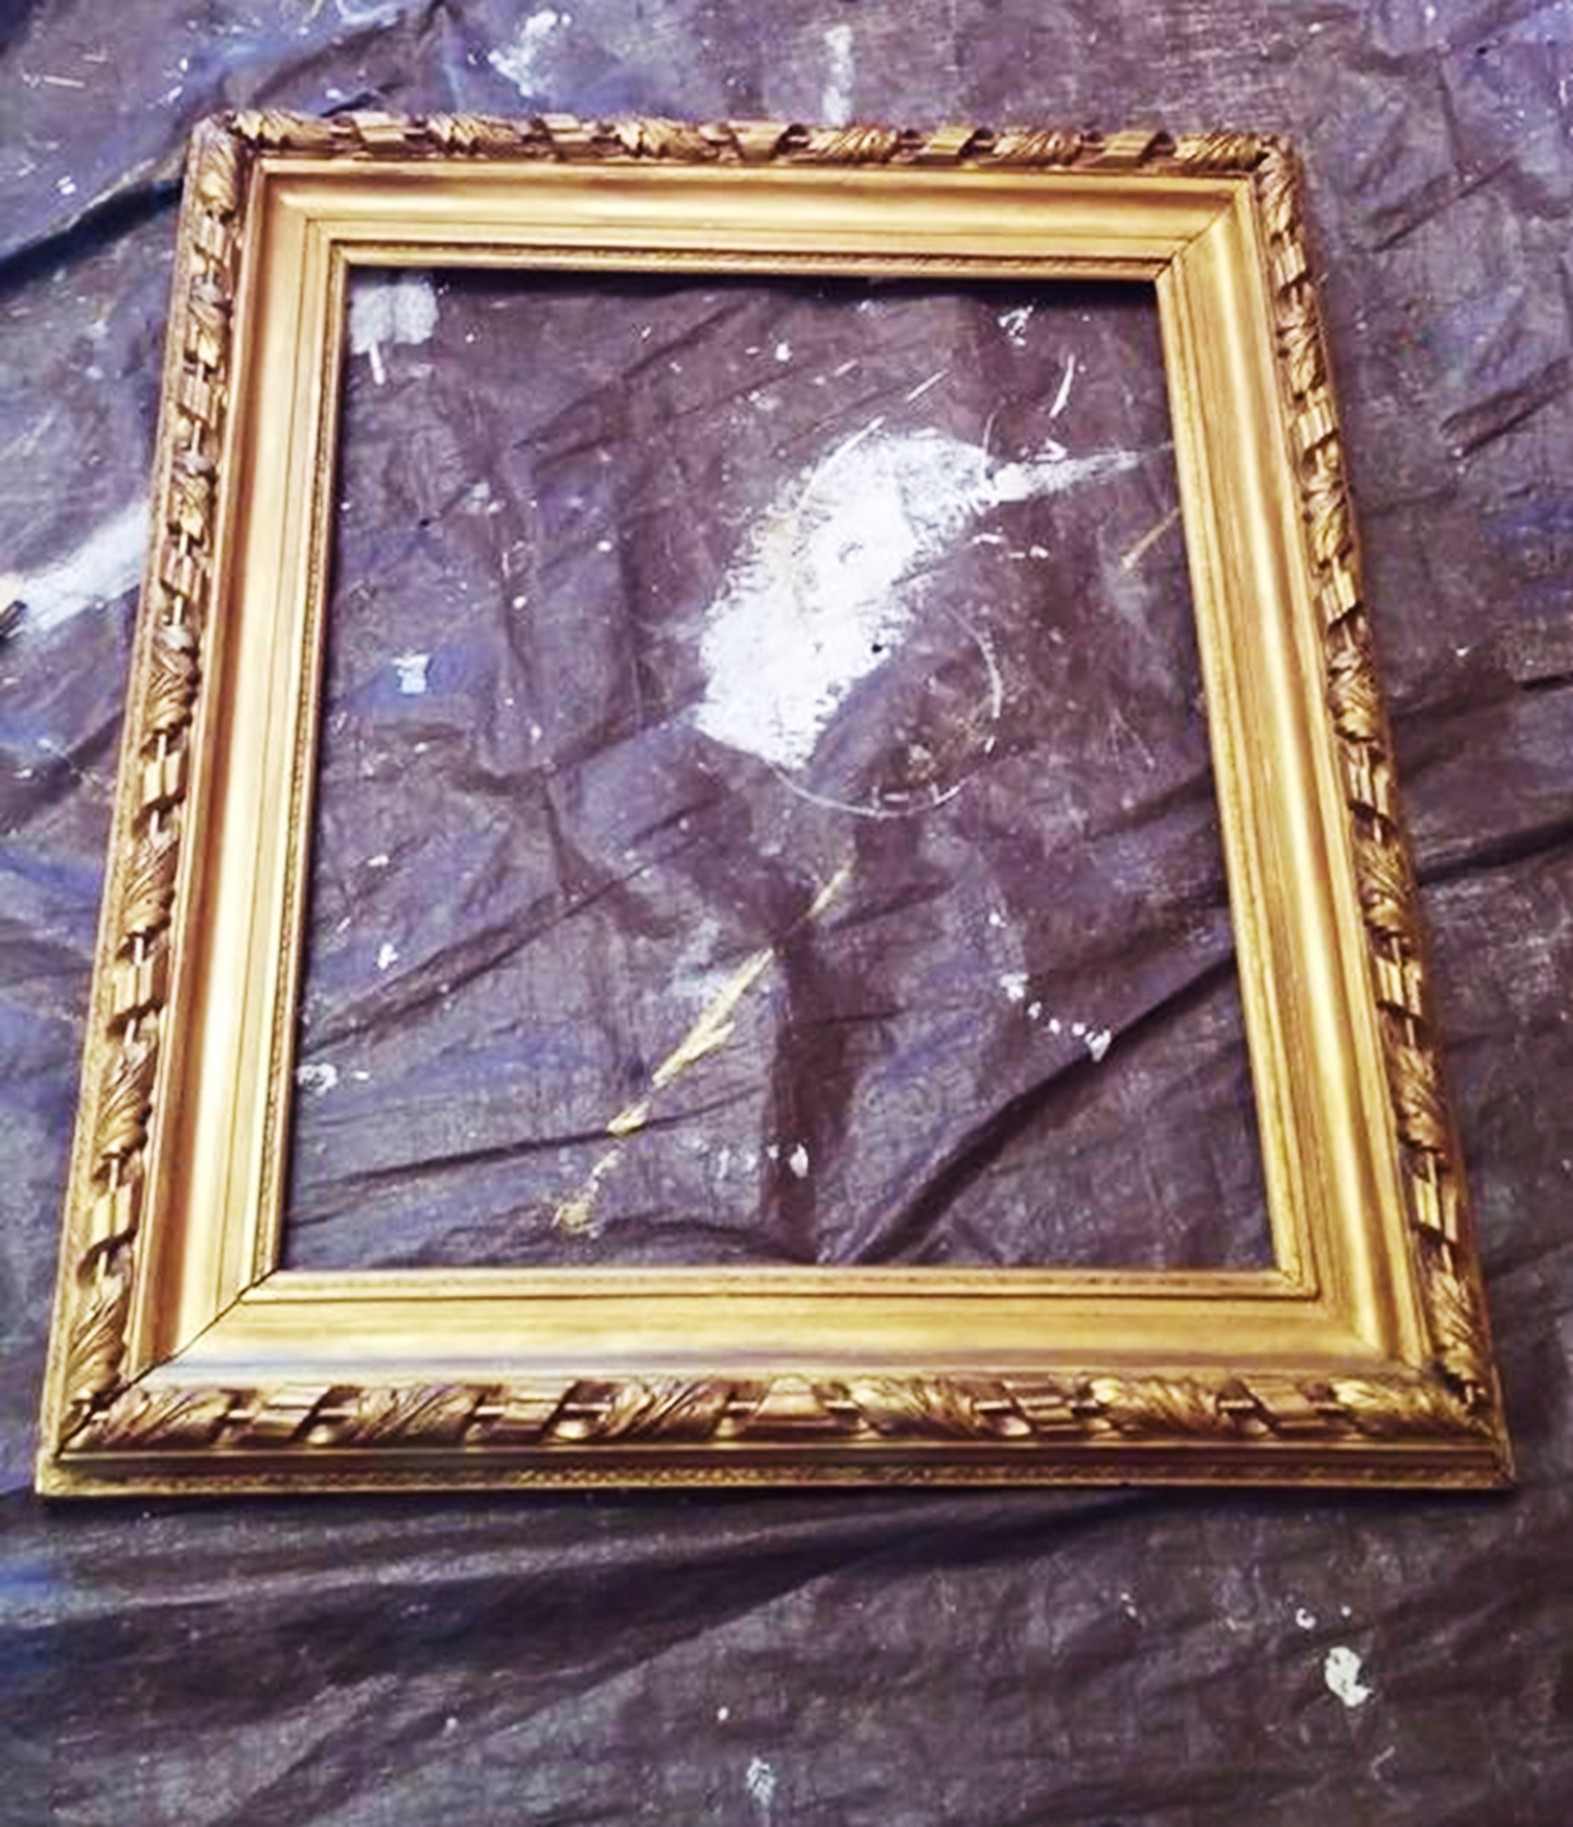
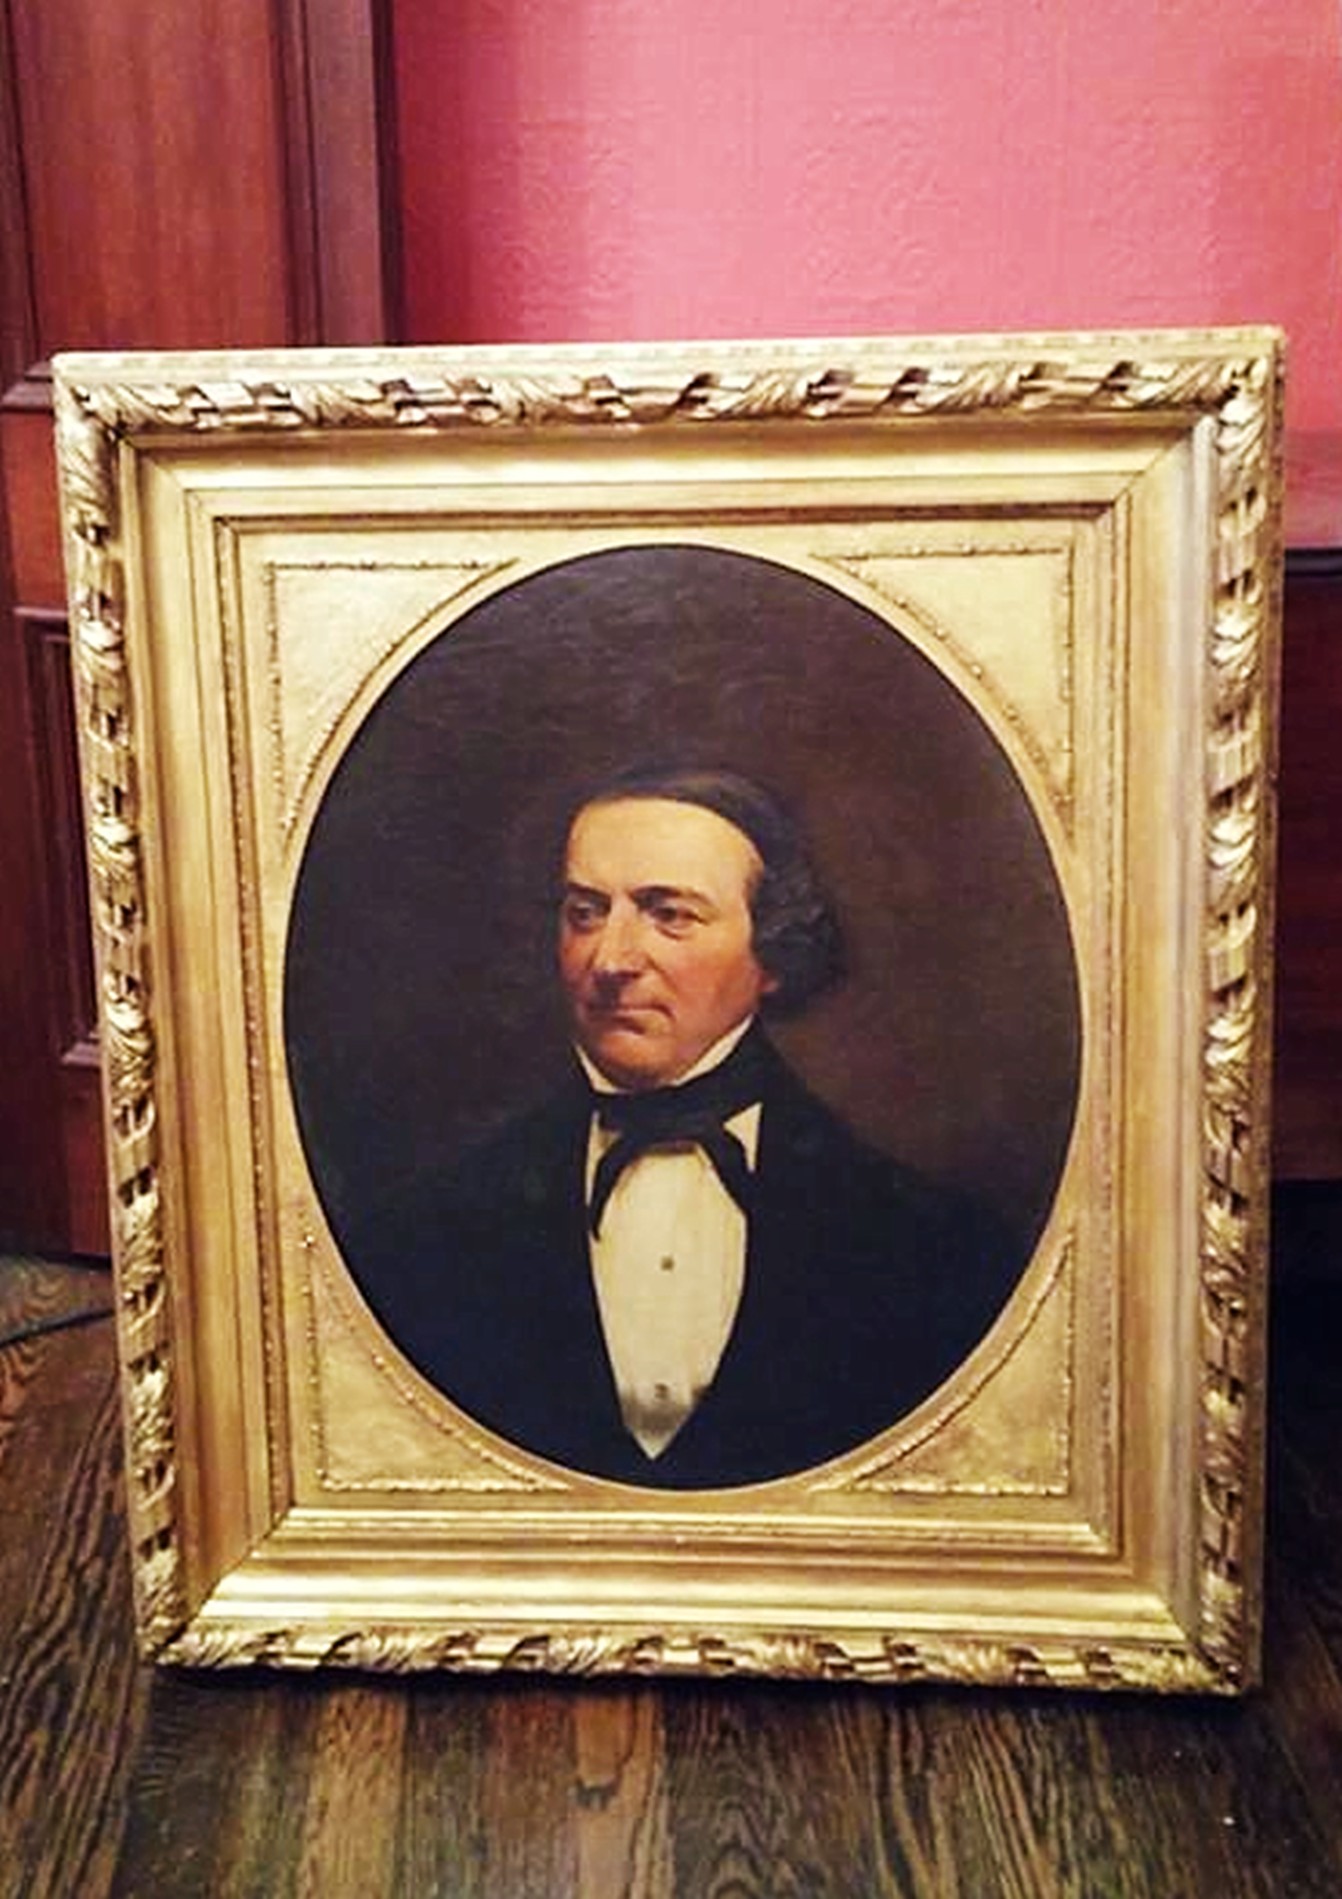
This remarkable 1850s Boston portrait was purchased in its original frame. Alas, the frame did not successfully stand the test of time the way the oil portrait did. One of our craftsmen undertook its restoration by replicating one of the missing leaves in the upper-left corner, by patching the many chipped areas, by reconstructing the bottom-right corner, and finally by re-gilding and glazing the entire frame.
The frame before restoration

The upper-left corner – before and after the casting of the leaf motif
The outer frame after applying the last coat of antiquing glaze
The final result, including the re-gilt original passe-partout.
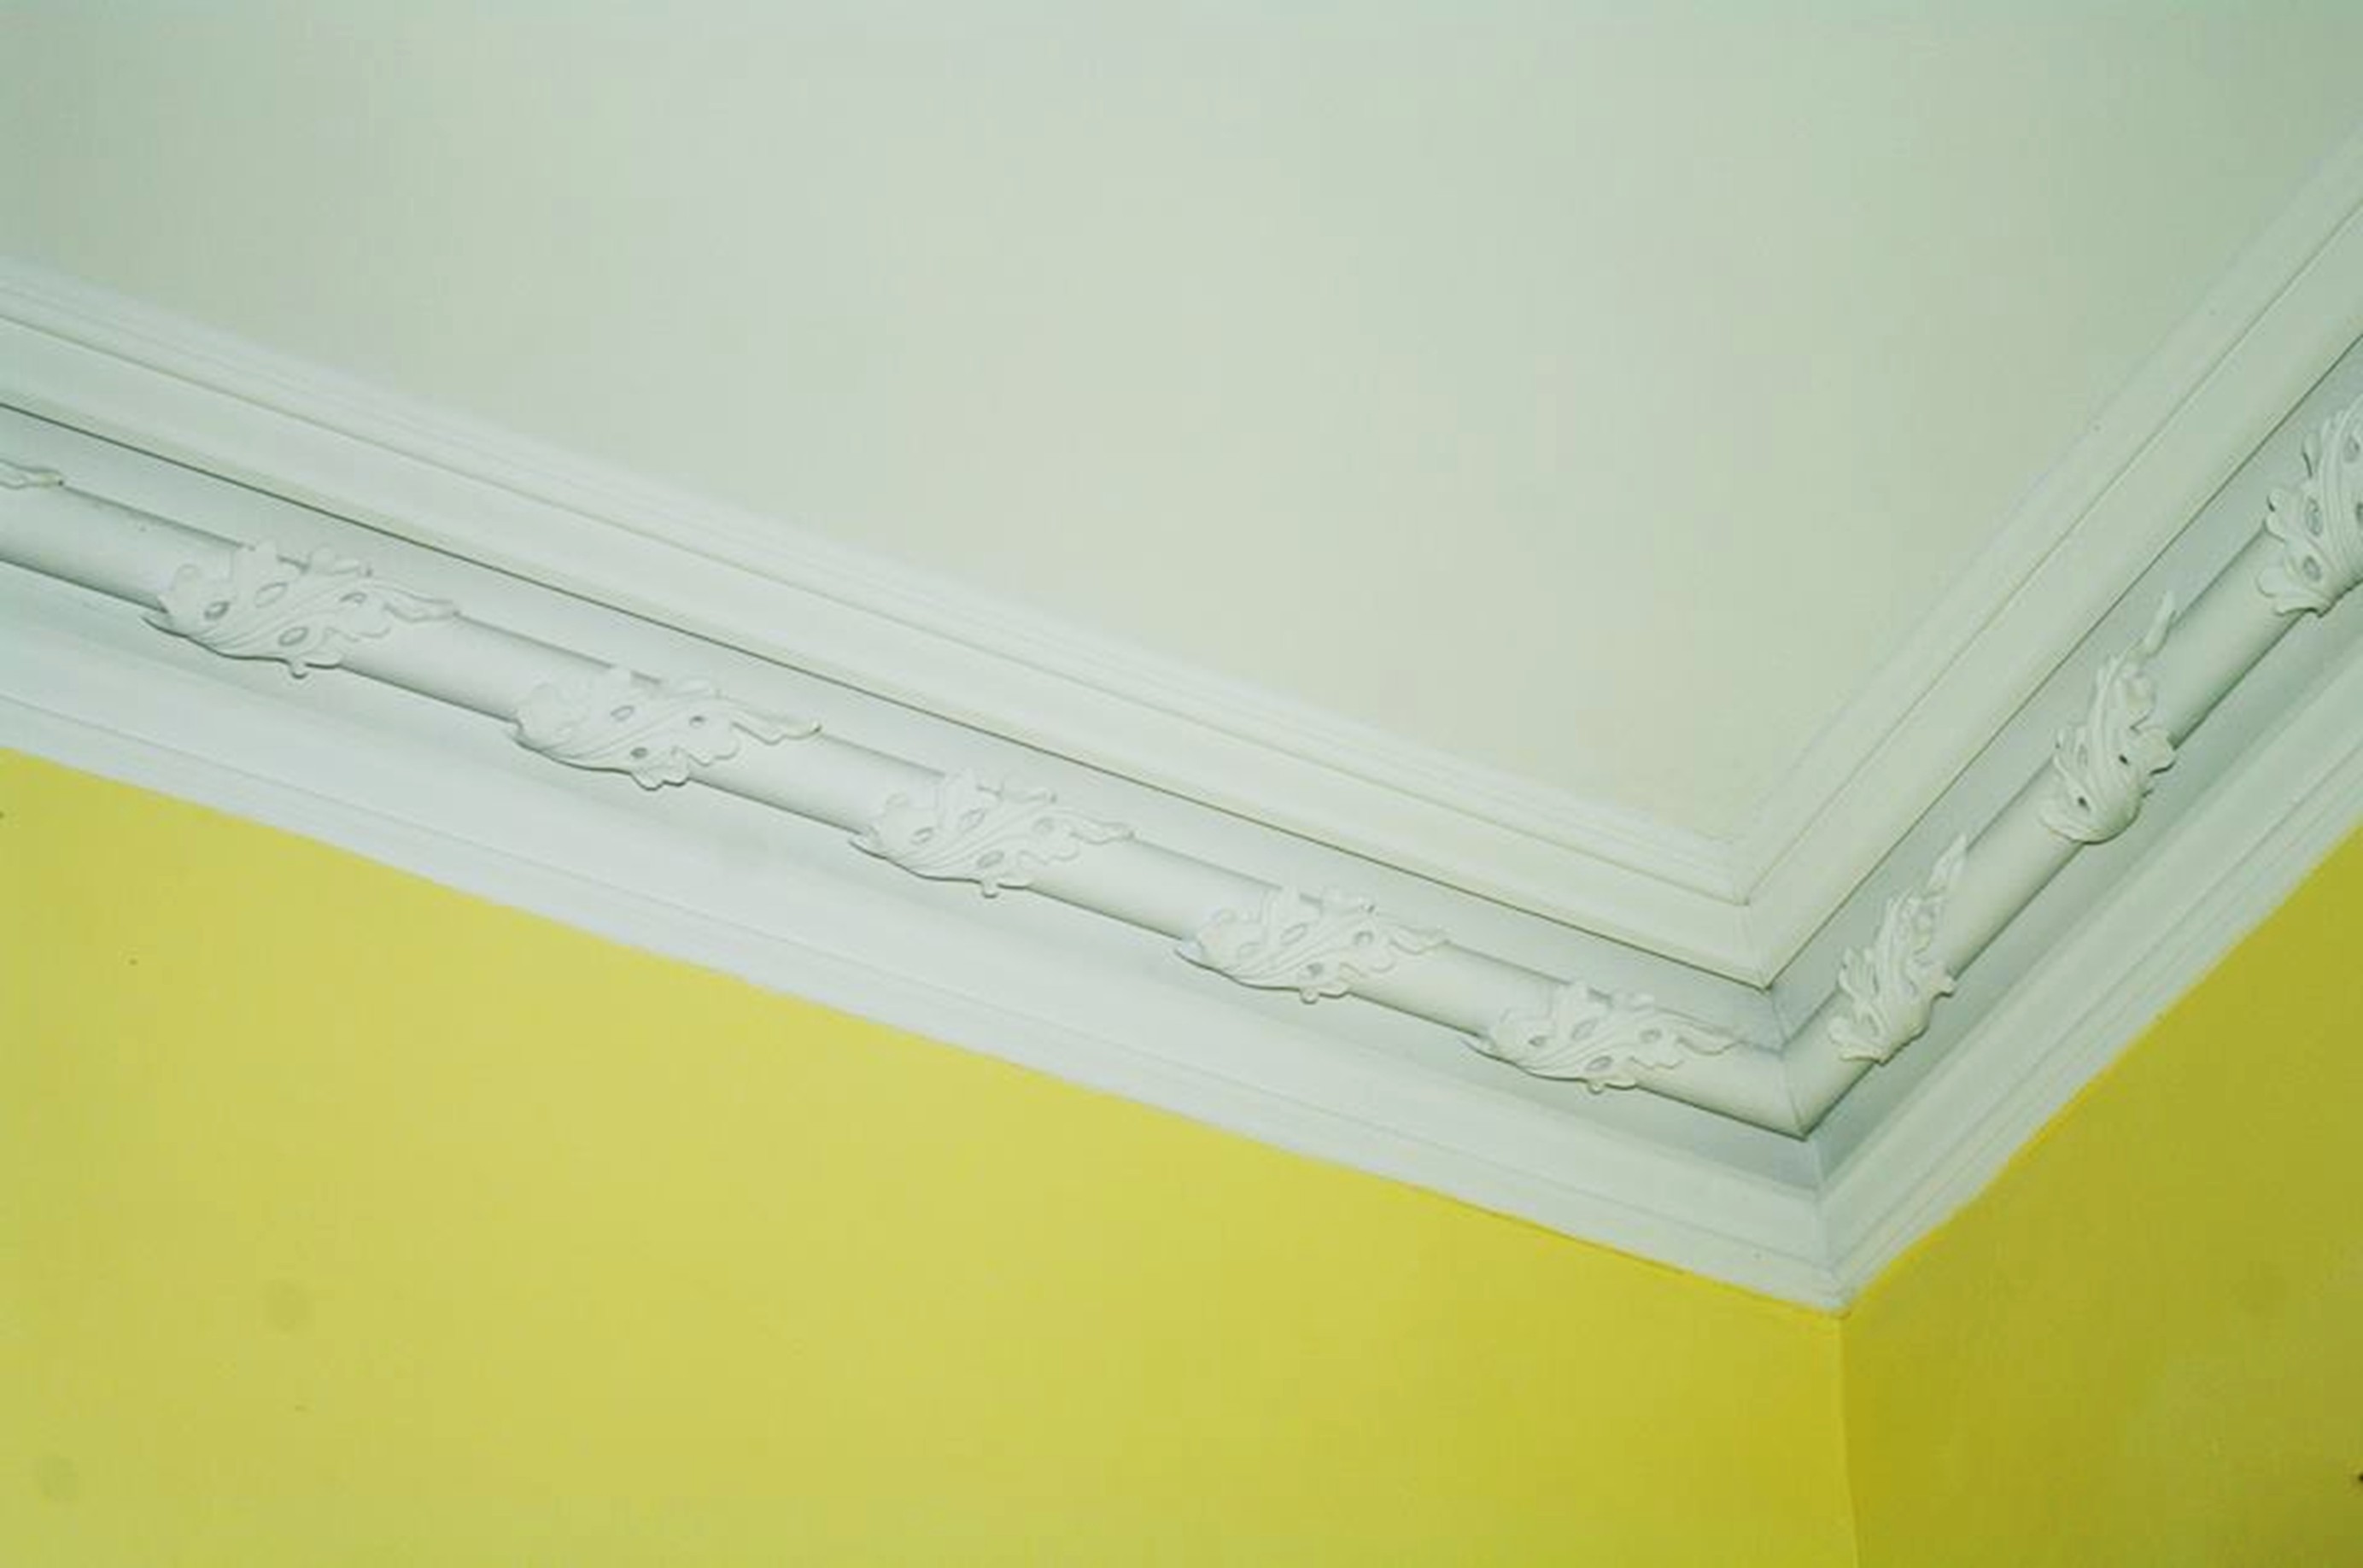
Replication of Historical Crown Moldings in 1850s South End Parlor
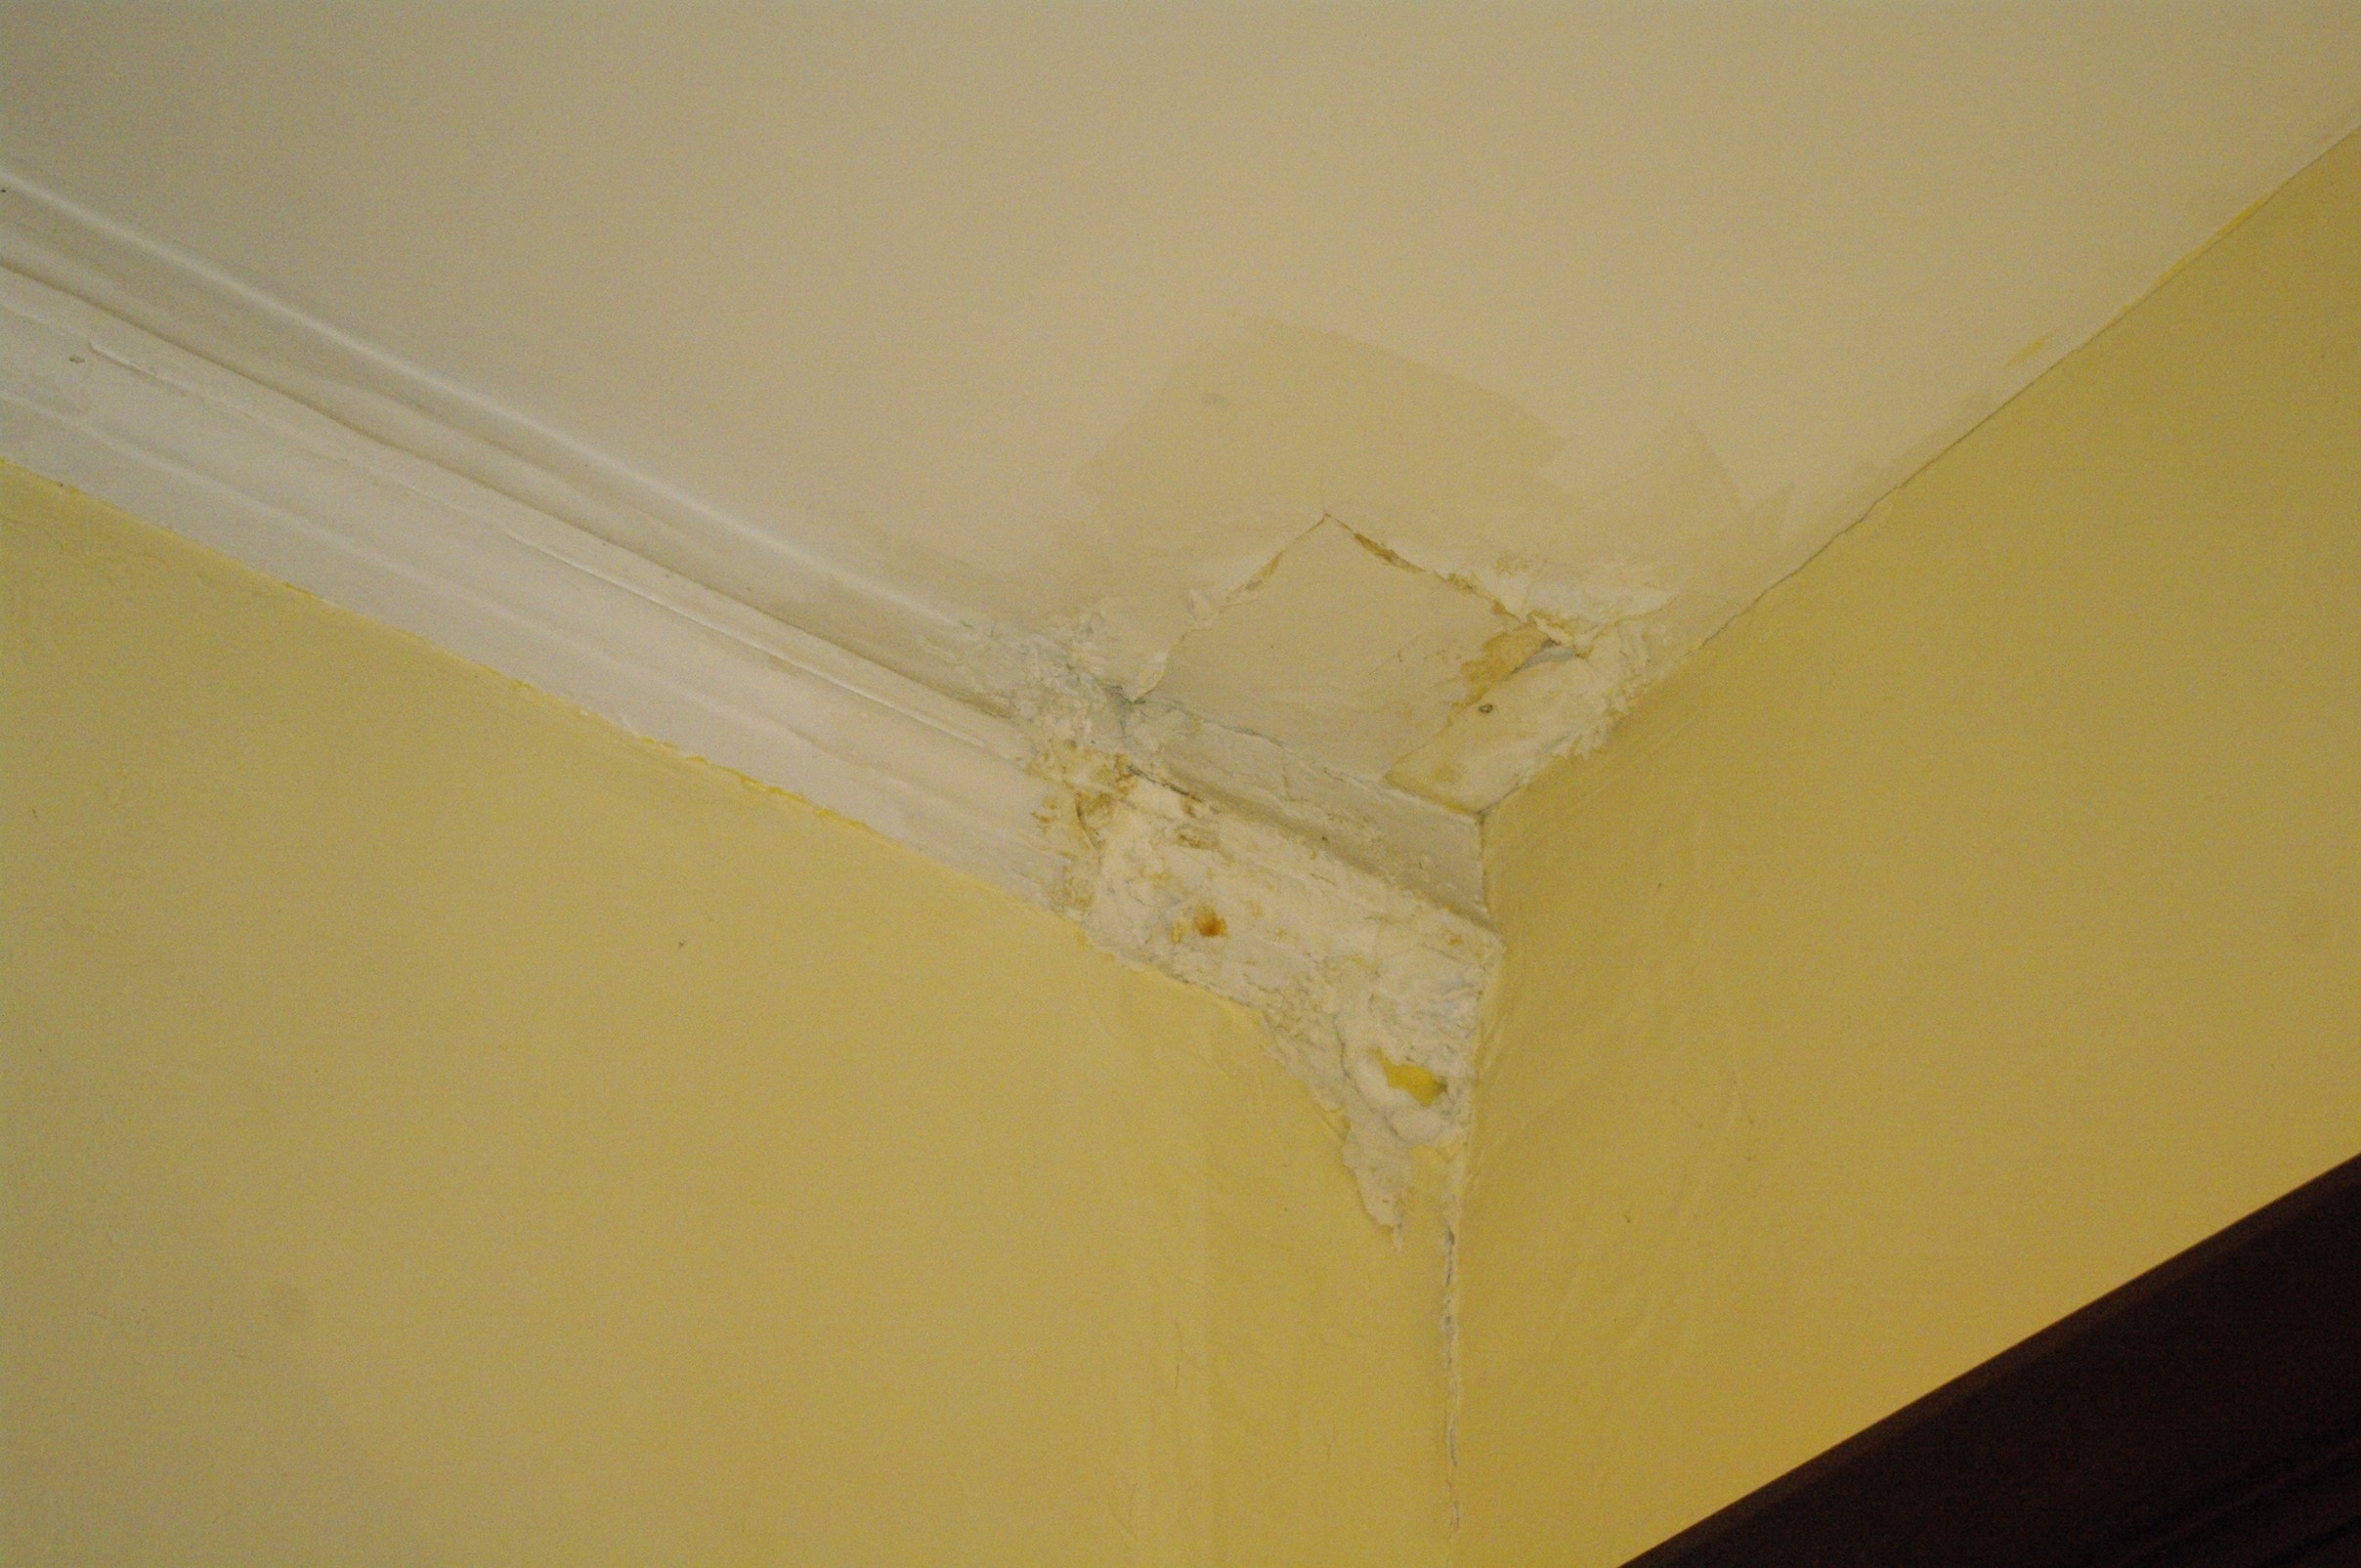
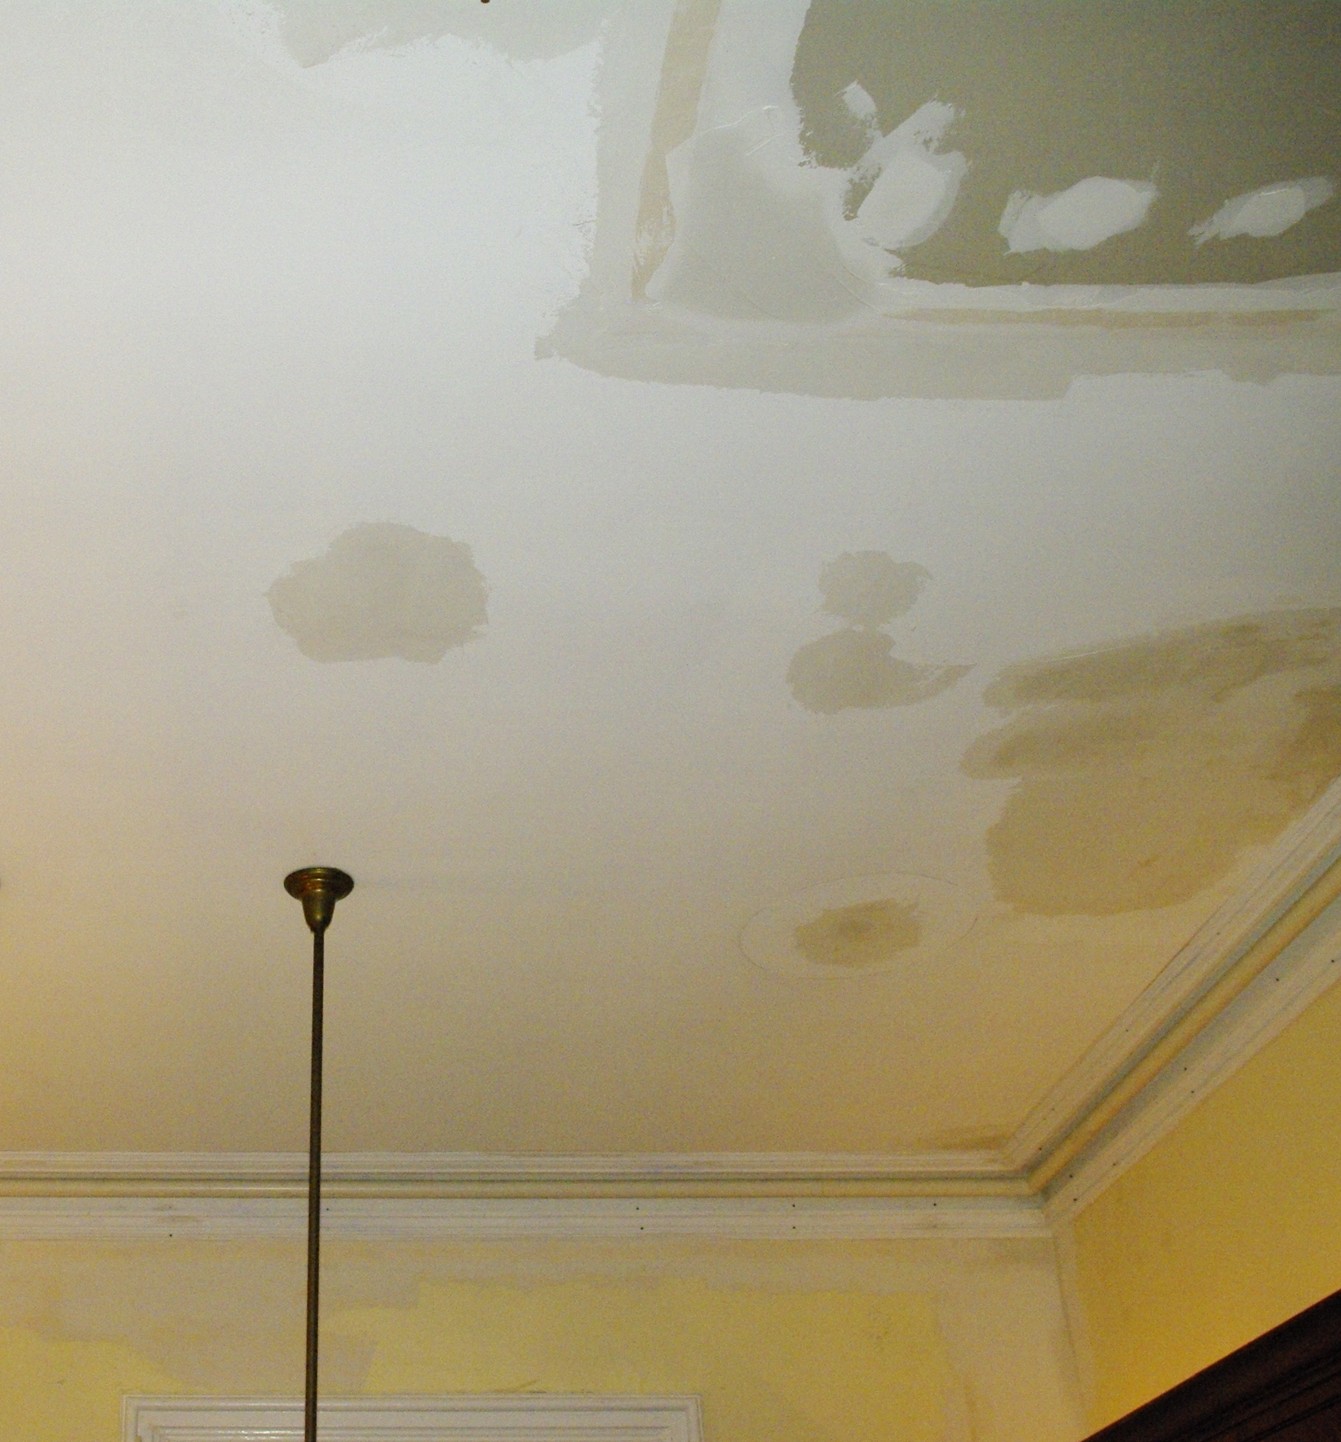
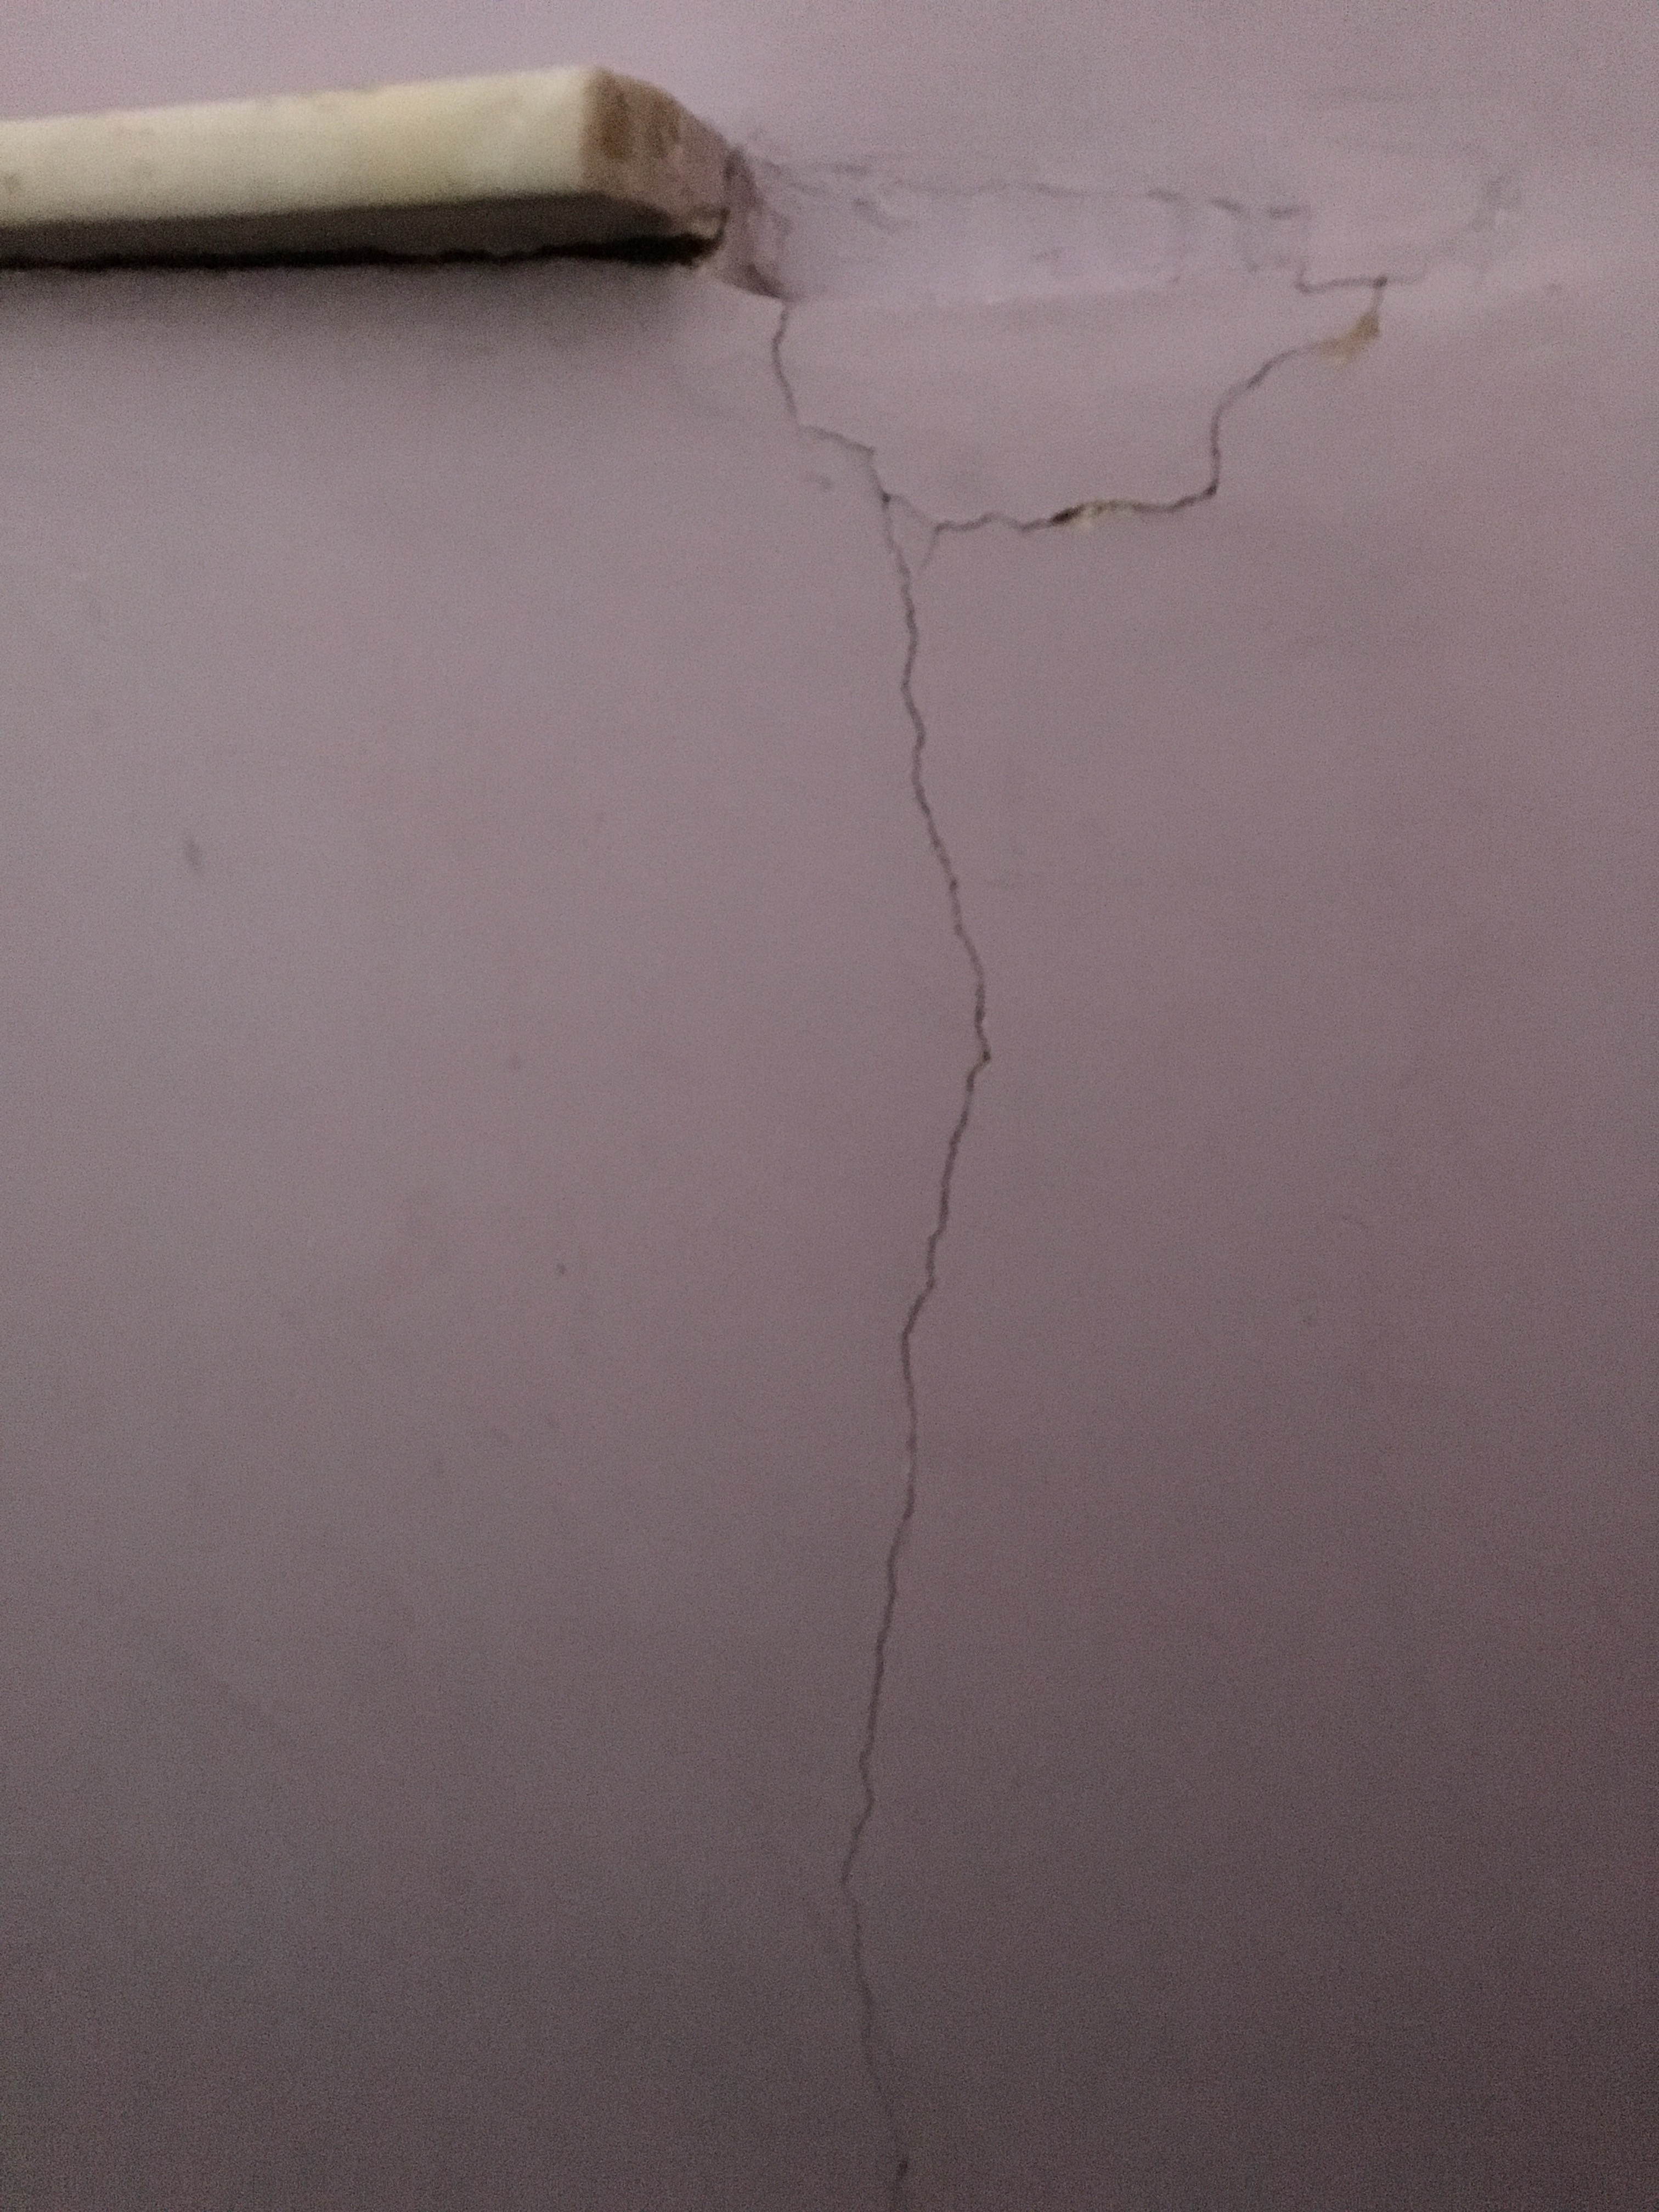
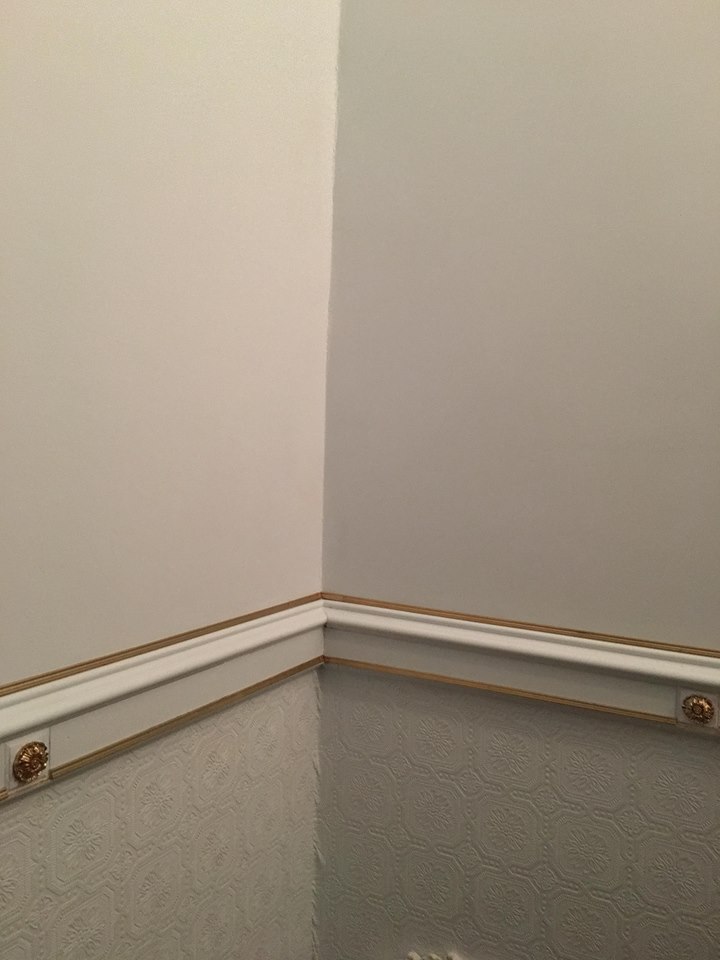
In this 1850s South-end parlor, years of damage caused by continuous rain infiltrations destroyed much of the original plaster crown moldings. Three of the walls were almost completely stripped. The following photos document the condition of the small section that had survived on the fourth wall:
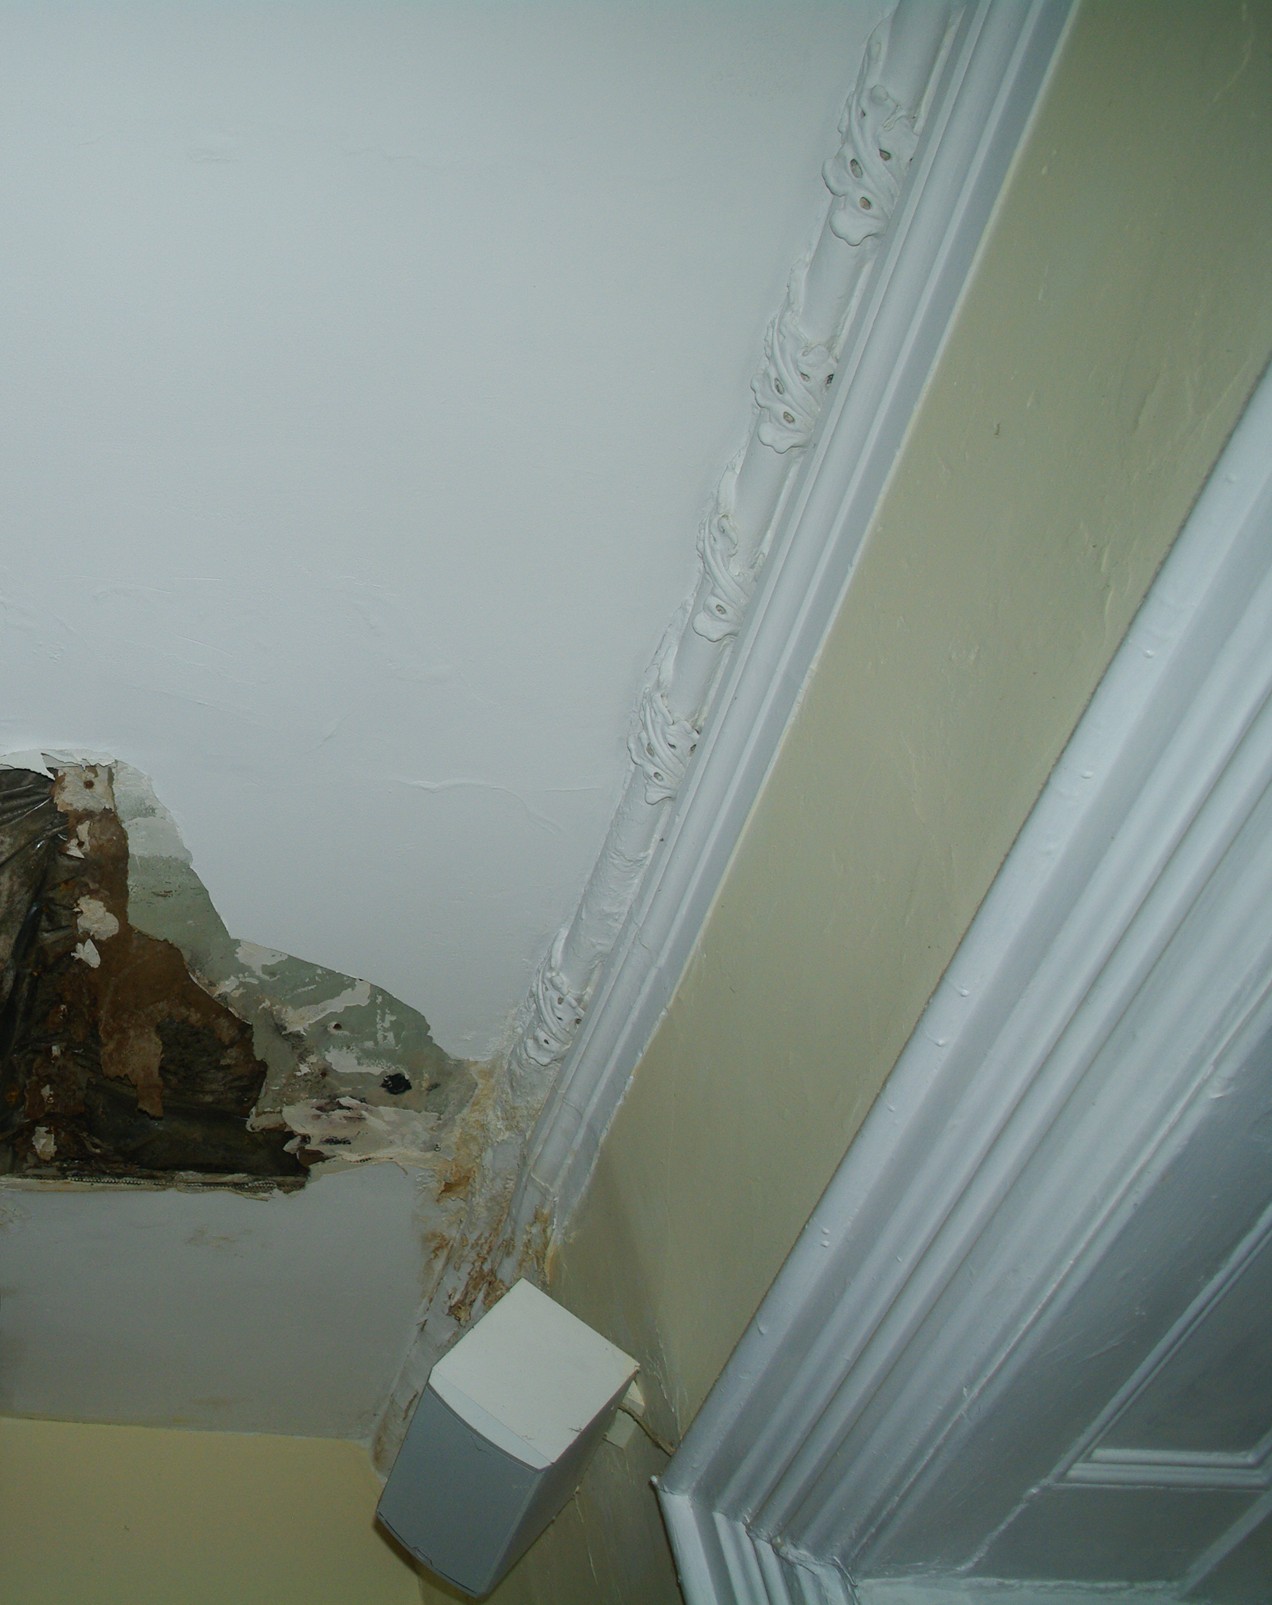
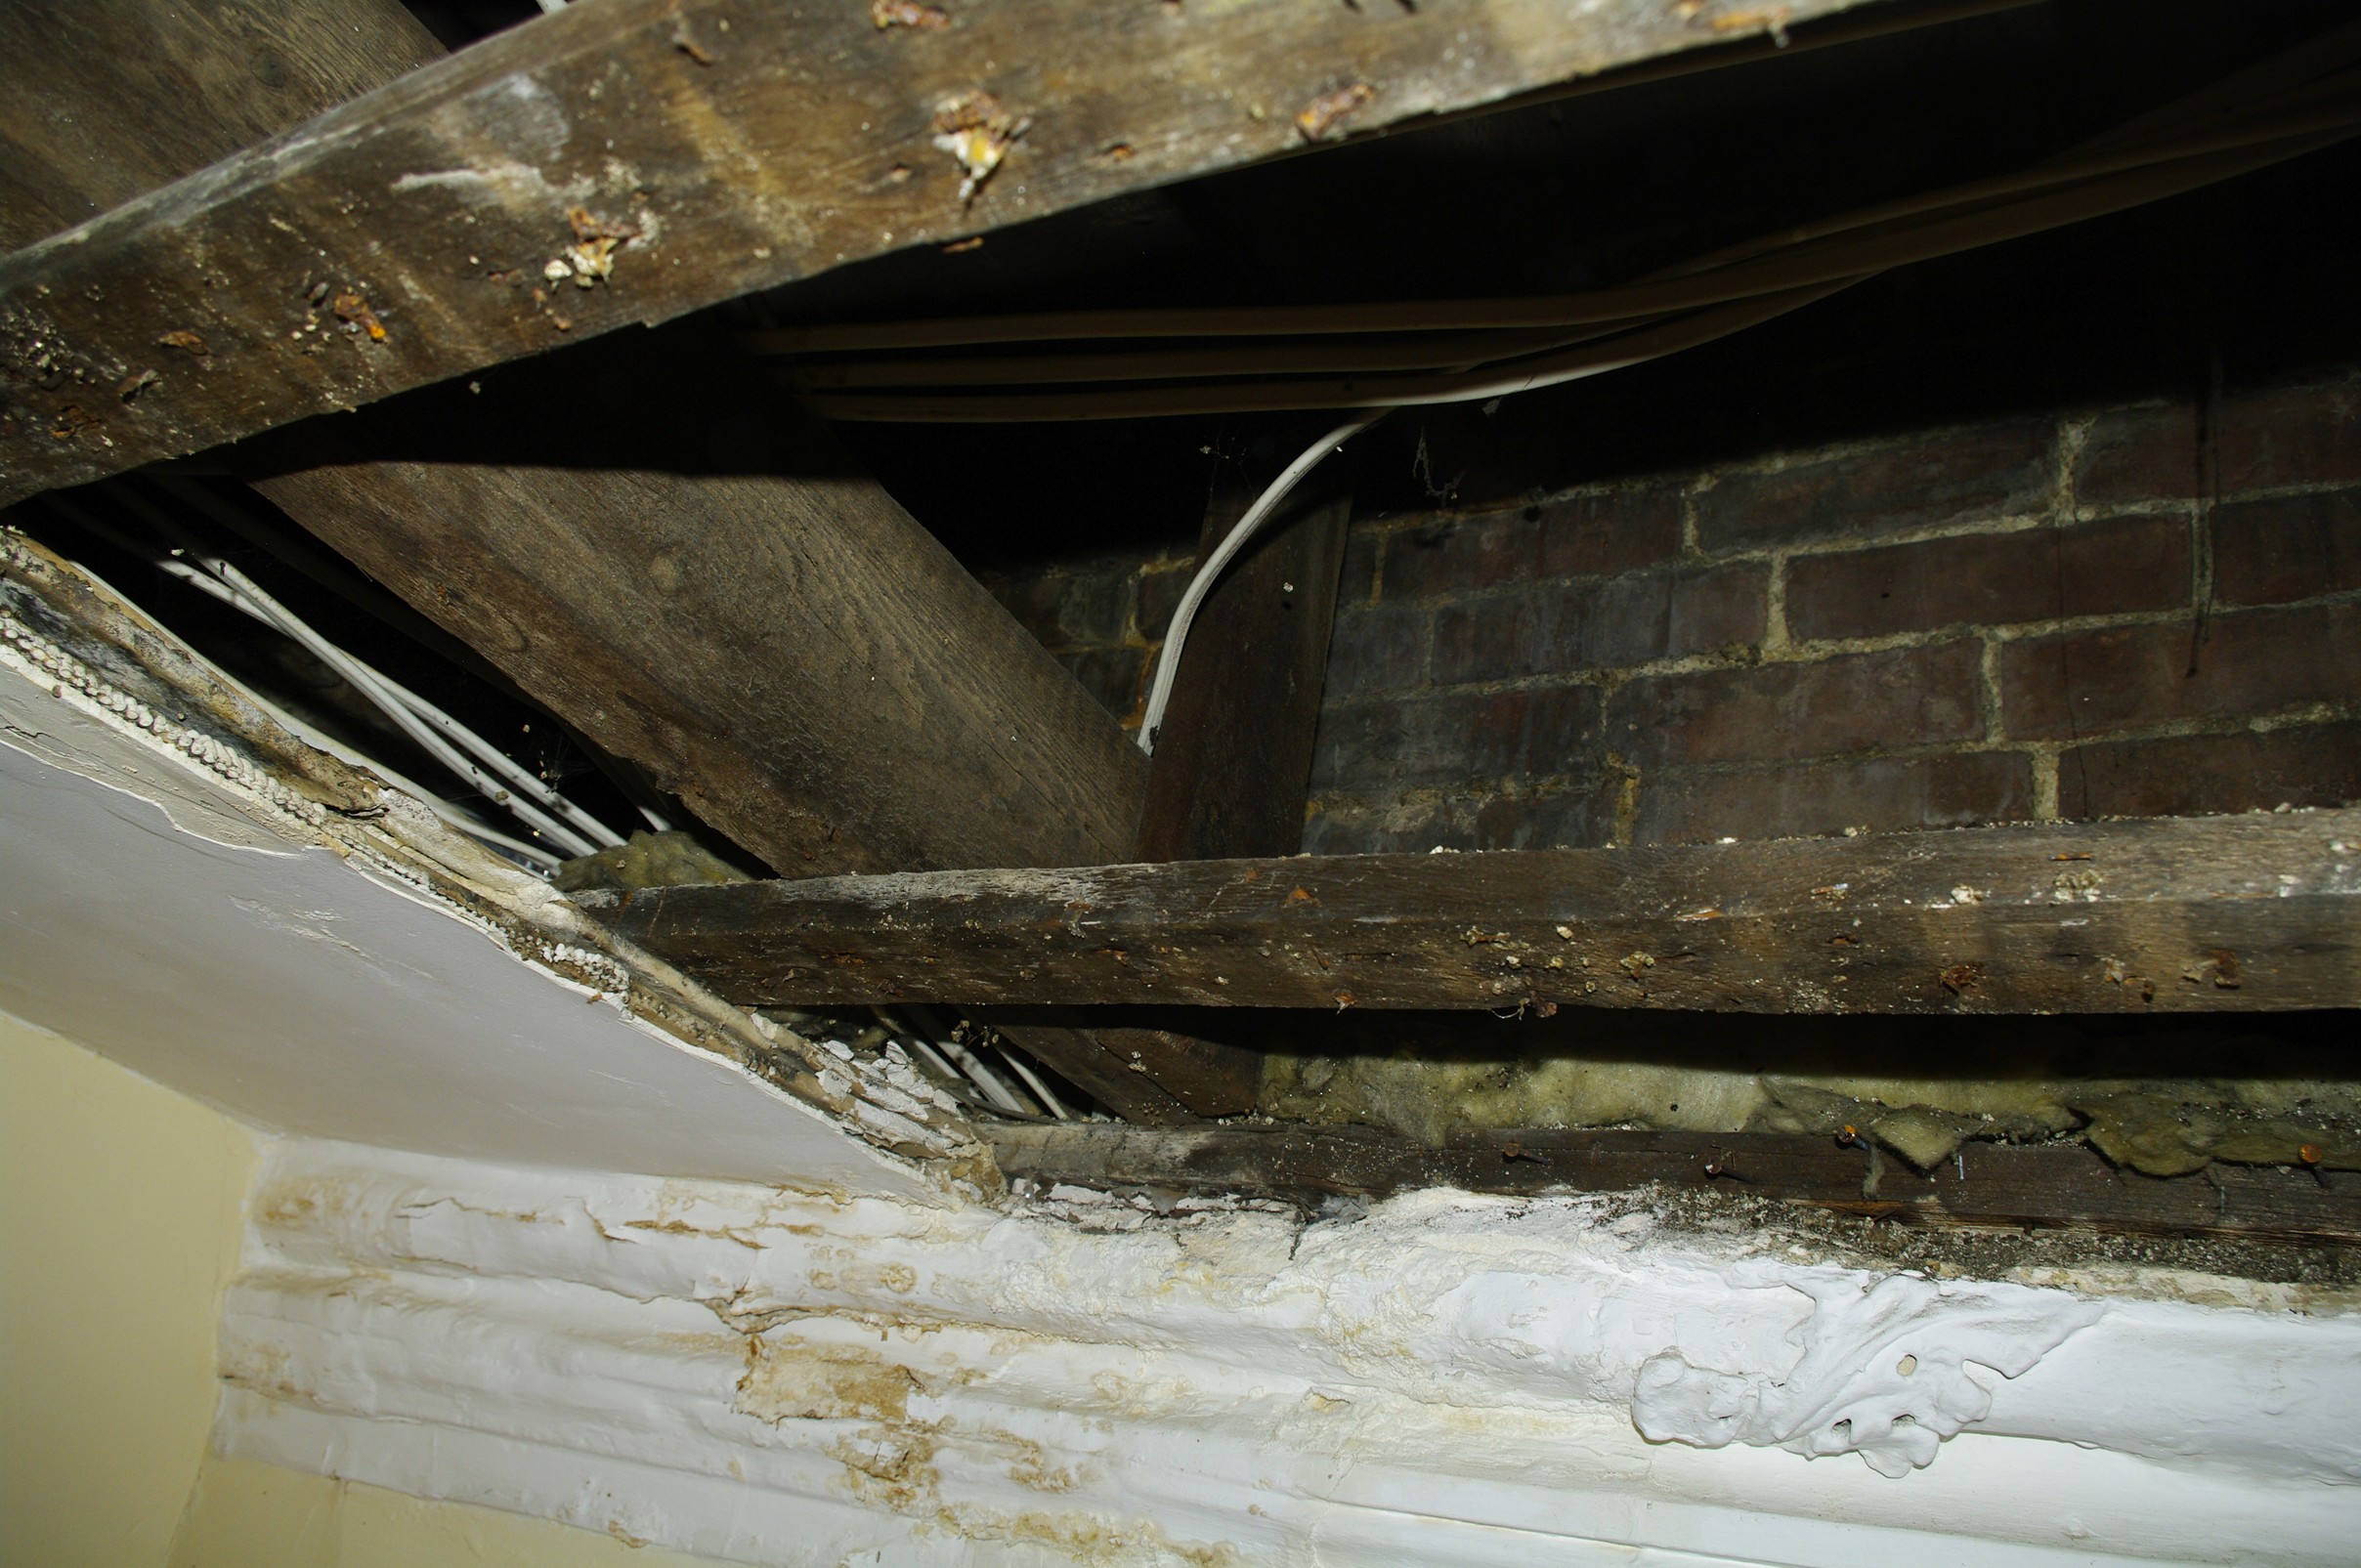
Much of the remaining section was adjacent to an area that, for years, experienced leaks from inadequate rain drainage. The problem was eventually fixed, but the damage was so extensive that nearly 20% of the ceiling had to be rebuilt. Upon touching it, entire sections of the upper portion of the wall beneath the moldings also crumbled and had to be replaced.
Other areas of the room were also affected by leaks. Here is a photo of the opposite corner, which shows that the crown moldings had lost most of their details, or were removed.
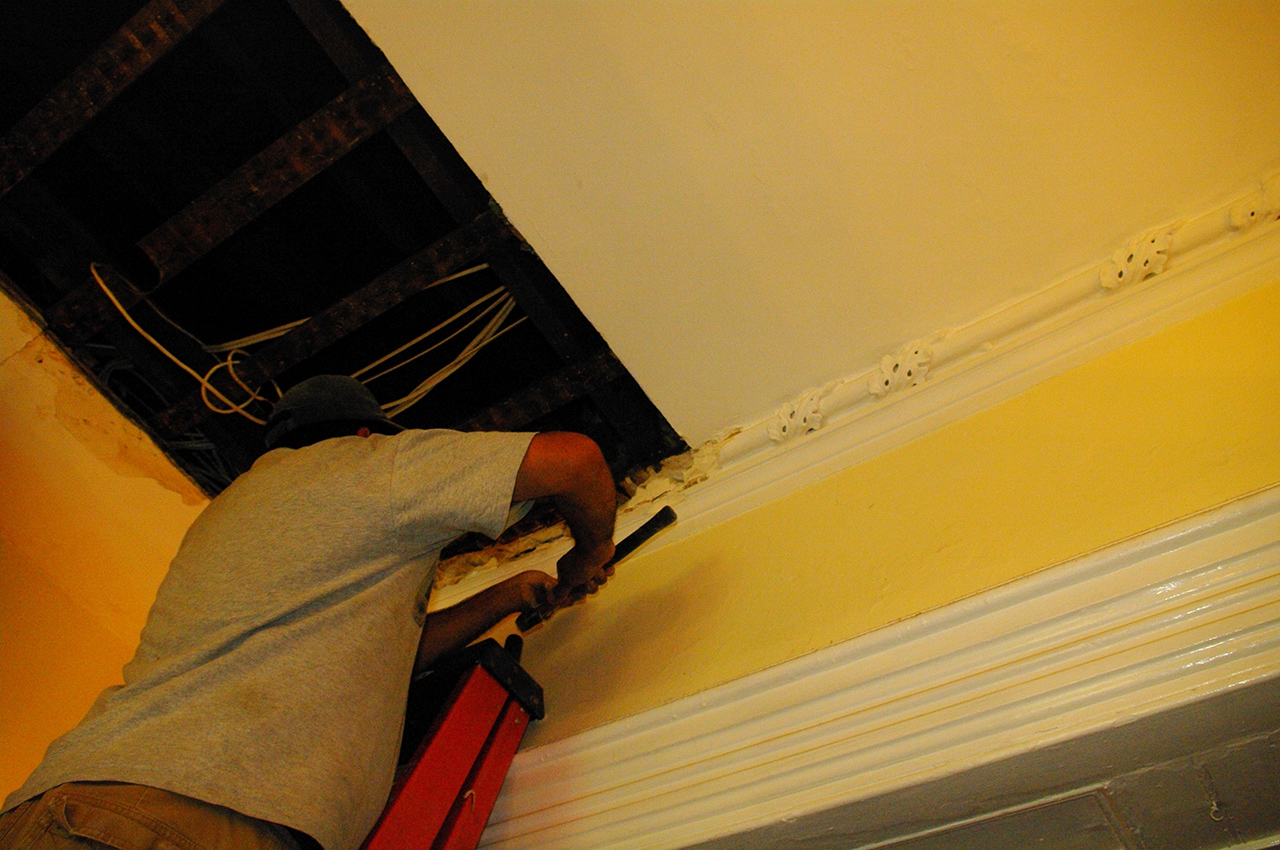
Restoration was not an option: demolition and replication were in order. Here is David Major, one of our experienced crew members, at work.

This photo shows all that was left of the room's original crown molding after removing it. After so many years of exposure to water, much of it disintegrated at the touch.
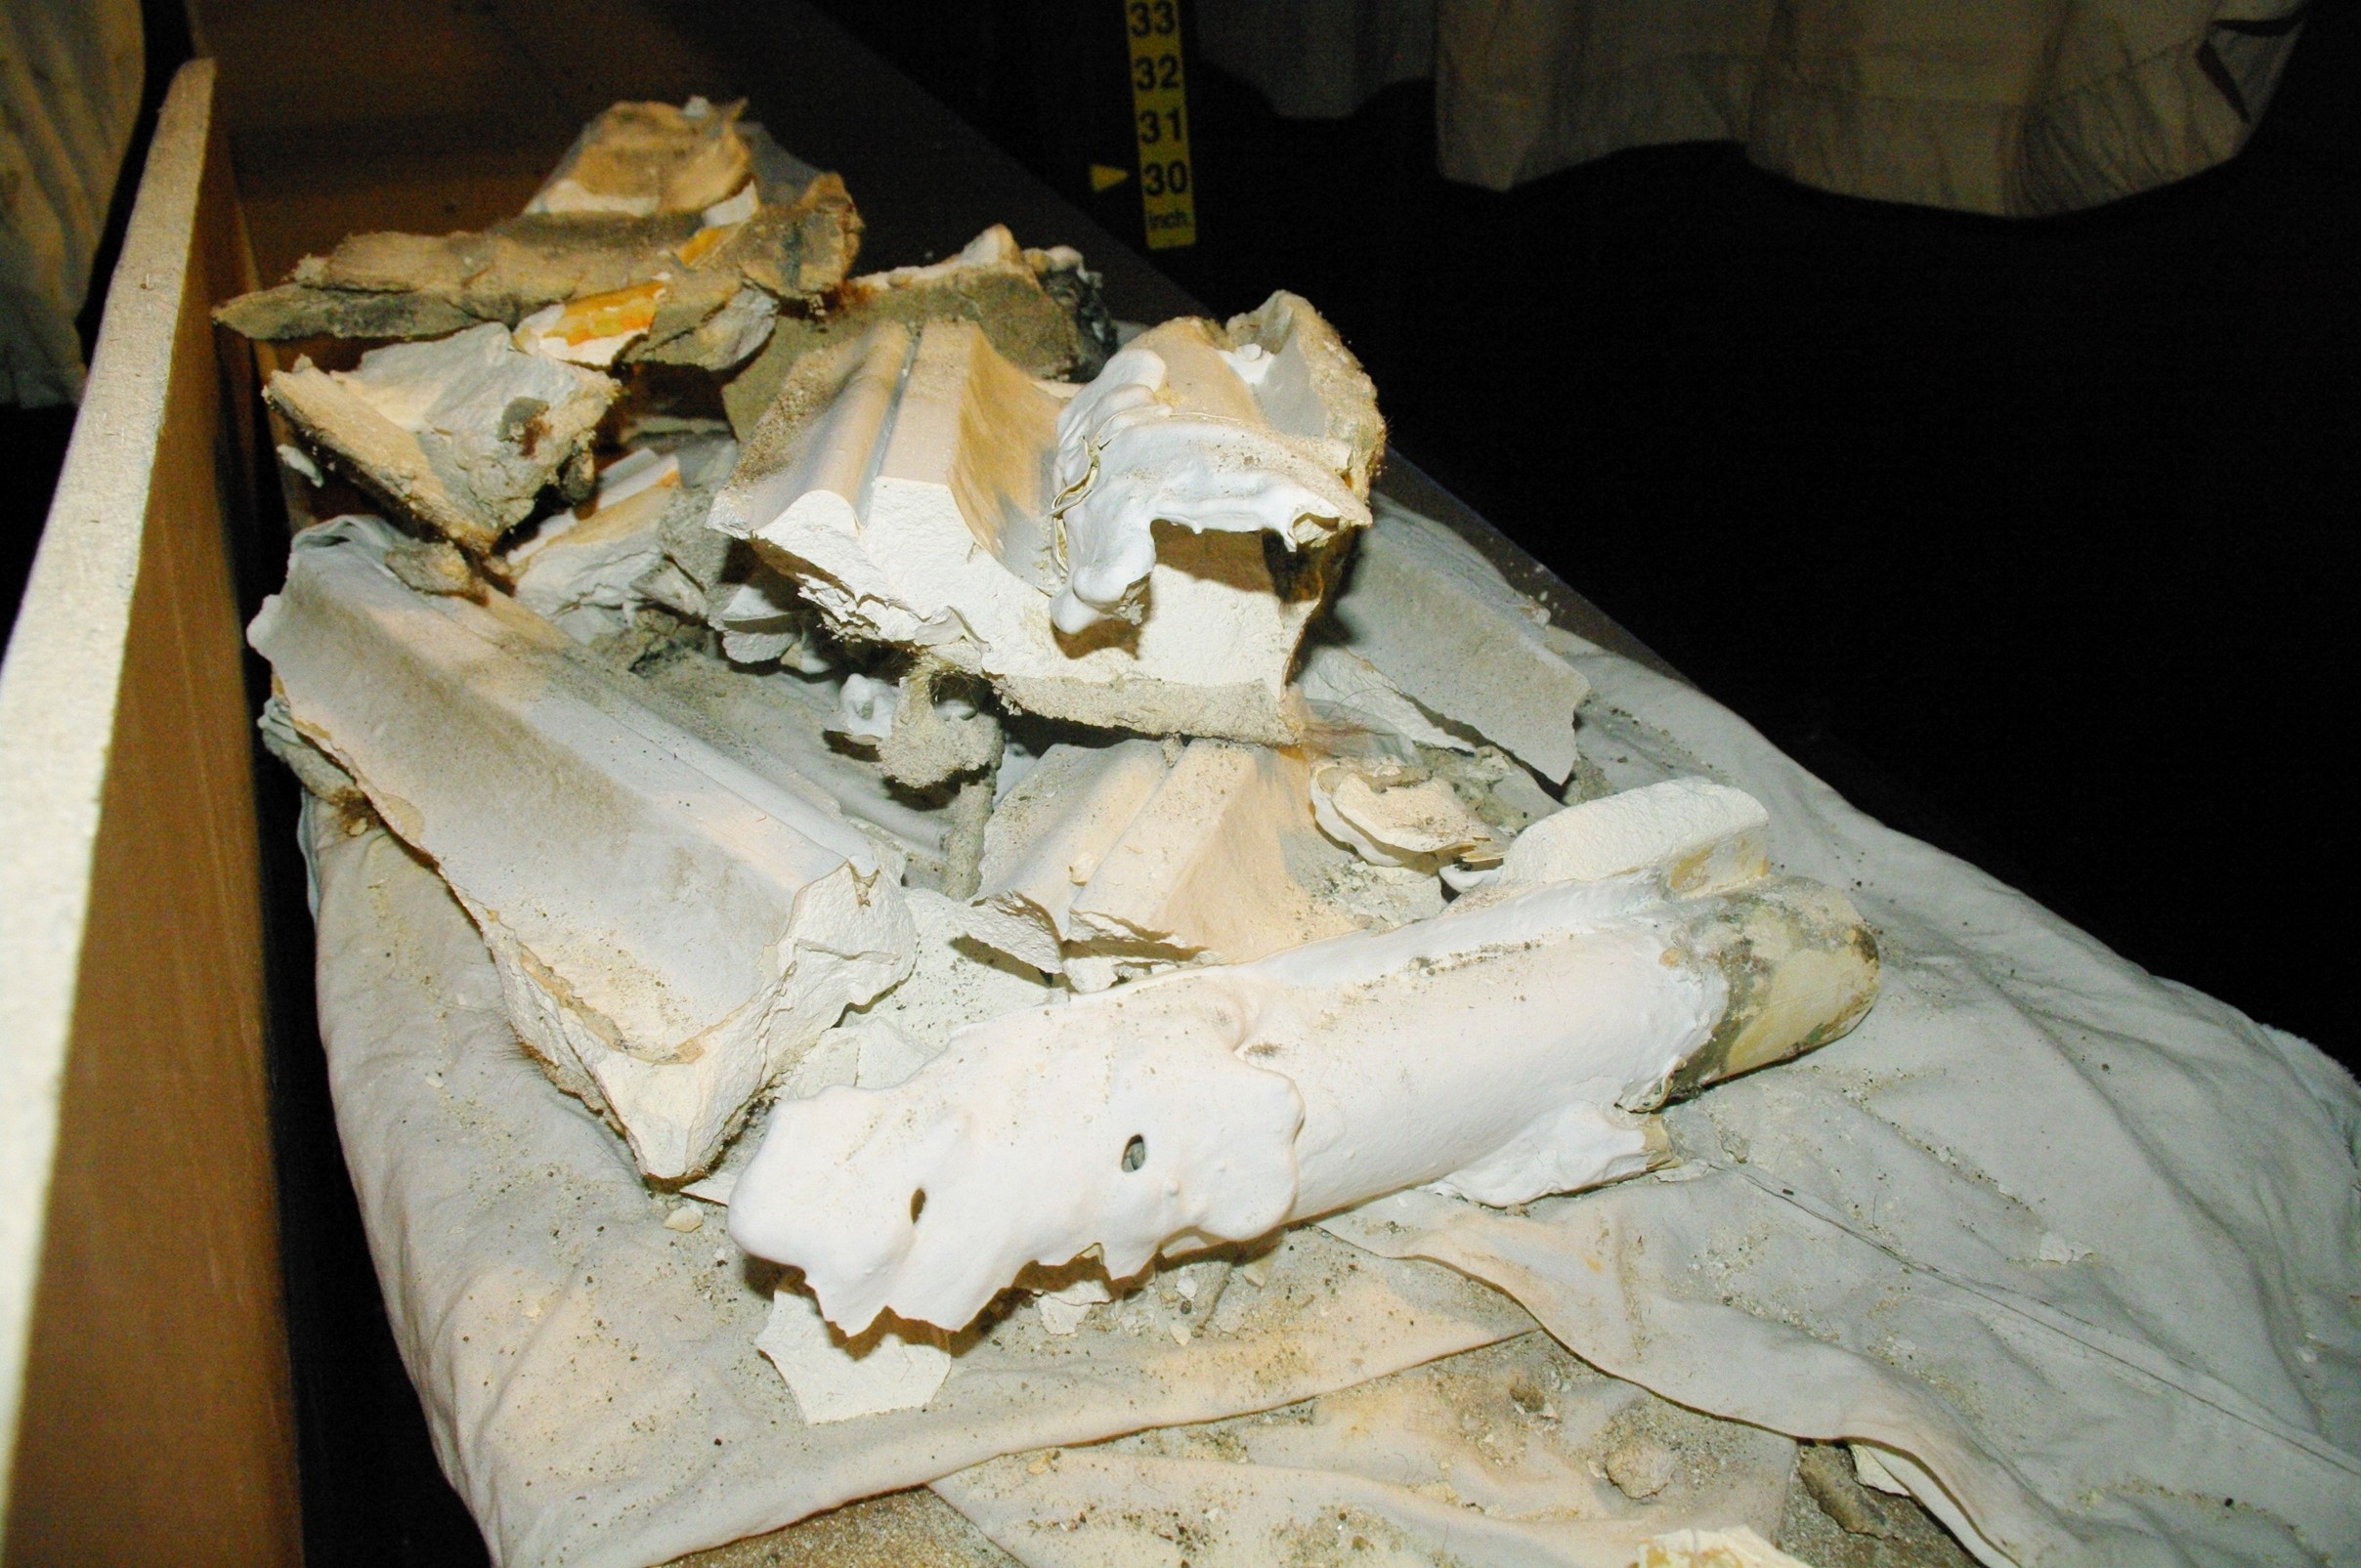
We called this crown molding profile 49 Chester Square, because this was the home's original address before it was renamed as part of Massachusetts Avenue in 1892. As the pattern was only partially visible in what was left of the crown molding, we decided to replicate the design from the adjacent parlor, which features the same details.
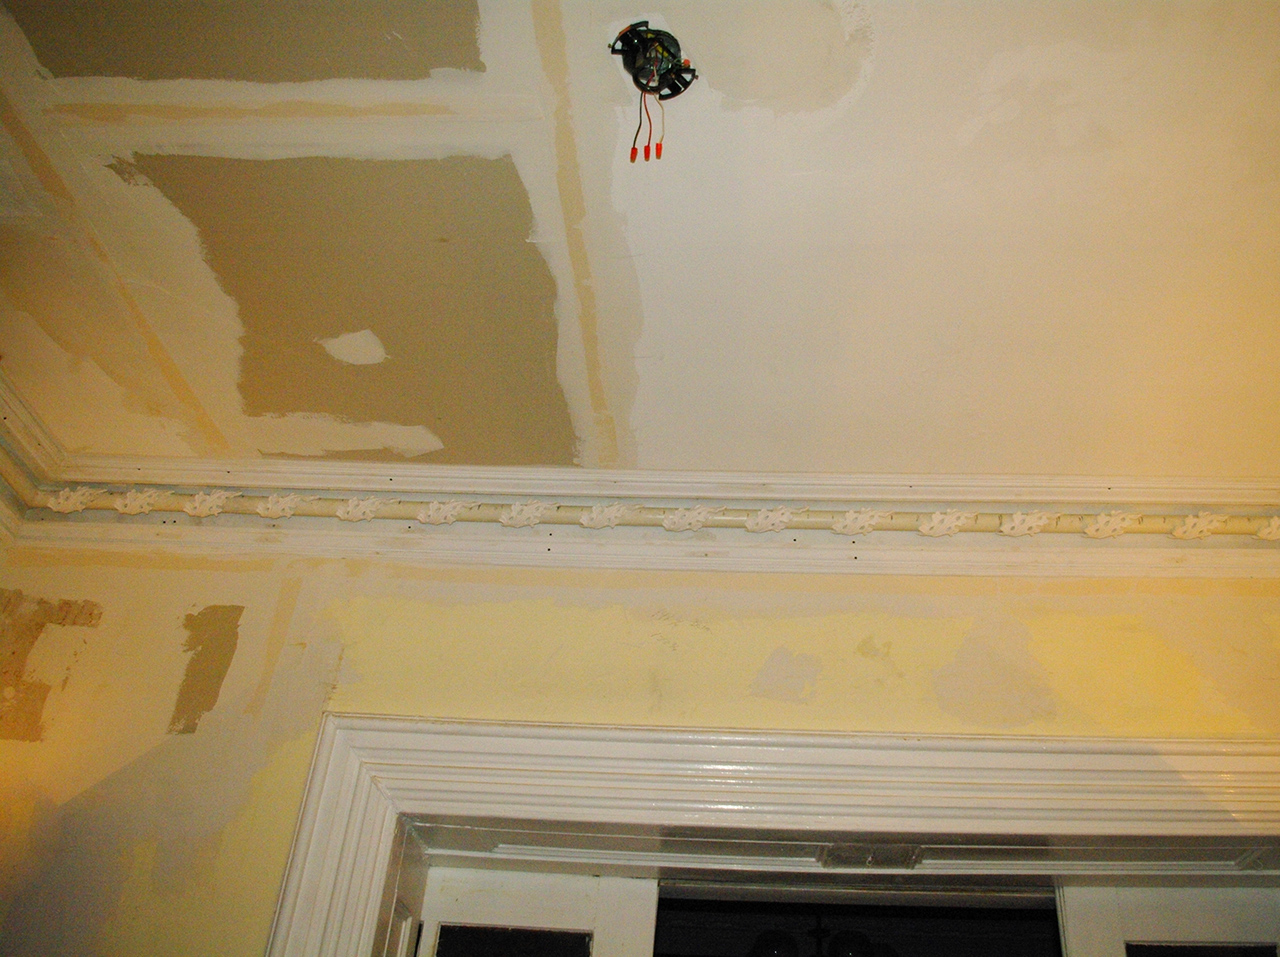
Our team installed the main body of the crown molding, whose profile is a large cove, a framing bevel on both the top and bottom portions, and a central dowel. Here is an image that shows some of the extensive repair to the ceiling, and the final stages of the crown molding's installation process.
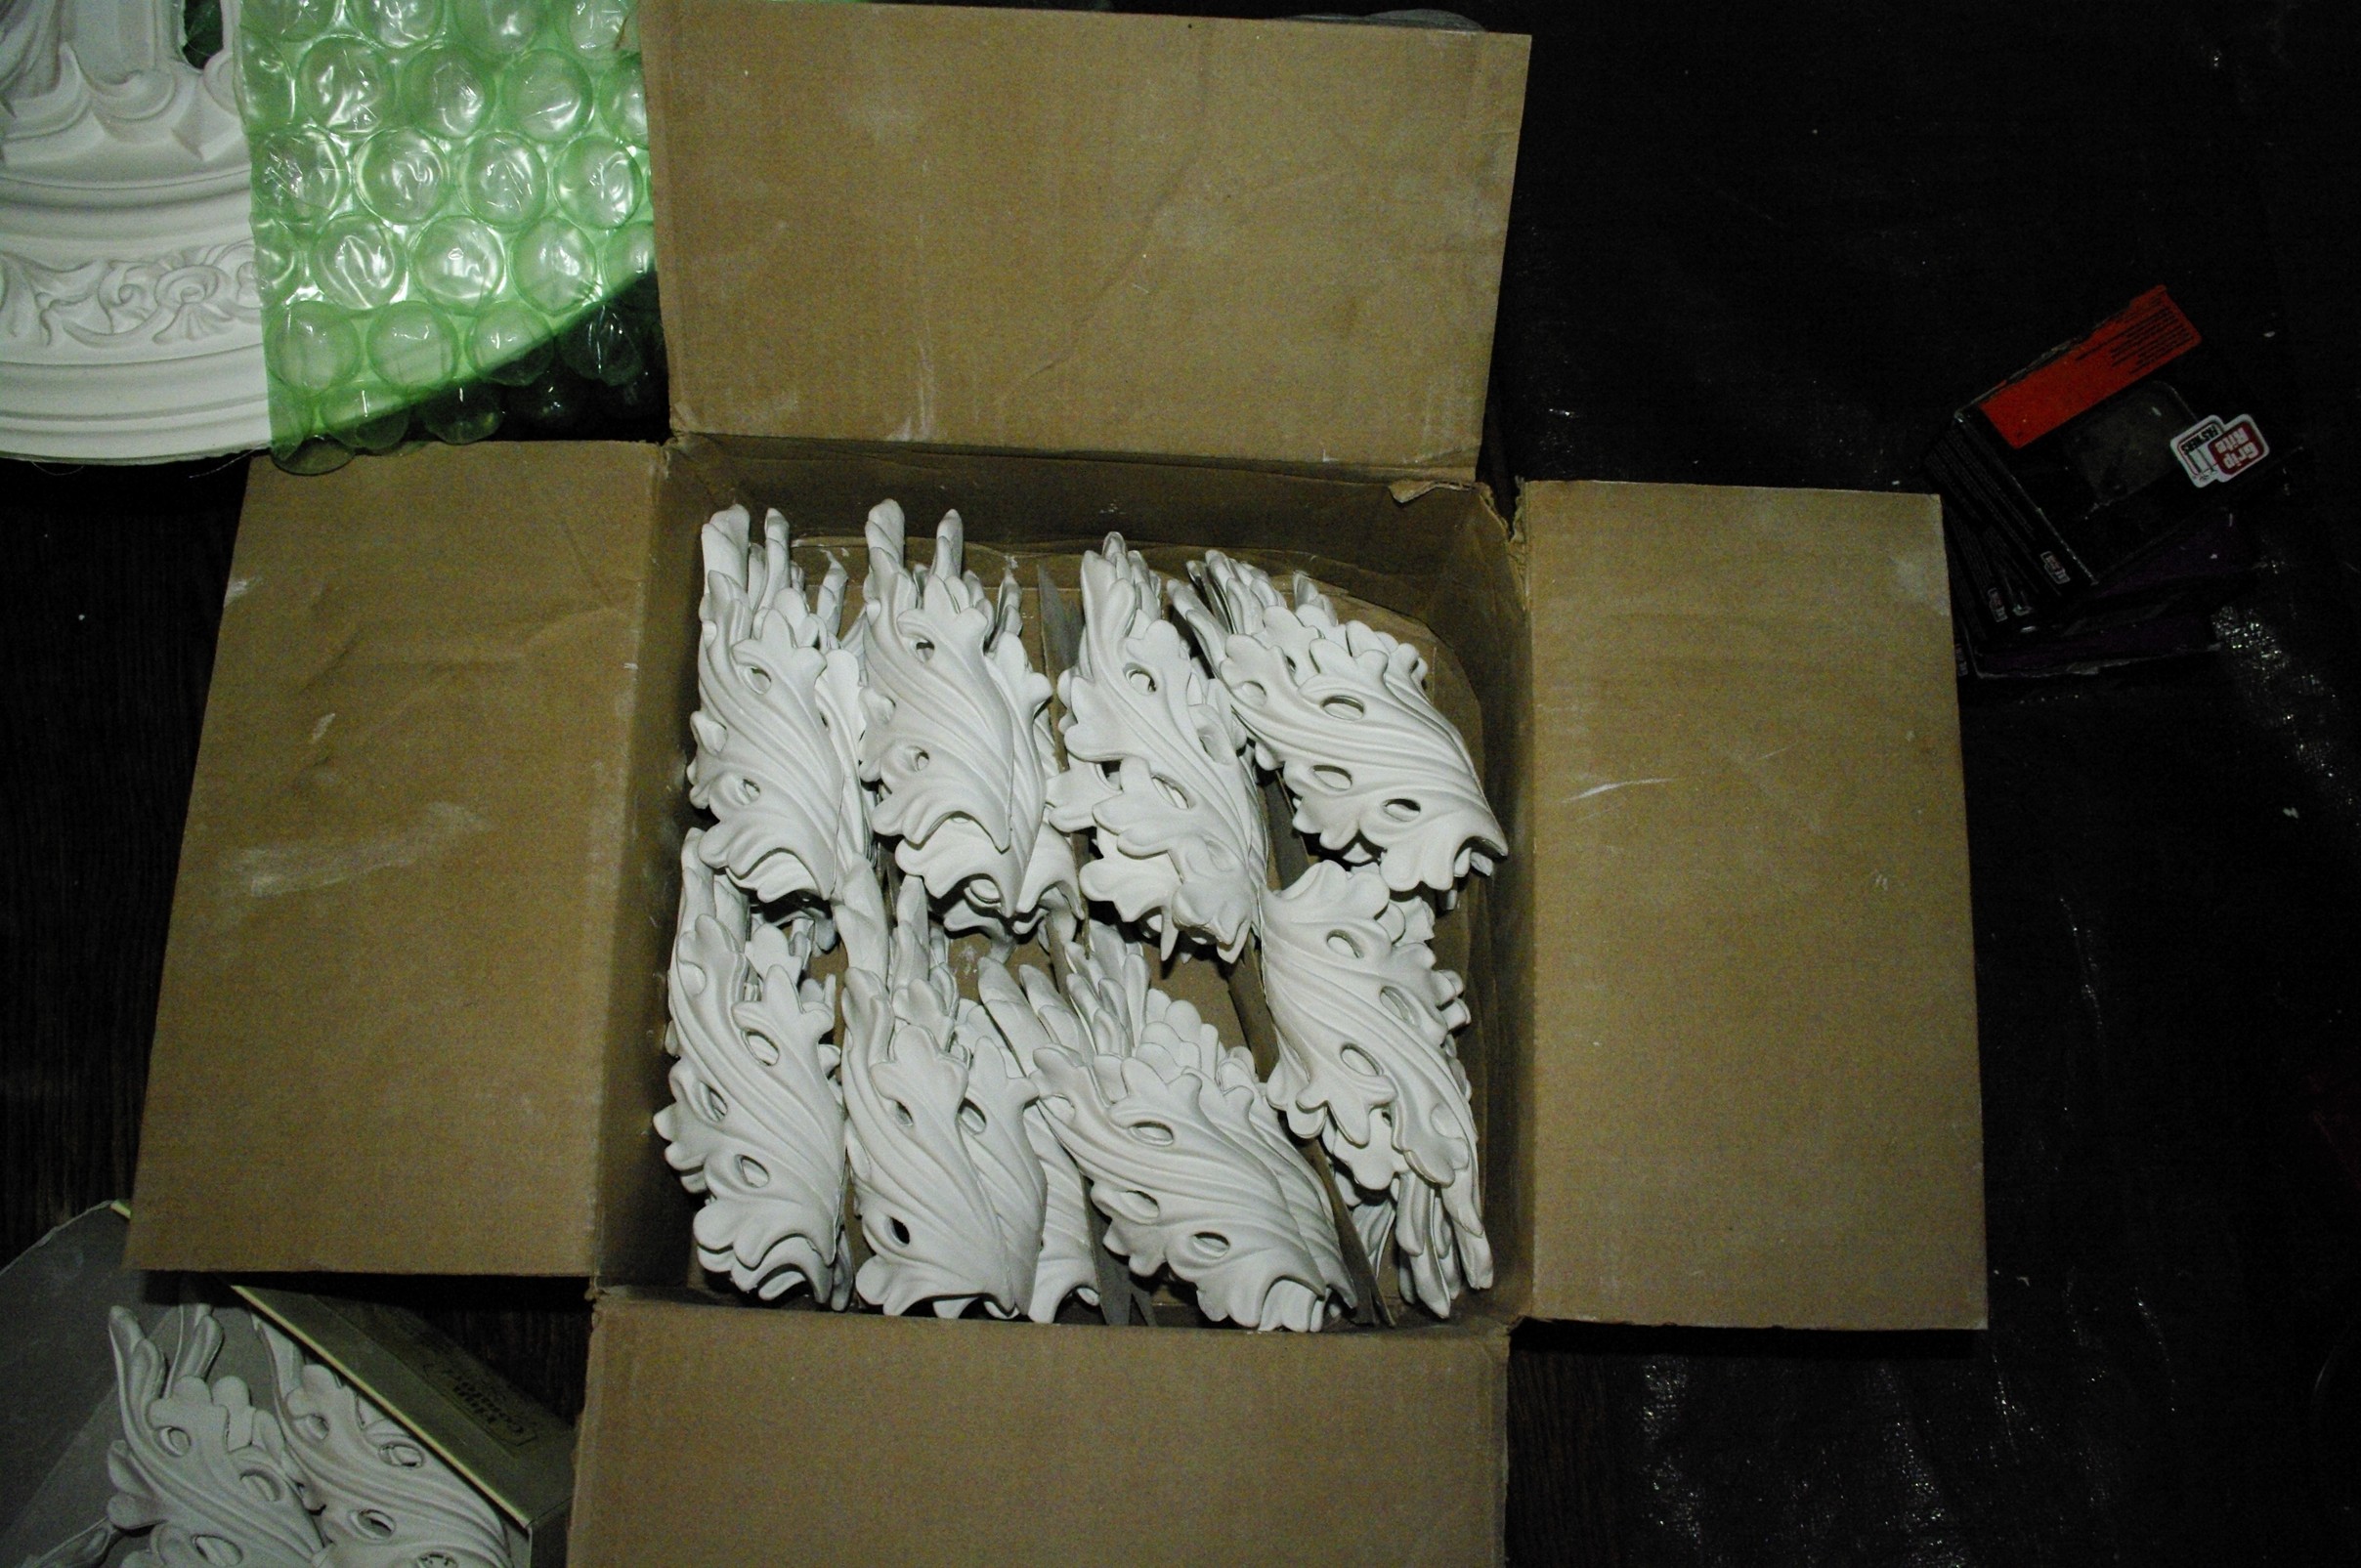
After thorough prep work on every surface, the walls and crown molding were ready to be painted. Only one thing was missing - the decorative leaf appliques, which were still fresh when we began to install them.
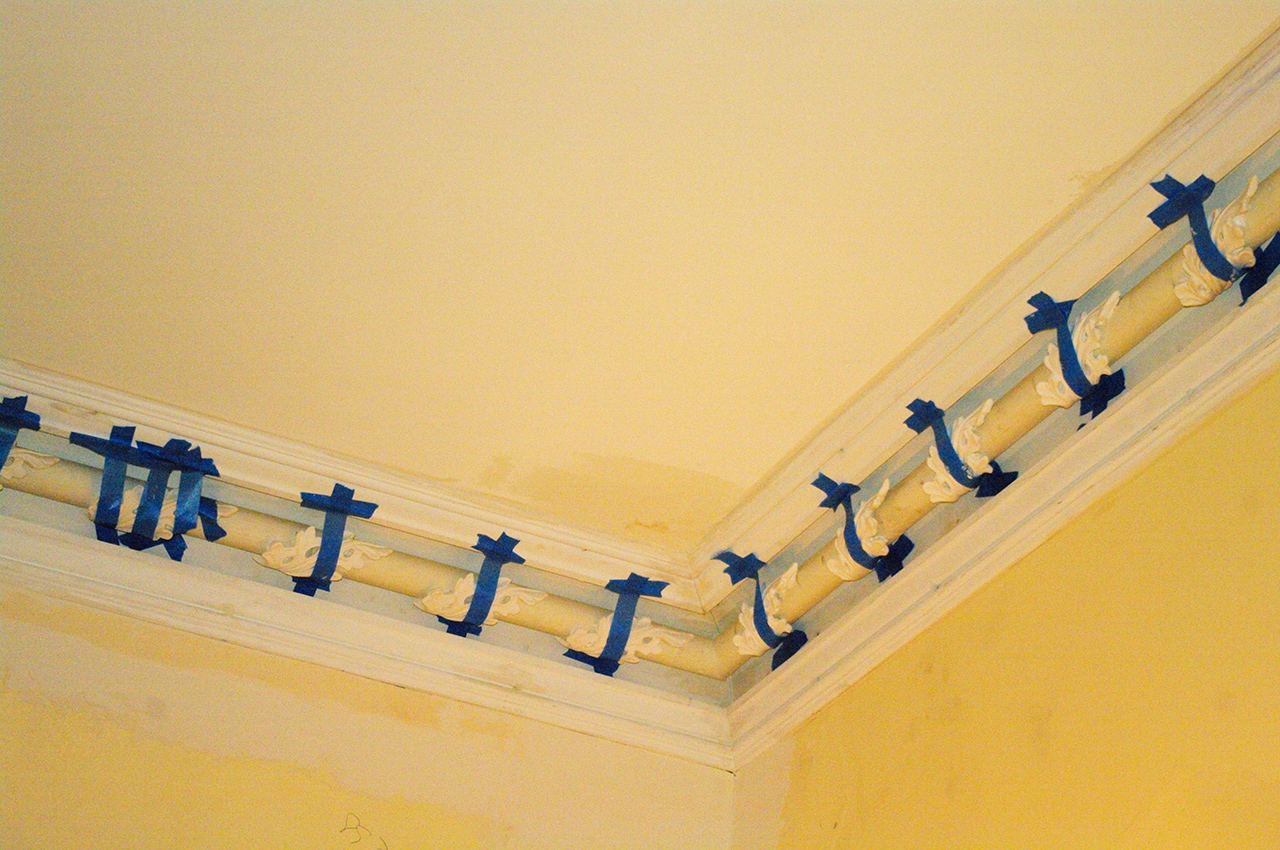
This was the fun part! We spaced the leaves evenly, secured them with adhesive, and held them tight against the central dowel for a few hours with painter's tape.
Here are the leaves after they dried, right before we began to apply the first coat of paint.
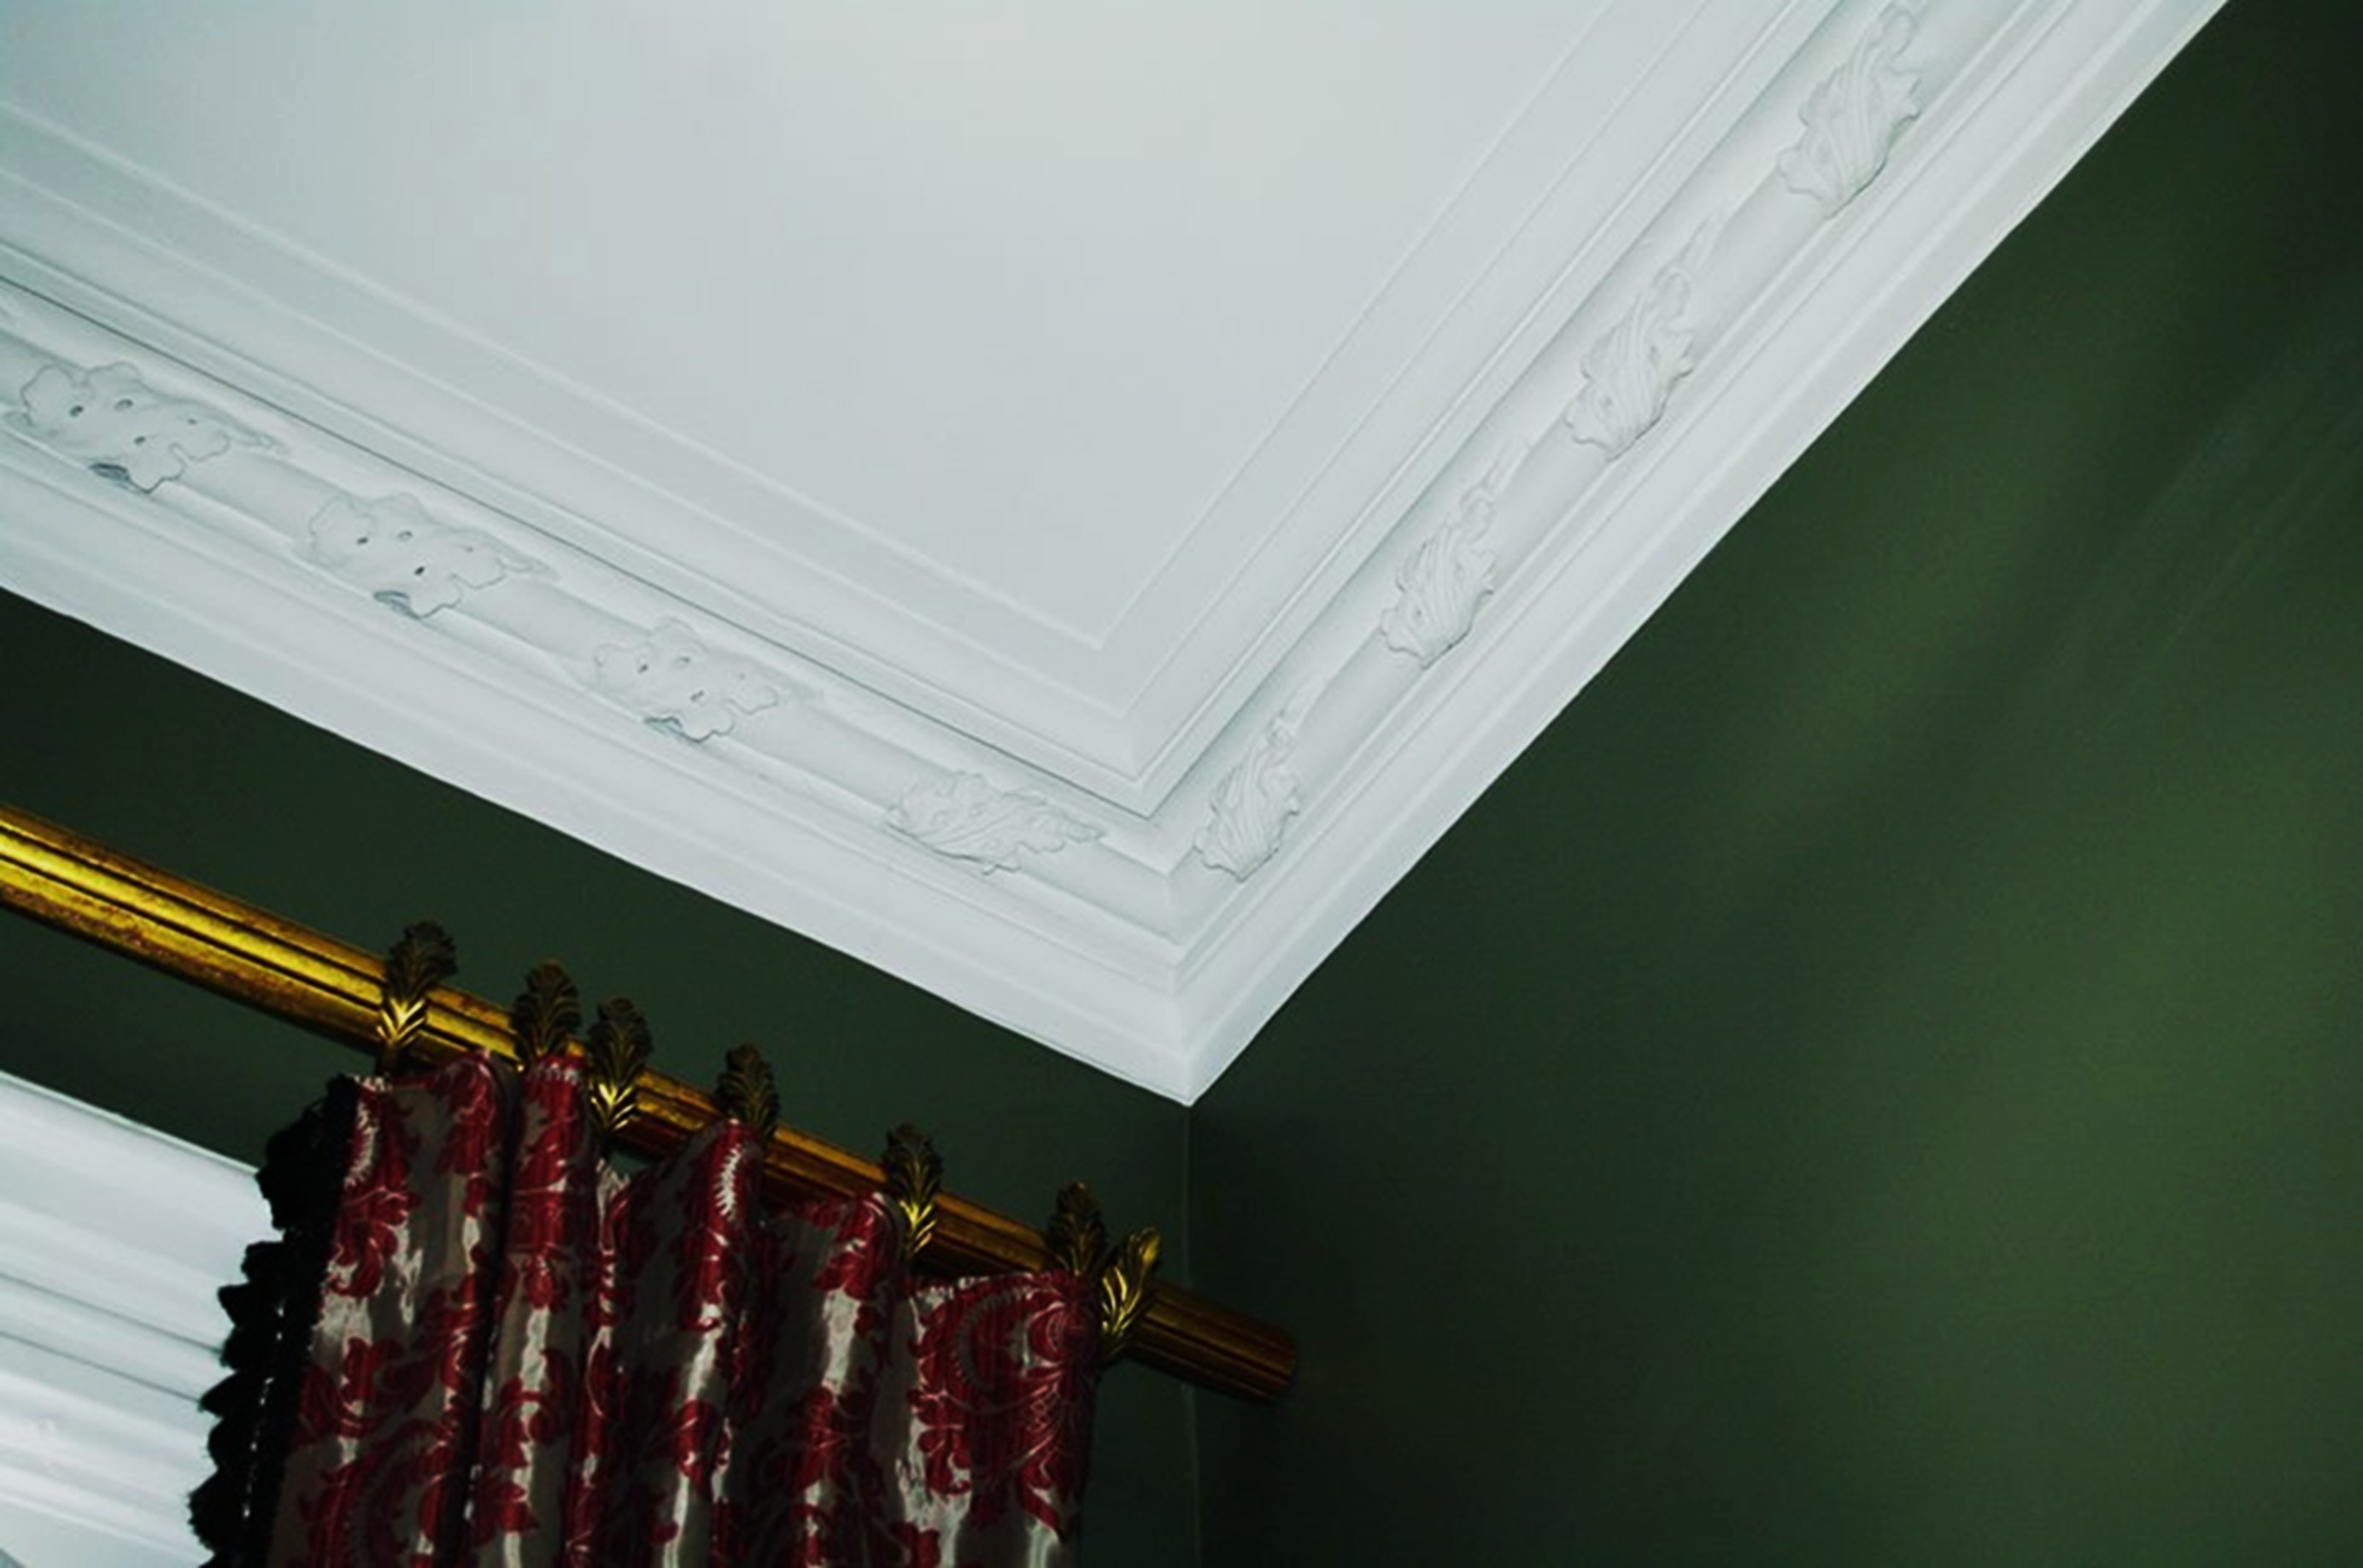
The owner chose to retain both the cream color on the walls and the brilliant white of the ceiling and crown molding. Here is the final result – a restoration that brought the original architectural splendor back into the room.
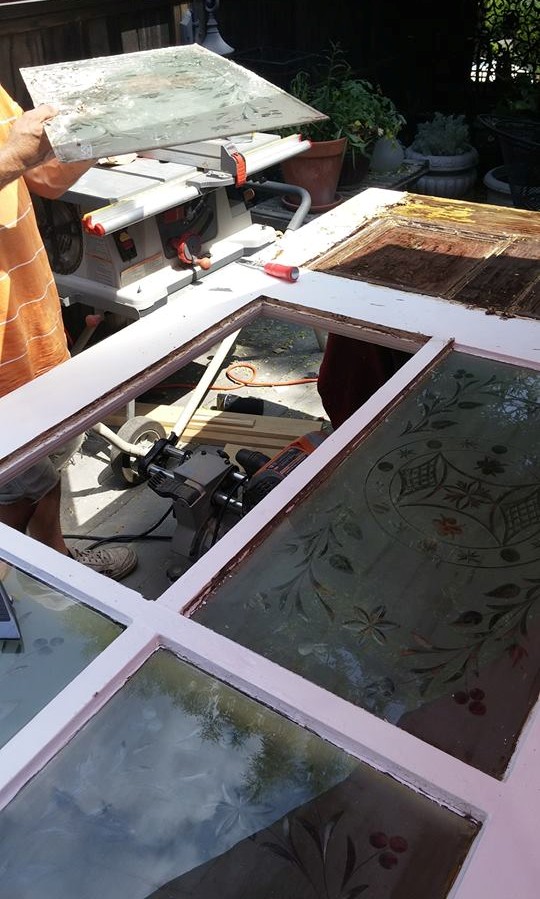
Removal of Paint from 1850s Pocket Doors
From a distance, these majestic pocket doors from an 1850s South End home looked stunning. Upon closer inspection, one could notice that decades of wear and carelessness left their mark – dripping paint, small protruding nails, and pieces of scotch tape and cat hair that had been painted over!
The paint was so thick that the original hardware – a beautiful set of pewter pulls – was no longer detectable.
Stripping these pocket doors was a risky proposition: the original glass panels would have been constantly exposed to sharp tools, chemicals, and heat. It is rare to see all the panels of decorative frosted wheel-cut glass survive intact on a pocket door that is over 160 years old. The glass is truly a delight to look at, but when the doors were painted no effort was made to protect it. We painstakingly began to remove the panels to clean its edges from the careless smears of paint, but the task began to look daunting. The glazing originally used to set the panels in place was so hard it required fine chiseling and an enormous degree of patience to extract them. After twelve hours of work, only two panels had been freed.
Six more panels were still secured by cement-like glaze, paint, and small nails and sets that kept the glass tightly in place. Whoever installed the panels clearly had no intention to see them removed! Not only was the project extremely time consuming; we soon realized that the small nails and sets along the edges, often buried in glaze and paint and not always visible, could have inadvertently cracked the delicate glass upon trying to lift the panels from the openings. We decided not to proceed with the other six panels, and work around them instead. We had planned to apply new glaze anyway, and decided to do so over the old one. Quite a bit of time was devoted to remove the smudges of paint from the edge of the panels, and we had to do so very carefully in order to preserve the frosting in its integrity.
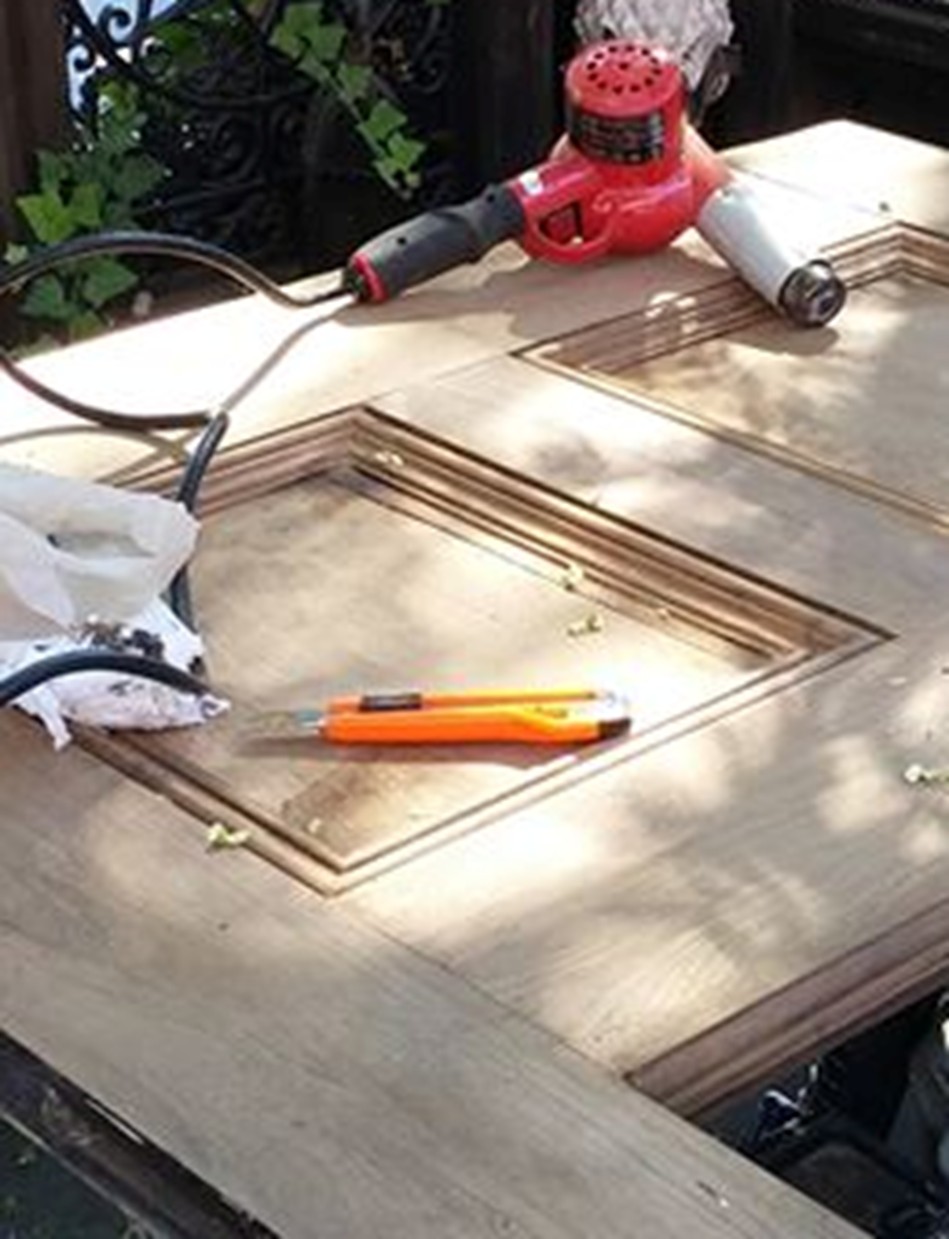
After several days of work, using almost exclusively heat guns alongside small amounts of chemical products, the beautiful mahogany began to show its extraordinary grain.
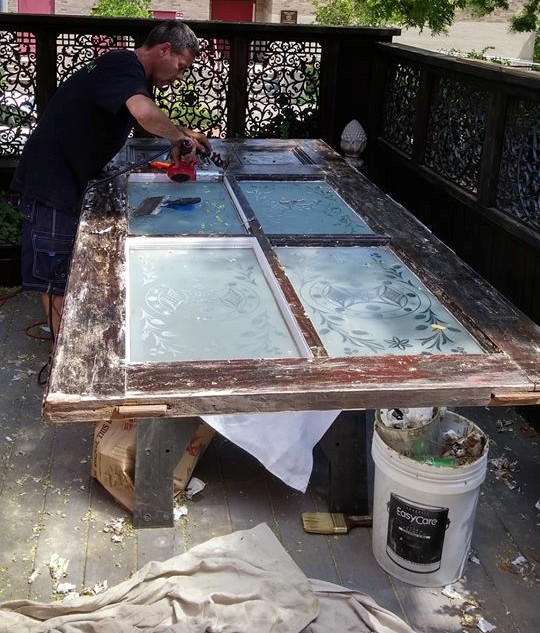
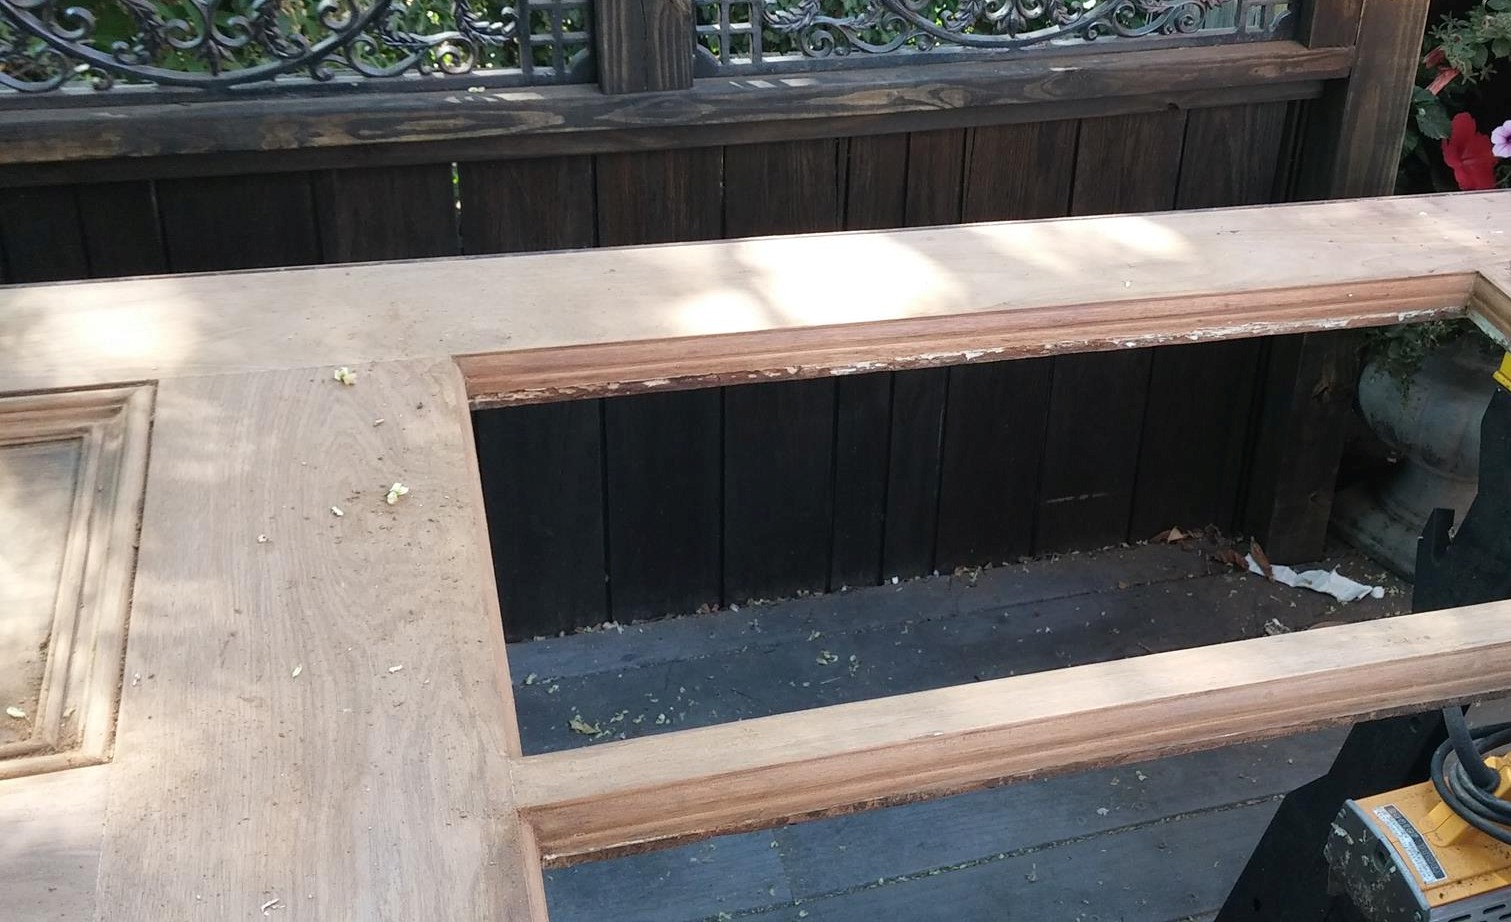
All the paint was carefully removed from flat surfaces, and from the crevices around the top and bottom panels. The wood was carefully sanded, and stained with two coats of red-mahogany stain. The wheels at the bottom of the pocket doors were cleaned, painted with an anti-rust product, and reinstalled with new, longer screws. The hardware was stripped of the old paint and cleaned with steel wool.
The doors were finally ready to be varnished. A hail storm, along with other precipitations, prevented us from continuing the work outside. We decided to do the varnishing indoors, since the product we chose was a low-odor, quick-dry product. Here is James Pacheco, one of our experienced craftsmen, applying the first coat of varnish.

And here are both doors, installed after the second coat of varnish dried!
Restoration of Victorian Fireplace 1
At the turn of the nineteenth century, the exigencies of modern living introduced stoves and forced steam, both safer and easier to operate than chimneys. A beautiful mahogany mantel in the rear parlor of a Boston home was deprived of its surround and summer cover in the 1930s, when its chimney was closed off to accommodate some of the conduits of the home’s new heating system. Because the flue was no longer operating, the fireplace was walled off with a plaster board placed in front of the opening; the surround and summer cover, no longer fitting, were discarded.
The installation of new oak floors, most likely carried out during the same renovation, included the removal of the fireplace hearth. A baseboard was installed in the opening, probably with the goal of creating visual continuity with the woodwork that surrounds the chimney’s wall.
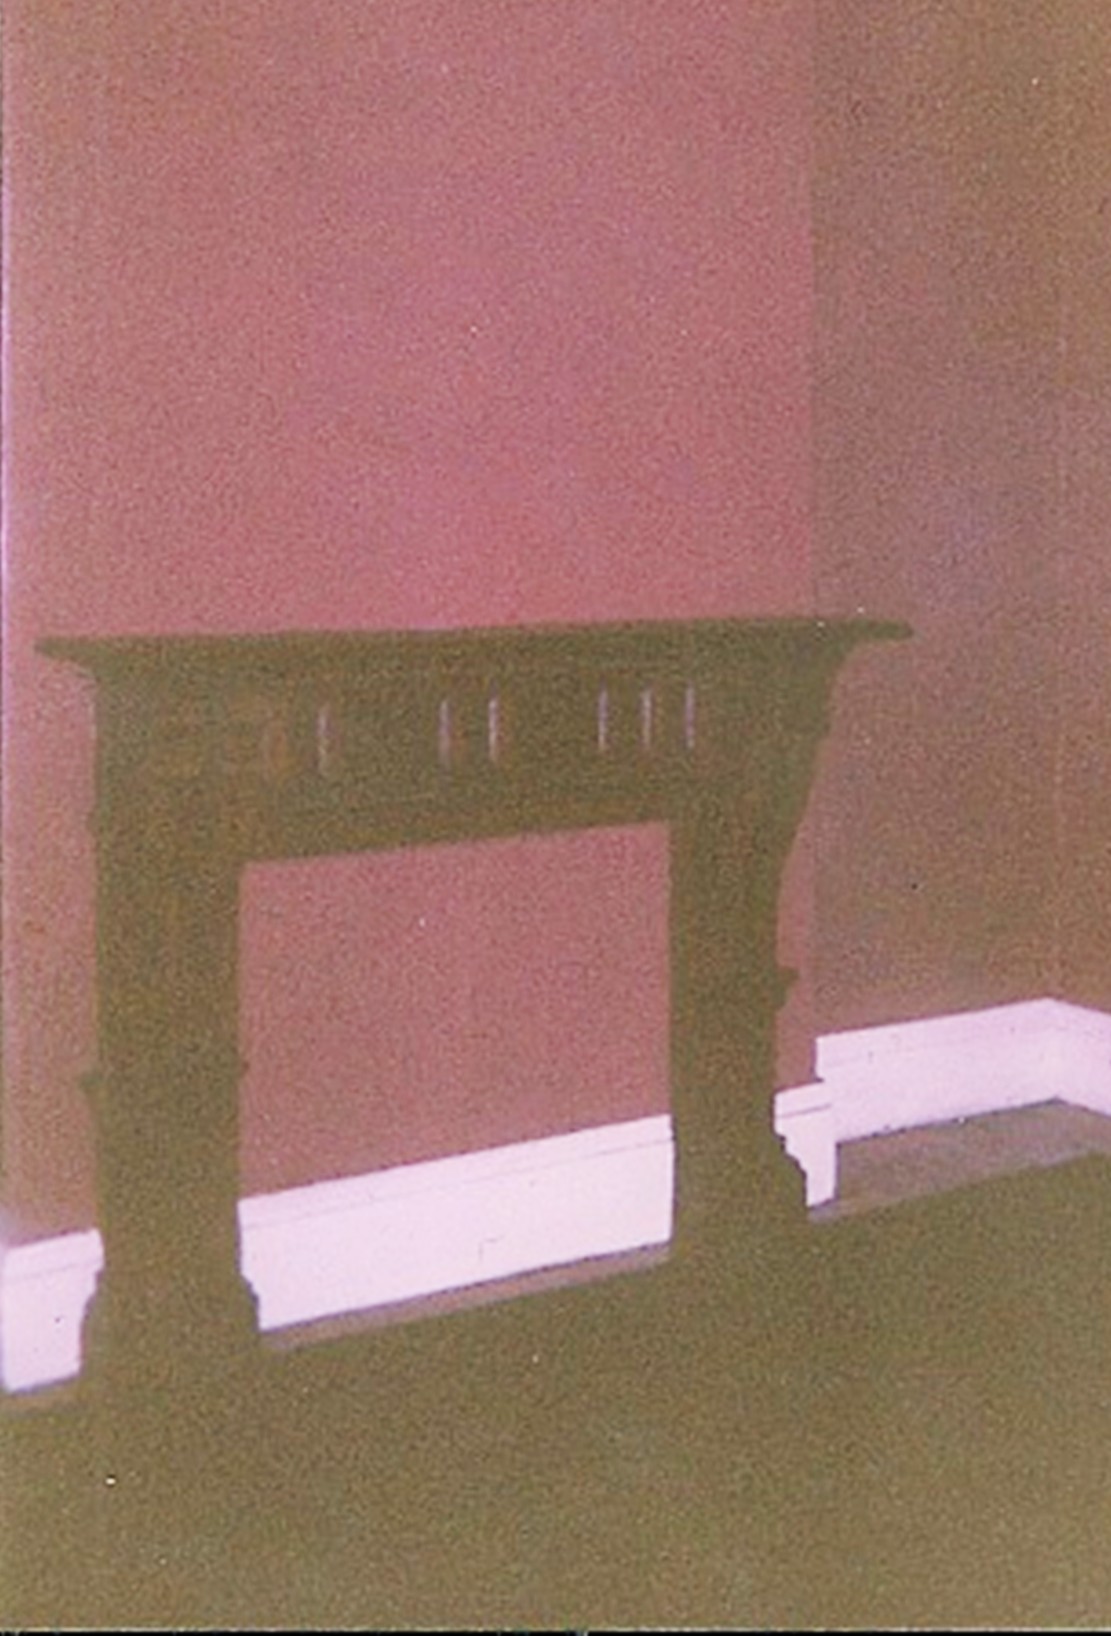
Two old photos that show the fireplace mantel before the restoration
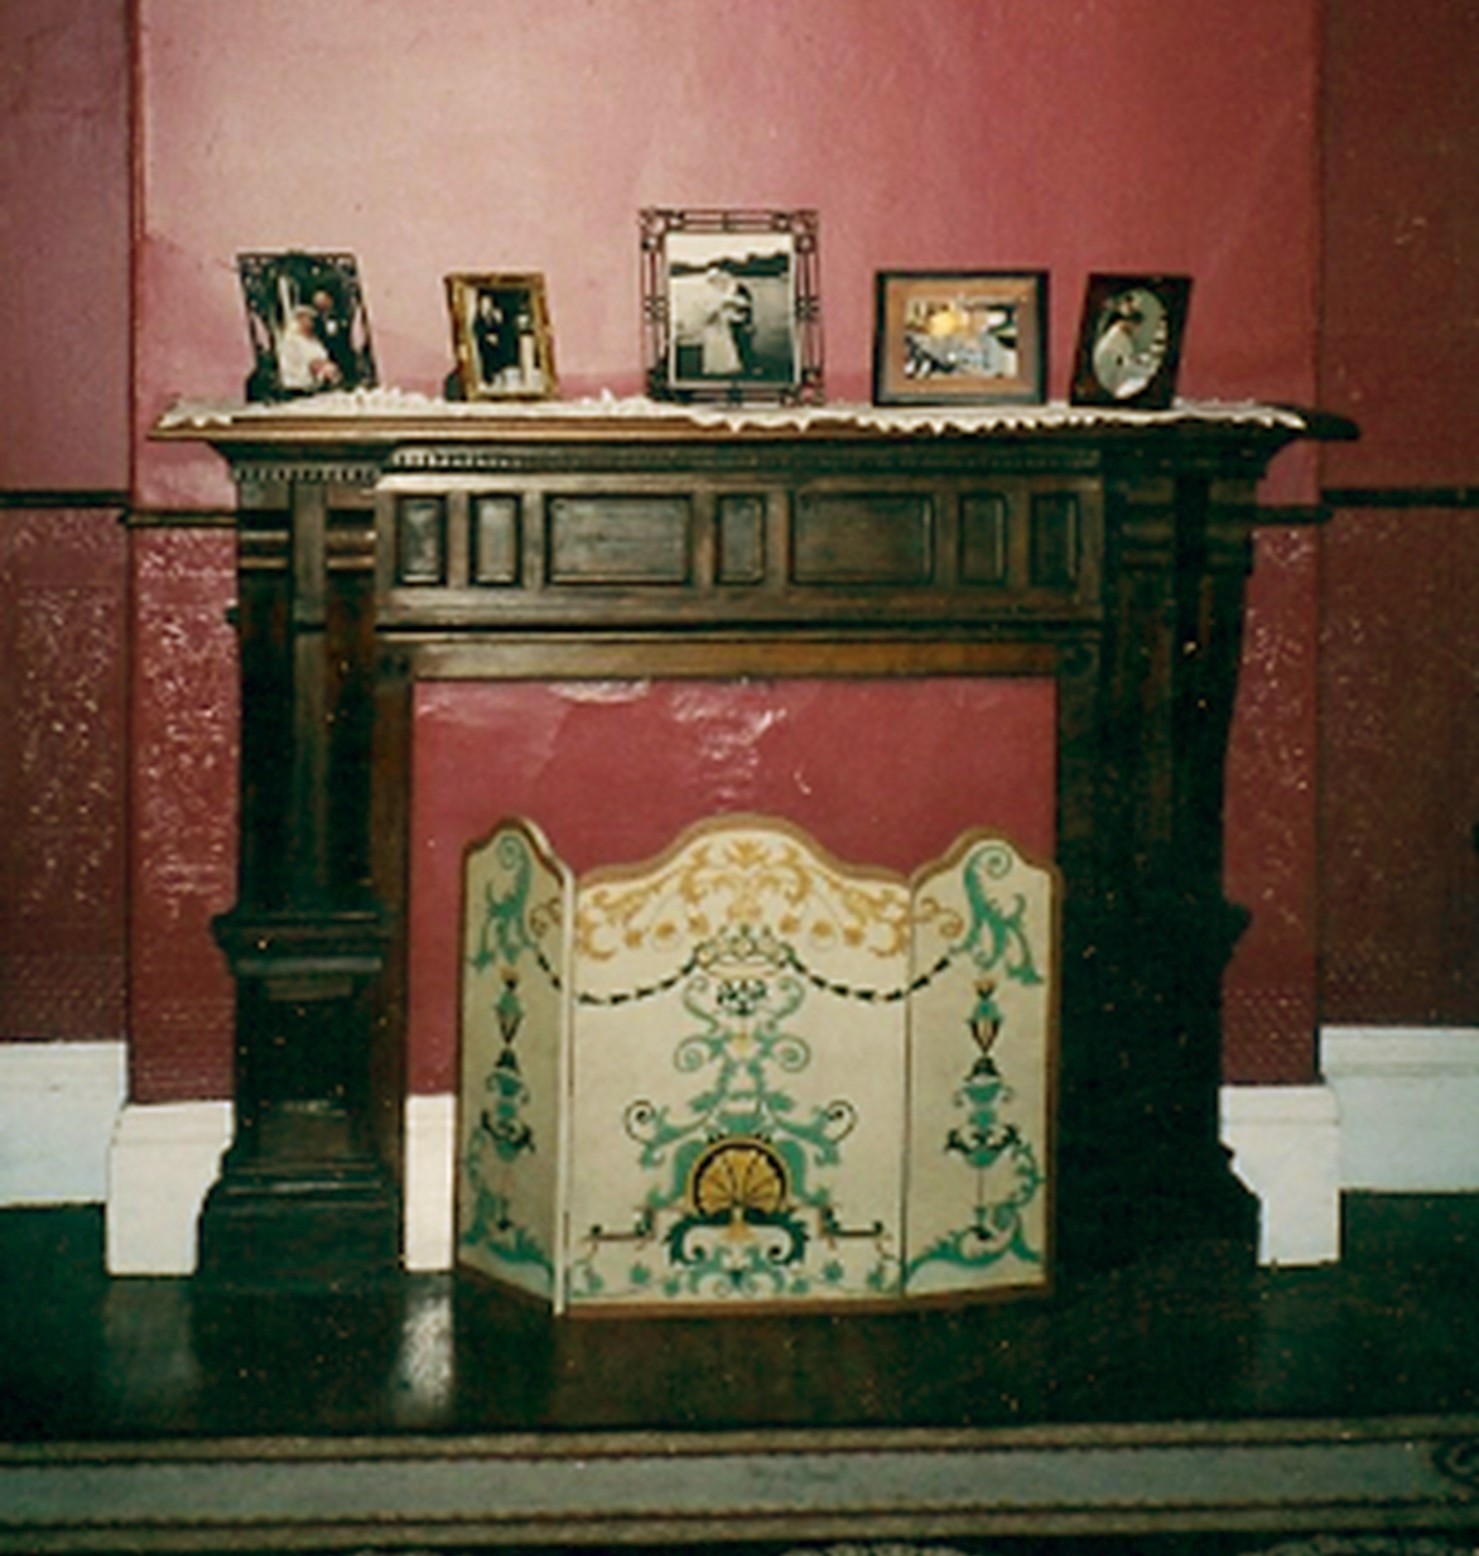
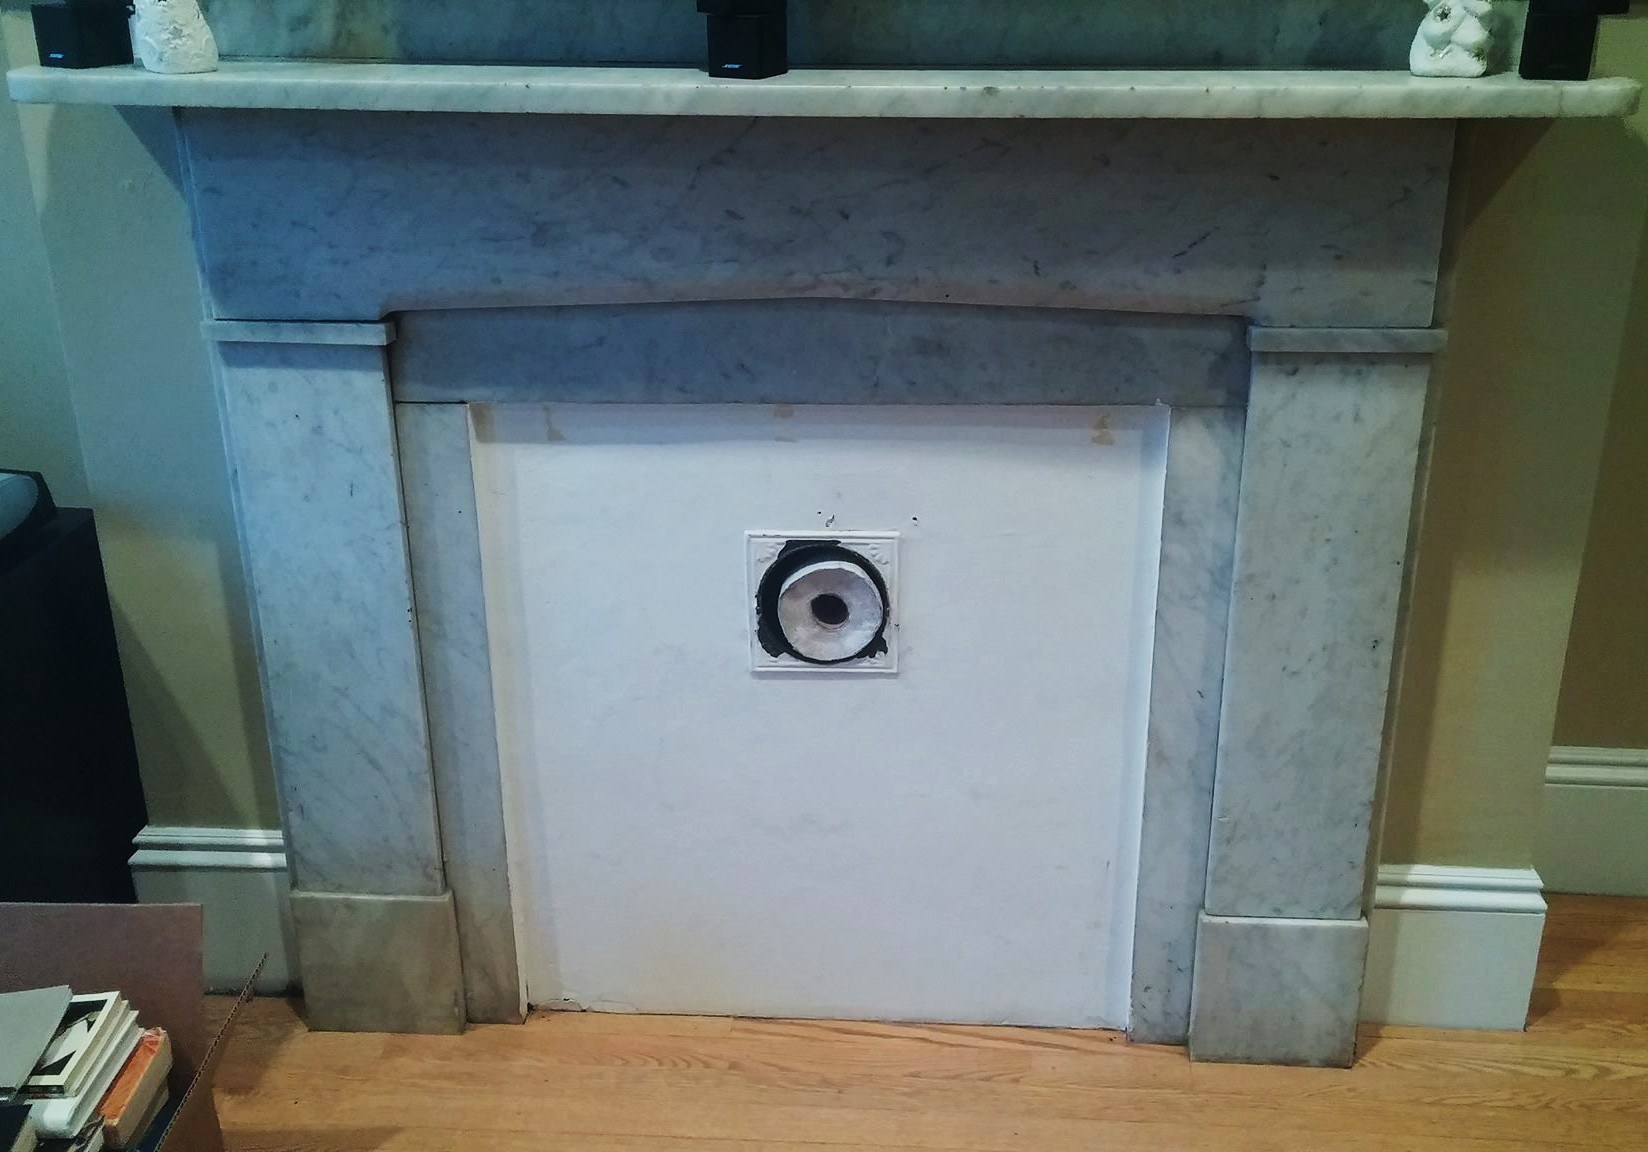
A few years ago, the owner decided to remove the baseboard, paint the inserted wallboard with black paint, and place a decorative panel in front of the opening. That was probably the best thing that happened to the fireplace in the last eighty years. Here is a more recent photo of the mantel:
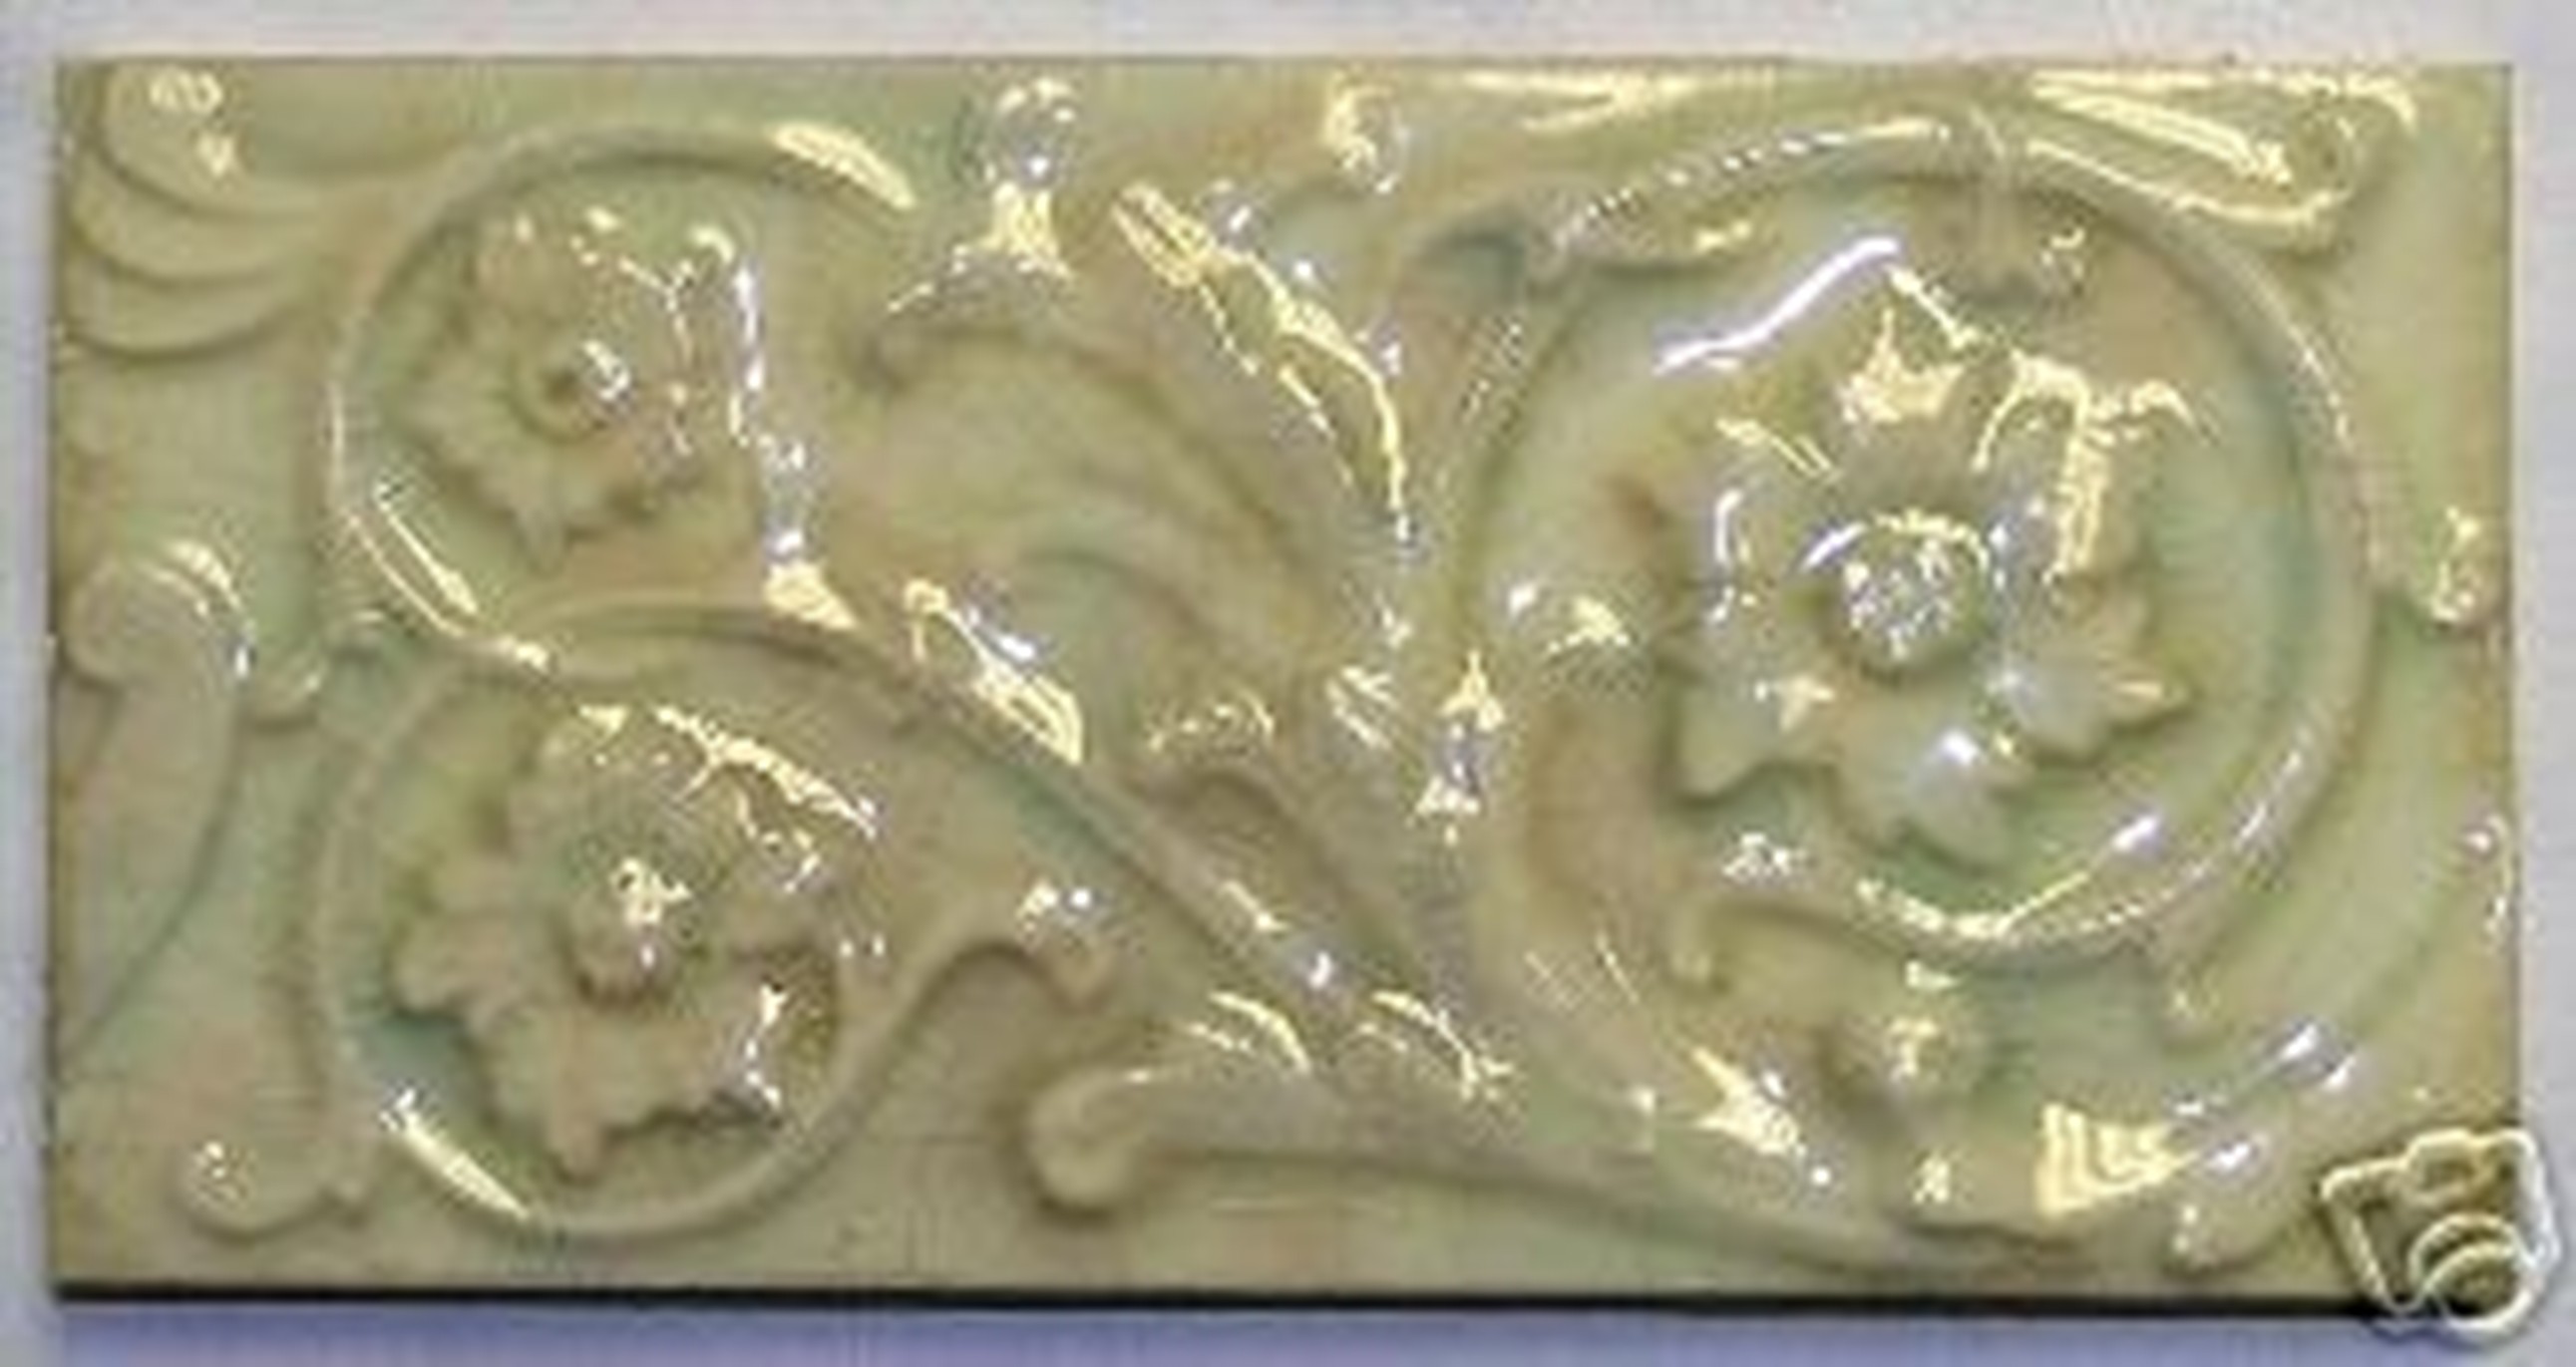
The owner was eager to restore the fireplace, but wavered as to whether the hardwood floor in front of it should remain. While he made a decision, we went ahead and began to work on the fireplace. We looked for period-appropriate surround ceramic tiles, and found a good quantity of exquisite pieces from the 1880s at an online auction. Rectangular in shape (3” x 6”), they feature a floral pattern whose edges flow naturally into one another. They are creamy in color, with light blue and pink hues. Up-close, the crackled glaze is absolutely to die for!
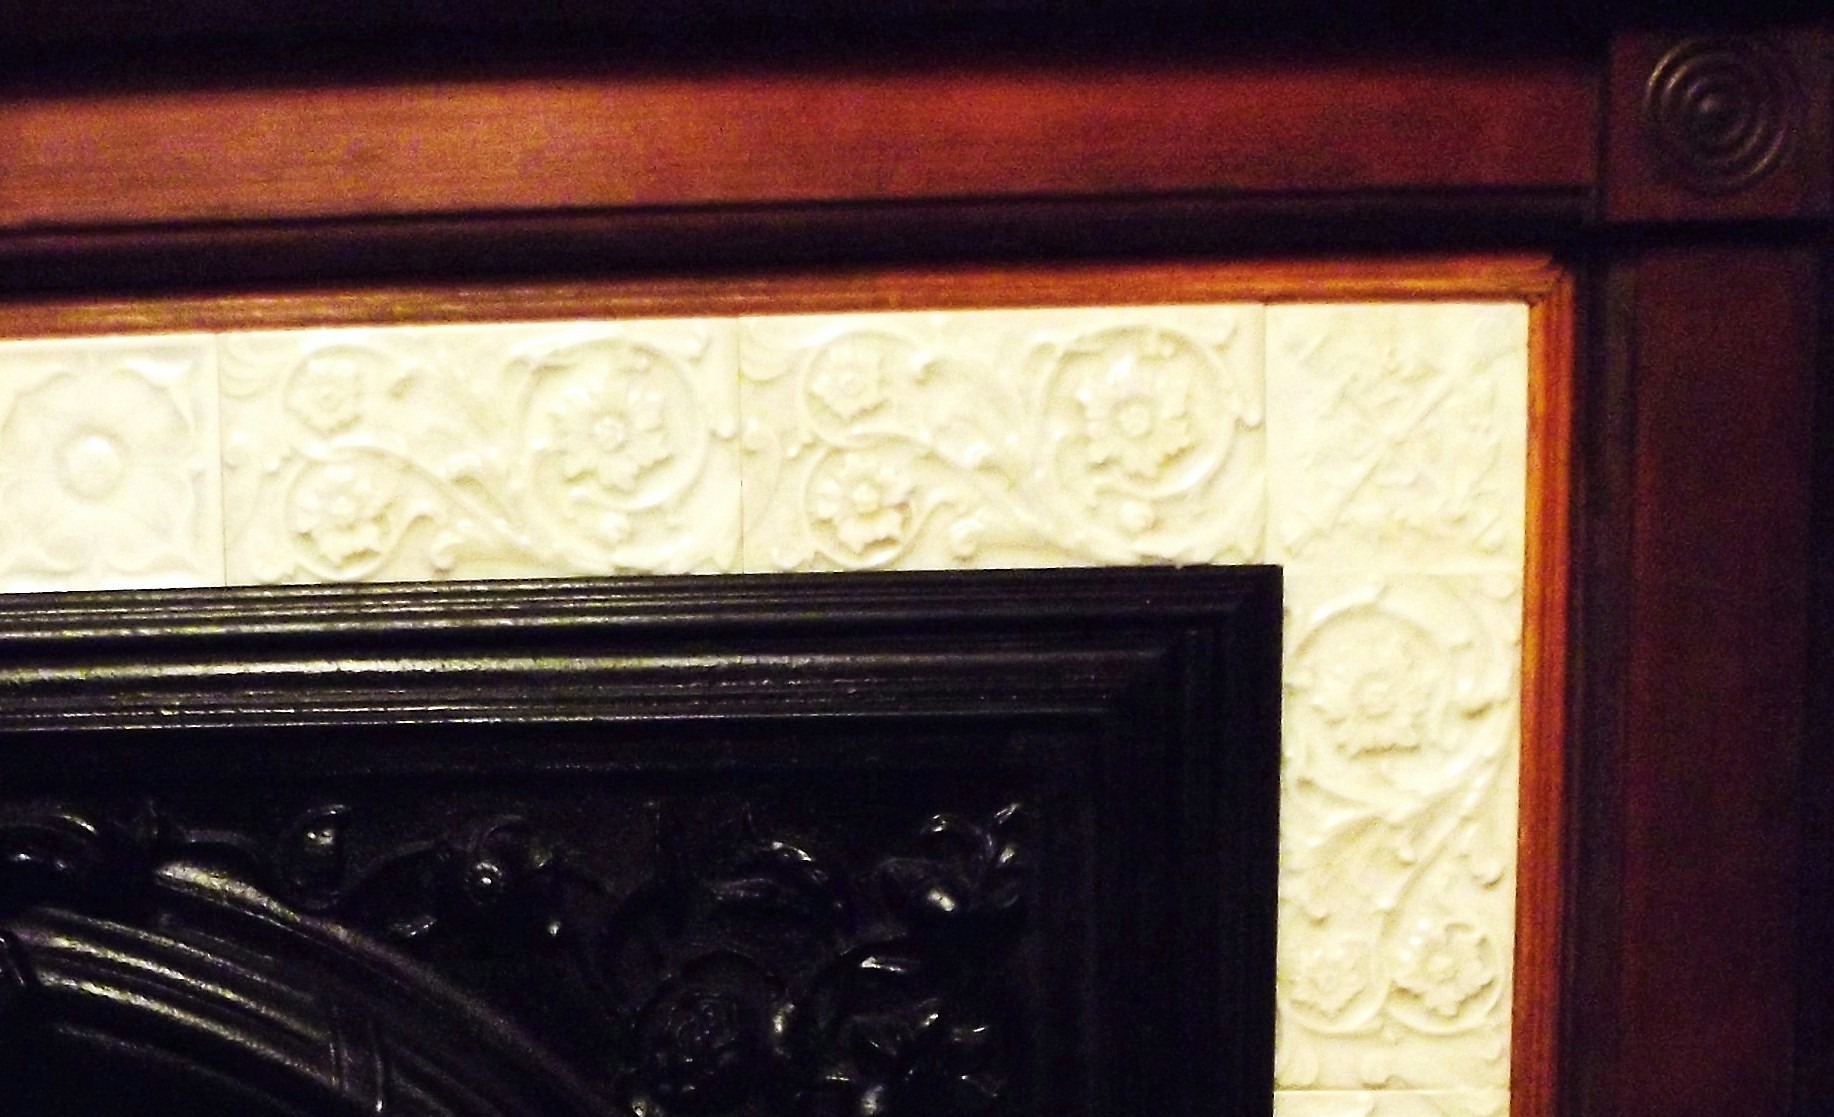
We had just enough tiles to cover the sides and the top portion of the surround, but were missing the corners and the plinths. We continued our shopping on the internet, and found two small sets of 3” square tiles – one with a large central flower, and one with a delicate wreath-and-torch design (you can see them in the photo above). Their color scheme and glazing miraculously matched the ones we already had. Thankfully, the size of the tiles was ideal: no tile needed to be cut to adapt to the dimensions of the opening.
Months earlier, Old Boston had acquired a cast-iron surround that ended up fitting the opening perfectly. We found it online, and it also dates from the 1880s.
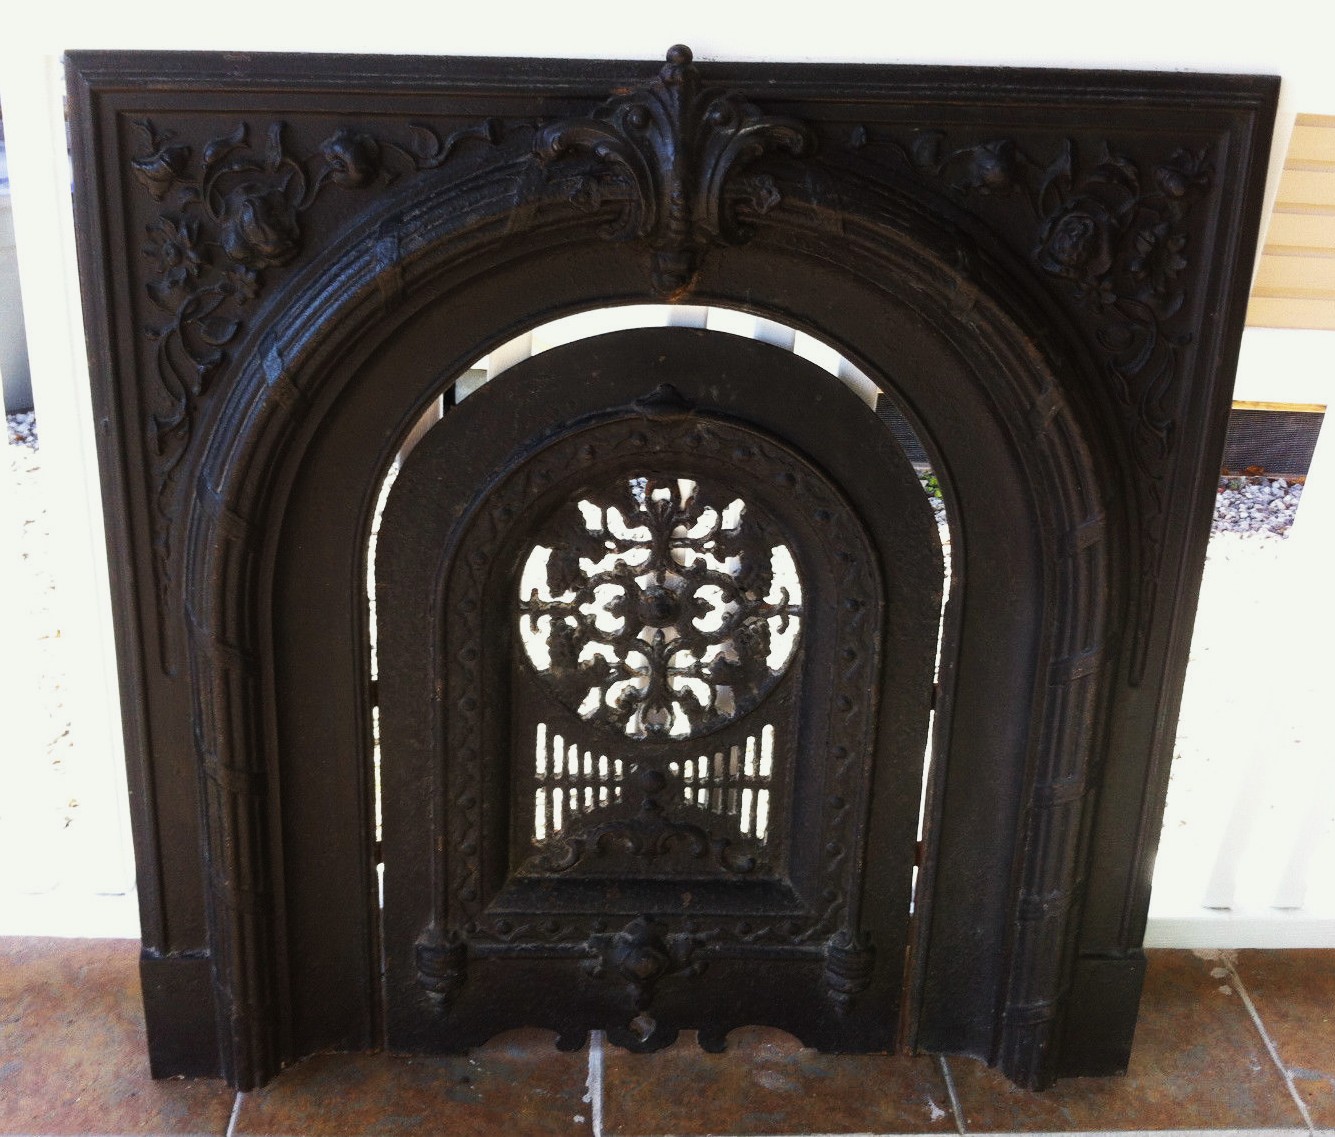
Unfortunately, the insert with which it came had been paired erratically, so we looked for a piece that would match both the dimensions of the opening and the floral motif. We found an extraordinary insert at Restoration Resources. The paint on both the insert and the surround had worn off in places. We stripped both pieces, and recoated them with an enamel satin black paint. We then created an appropriate wooden frame on which to rest the cast-iron surround. A couple of screws, and the cover was anchored to the wall.
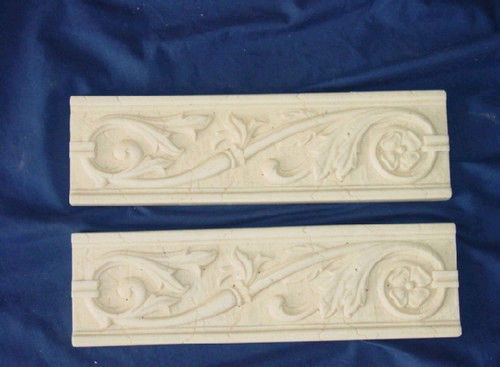
After seeing the restoration of the fireplace's opening, the owner decided to restore the hearth as well. Originally, it was probably a simple marble slab, but the owner wanted something a little more elaborate – possibly a decorative border to surround large 18” square black-granite tiles. We could not find adequate quantities of antique tiles that would cover the perimeter of the hearth, and the few ones we found were Art Deco and did not quite match the style of the fireplace anyway. We resolved to look for a mold to create the tiles ourselves, and found a lovely design that evokes the one on the ceramic surround:
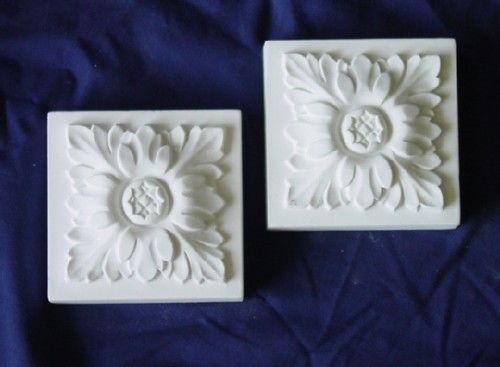
We also purchased a mold to create the corner tiles:
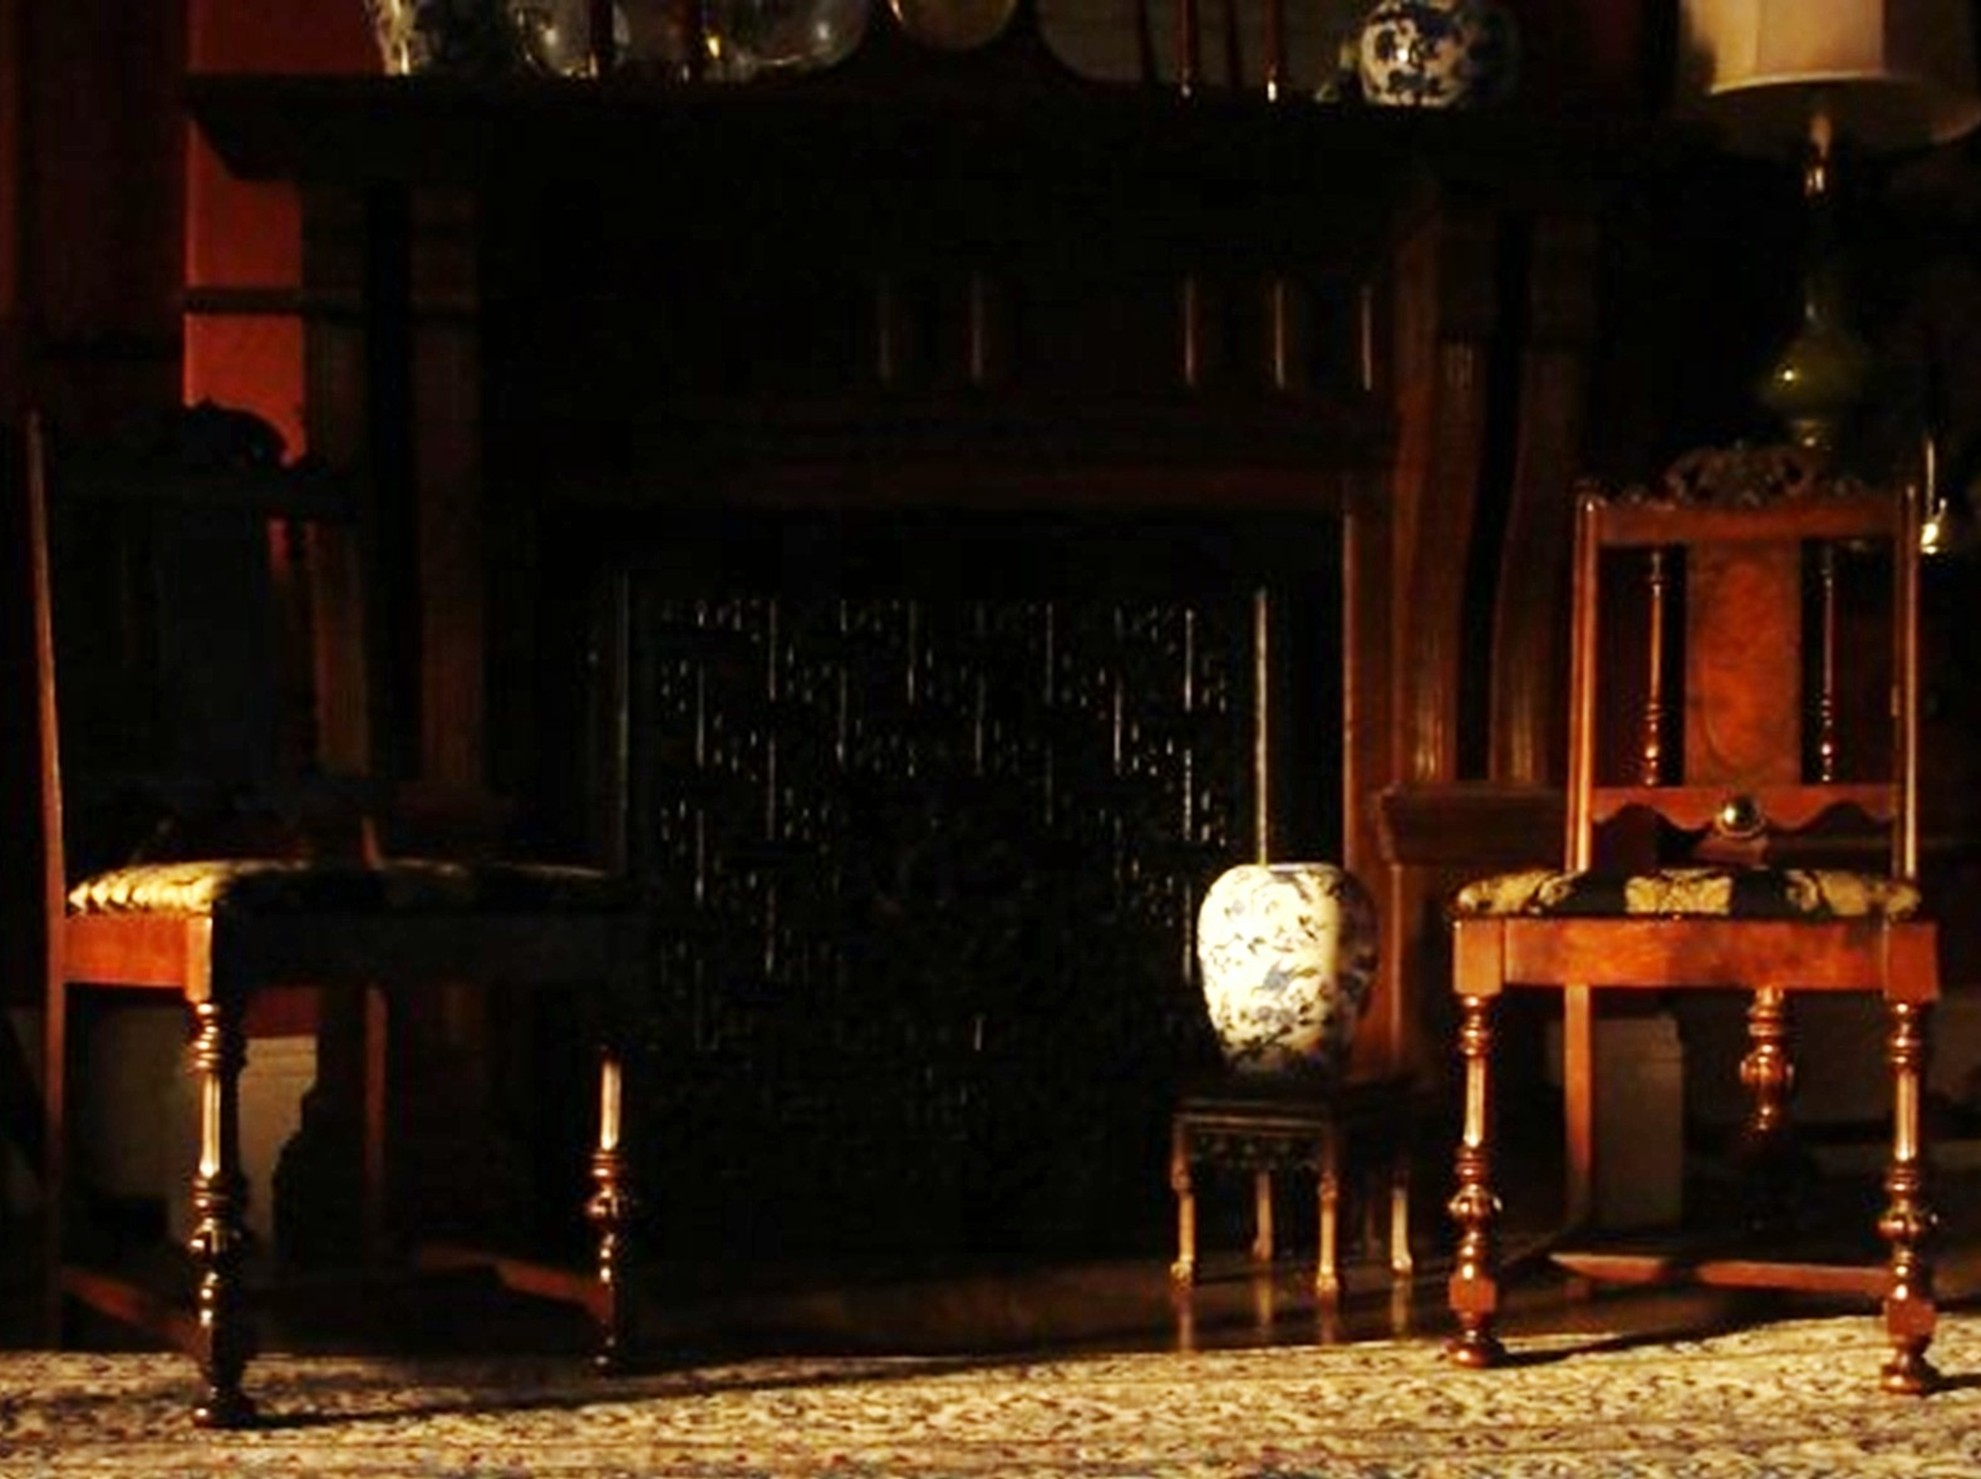
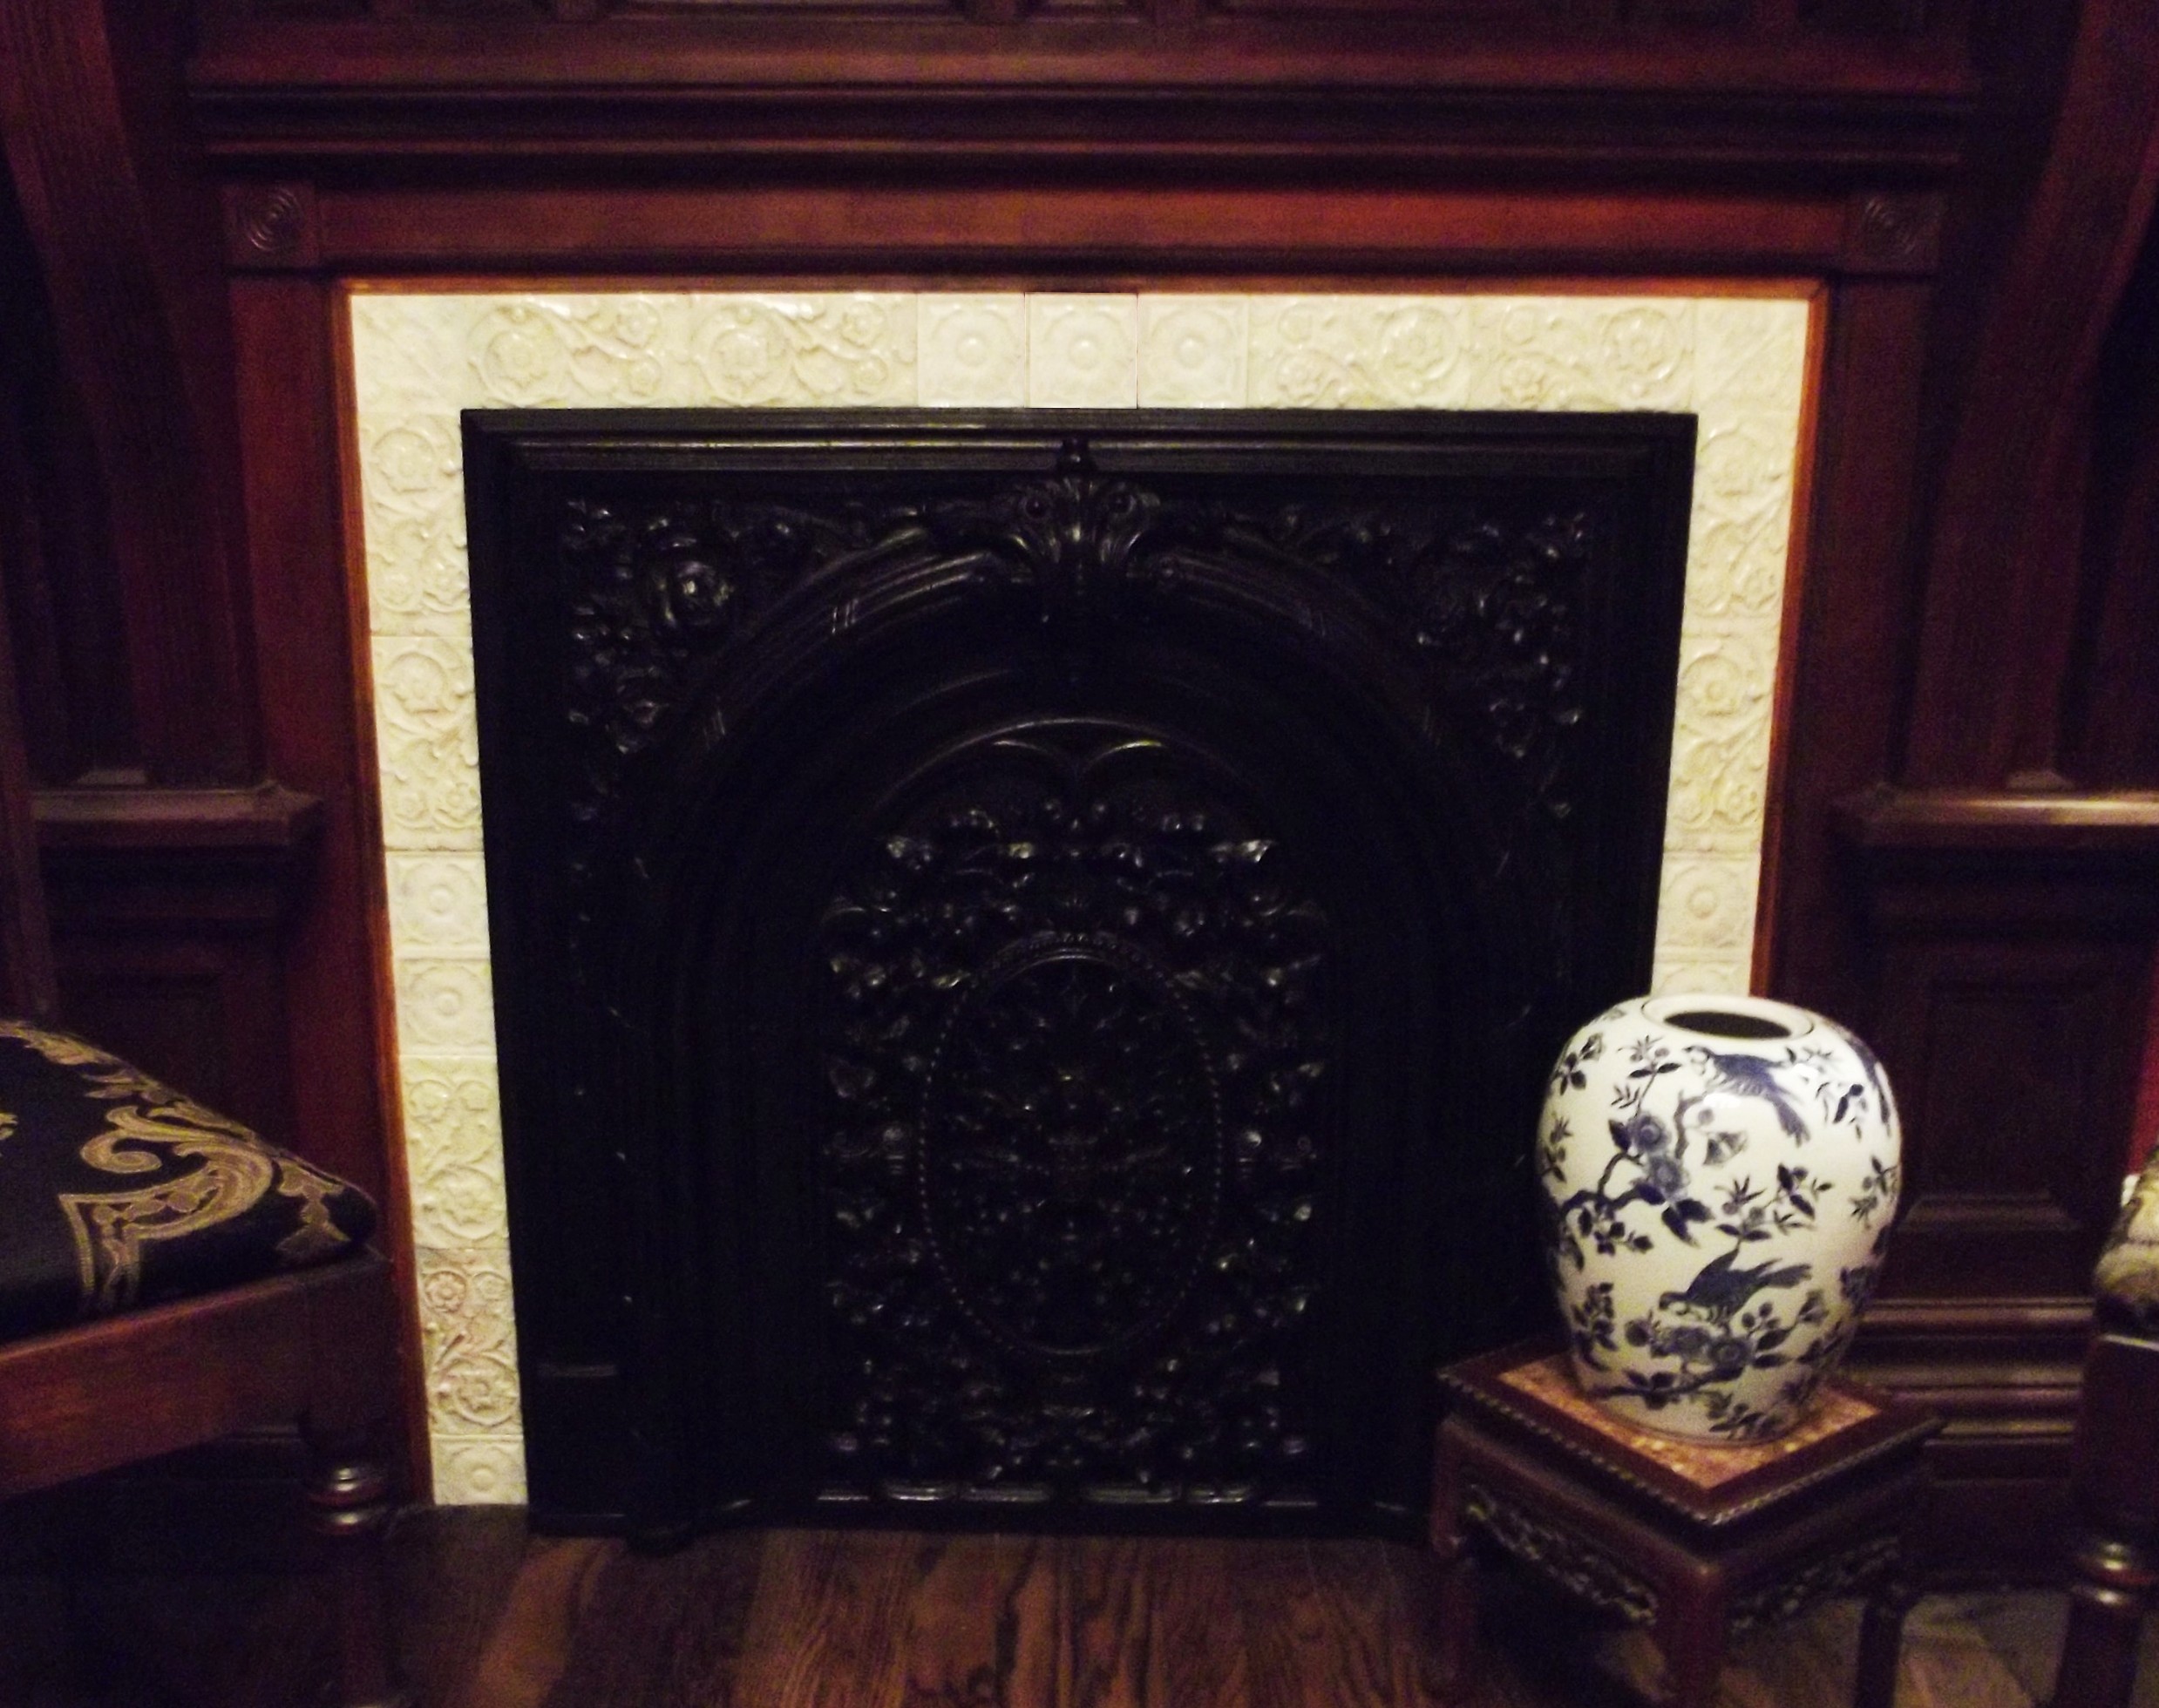
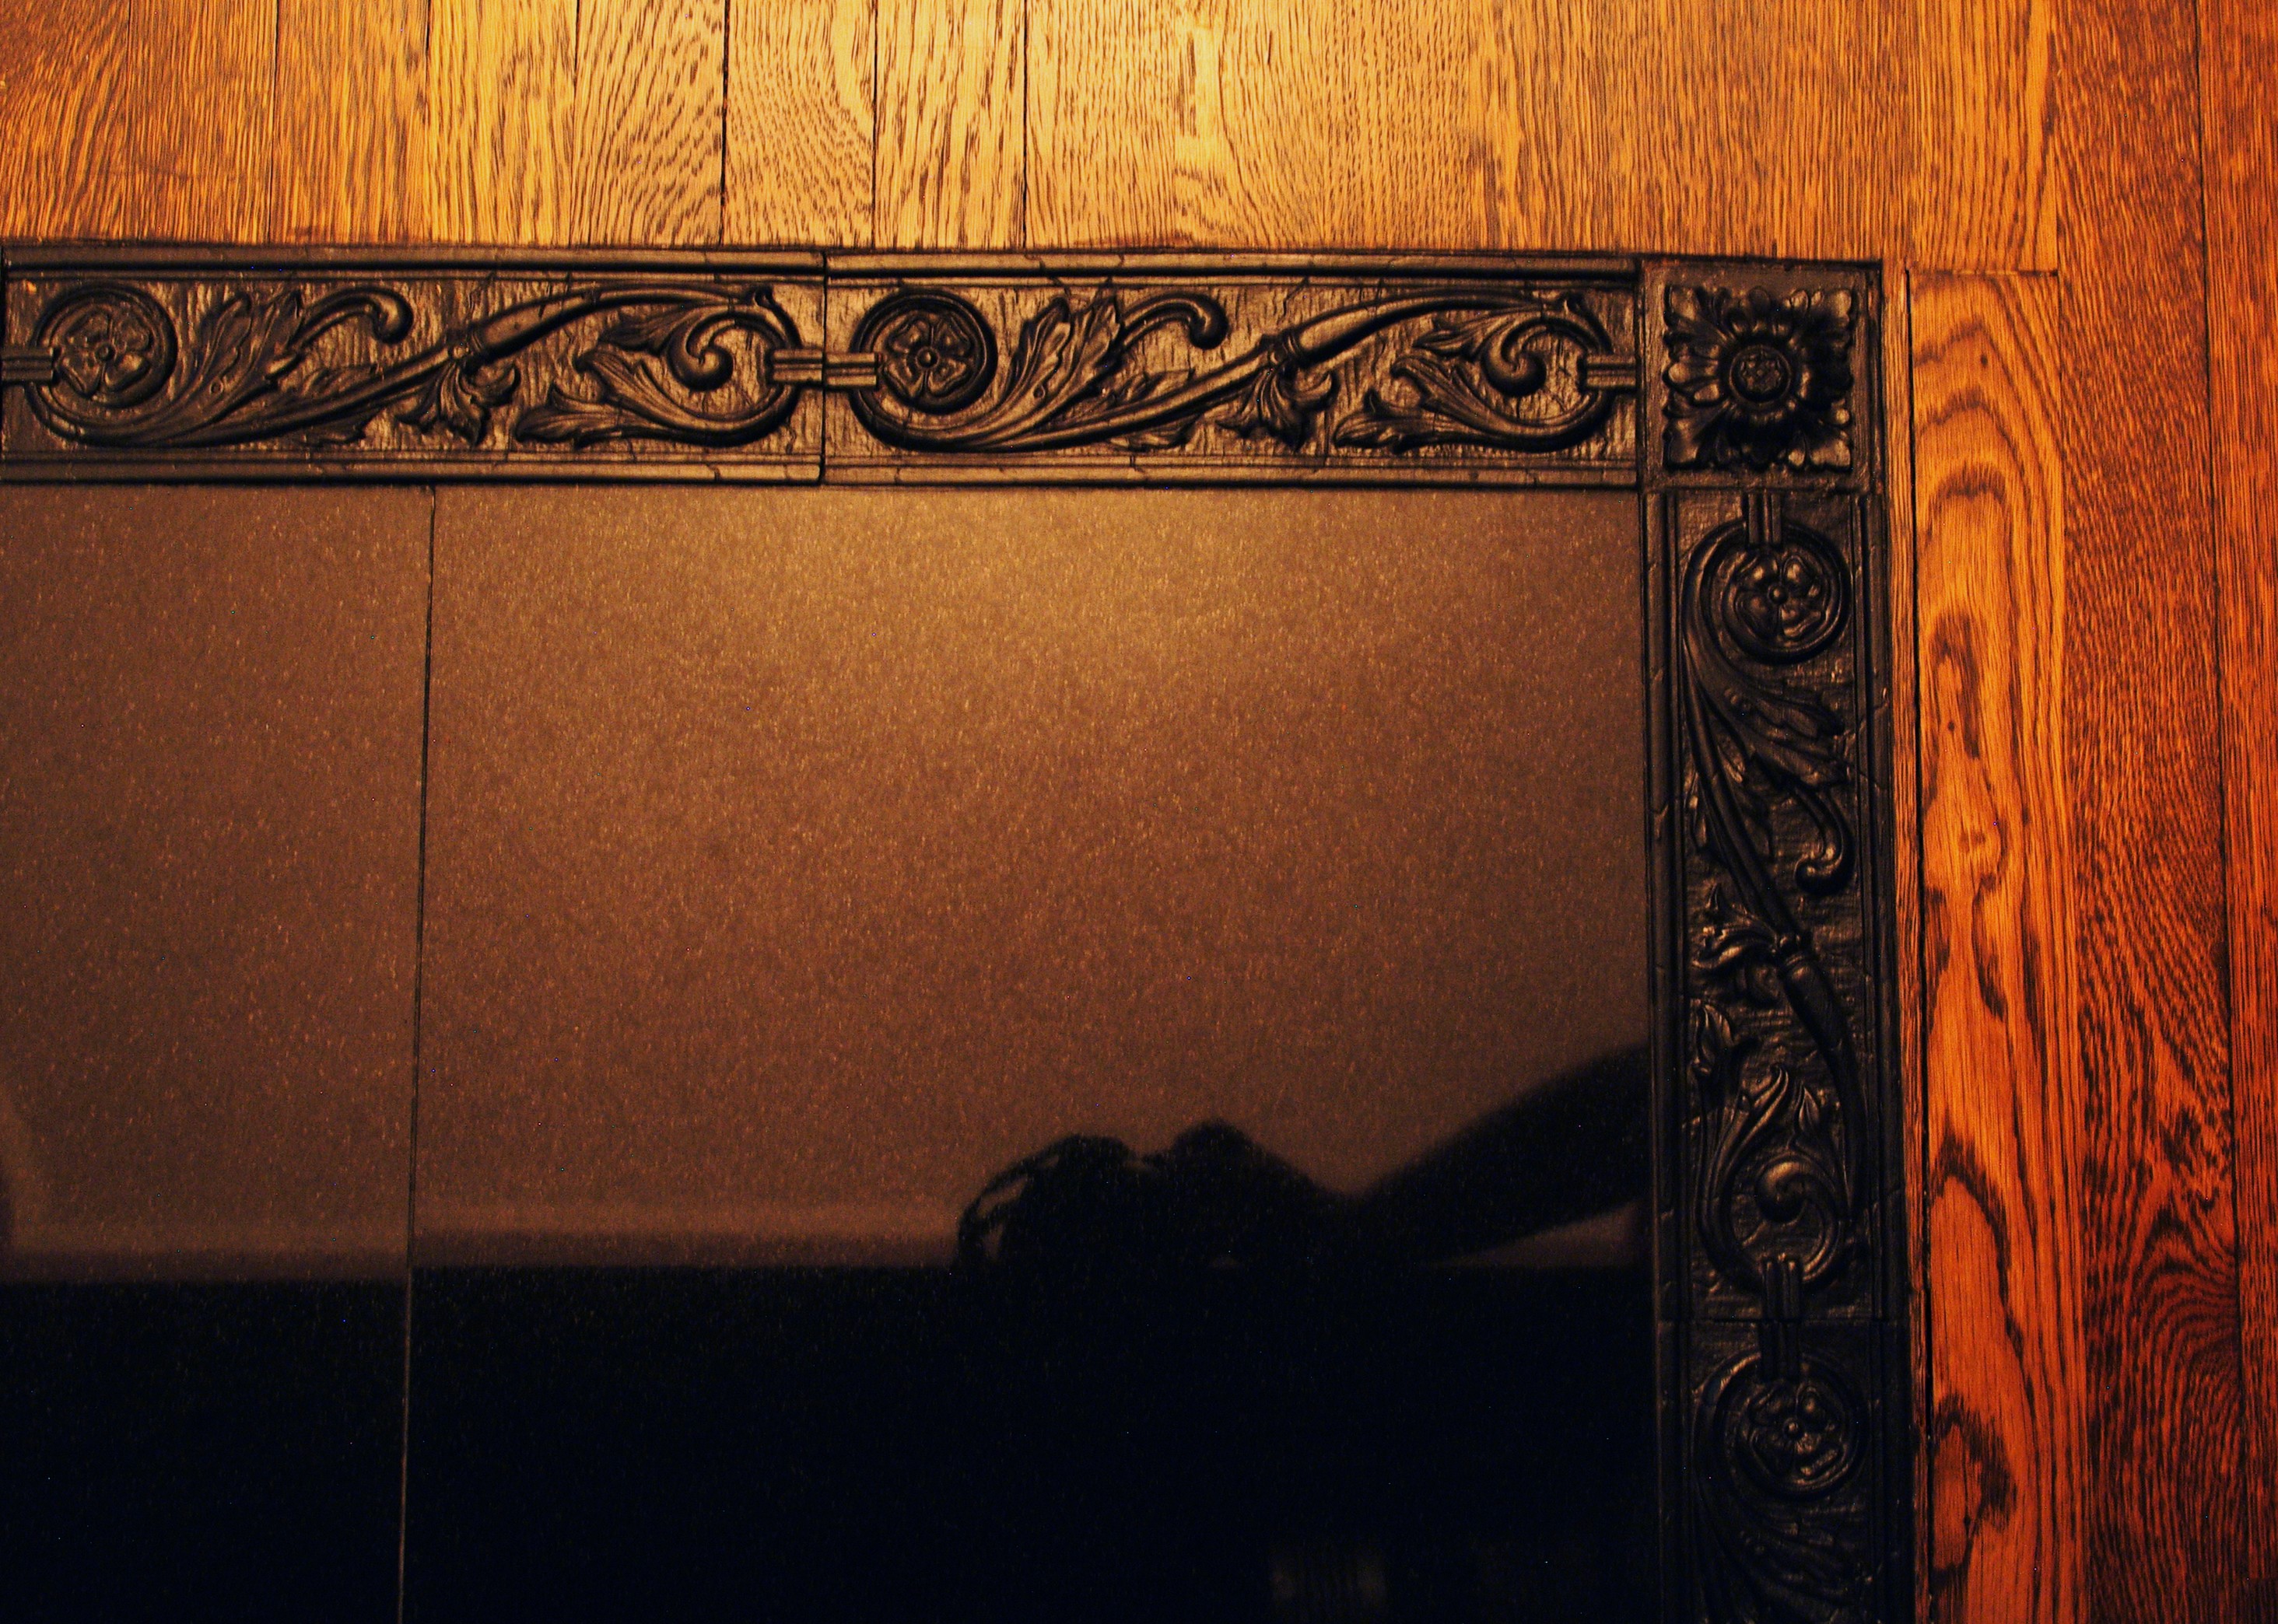
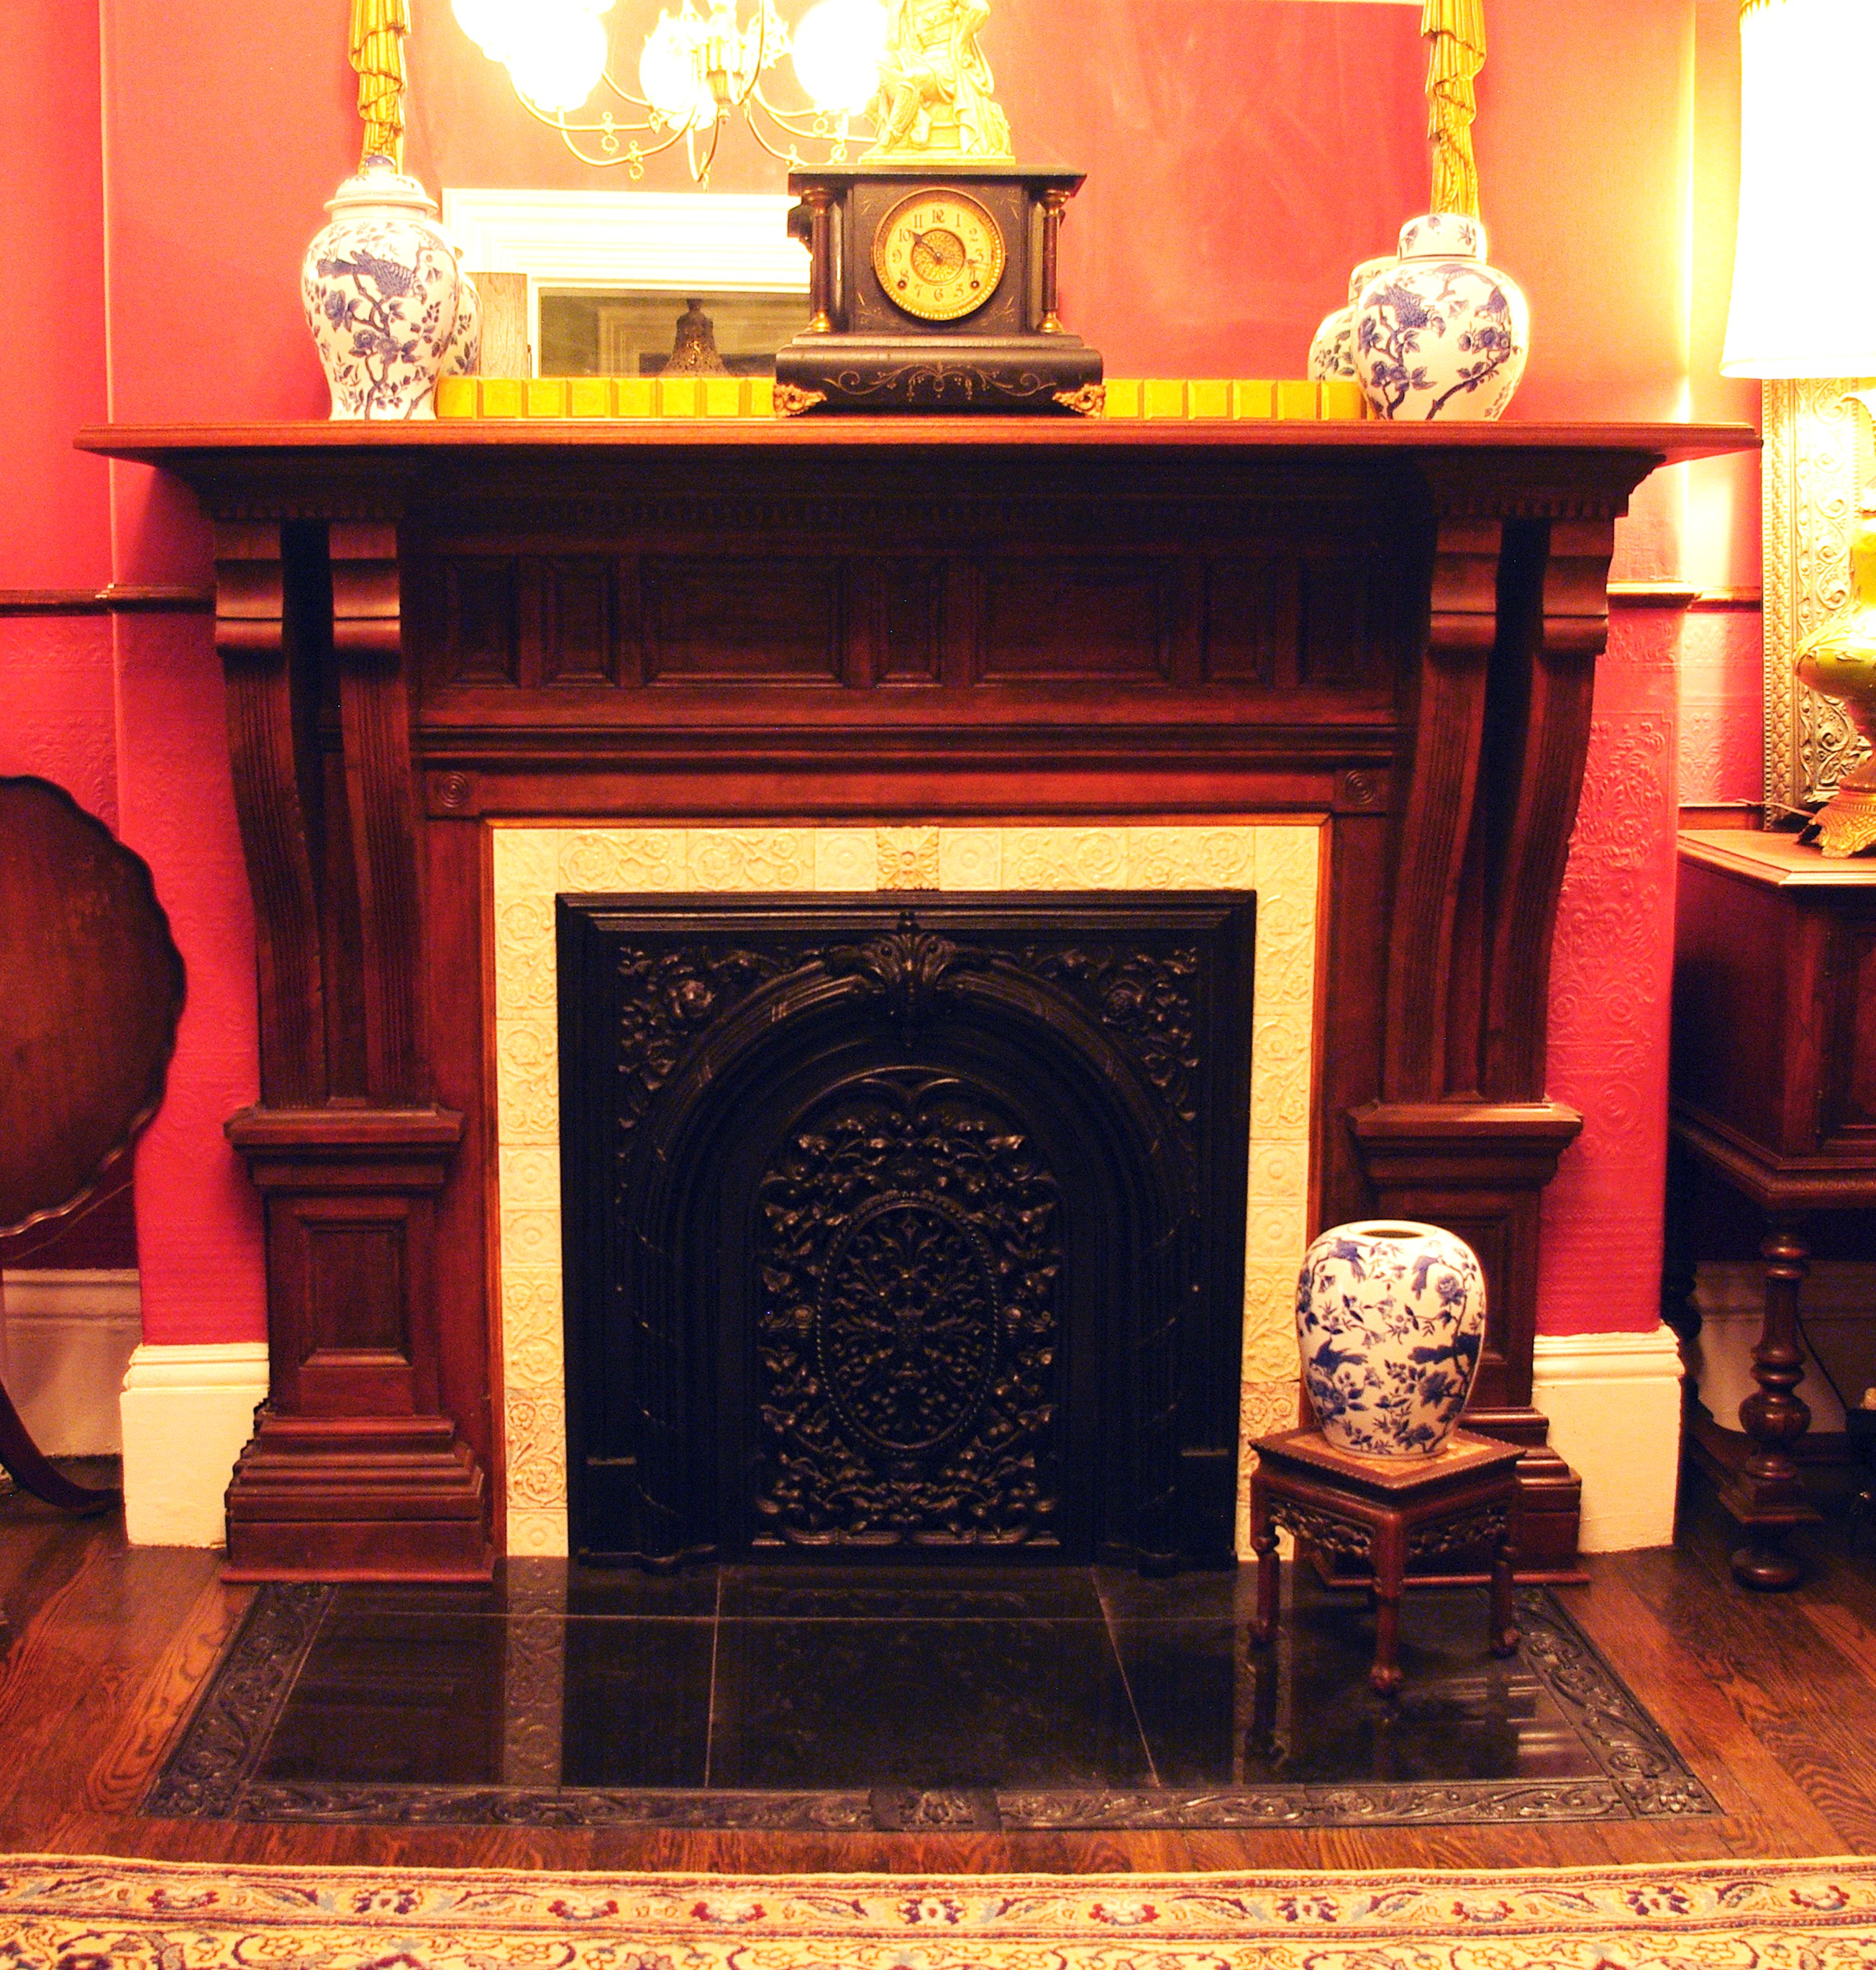
We cast the tiles in a very durable resin, and coated them with black enamel paint. We think the result is stunning, and so does the owner!
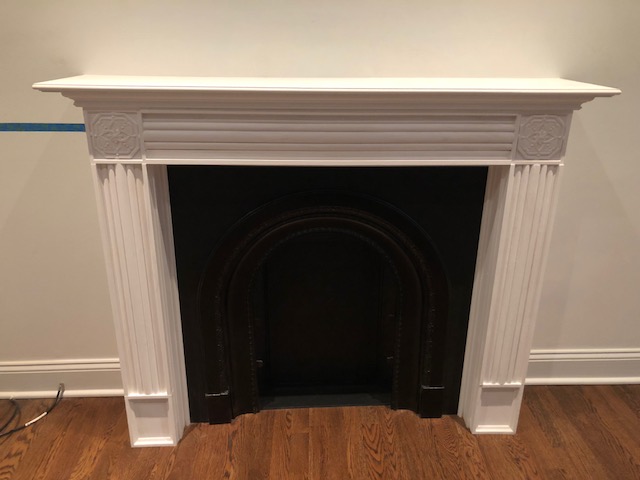
Restoration of Victorian Fireplace 2
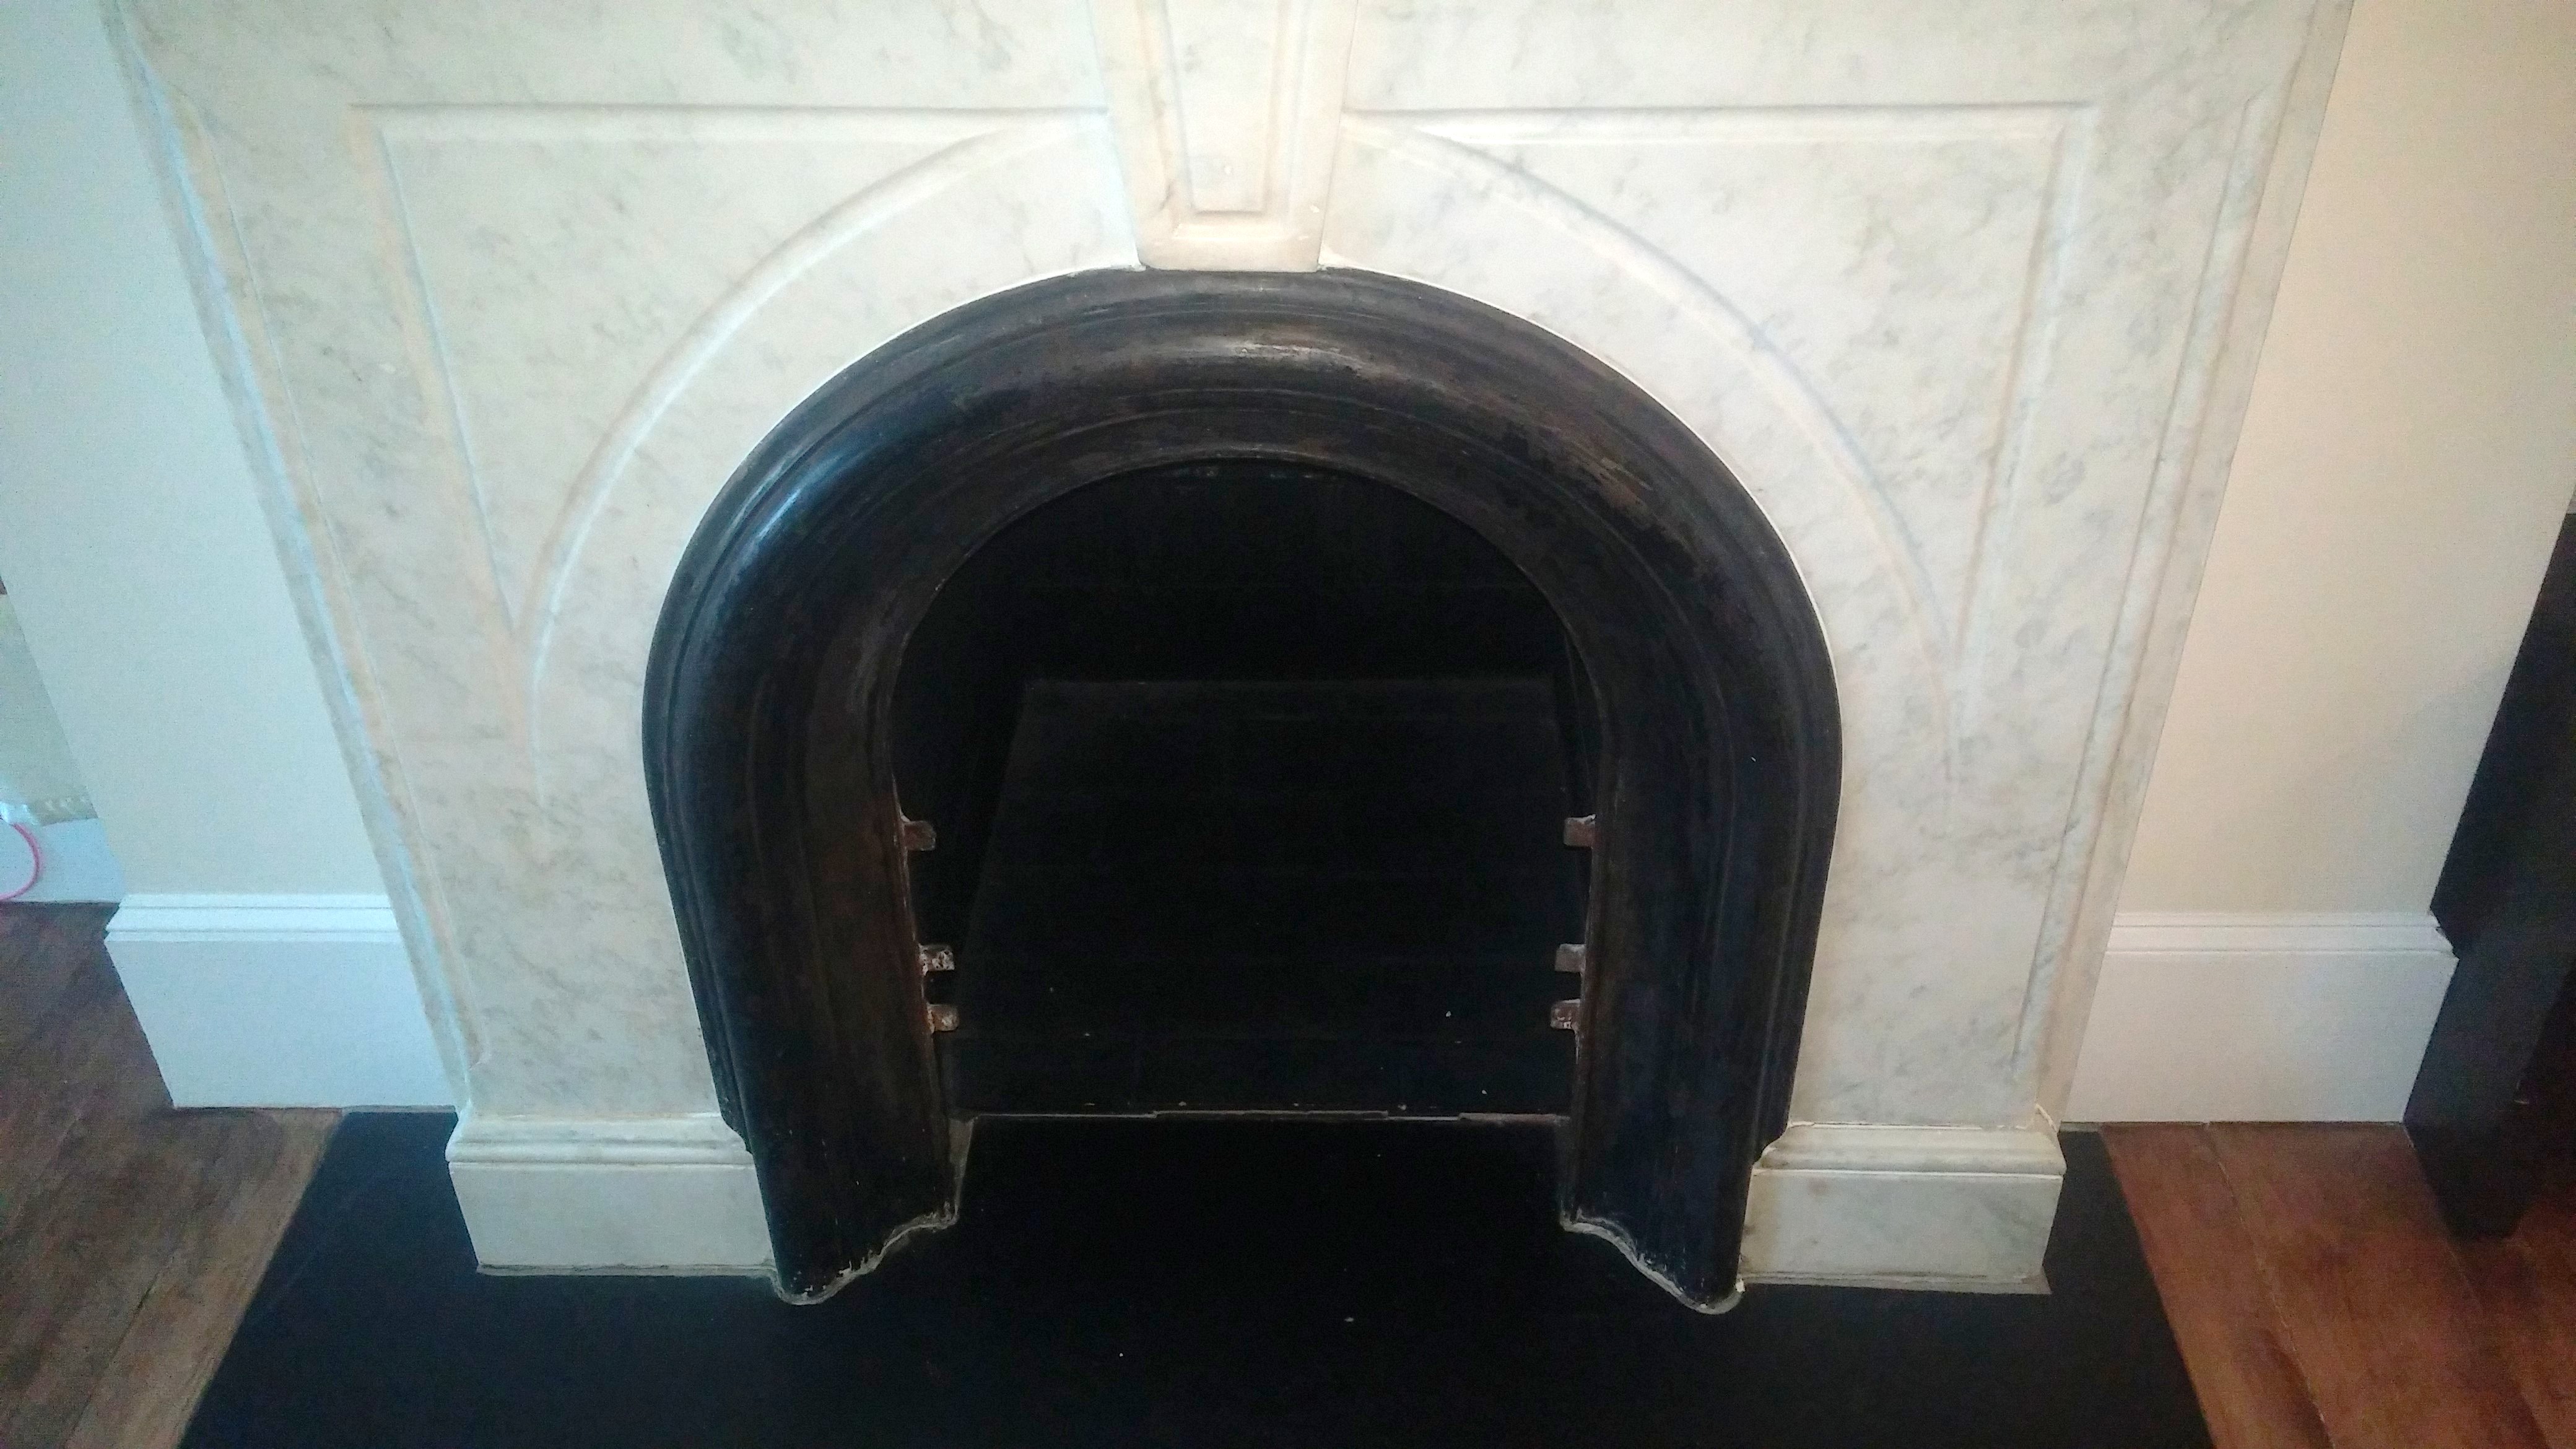
The passing of time is often unkind to architectural elements – especially in the South End, where much neglect and inconsiderate real-estate speculation in the years that followed the Second World War scarred the handsome interiors of once-splendid townhouses. It reassures us to know that many people care about preserving the past, and want to give the unique historical architectural details of their homes a second chance. We are thrilled when we meet new clients who have both a vision for their homes and a clear idea of how to realize it. For a number of years, our new client had lived with a fireplace mantel that he described as “an eyesore” - until he heard about Old Boston and decided to give us a call. Not only did we admire that he was very specific about what he wanted to see; as we discussed the project, we were also happy to hear that his main concern was about how the fireplace restoration would bring beauty to his home and joy to his household.
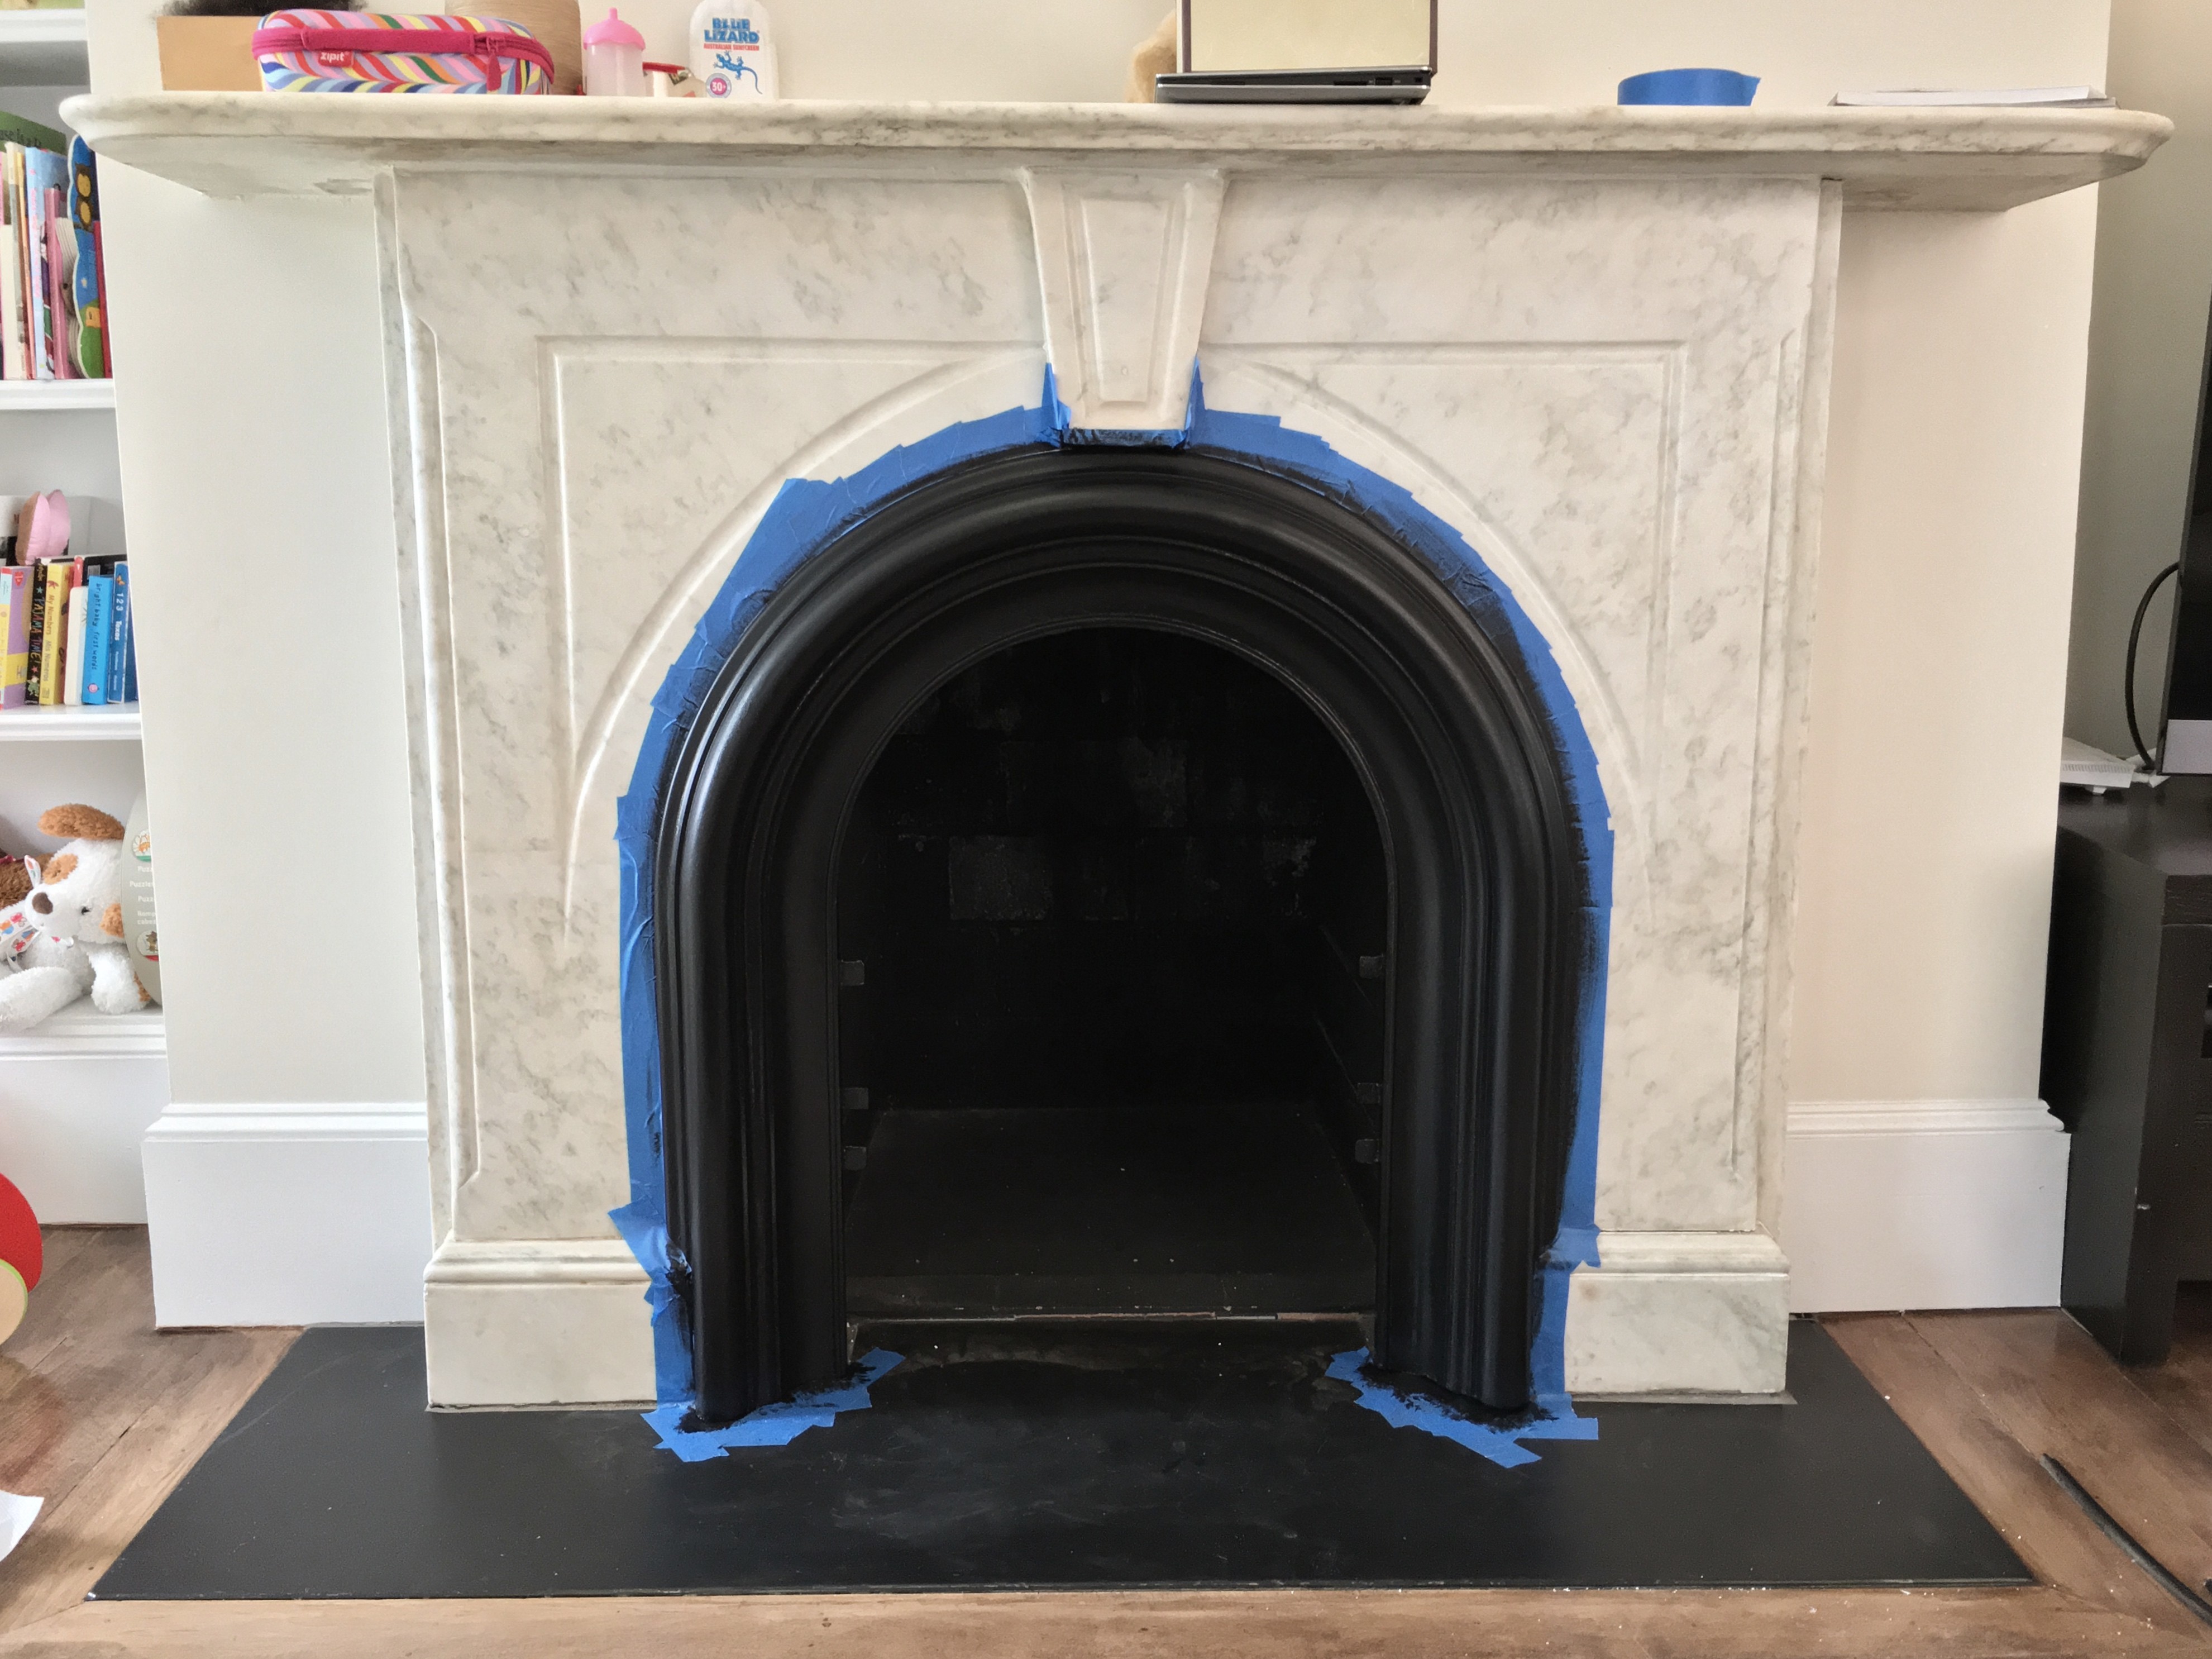
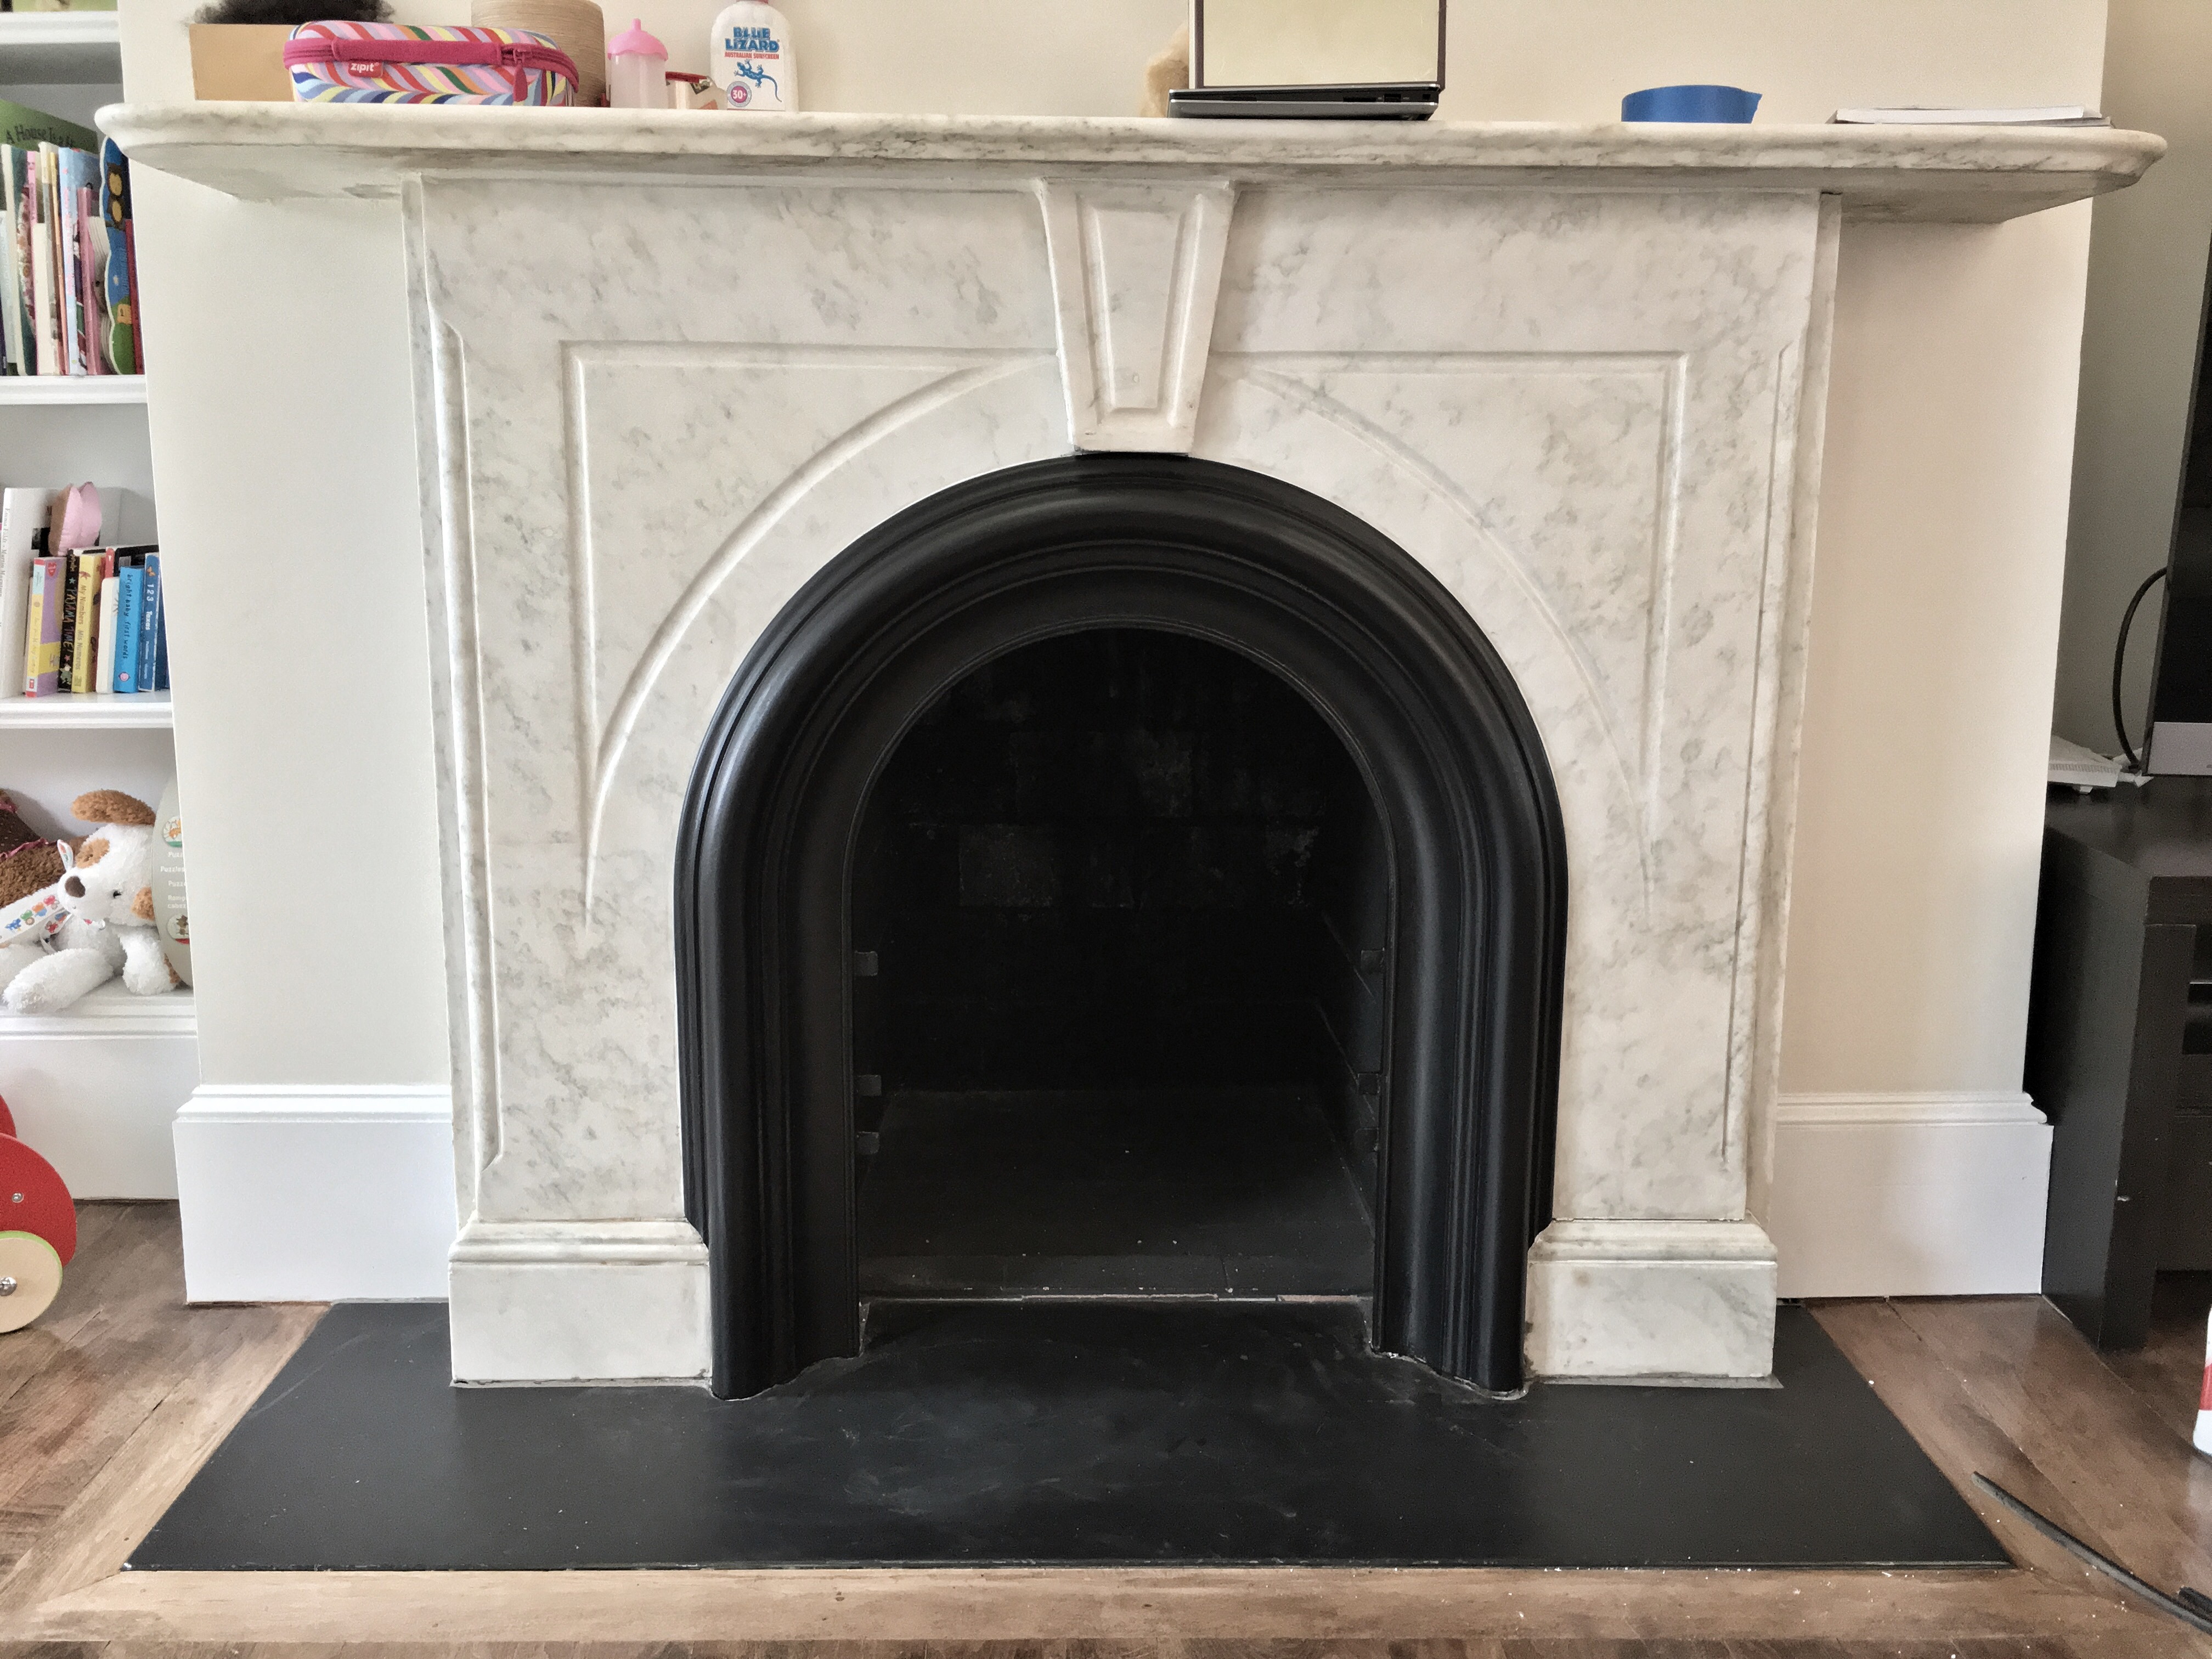
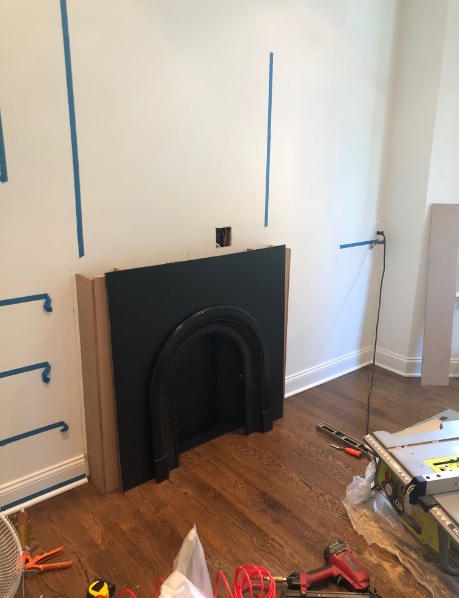
The Carrara-marble mantel, typical of the upper rooms of Boston's 1860s townhouses in its simple but elegant lines, was in need of a good cleaning, as the surface was covered with specks of paint, grime, and old caulk that had been poorly applied to fill the gaps between each portion of the mantel. The fireplace opening was walled off, as it was often the case once new heating systems were introduced at the turn of the twentieth century. The plaster insert was painted white; and a hole, framed by a small cast-iron cover, was created to accommodate the exhaust pipe of a stove. Finally, nothing in old homes is leveled: the hearth probably cracked with the settling of the building over the years, and was eventually removed as it no longer served its purpose.
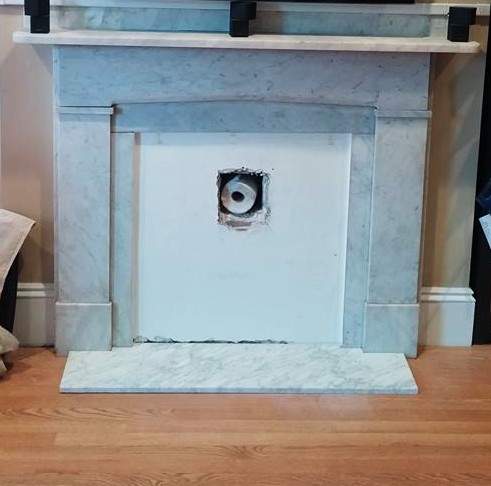
Our client chose to have a new Carrara-marble hearth installed, and have it rest at floor level rather than recess it into the hardwood floor. This avoided the often hopeless battle between the perfectly leveled new marble slab and the unevenness of the old floors. Here is the hearth immediately after its installation:
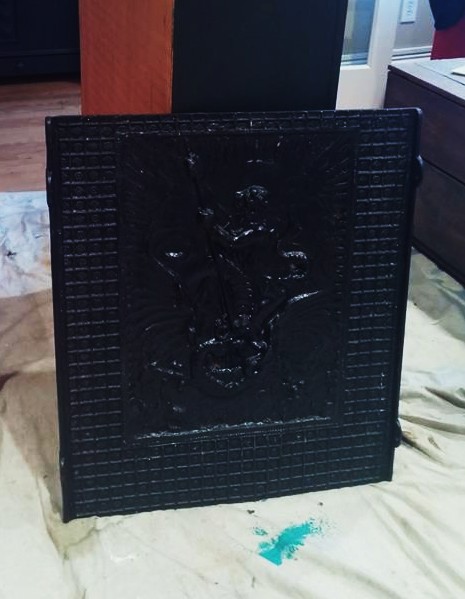
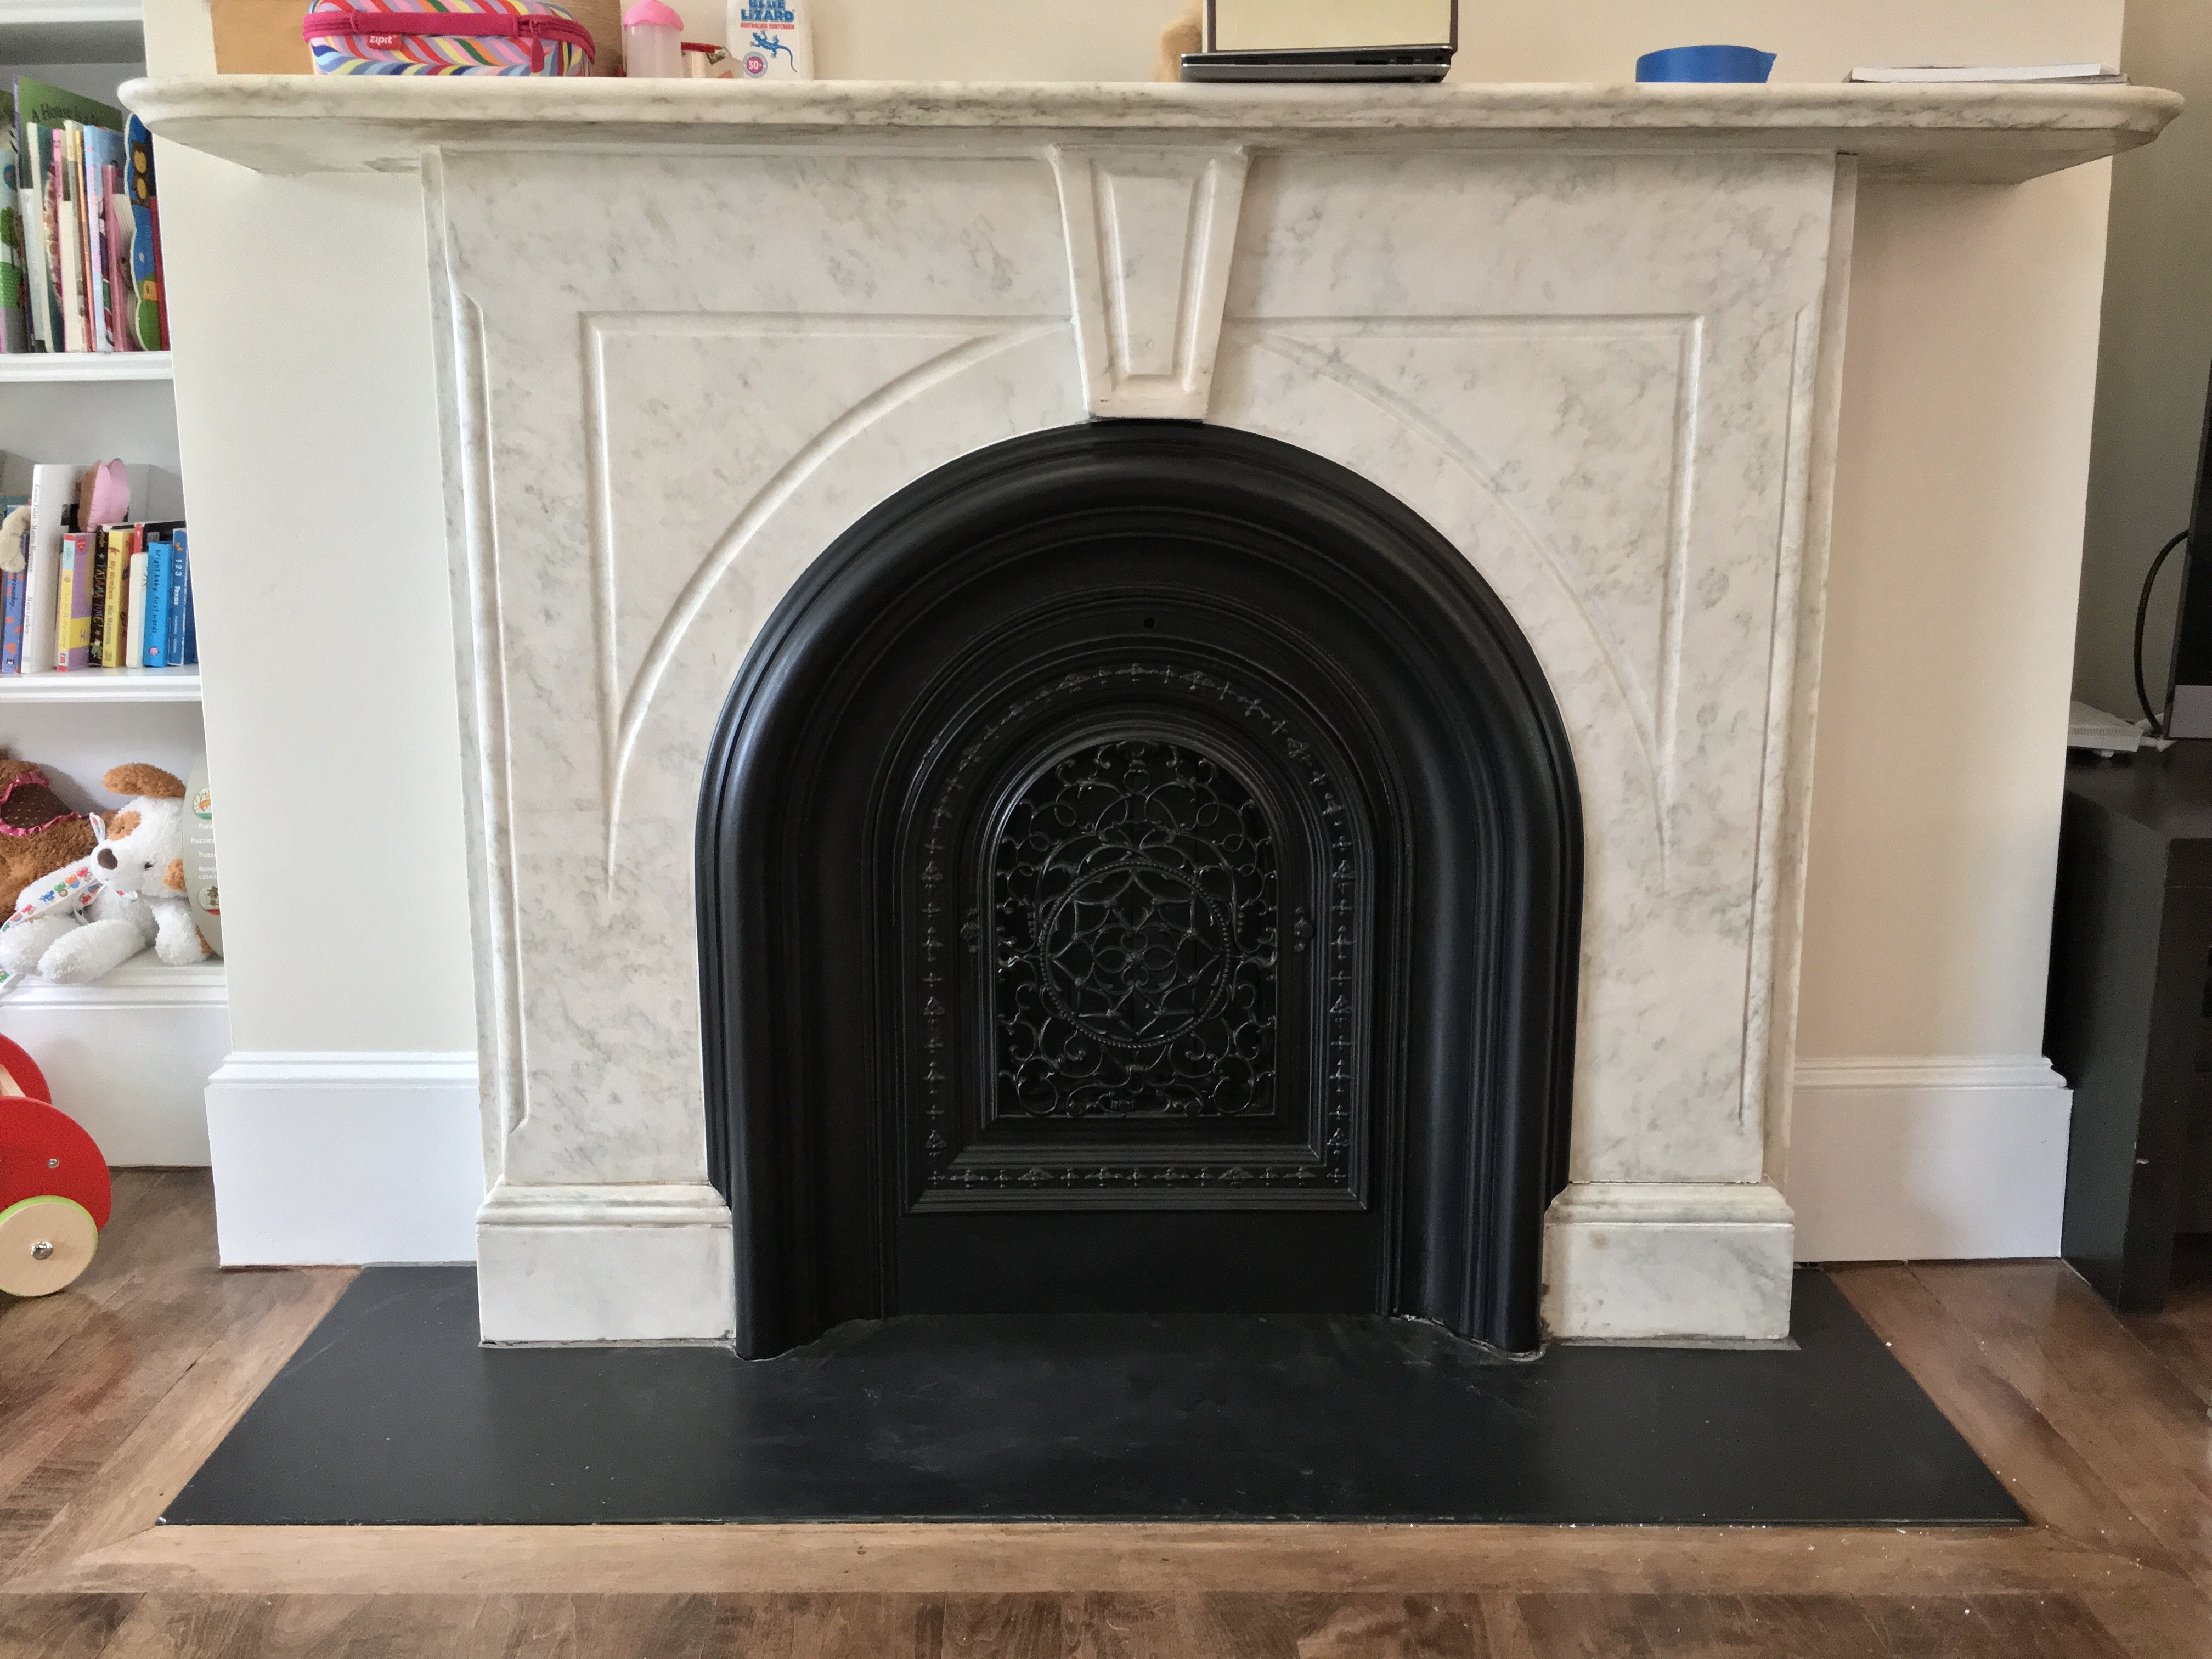
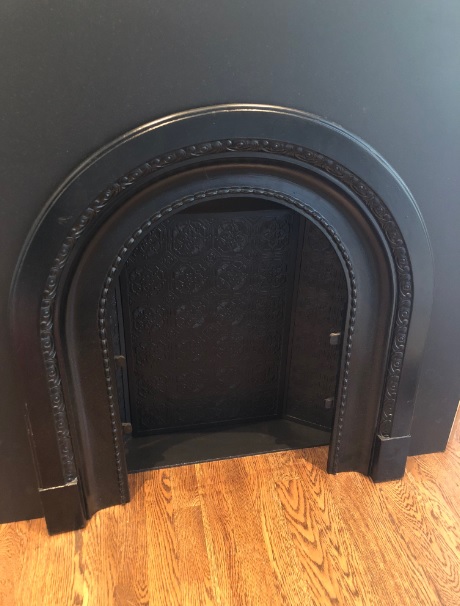
After we patiently cut the hearth to fit the shape of the mantel, we began to work on the fireplace opening. Our client wanted to use a beautiful antique cast-iron panel he acquired several years ago with the purpose of using it as a central panel. It features Neptune riding the waves, and had been sitting for a while against the opening to cover the unsightly stove hole.
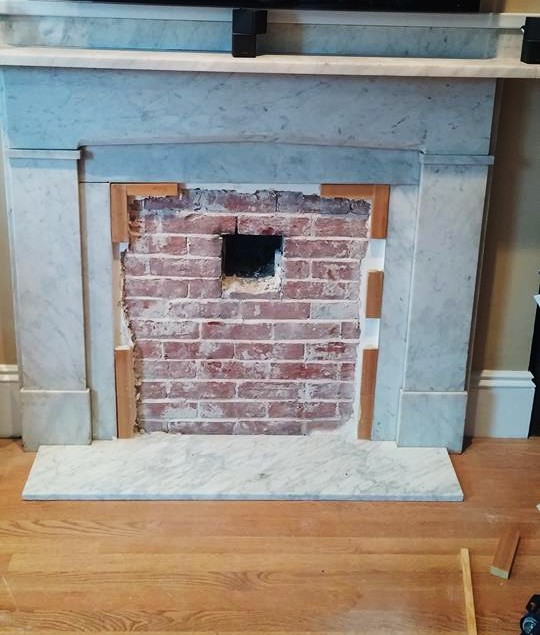
The panel was slightly thicker than the recessed area. In order for it to fit properly, we had to remove the plaster, which revealed the brick wall built to board up the flue.
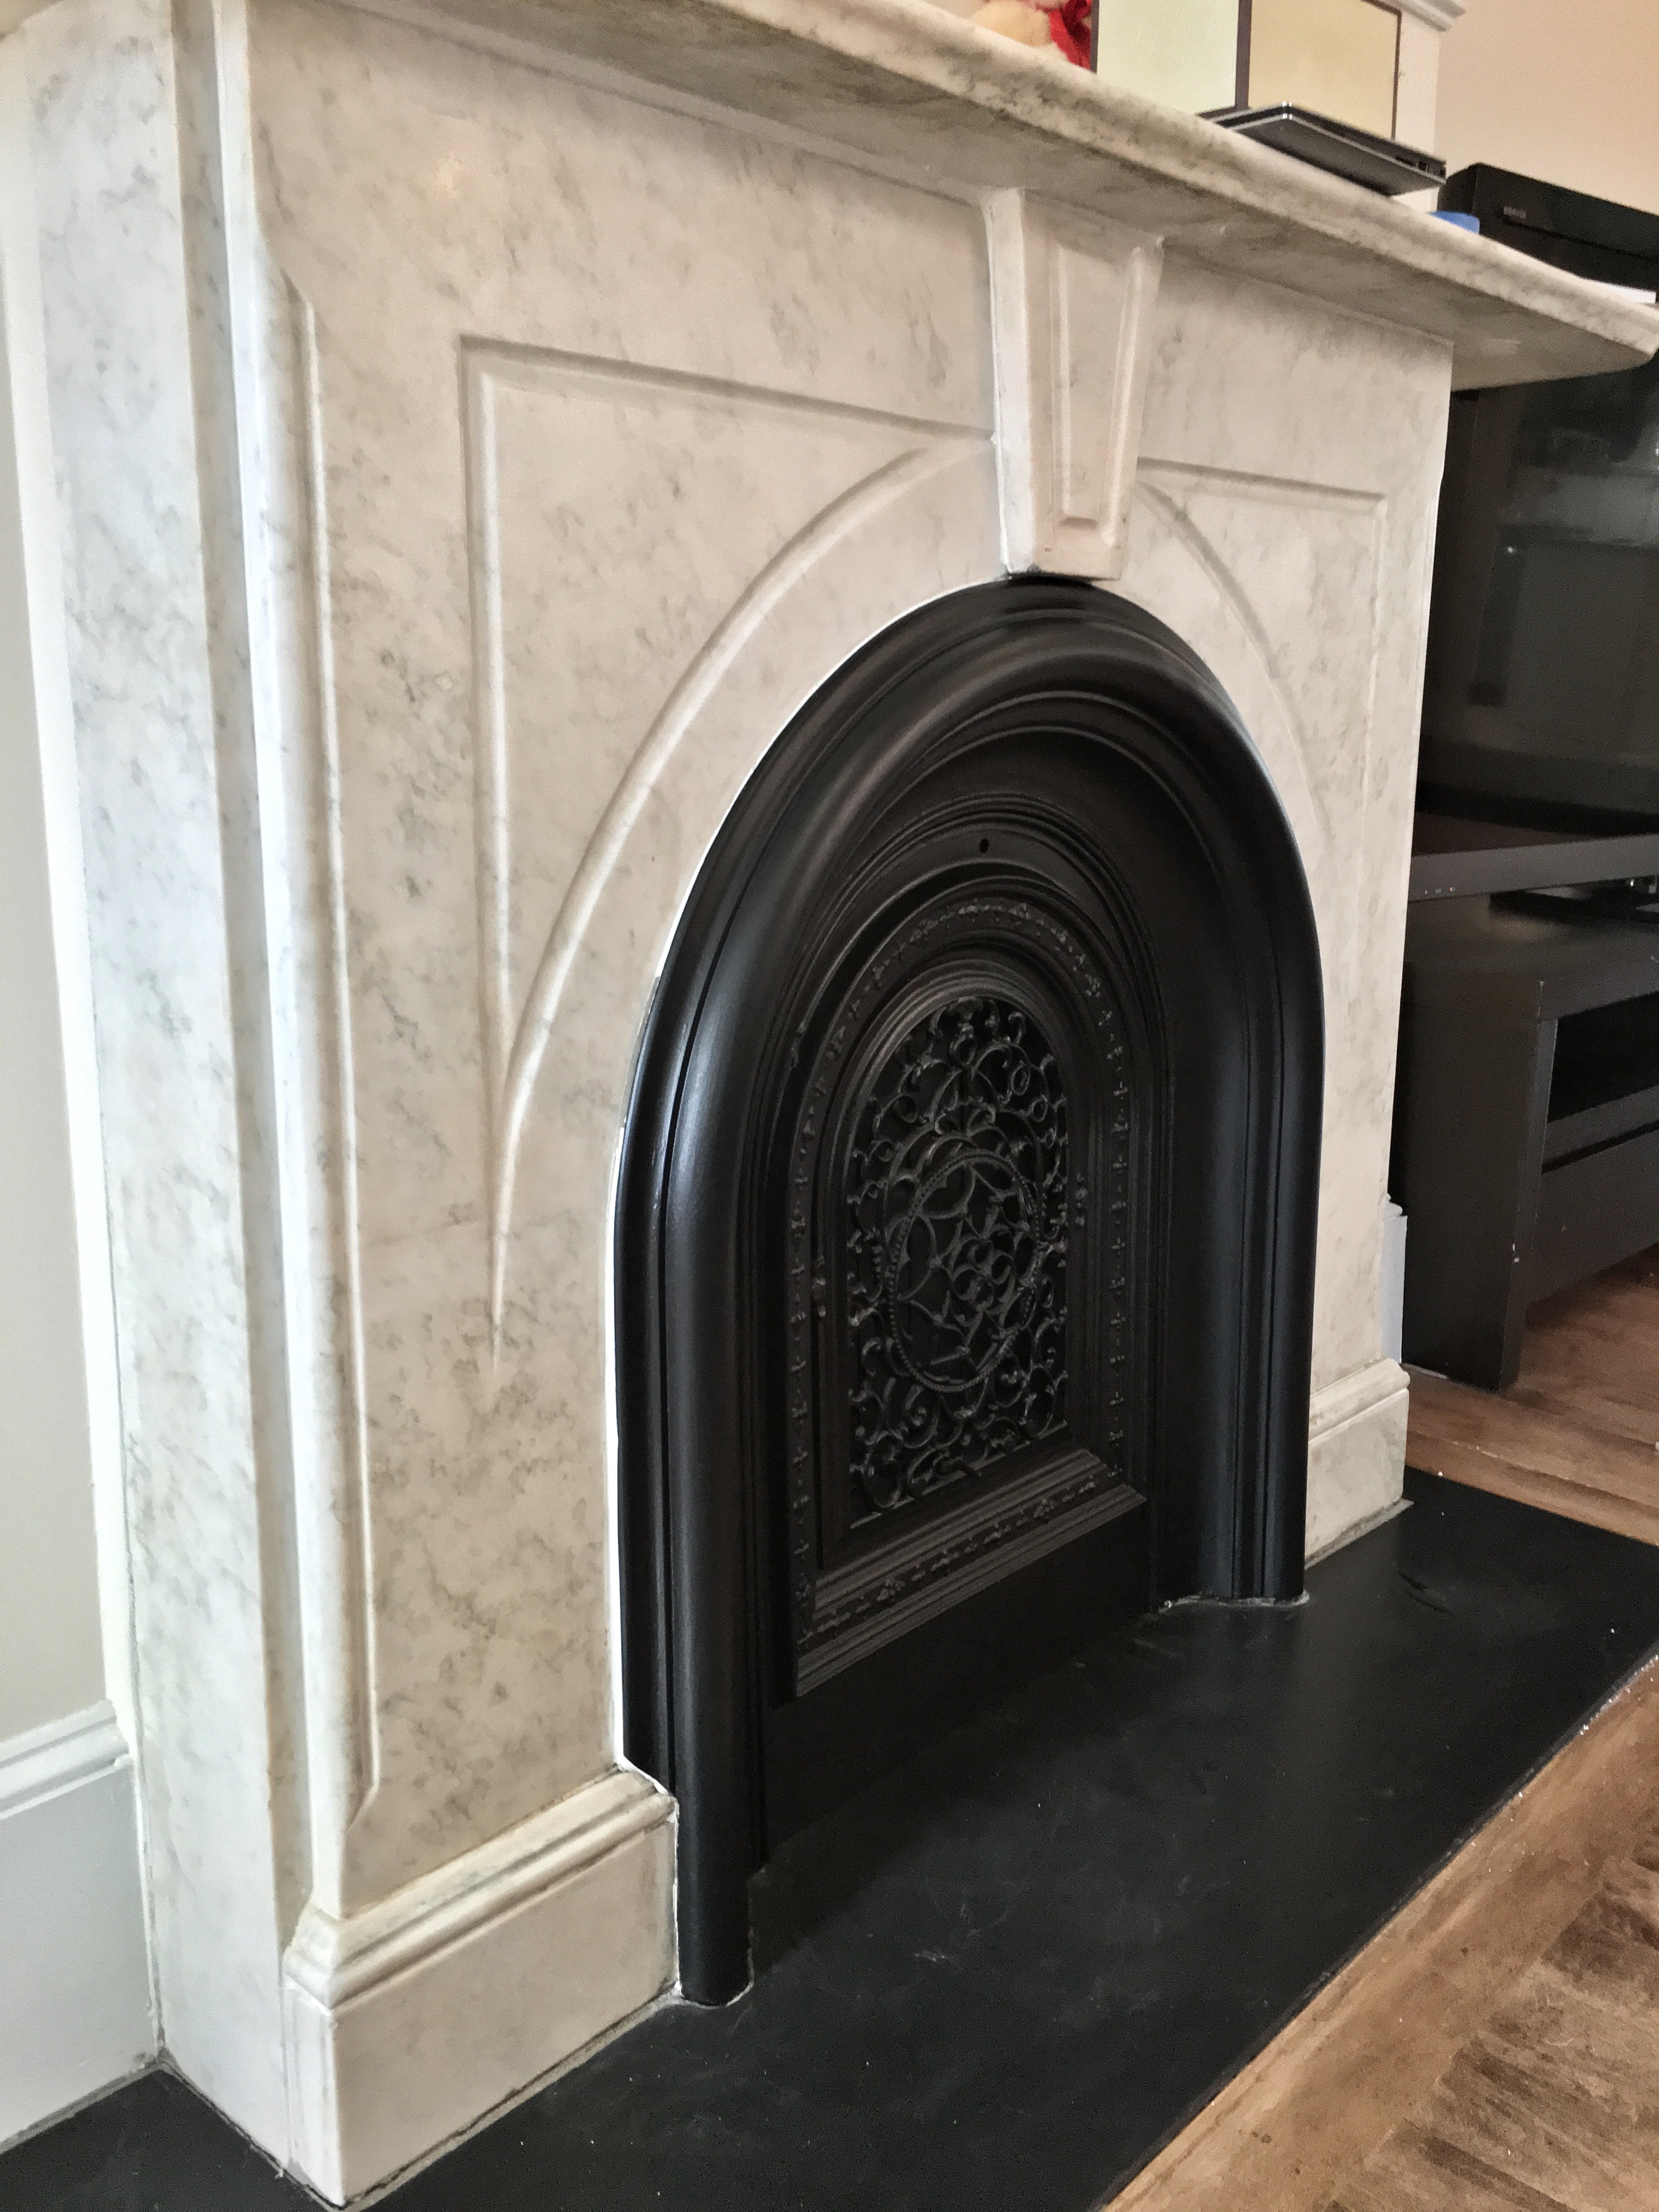
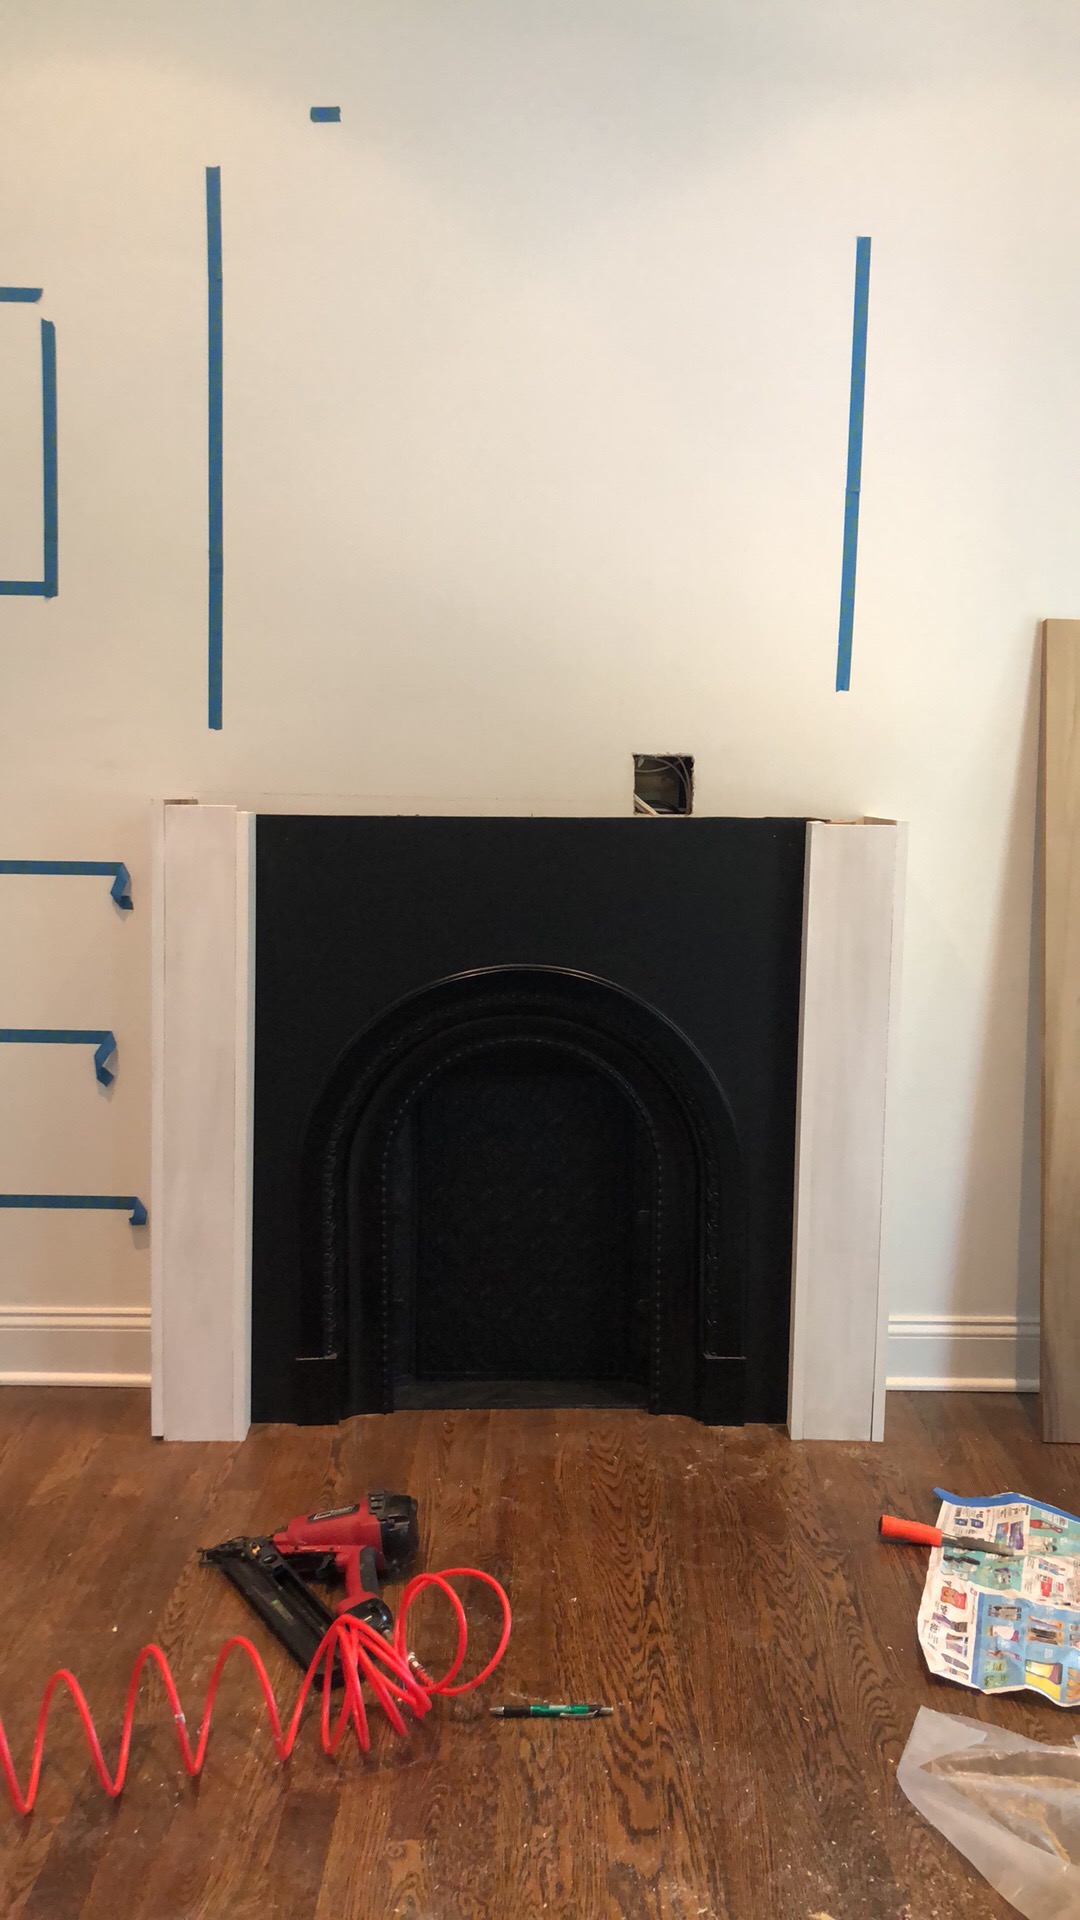
It would have been impossible to locate a matching cast-iron frame for the beautiful panel our client already owned, as it was originally a fireback – an ornamental piece conventionally installed at the back of a fireplace in order to retain heat and radiate it back into the room. Since the fireplace is no longer operating, we chose to create a stylistically appropriate wooden frame to encase the opening. We built two elegant pedestals, along with a decorative keystone that continues the nautical theme of the fireback. A beautiful molding trim surrounds the central panel.
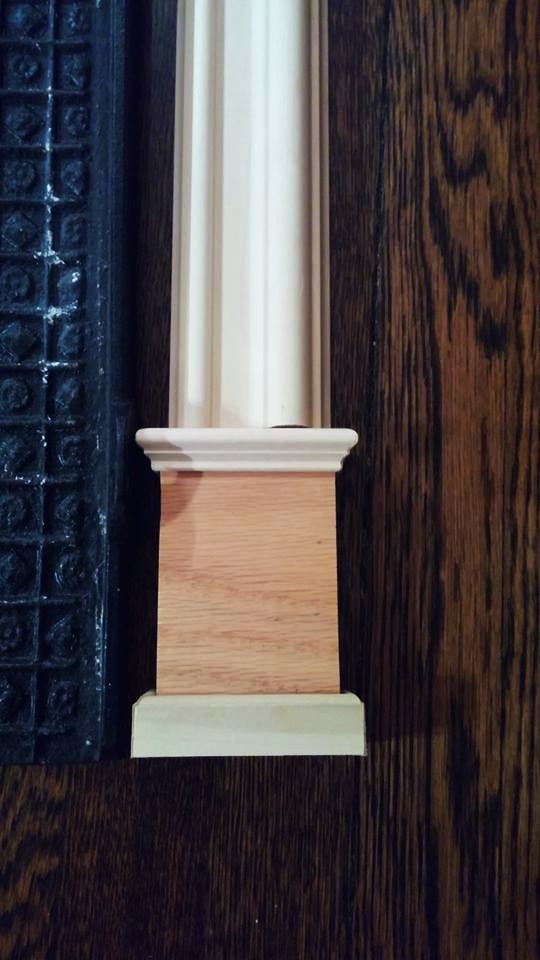
One of the two pedestals before being painted
The fireback came with four protruding elements, originally designed to host metal bolts that held the panel in place. We had to cut them in order for the panel to fit properly behind the frame.
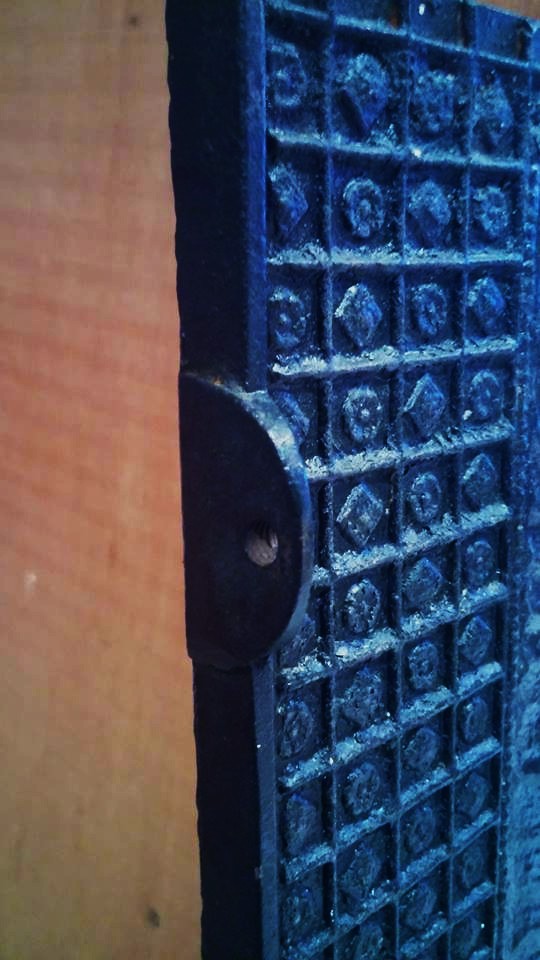
One of the four protruding elements
The fireback and the frame were painted with a beautiful black satin finish.
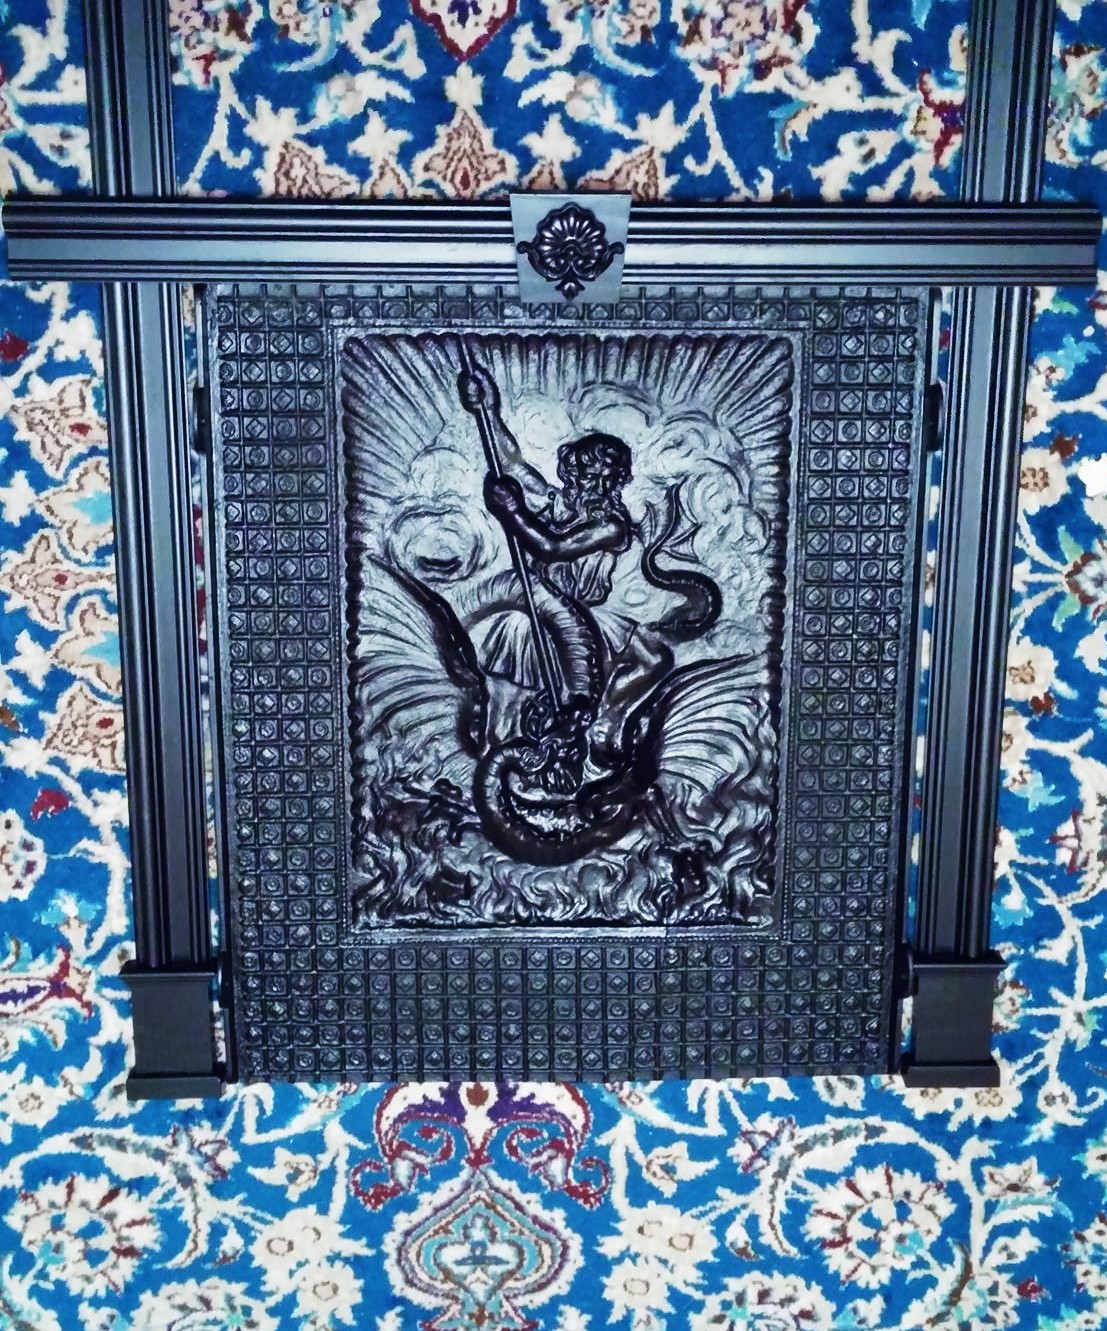
The fireback and the new frame before trimming and installation
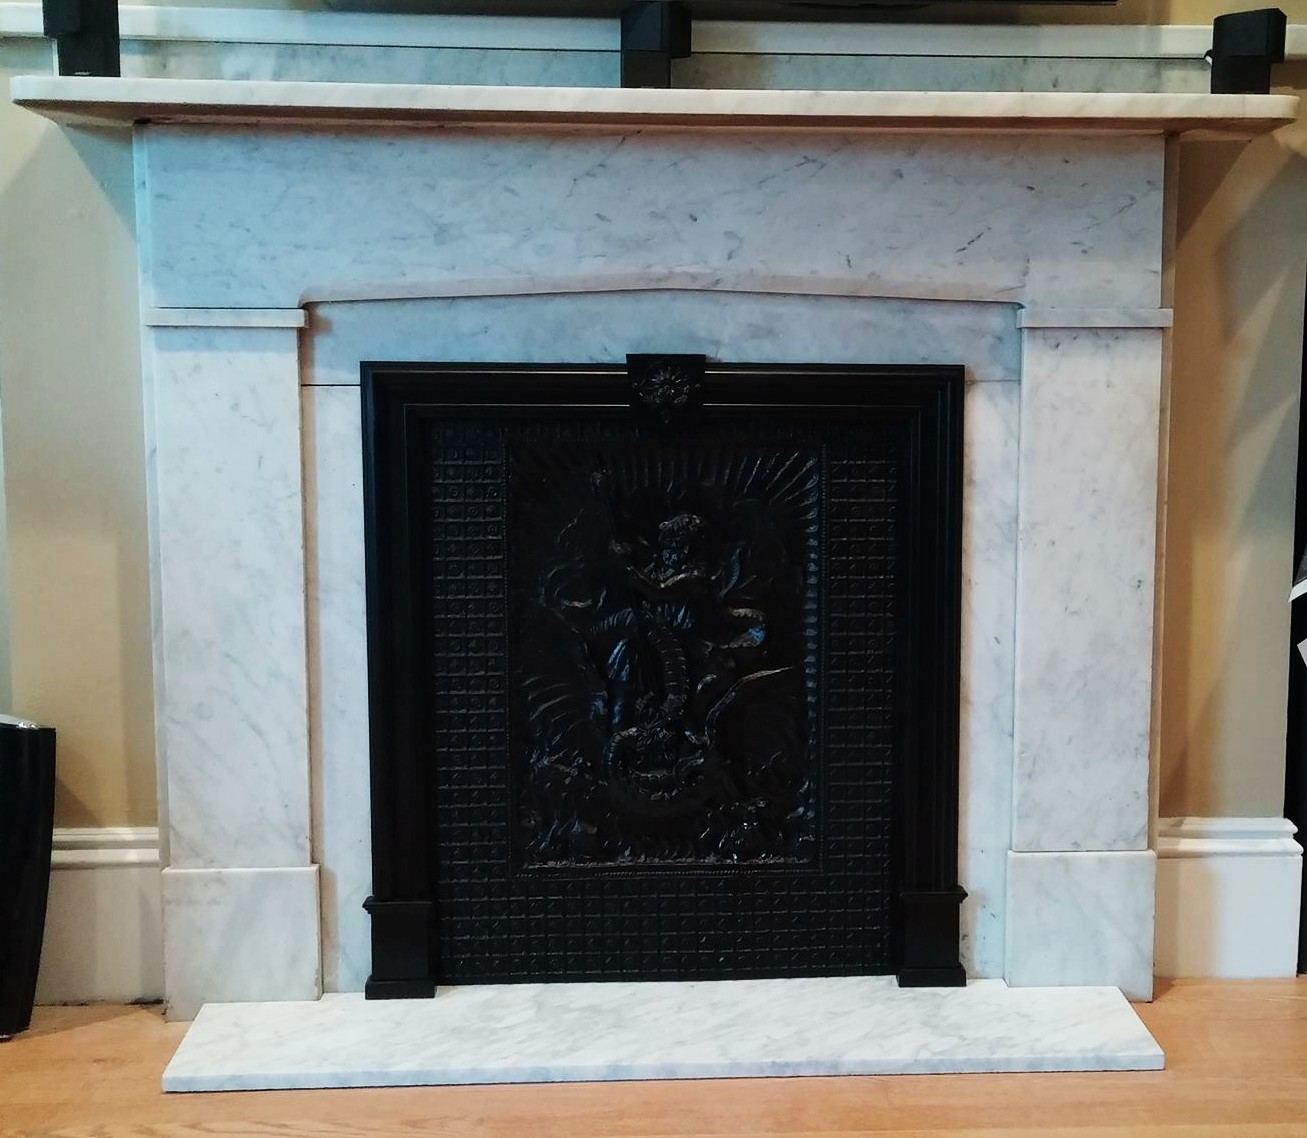
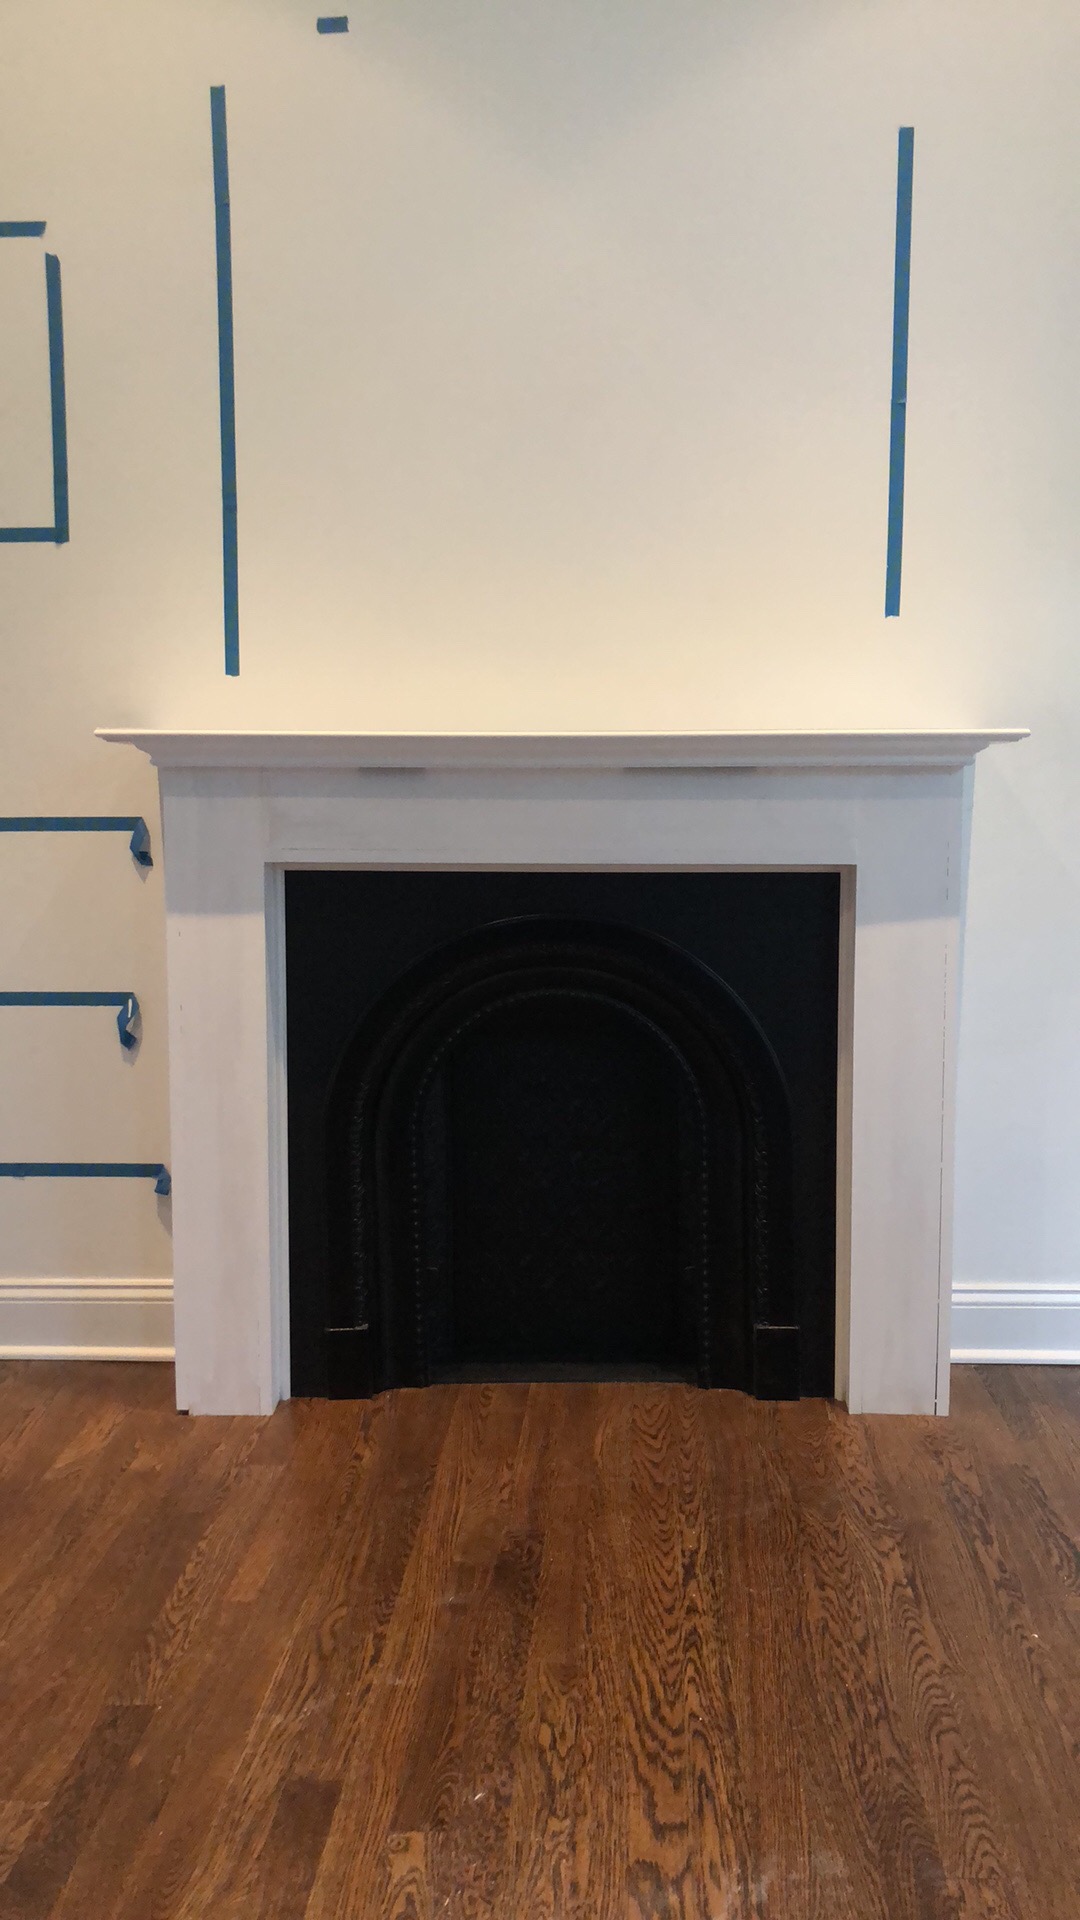
Restorations such as this are rather simple undertakings, but bring much beauty to a room. Here is the completed project!
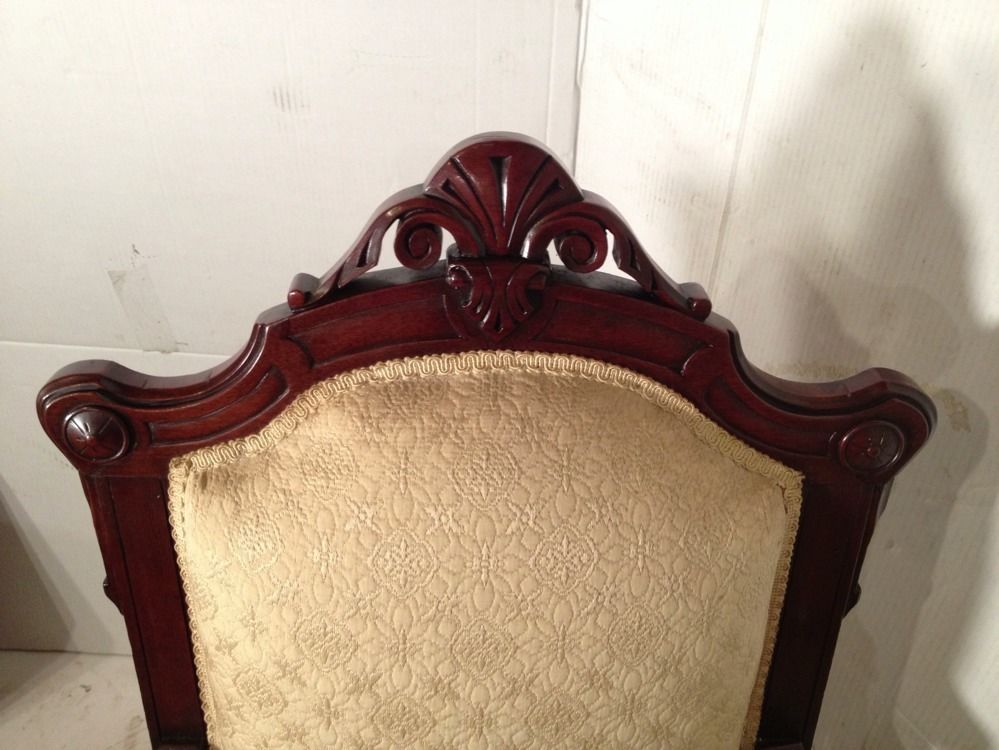
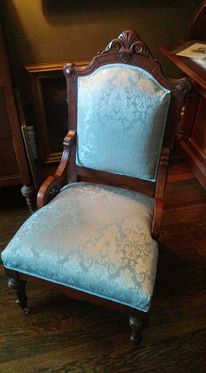
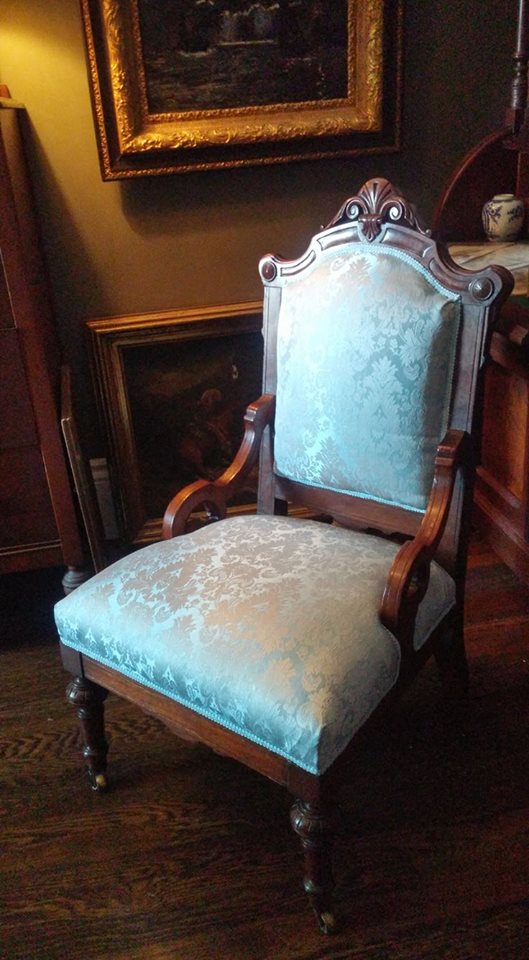
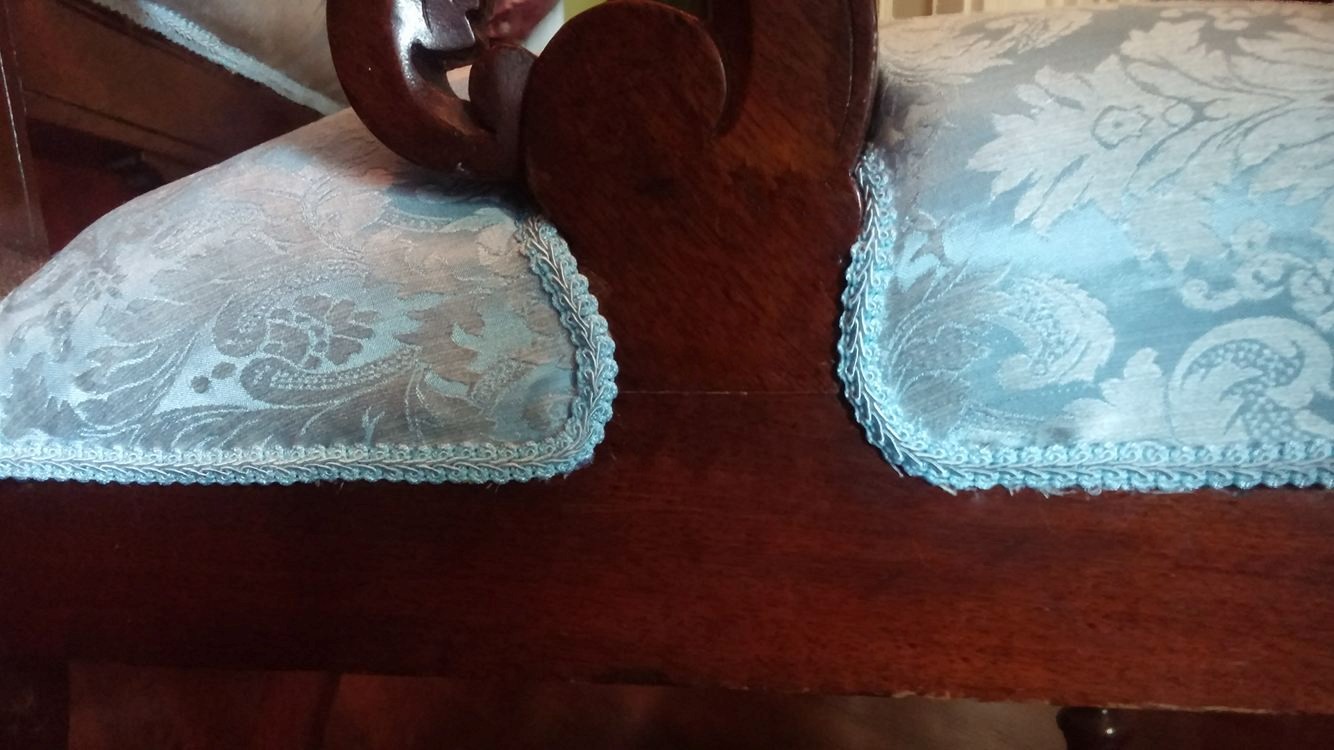
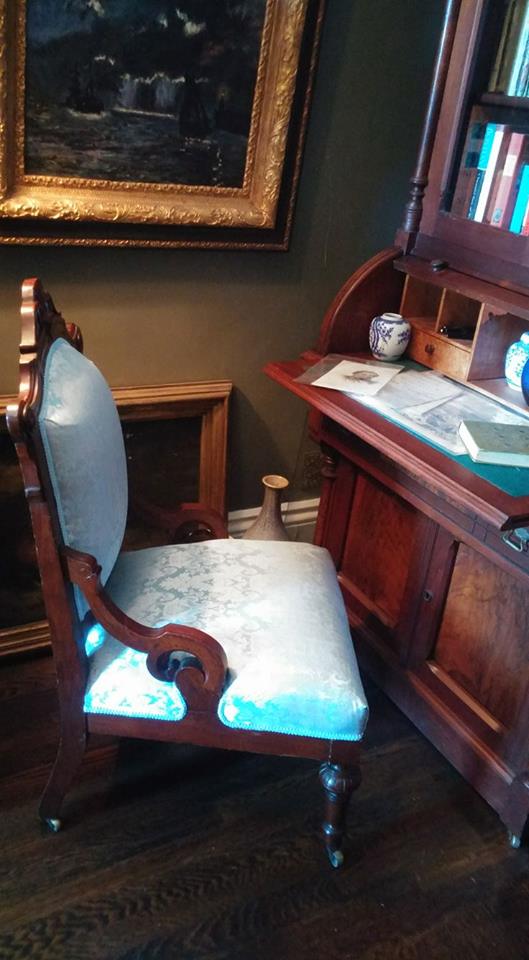
Restoration of 1870s Ansonia Mahogany Lady's Chair
Not long ago, one of our faithful clients contacted Old Boston to carry out the restoration of a Victorian 1870s Ansonia mahogany lady's chair with original brass rollers. It had just arrived to Boston from Virginia, where it was purchased at an antique store. It was acquired to complete the furnishing of the master bedroom in an 1850s South End brownstone, and its design beautifully complements the Eastlake secretary with roll top desk in one of the corners of the room, near the main doorway.
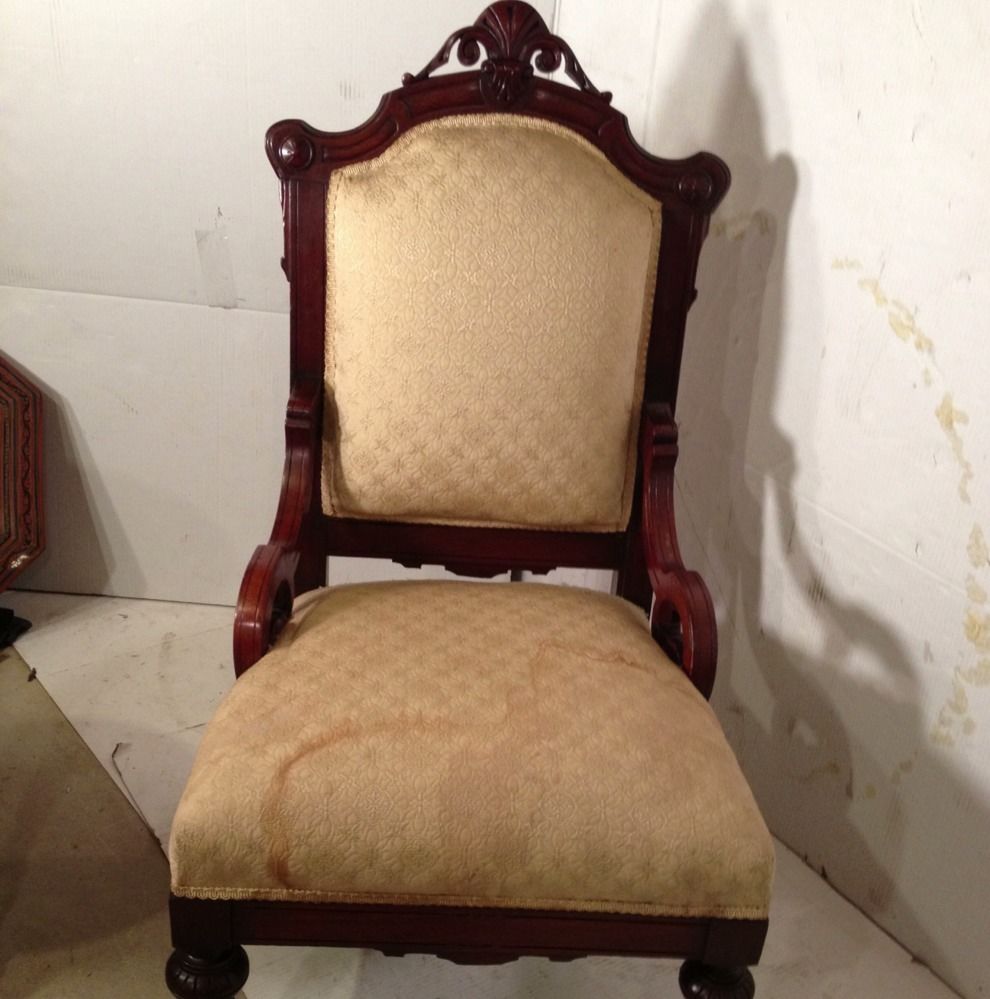
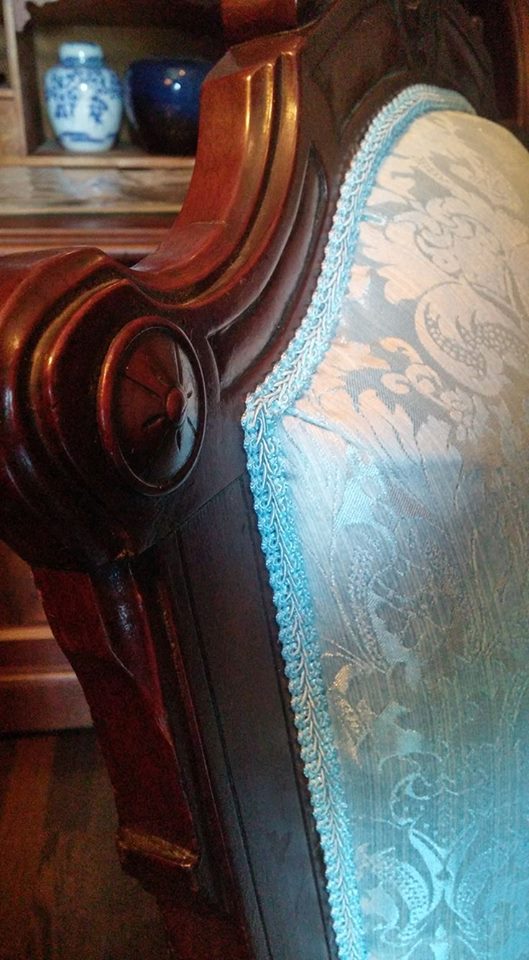
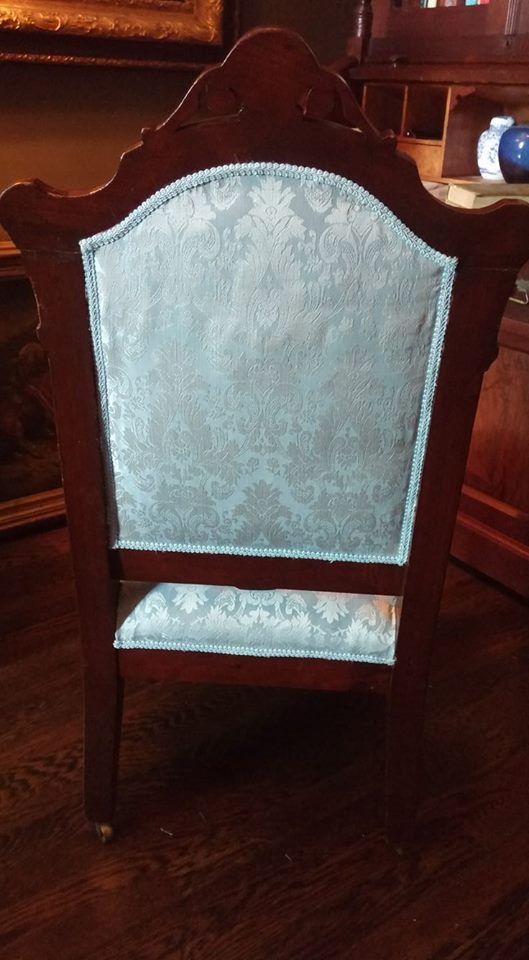
The chair was in solid shape and in good cosmetic condition; it only needed a small repair to a fine crack on one of the arms, a good cleaning, and clearly new upholstery!

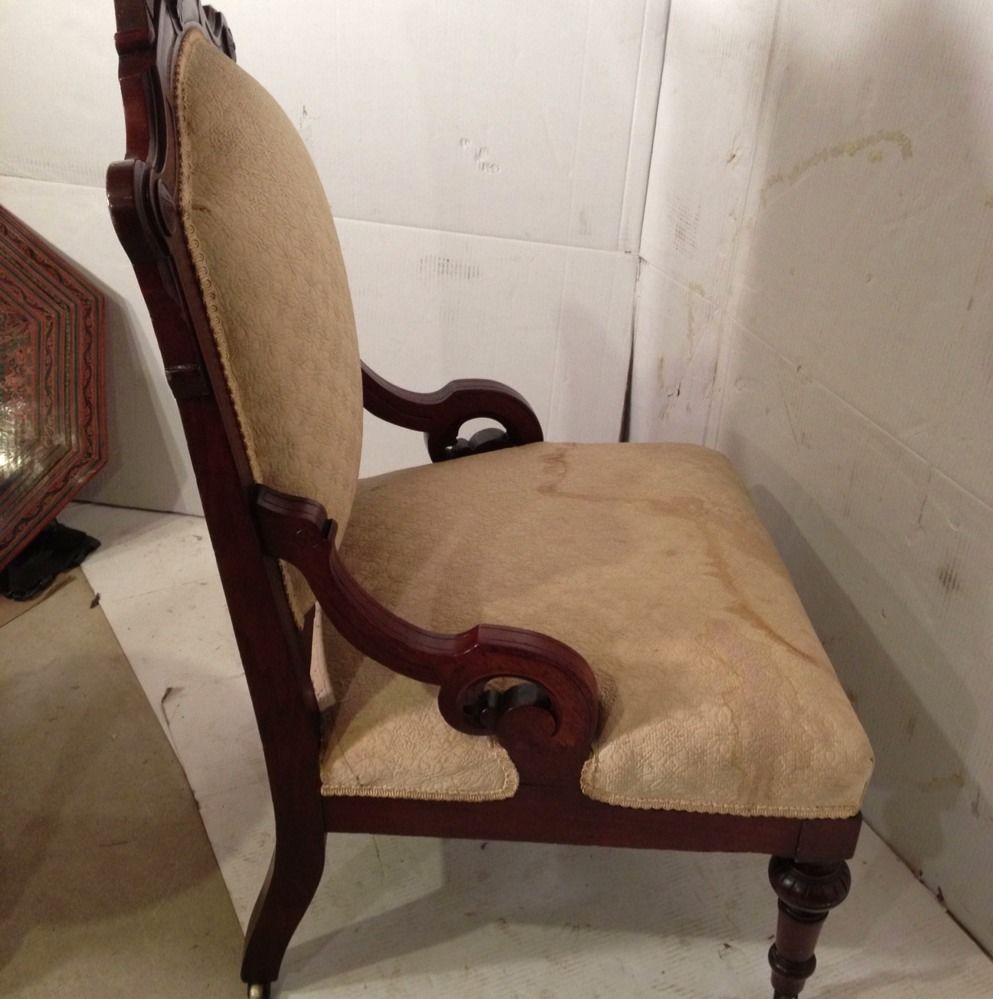
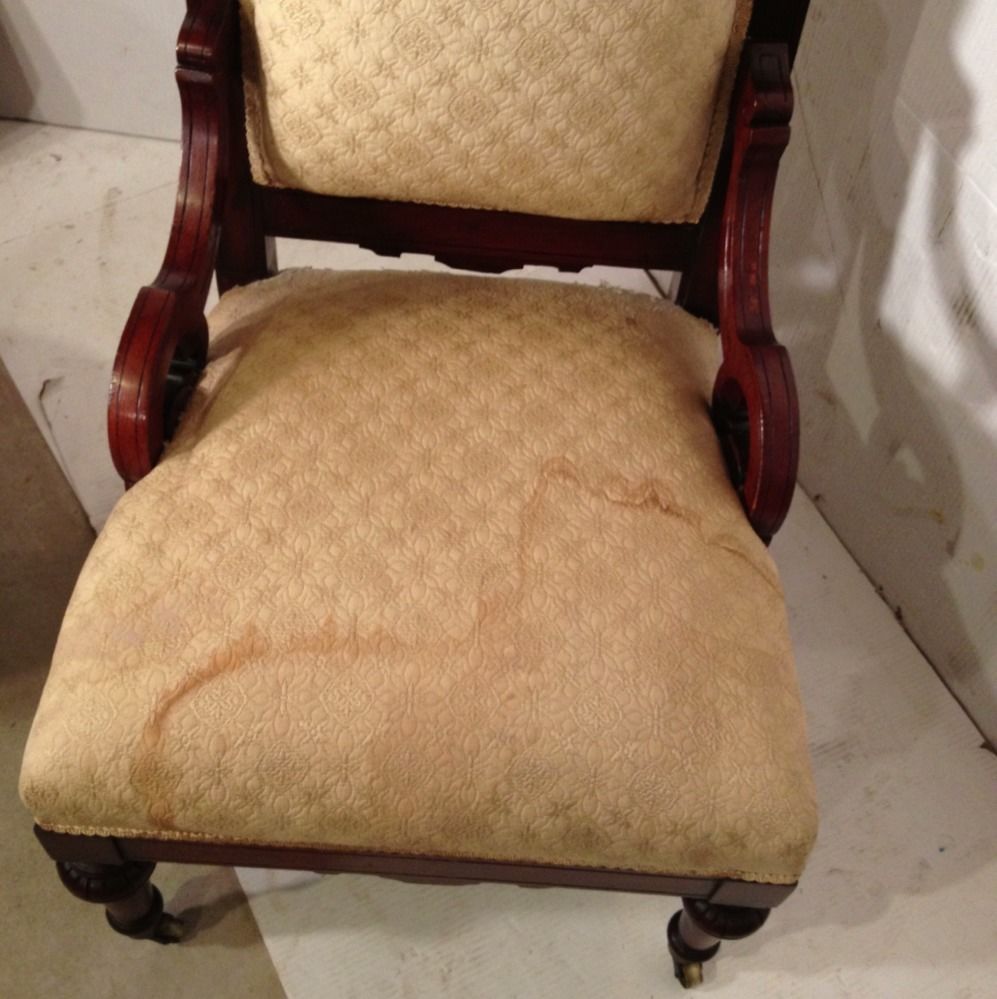
After the necessary repairs, cleaning, and touch-ups to the finish, our master upholsterer recovered it with a beautiful light-blue damask fabric and matching gimp trim. Here is the final result!

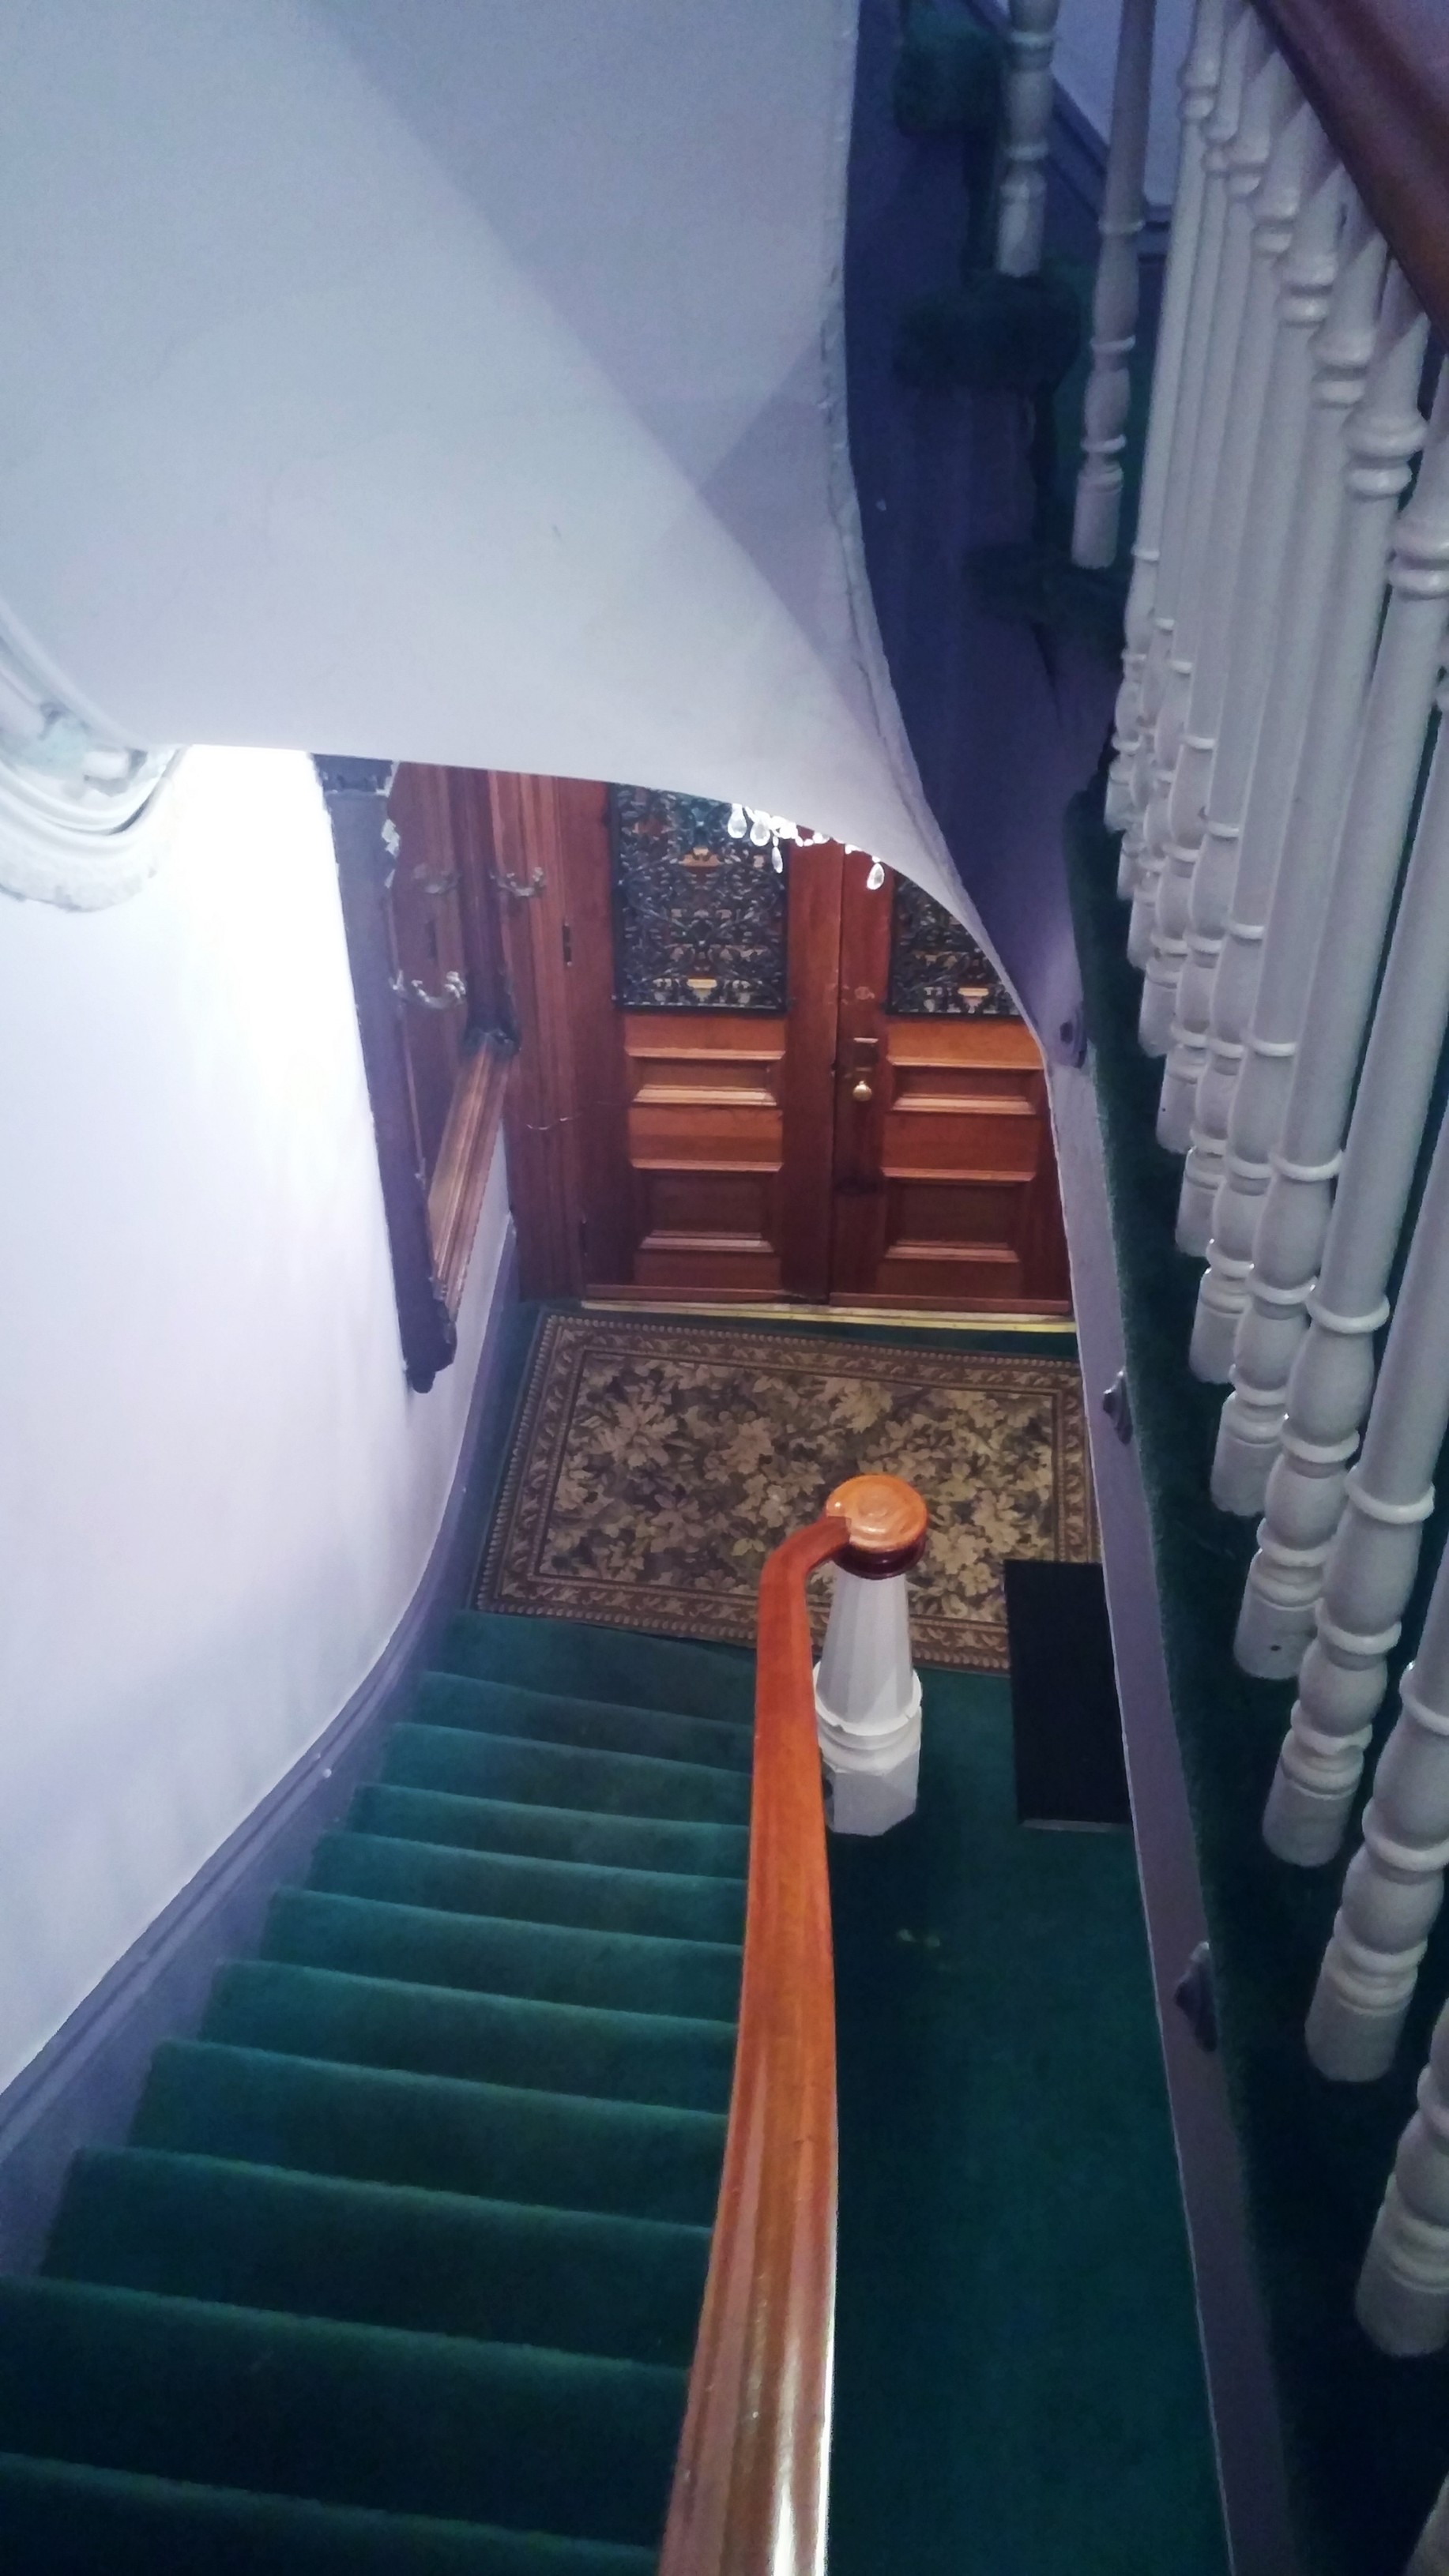
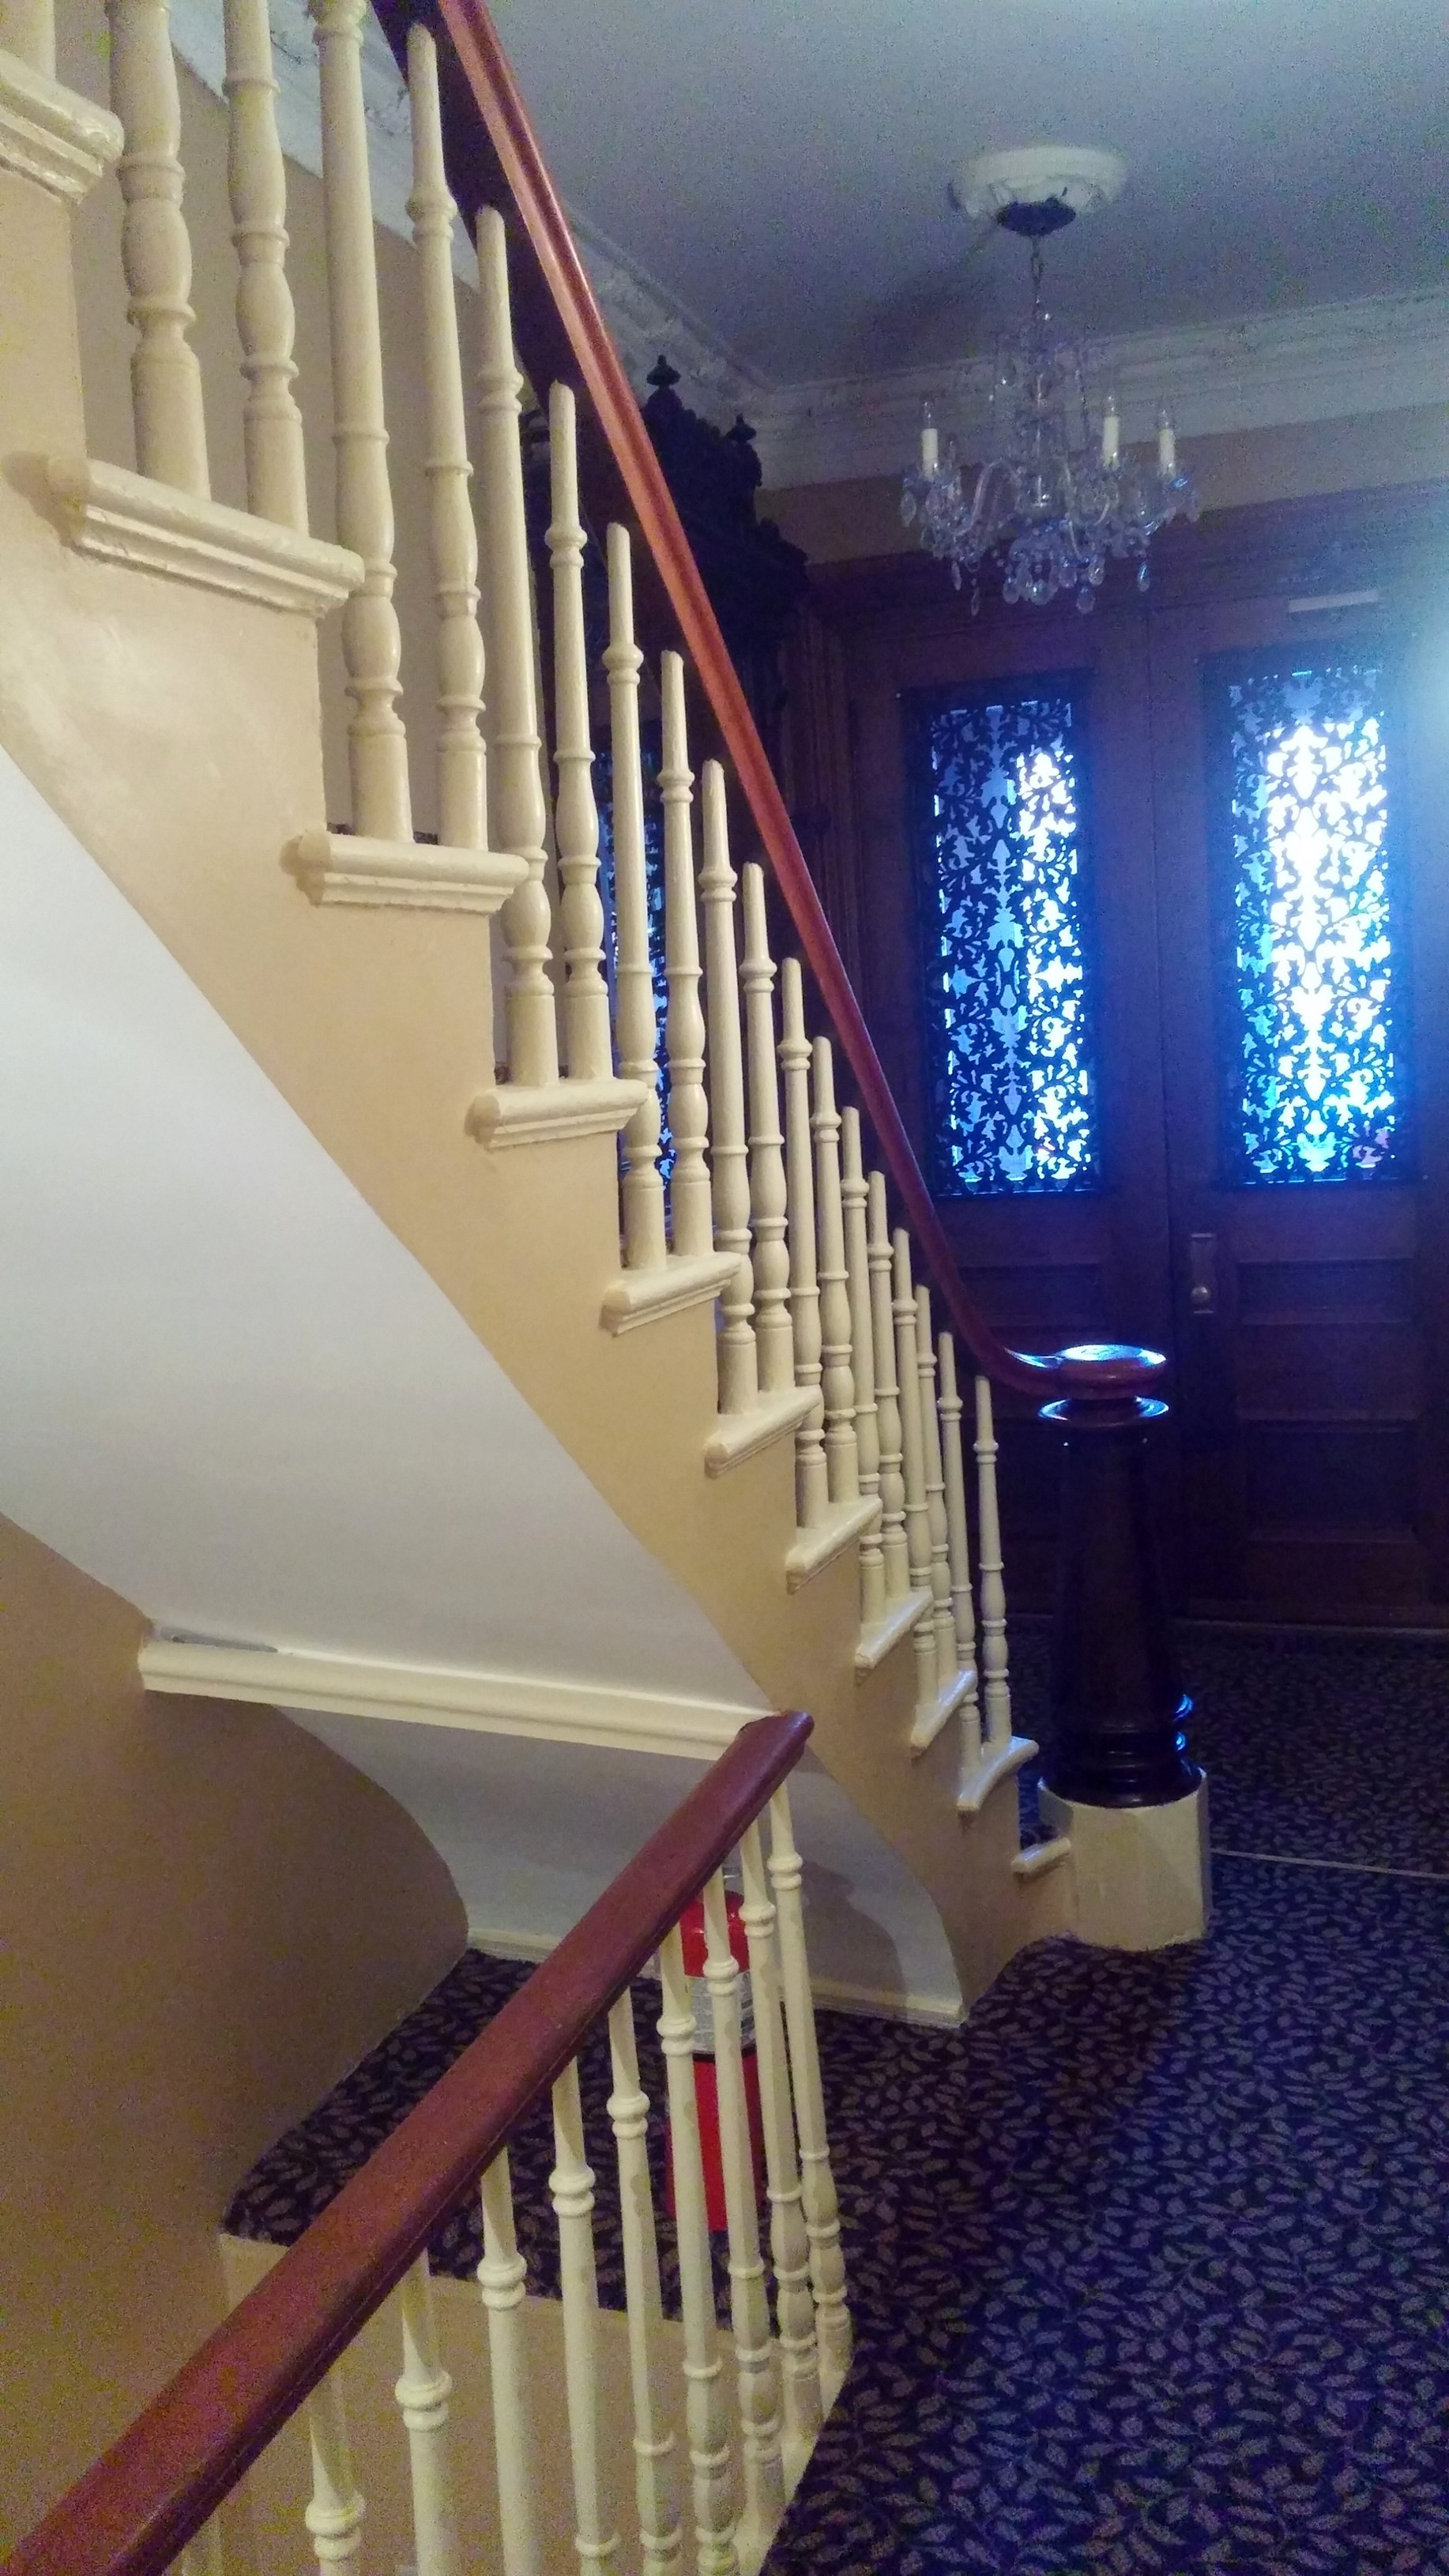
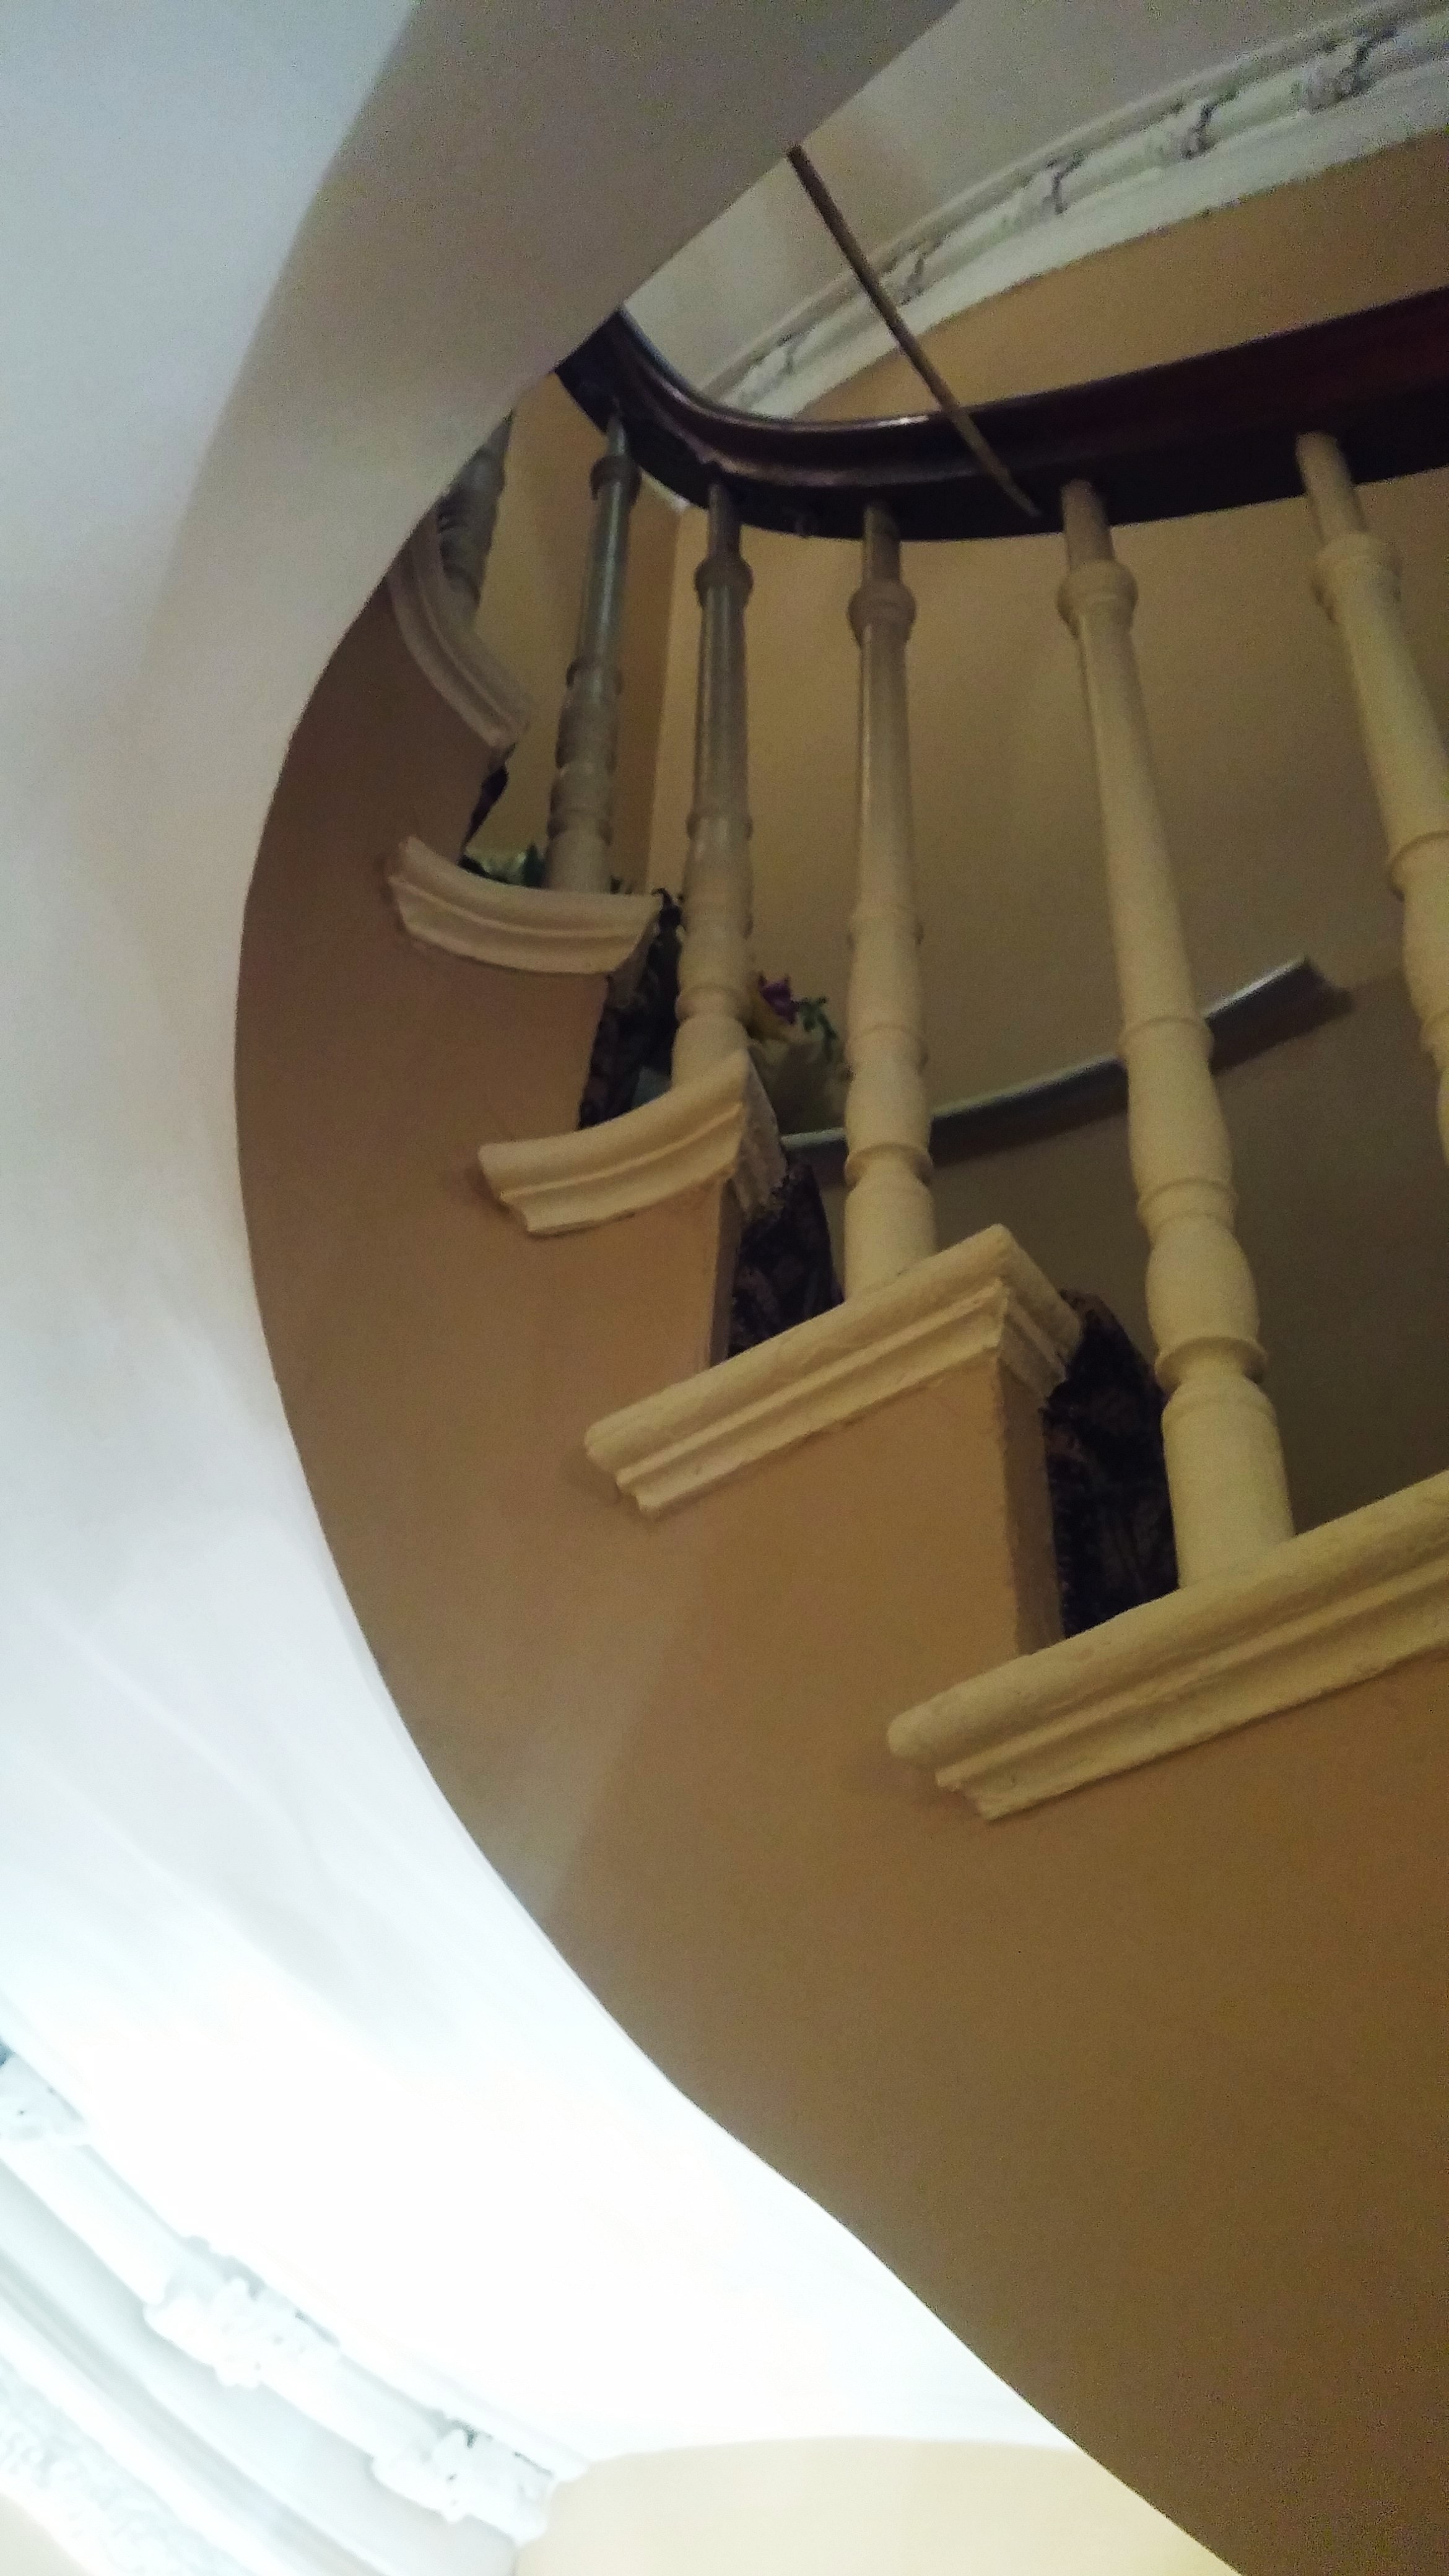
Restoration of Stairwell in 1865 South End Townhouse
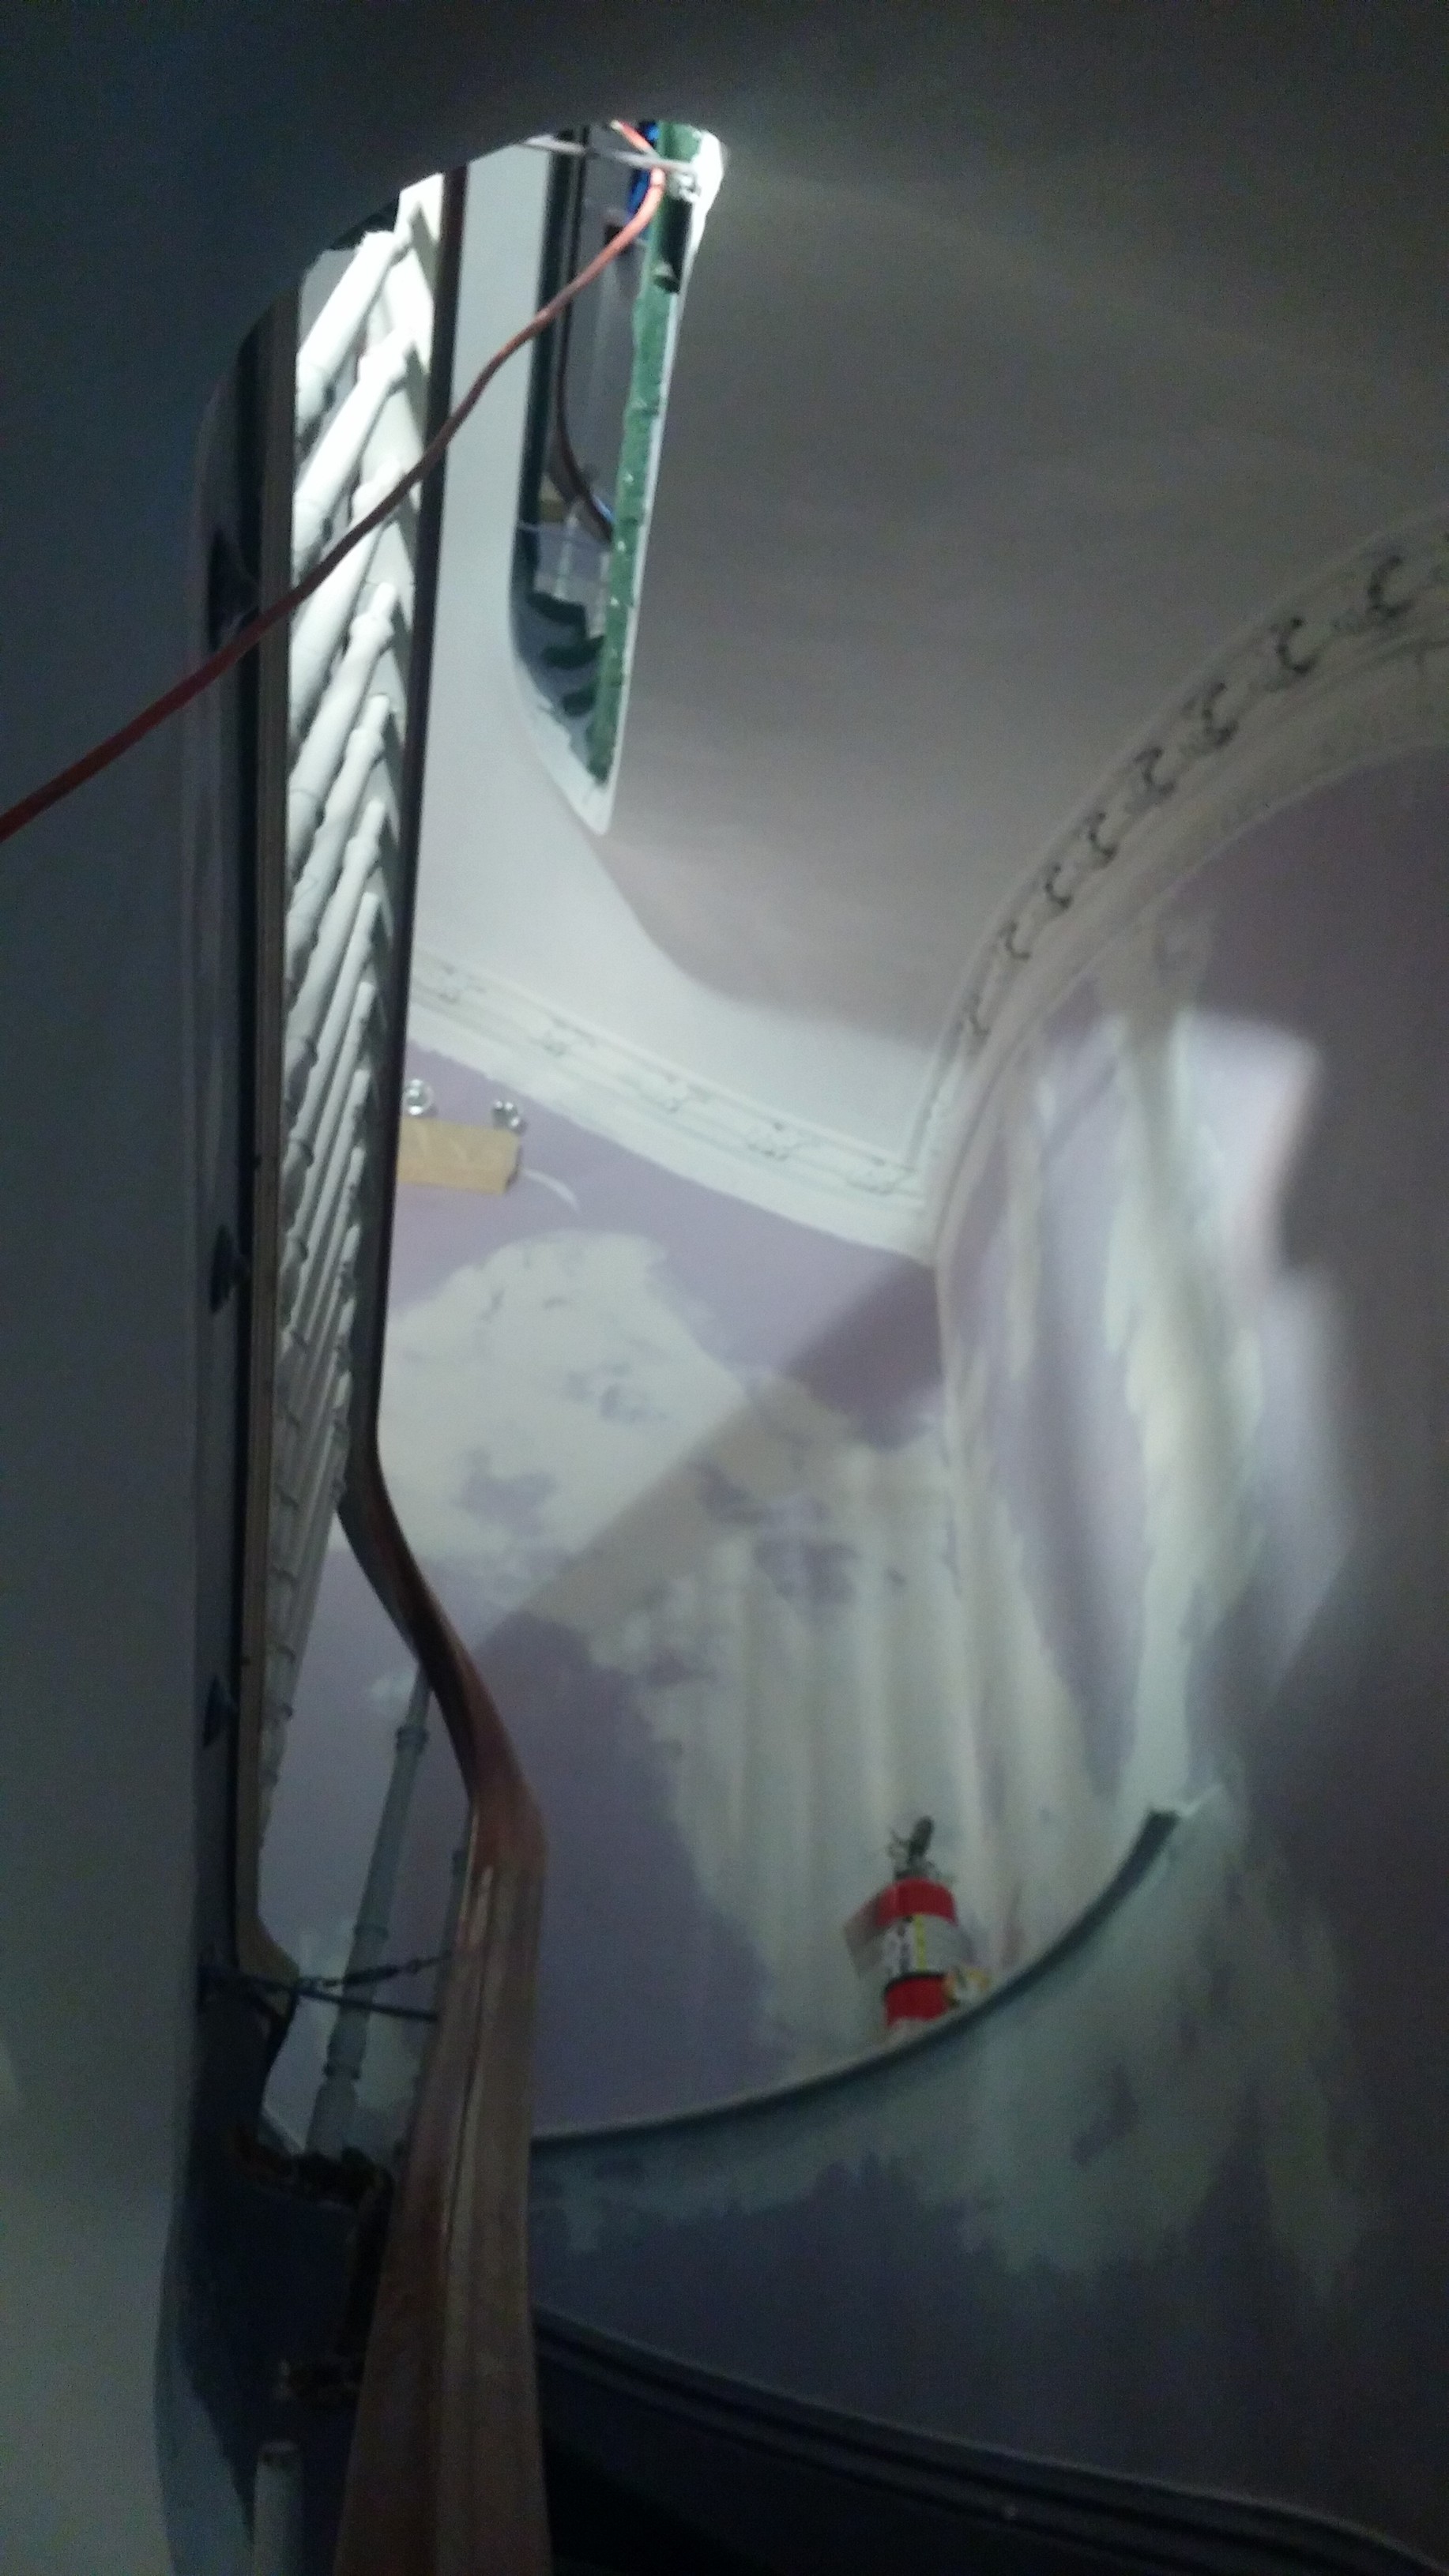
Once the home of John Dickson, a wealthy merchant of distilled liquors, this beautiful 1865 Victorian brownstone is located at what was originally 29 Chester Park, at the outskirts of the South End. Despite the urban decline the area witnessed during the second half of the twentieth century, the building retained its architectural integrity - from the elaborate crown moldings in the first floor's former dining room and library and in the large second-floor reception room, to the marble fireplace mantels, to the attractive walnut doors with their original hardware, to the banister that follows the interminable staircase all the way up to the servants' quarters on the attic floor. Old Boston undertook the restoration of its stairwell - walls, woodwork, ceilings, and crown moldings got a make-over. And most importantly, the emerald green 1970s carpet was finally replaced!
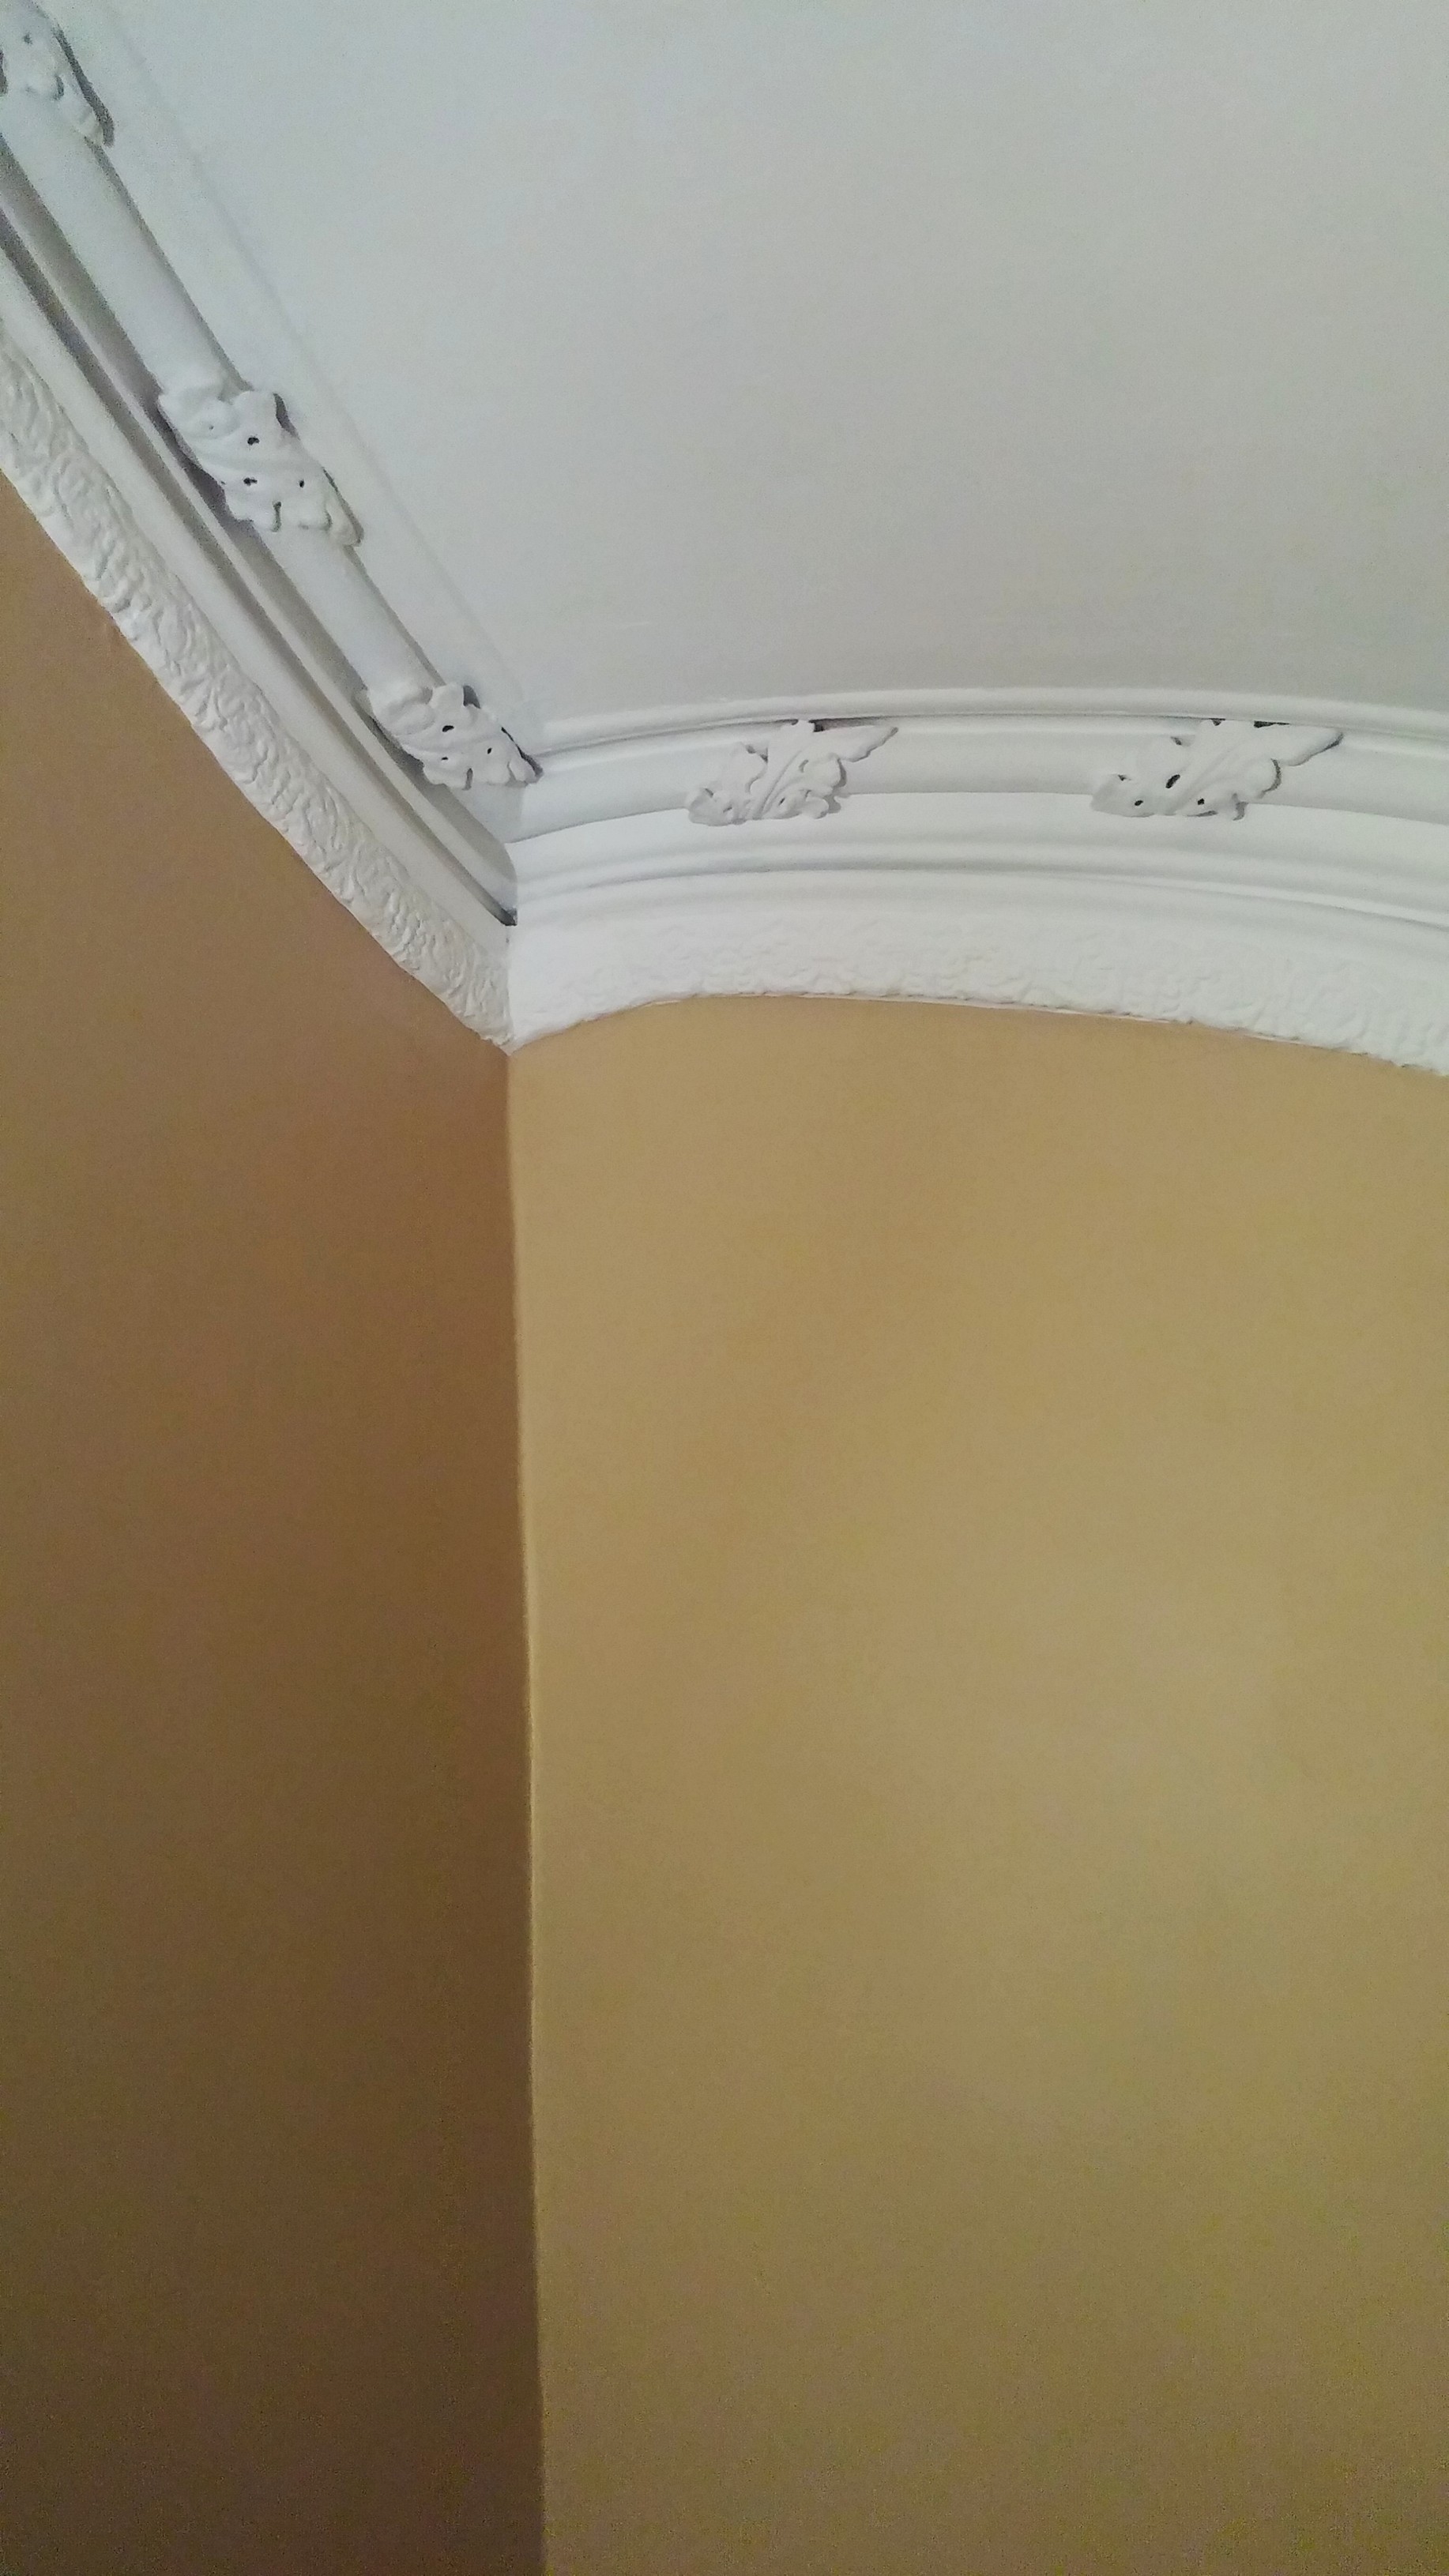
At our recommendation, the owners chose to preserve the Victorian feel of the front hall and stairwell, and restore the original architectural details. It was a joy to see that the plaster crown moldings - the most delicate, vulnerable architectural element in a Victorian room - stood the test of time. Despite a few issues, they were overall in good condition: not one single plaster leaf was damaged or missing.
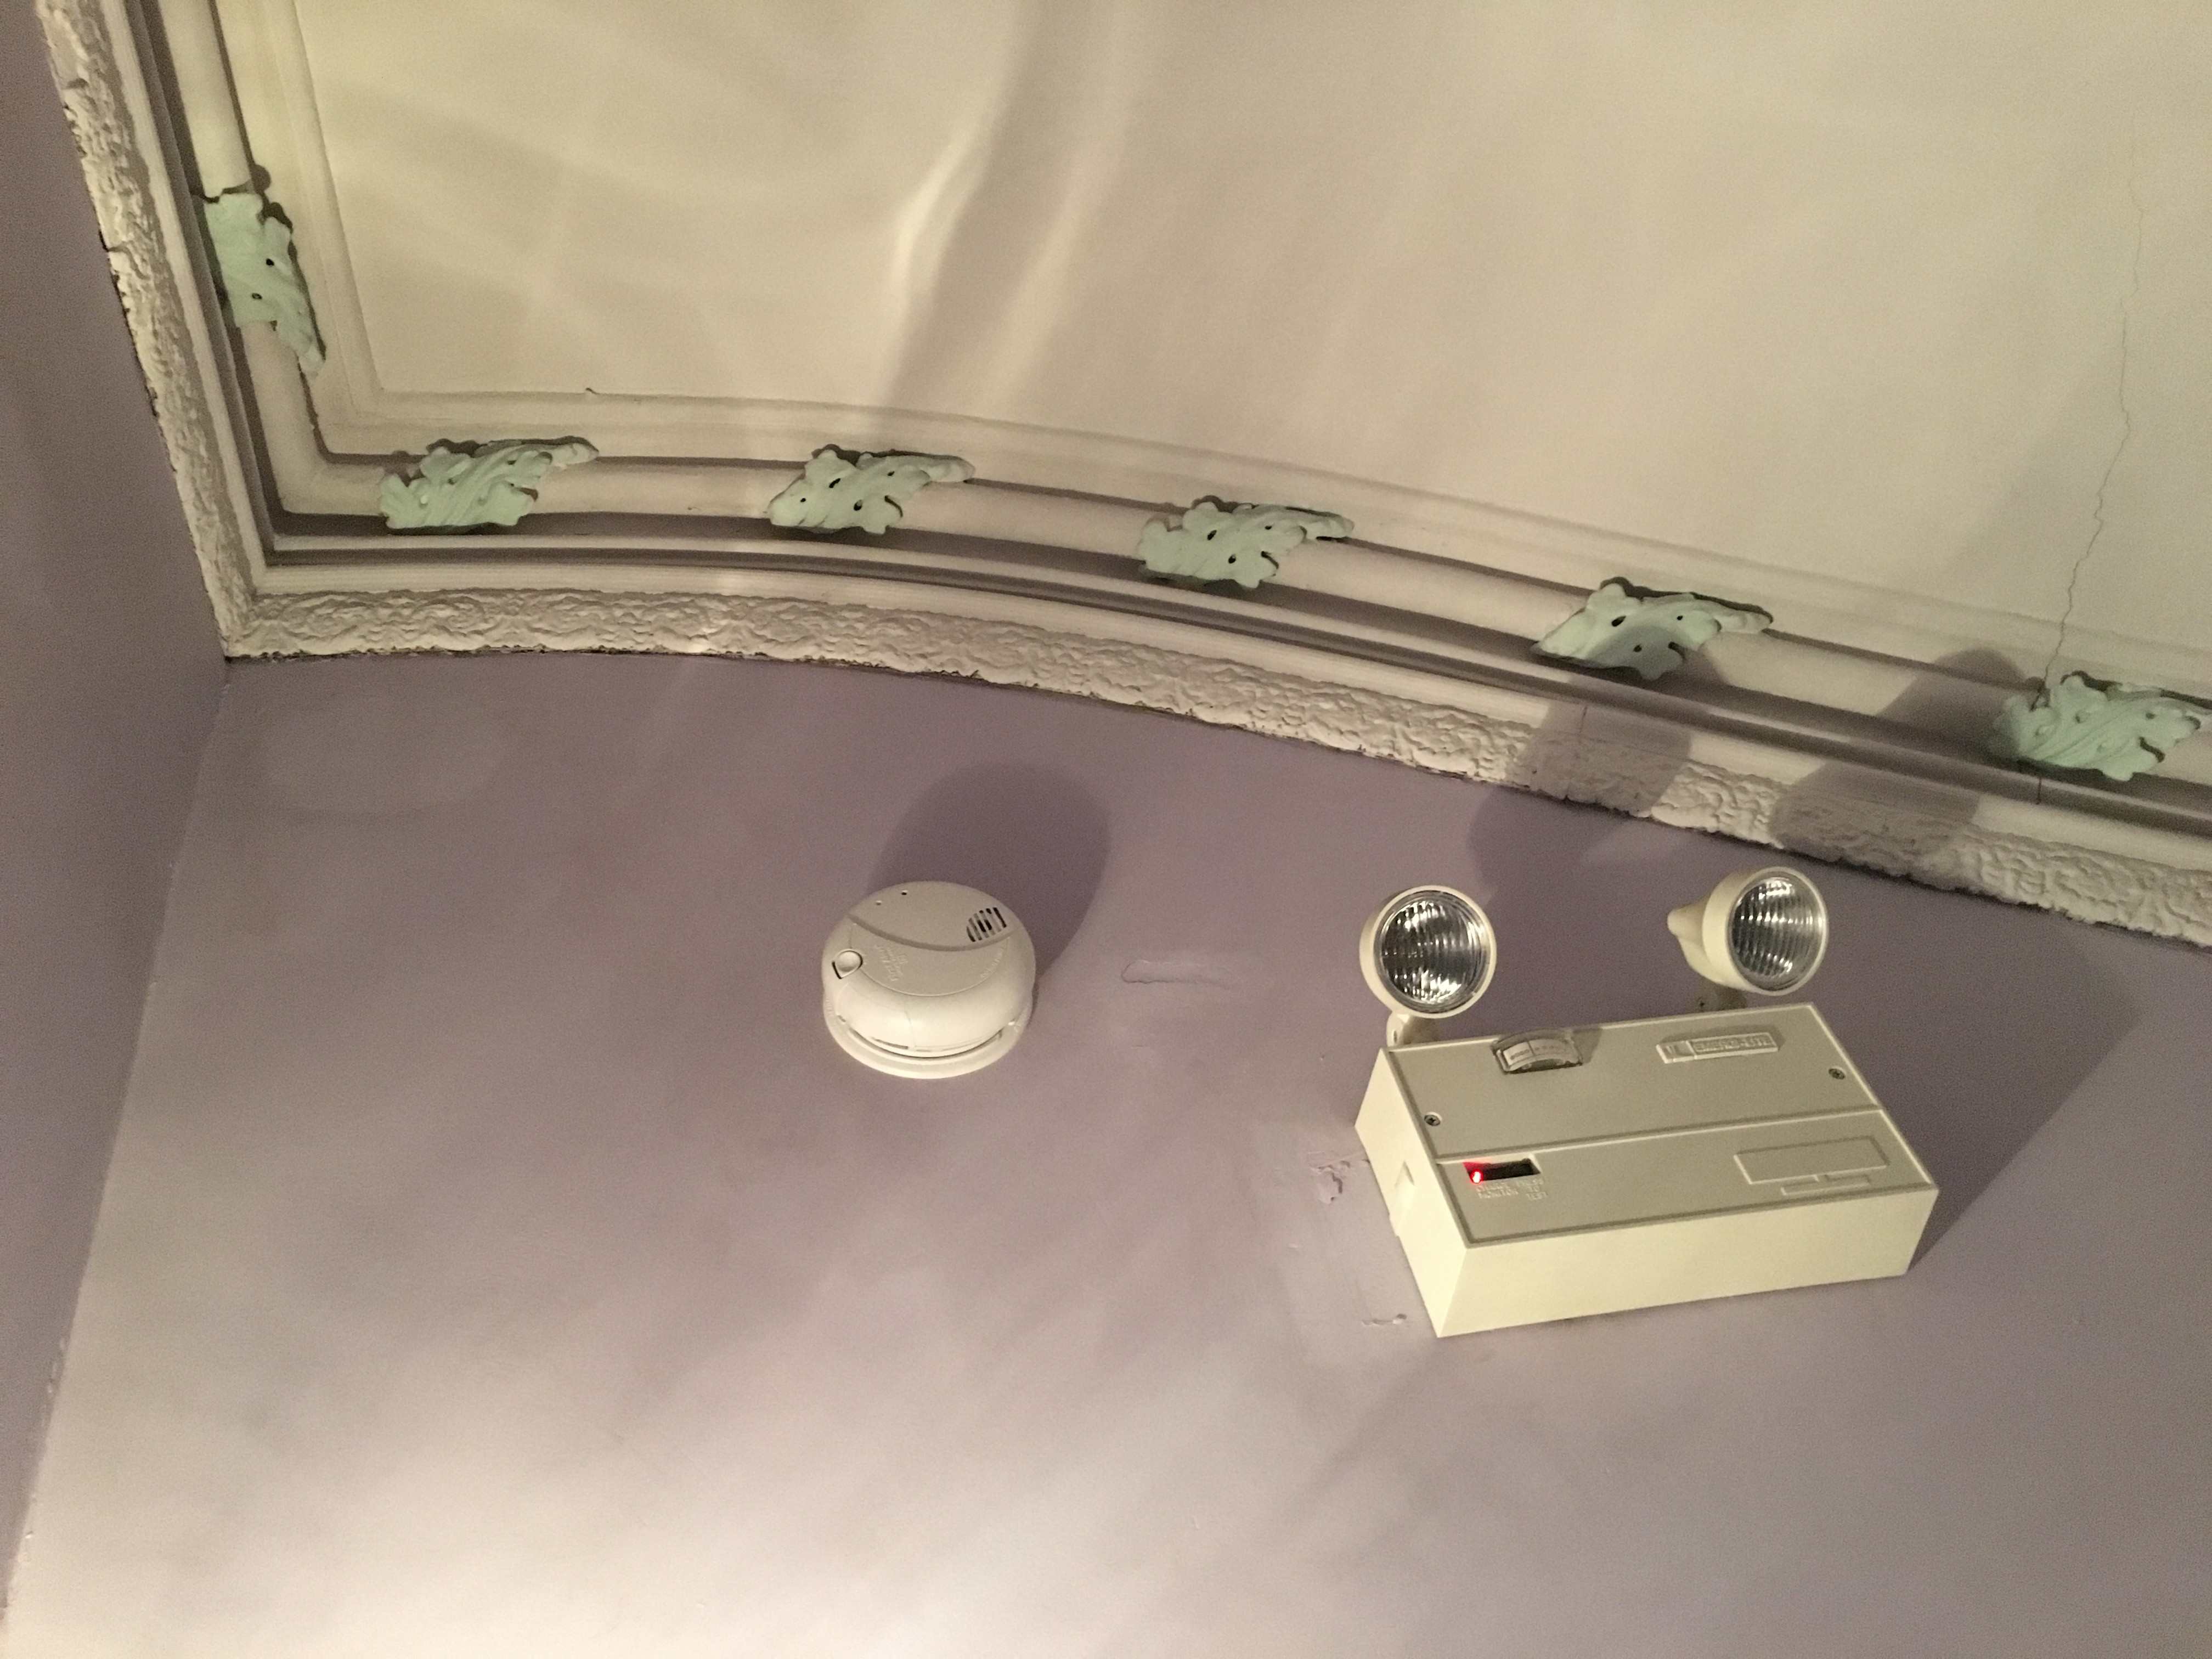
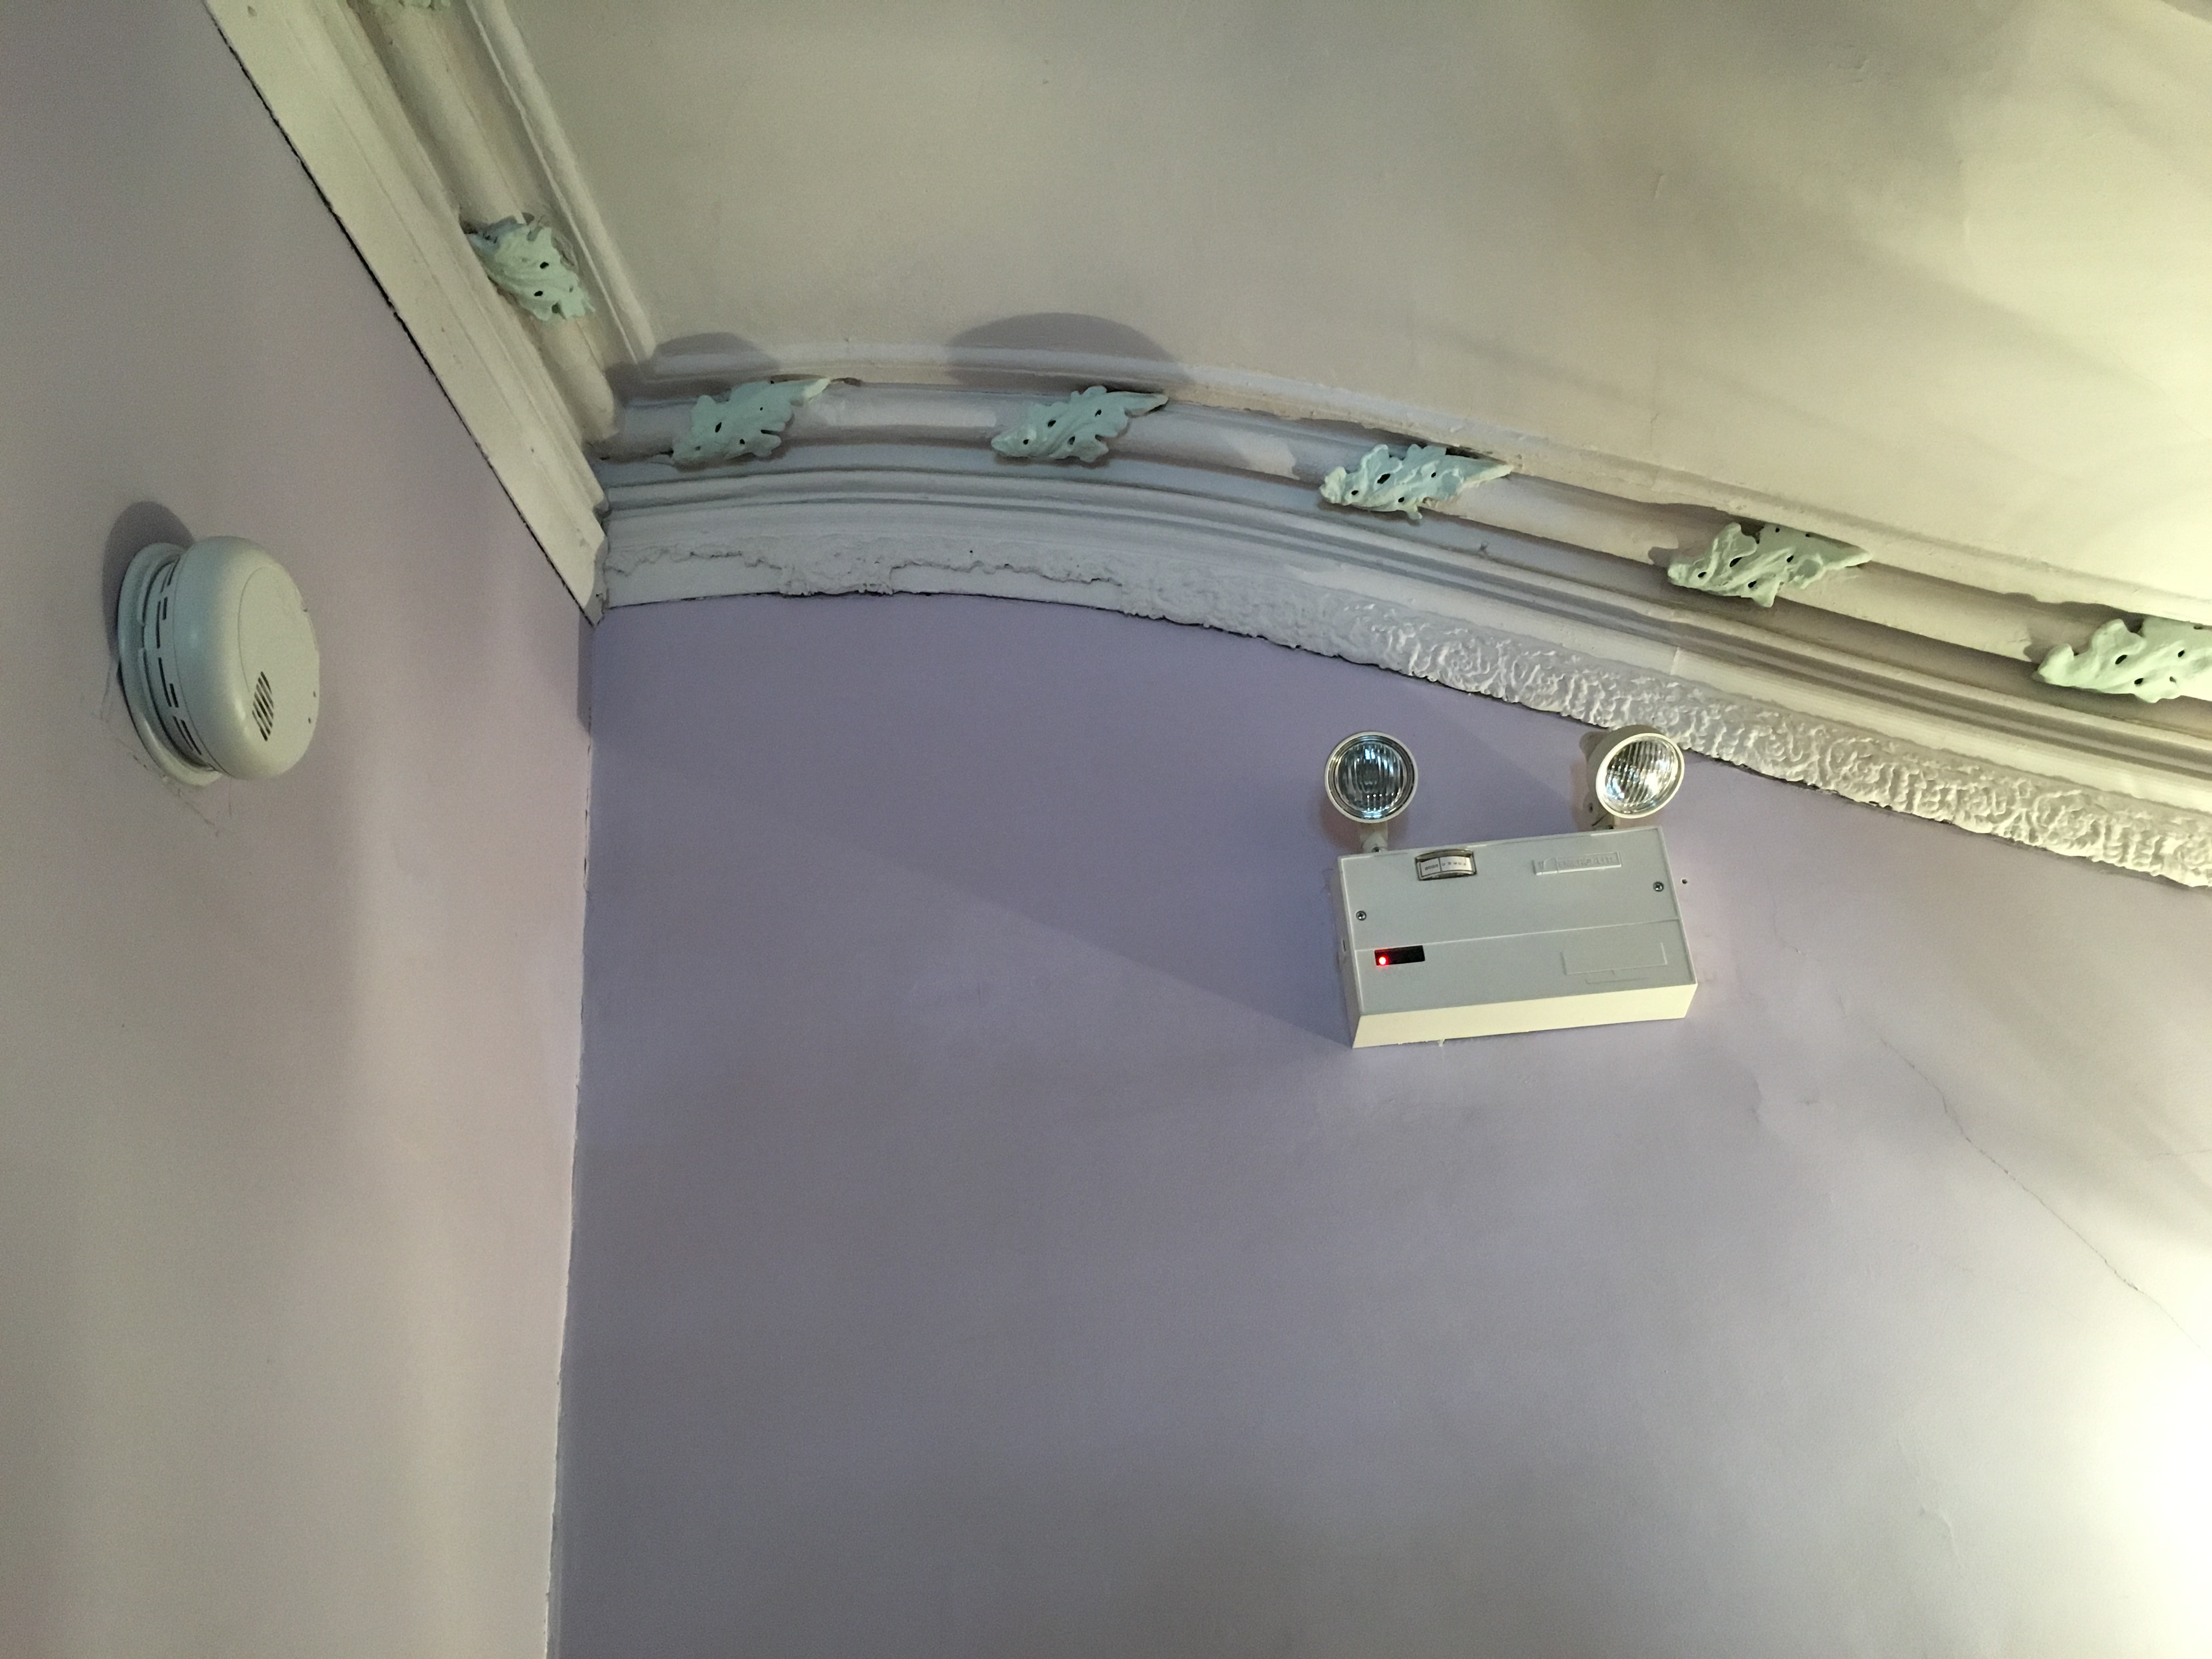
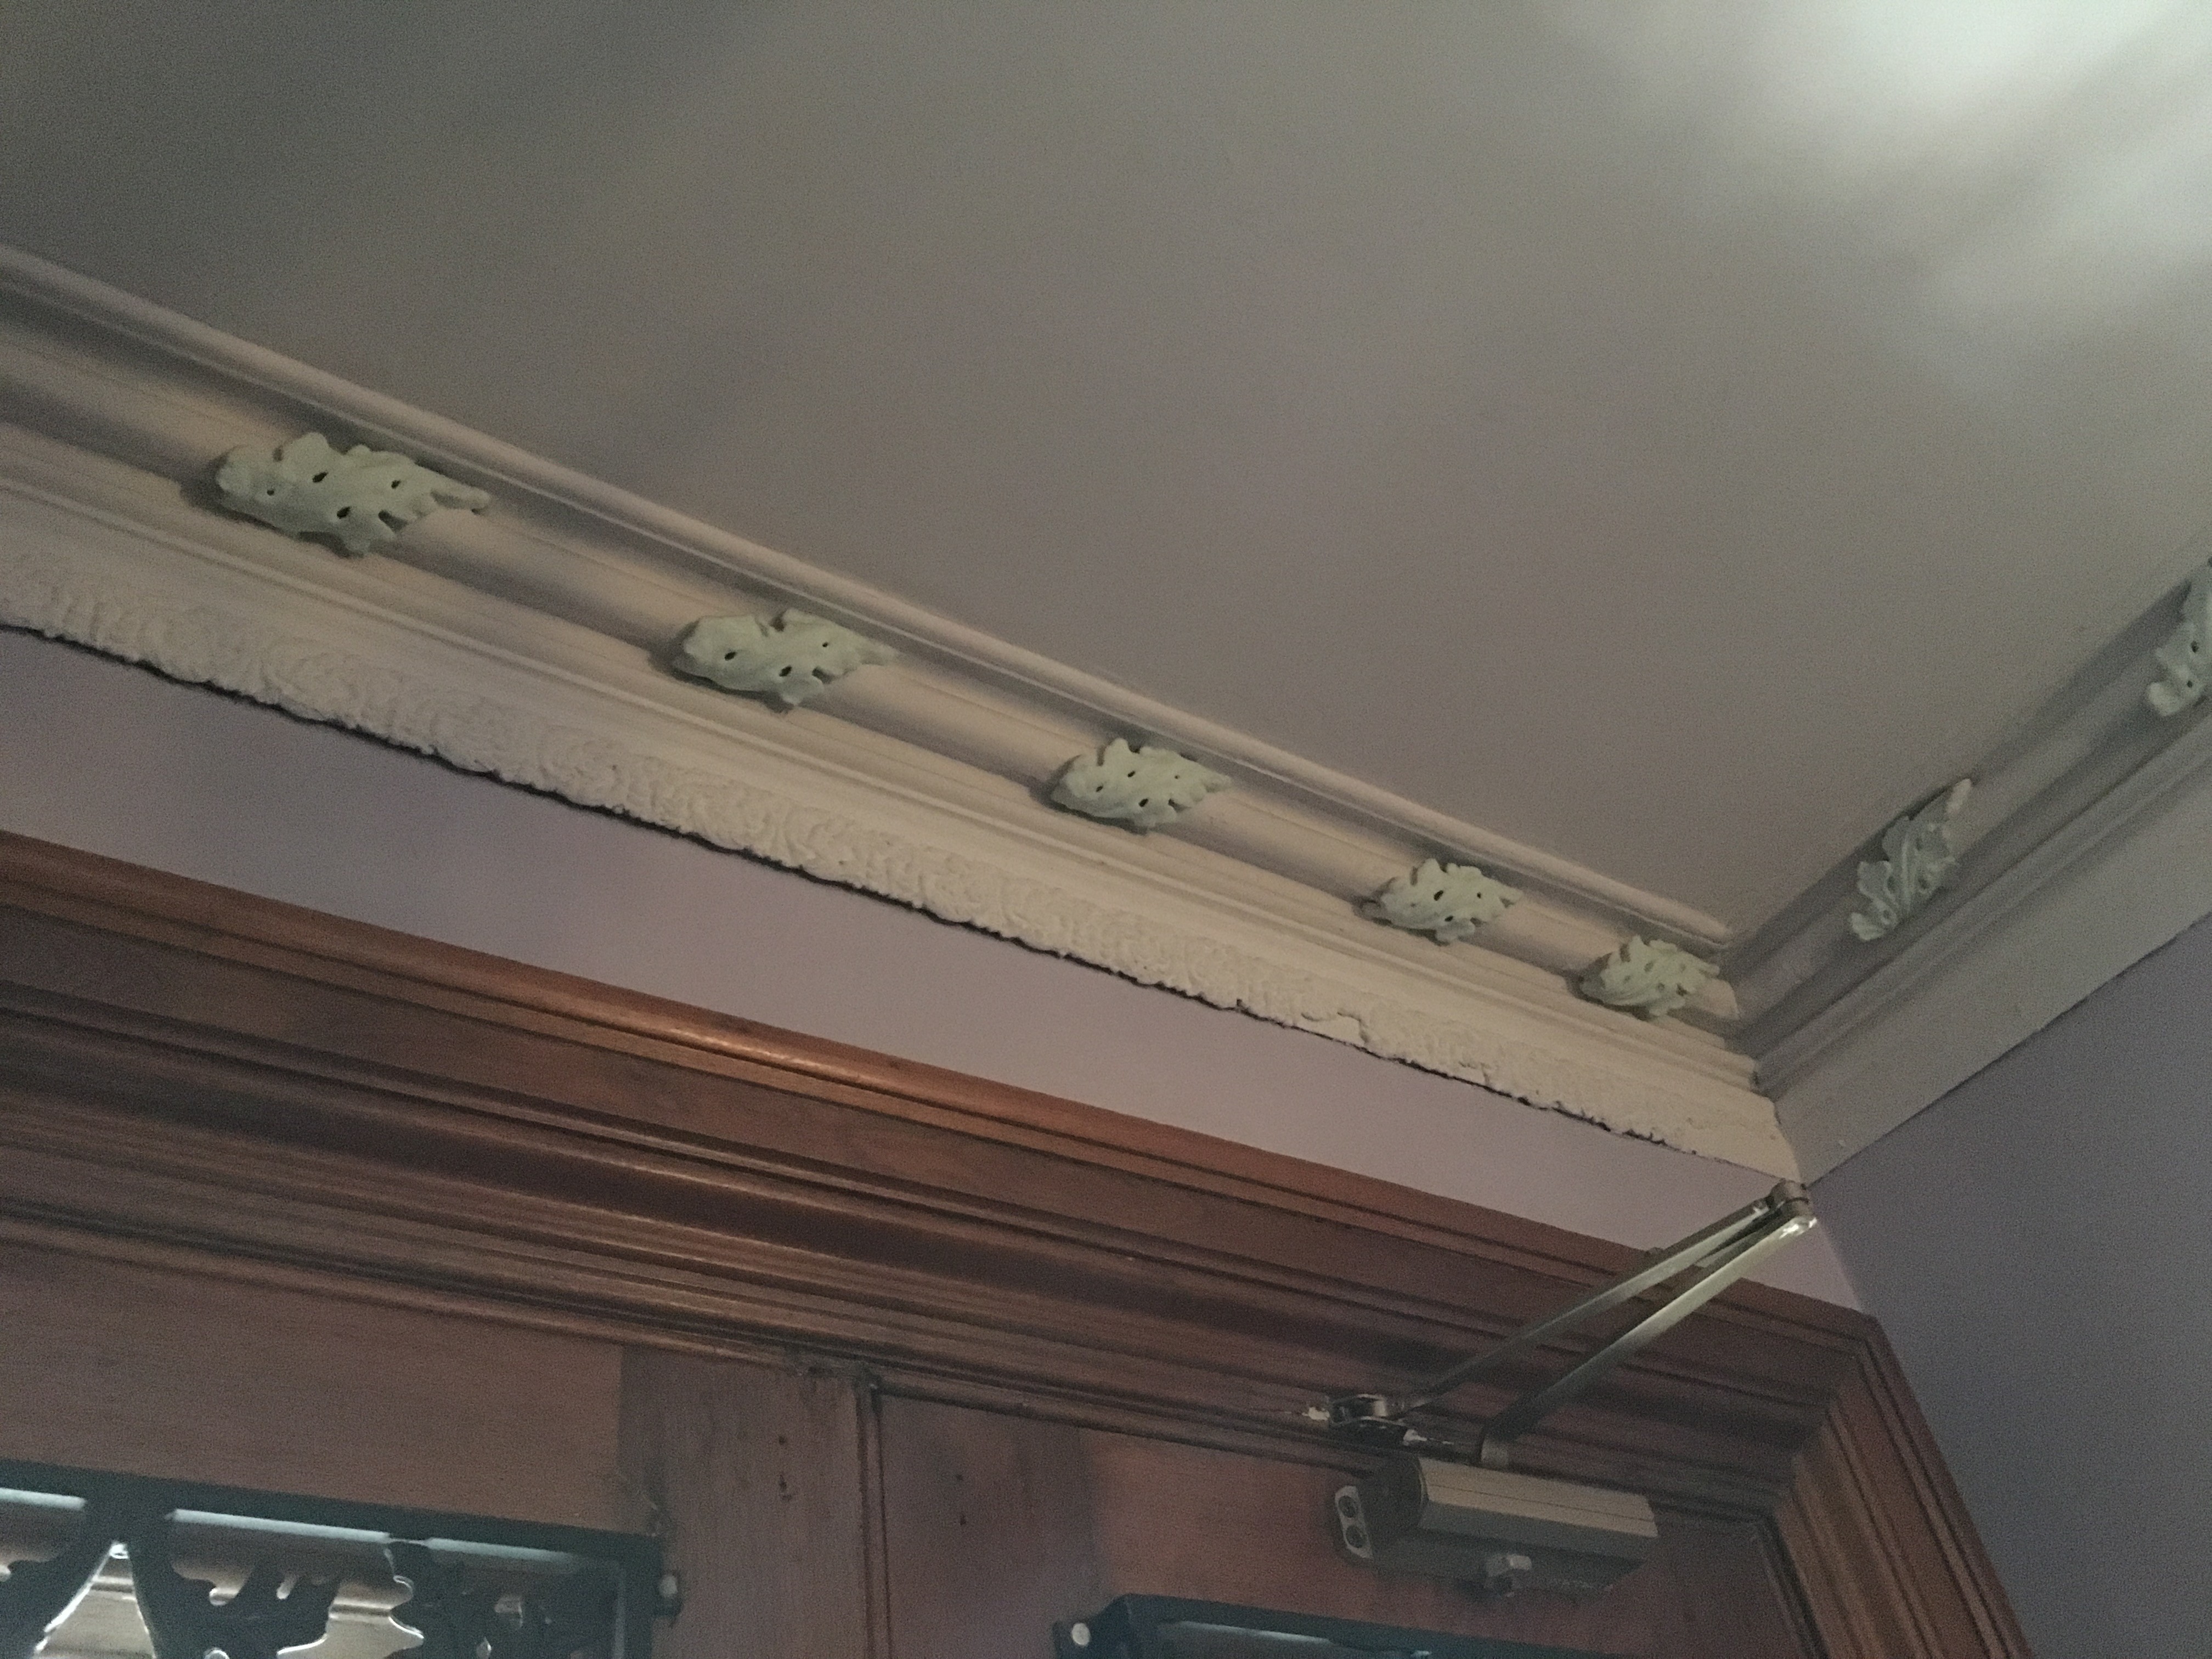
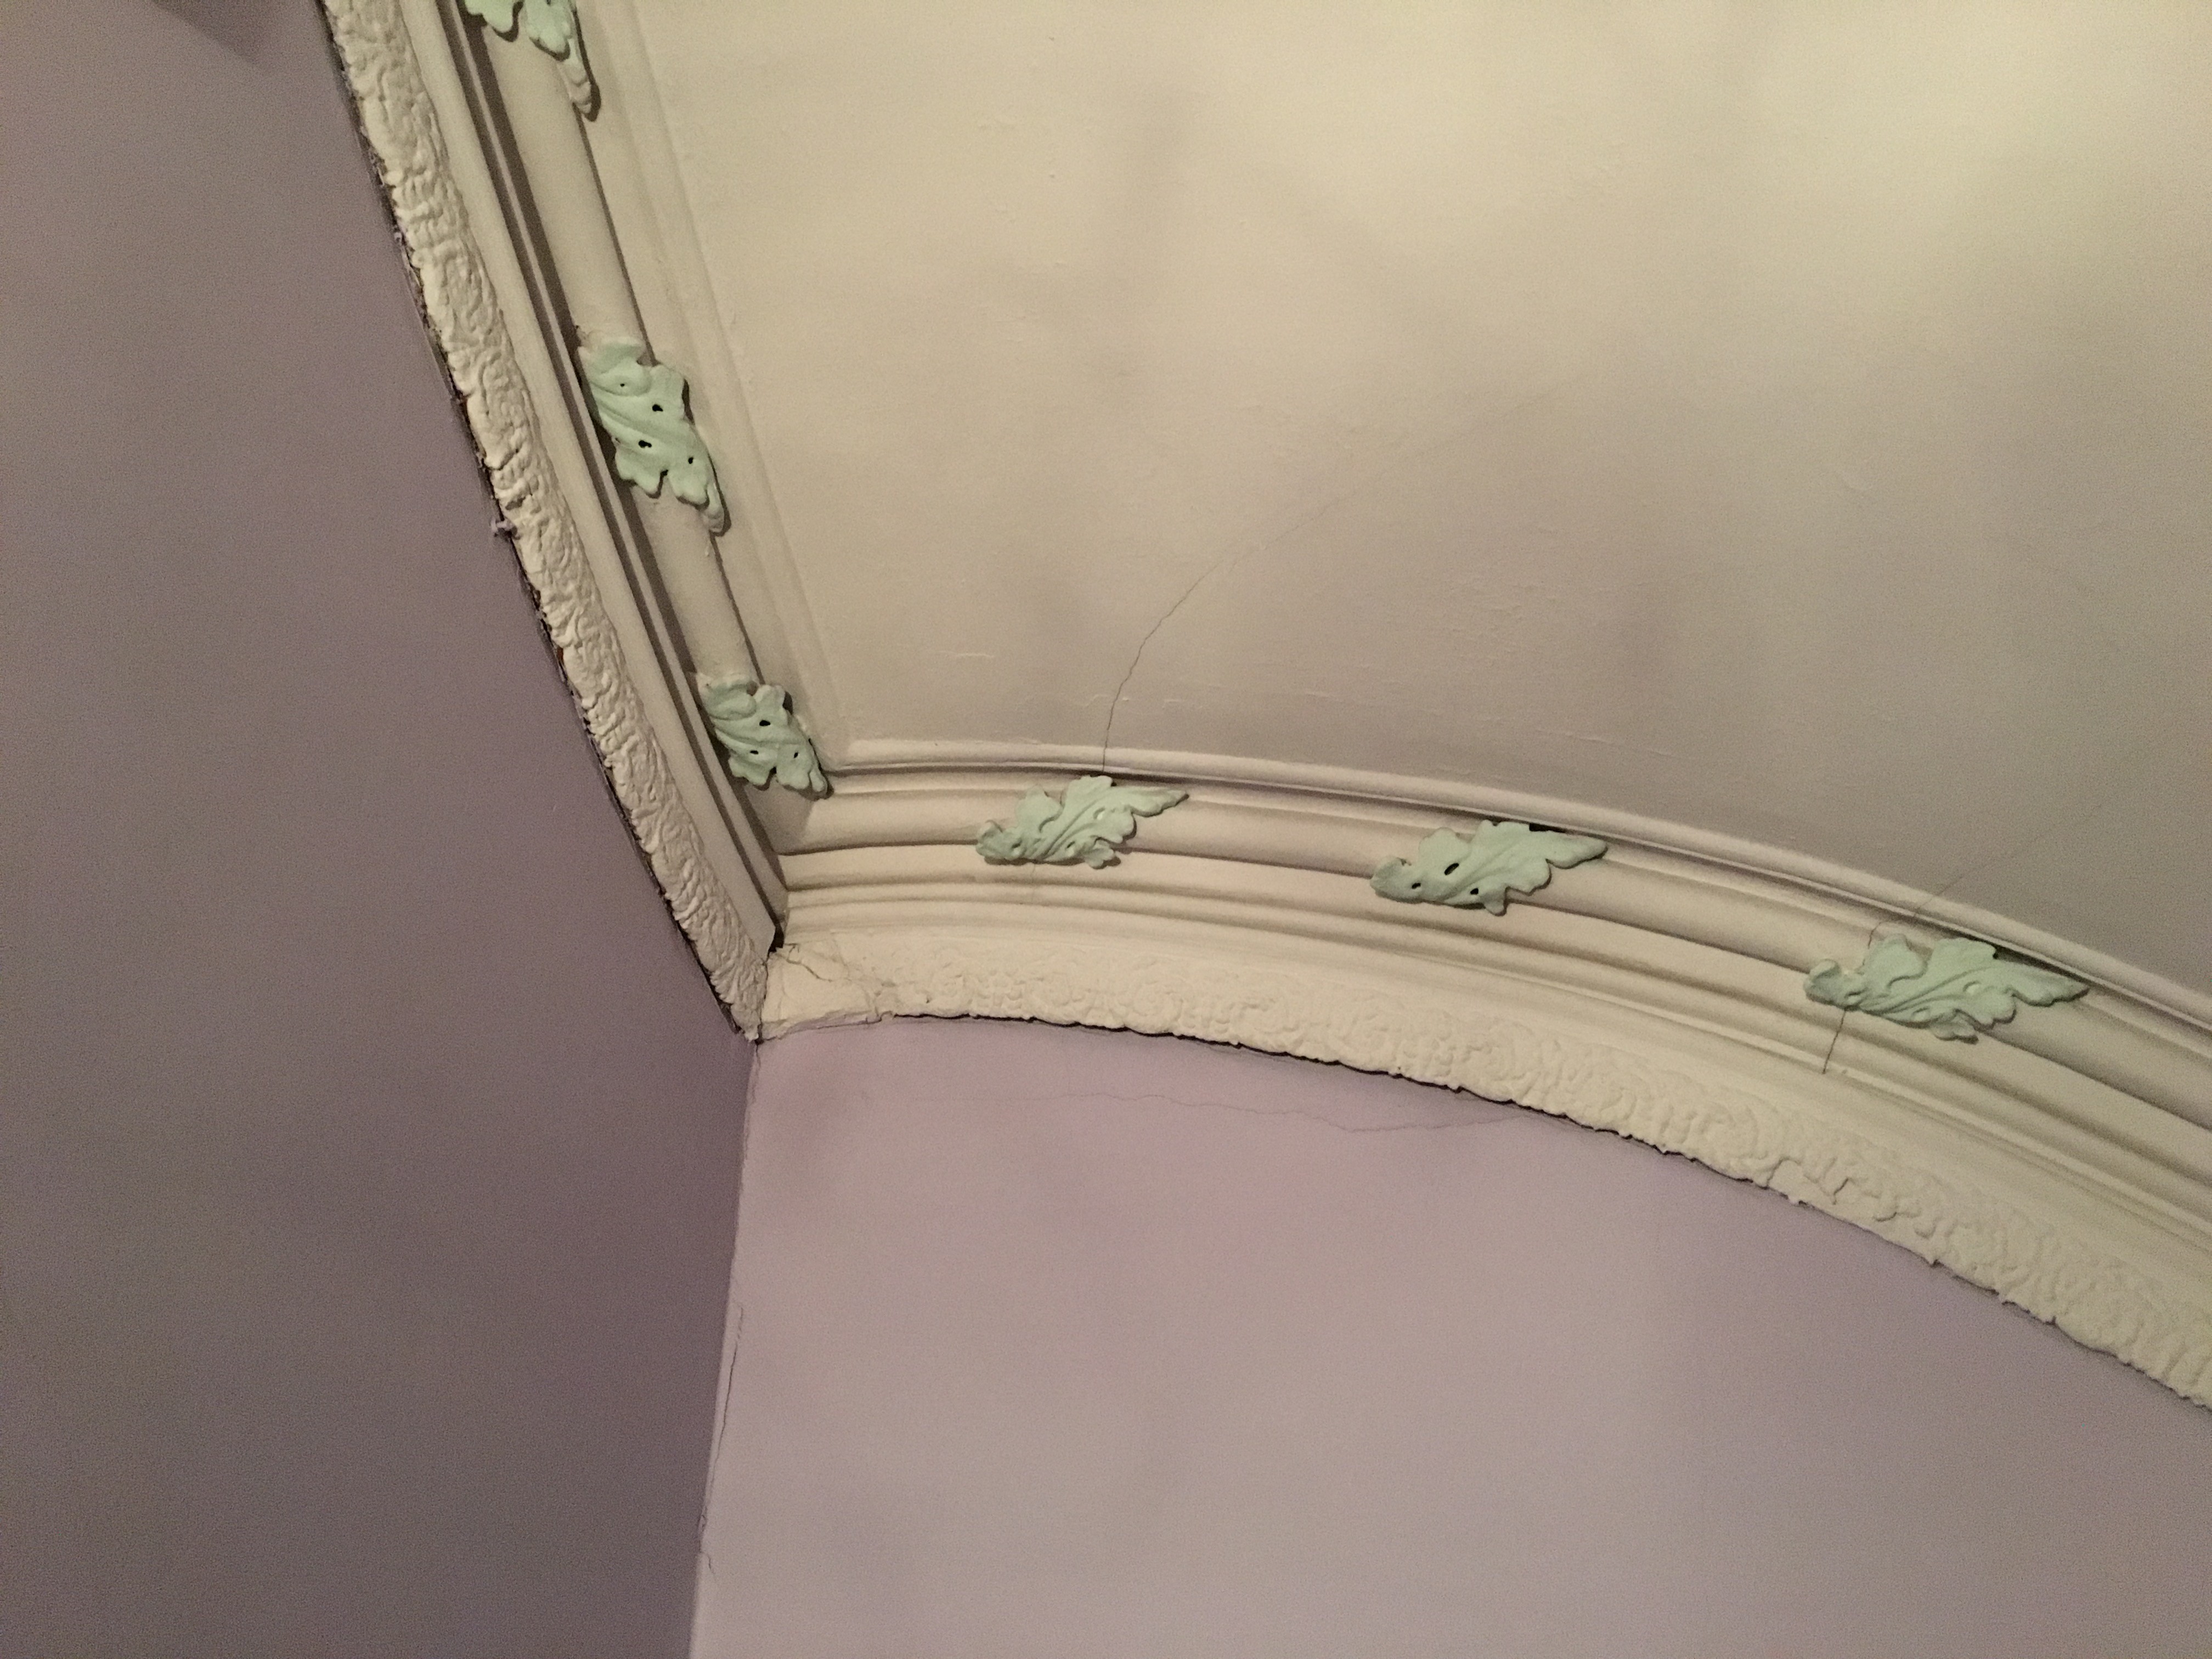
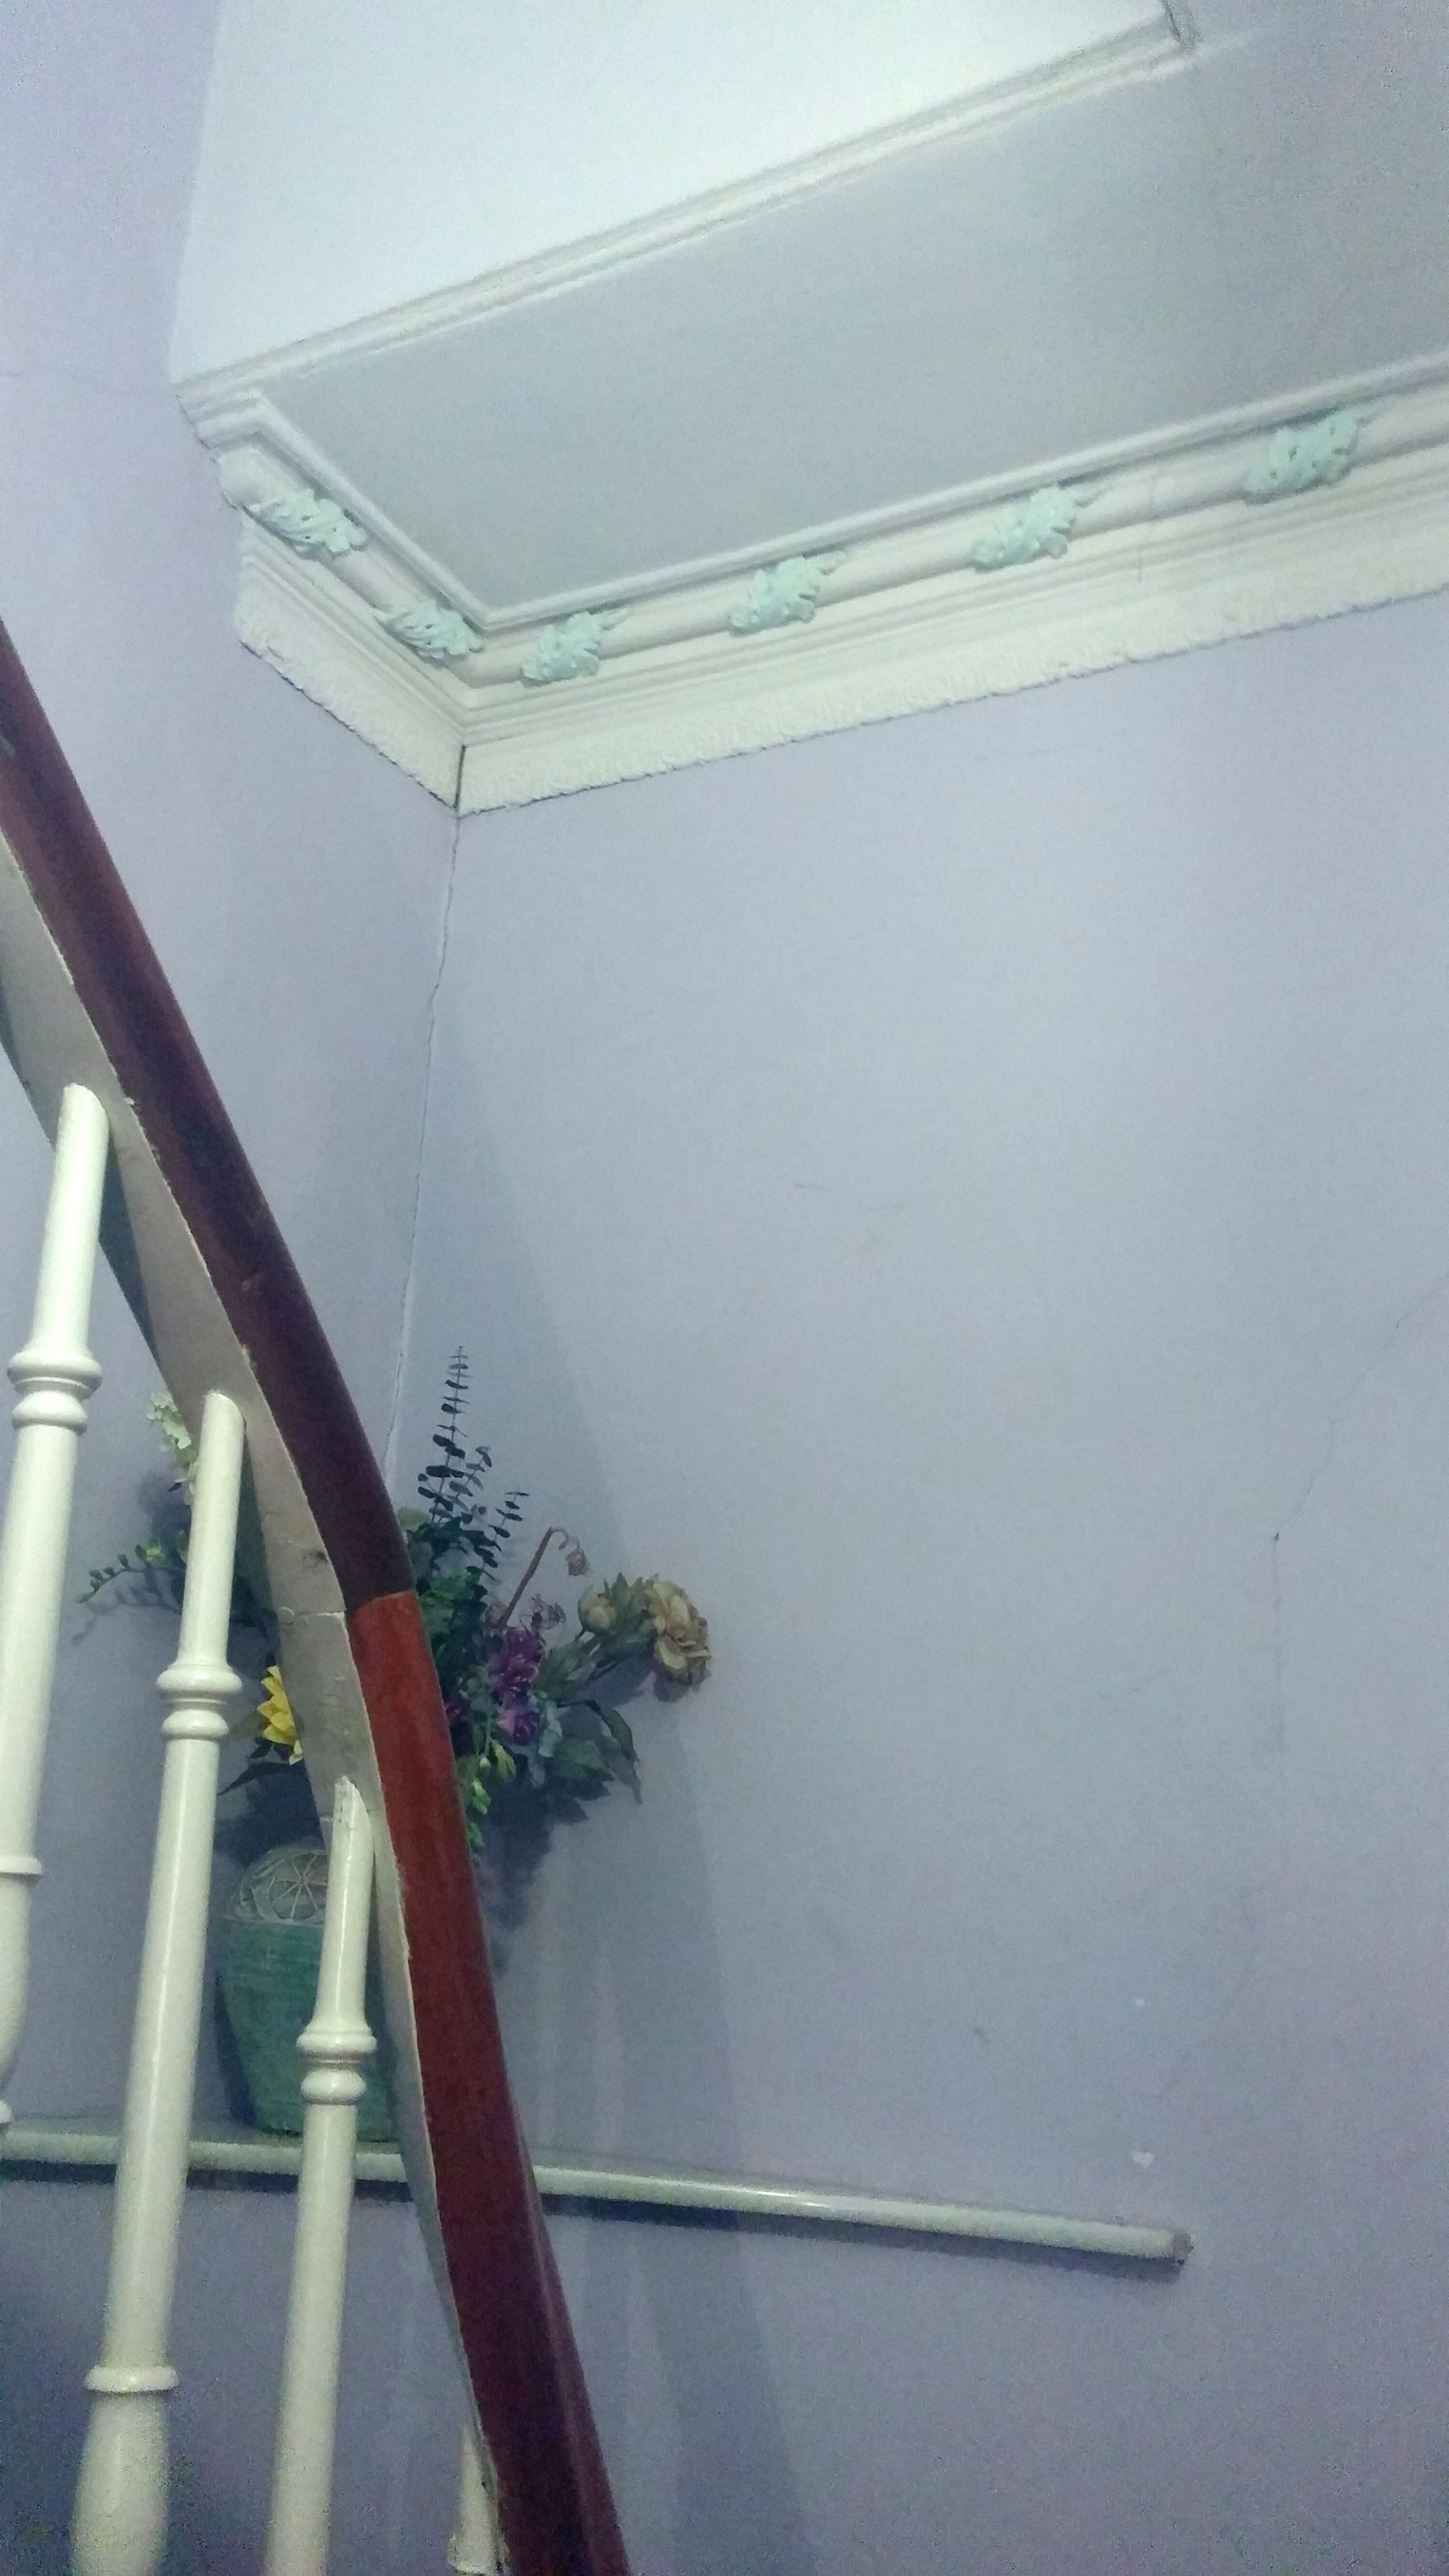
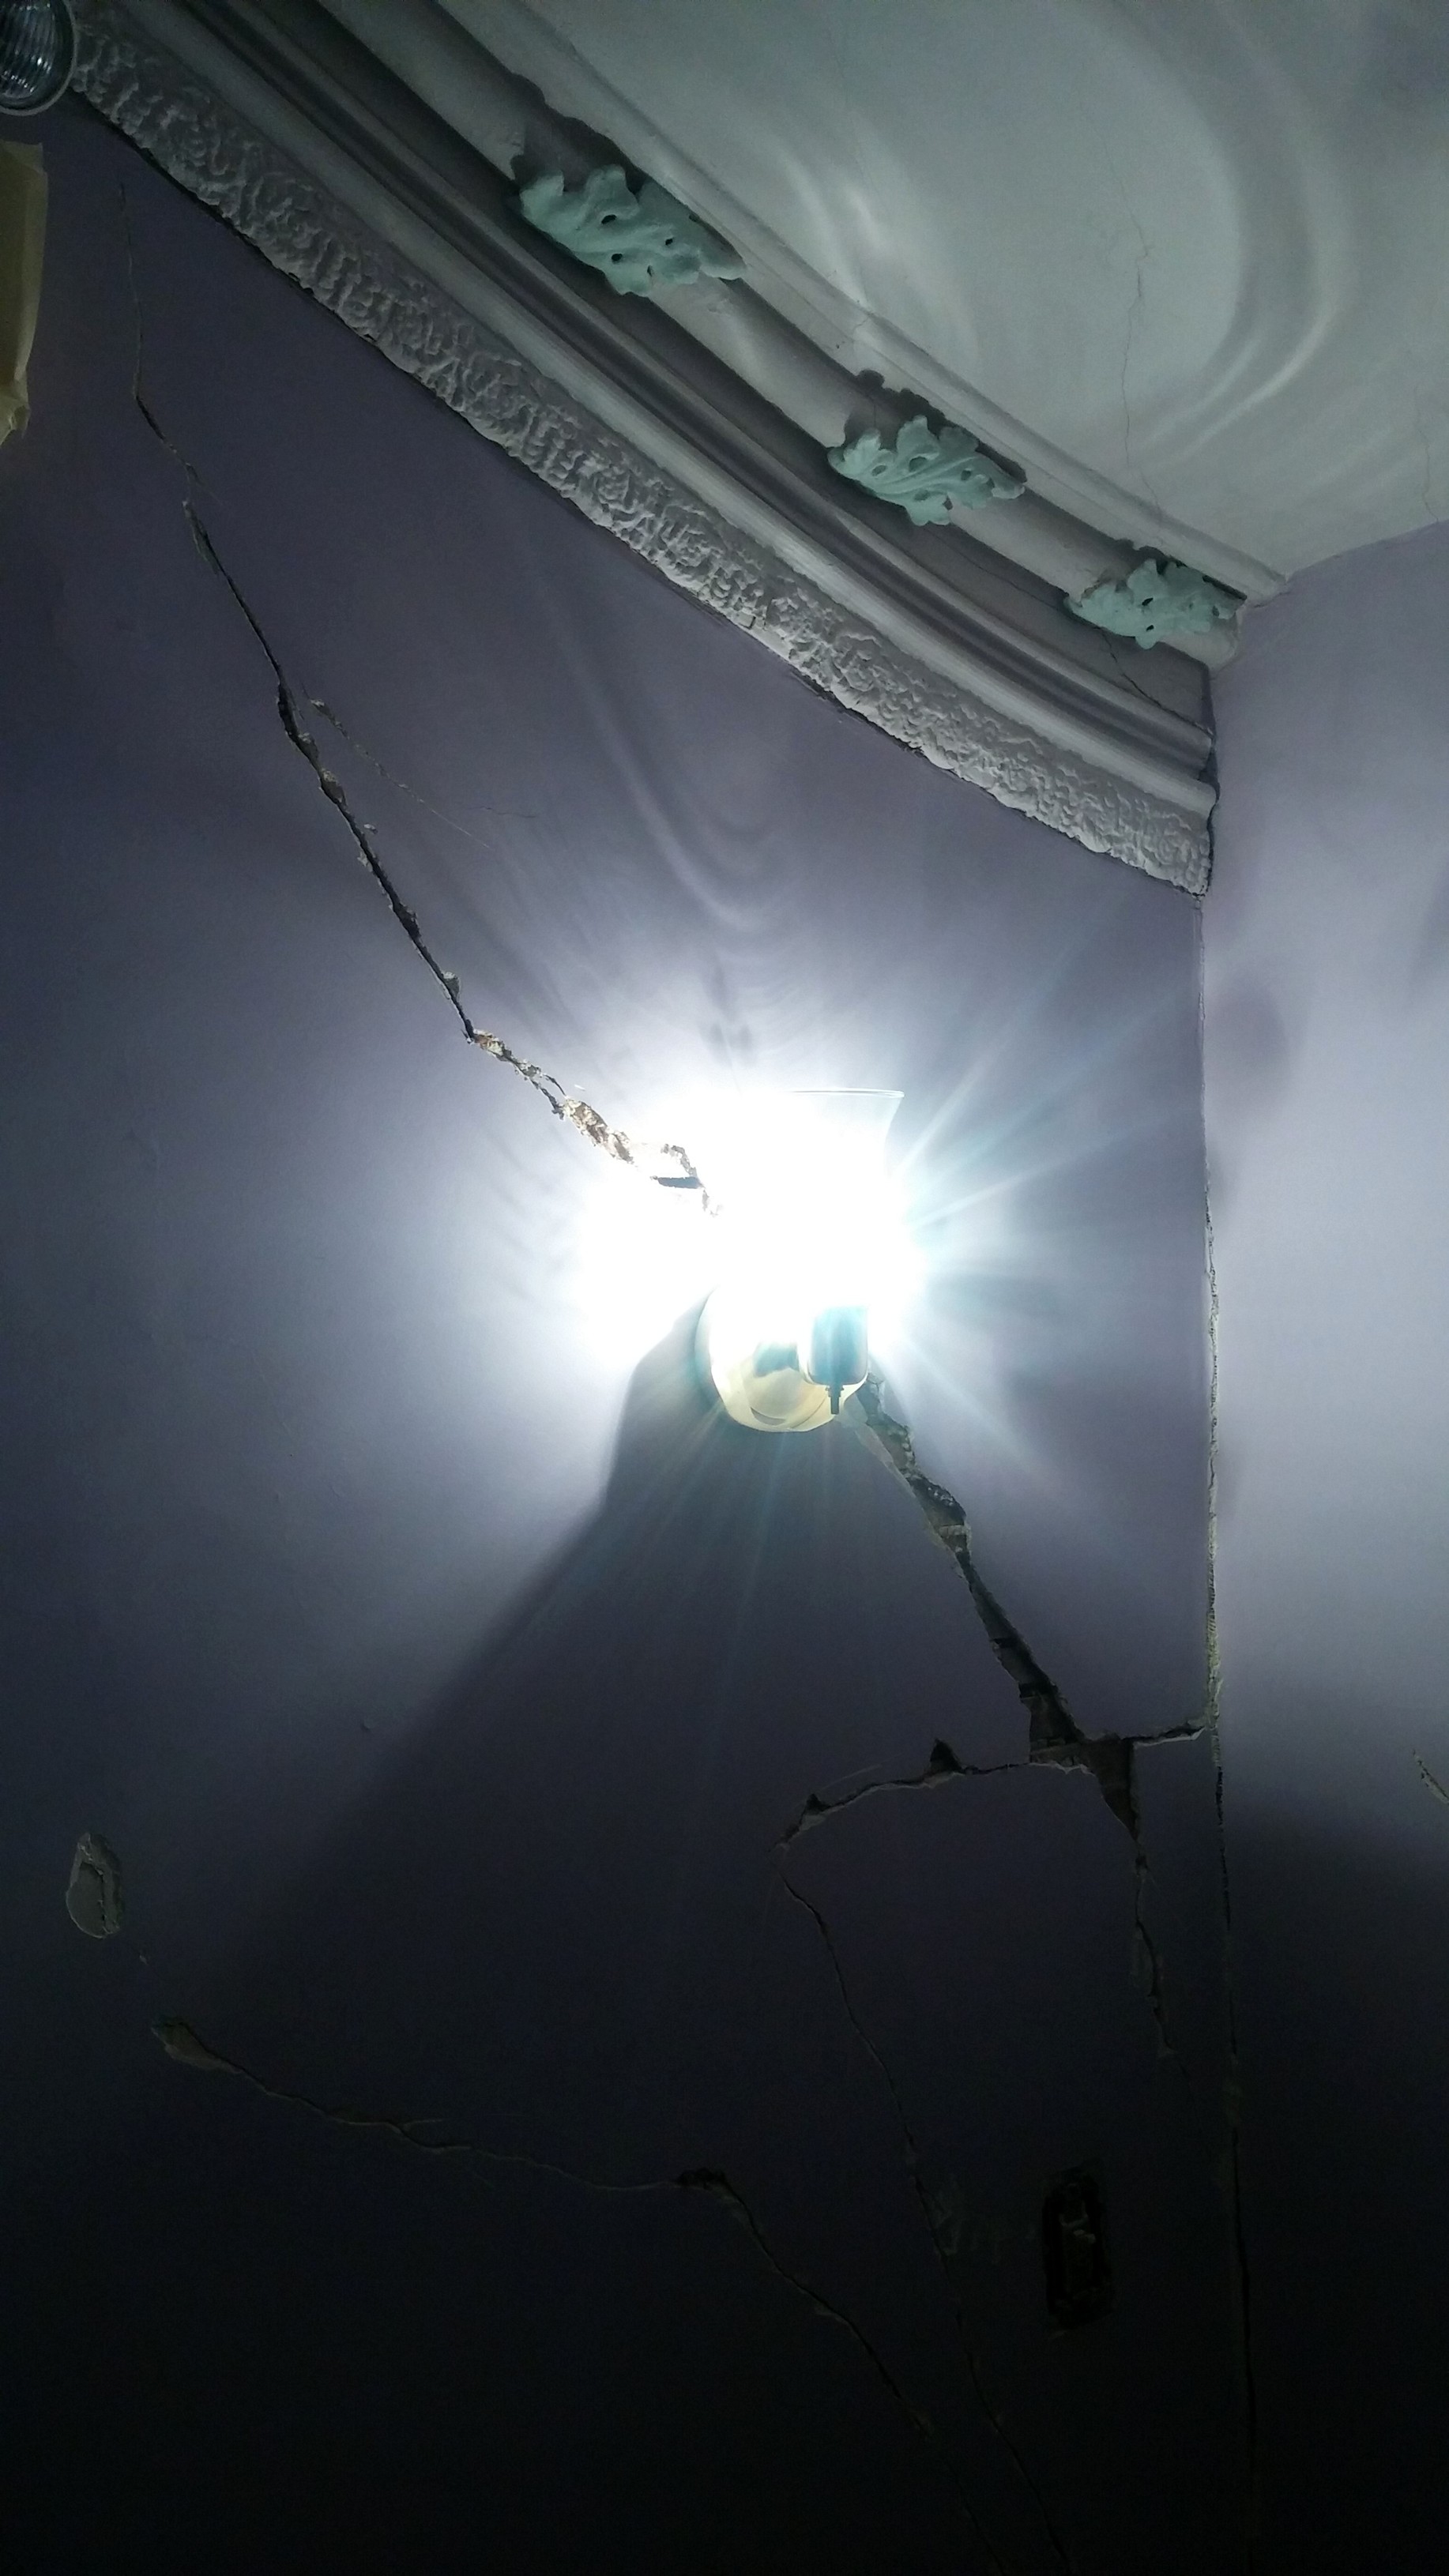
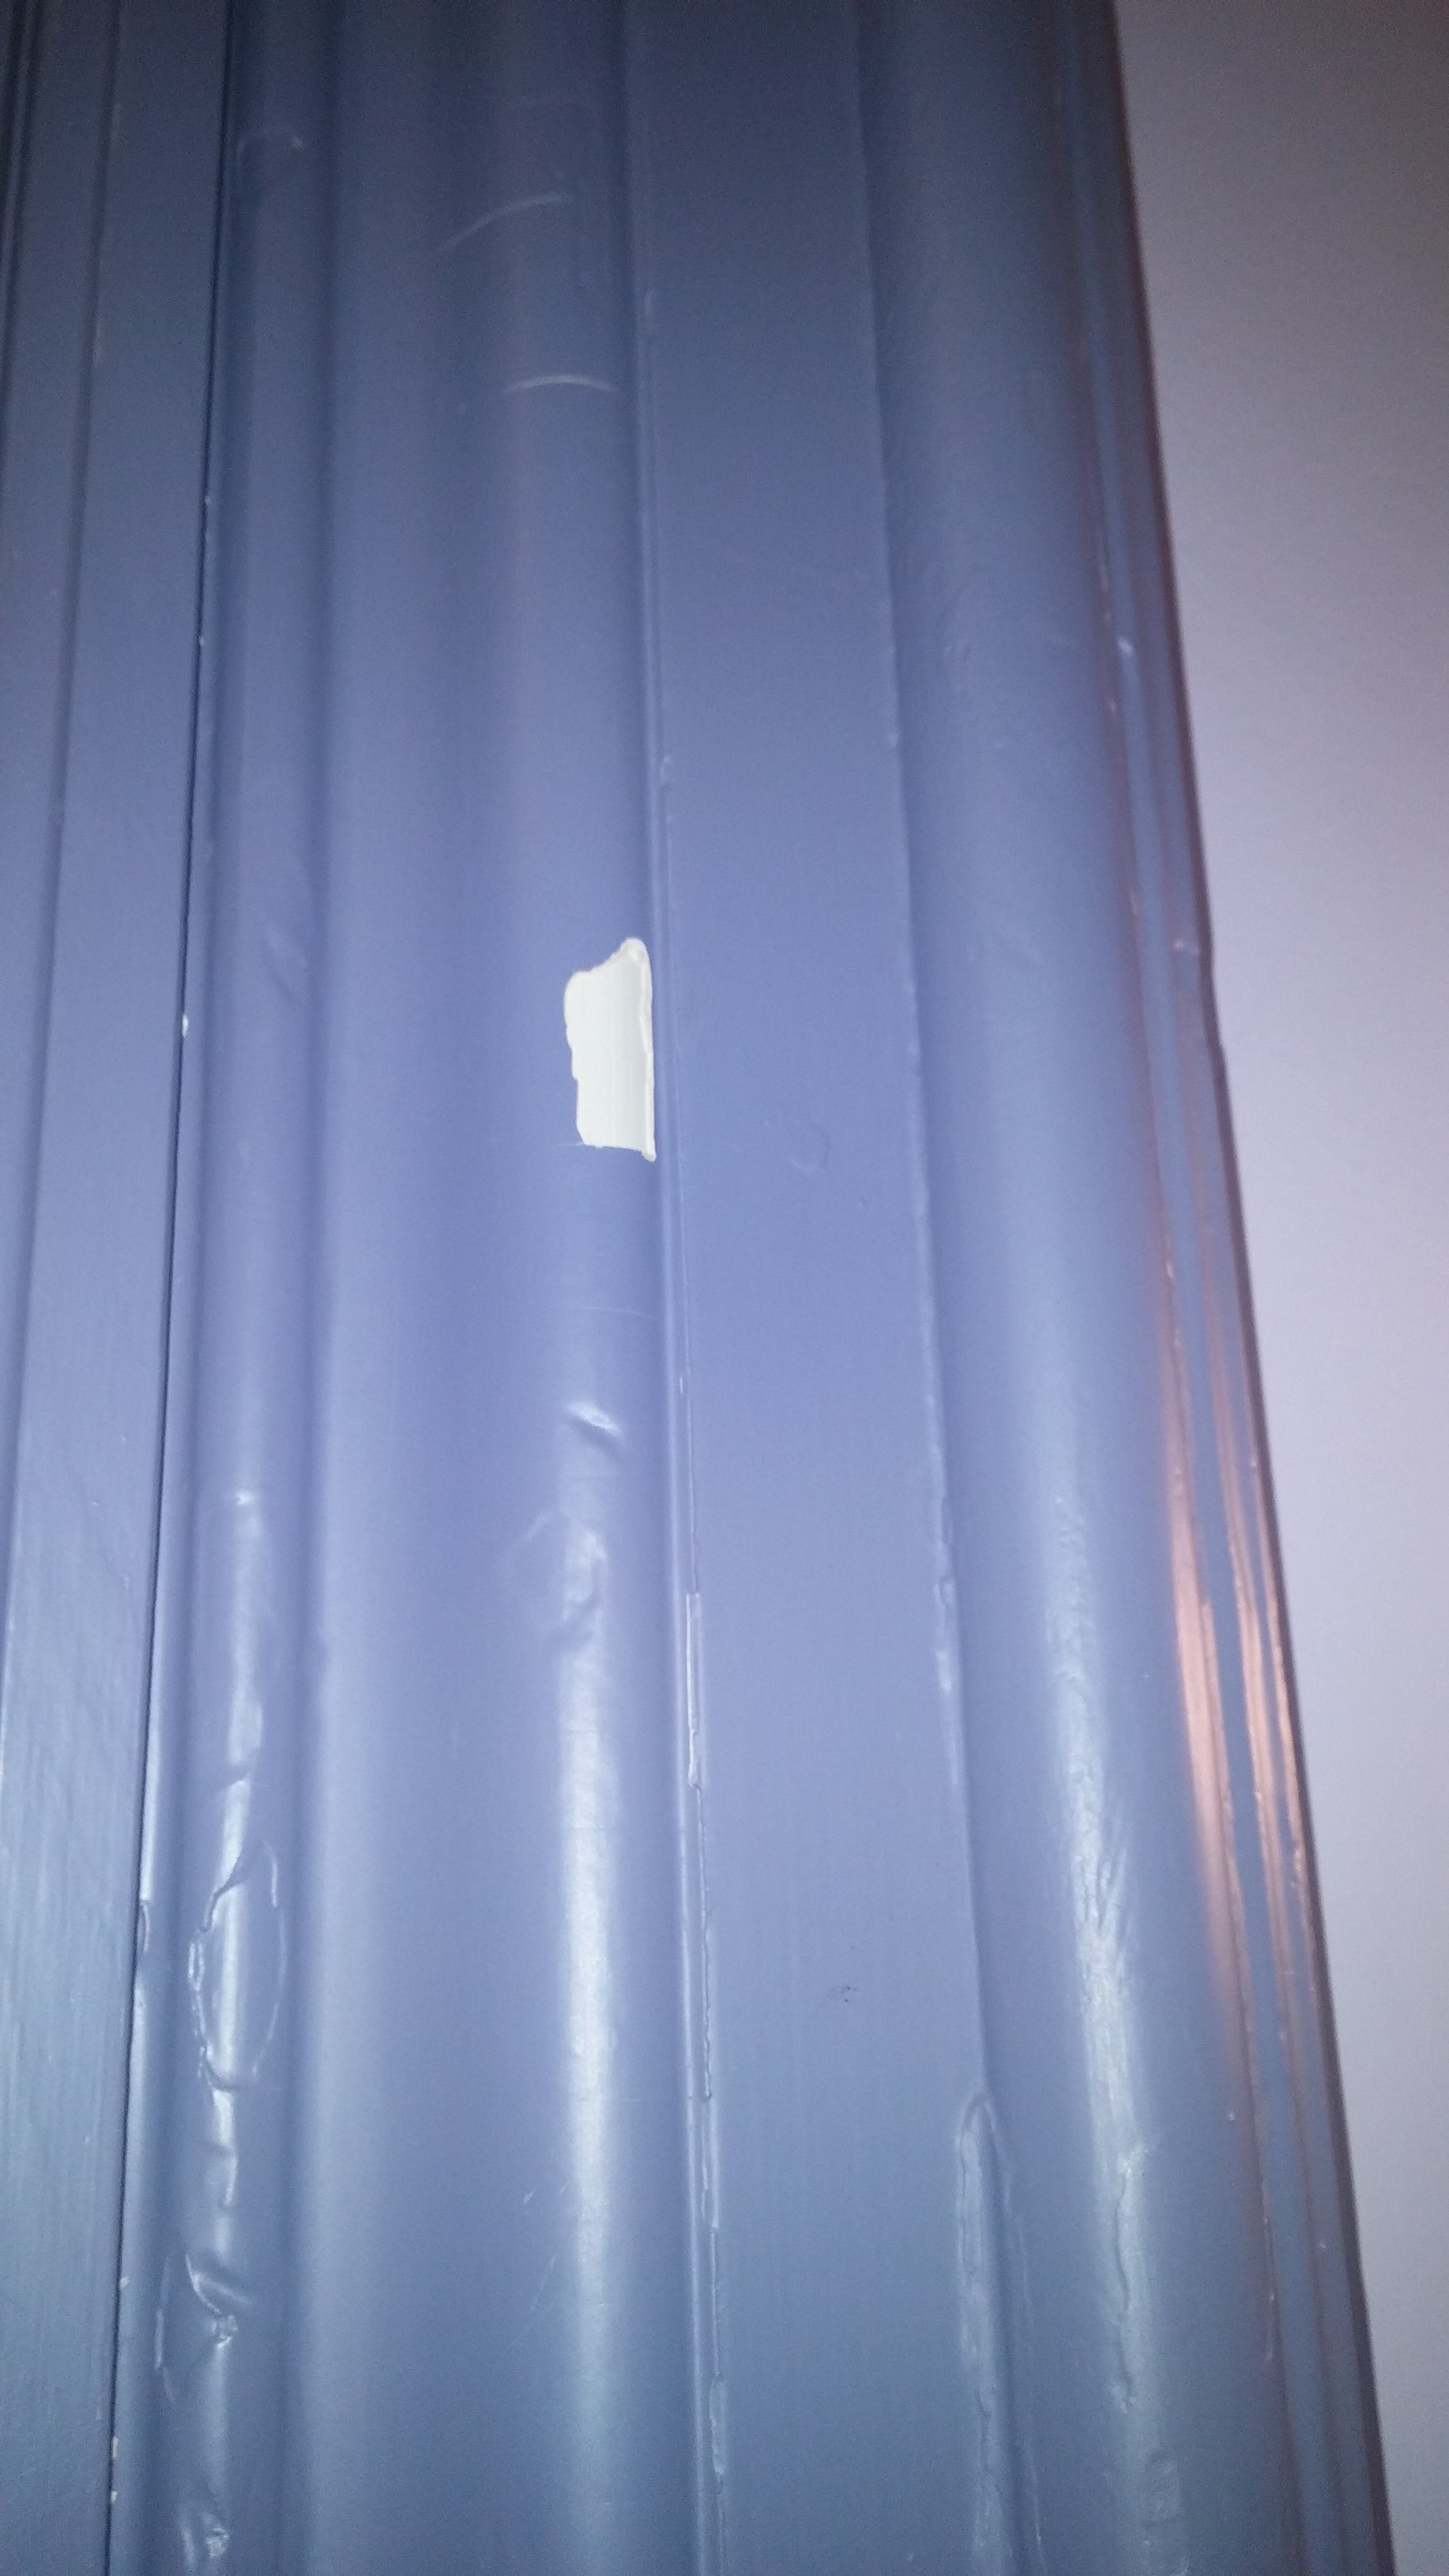
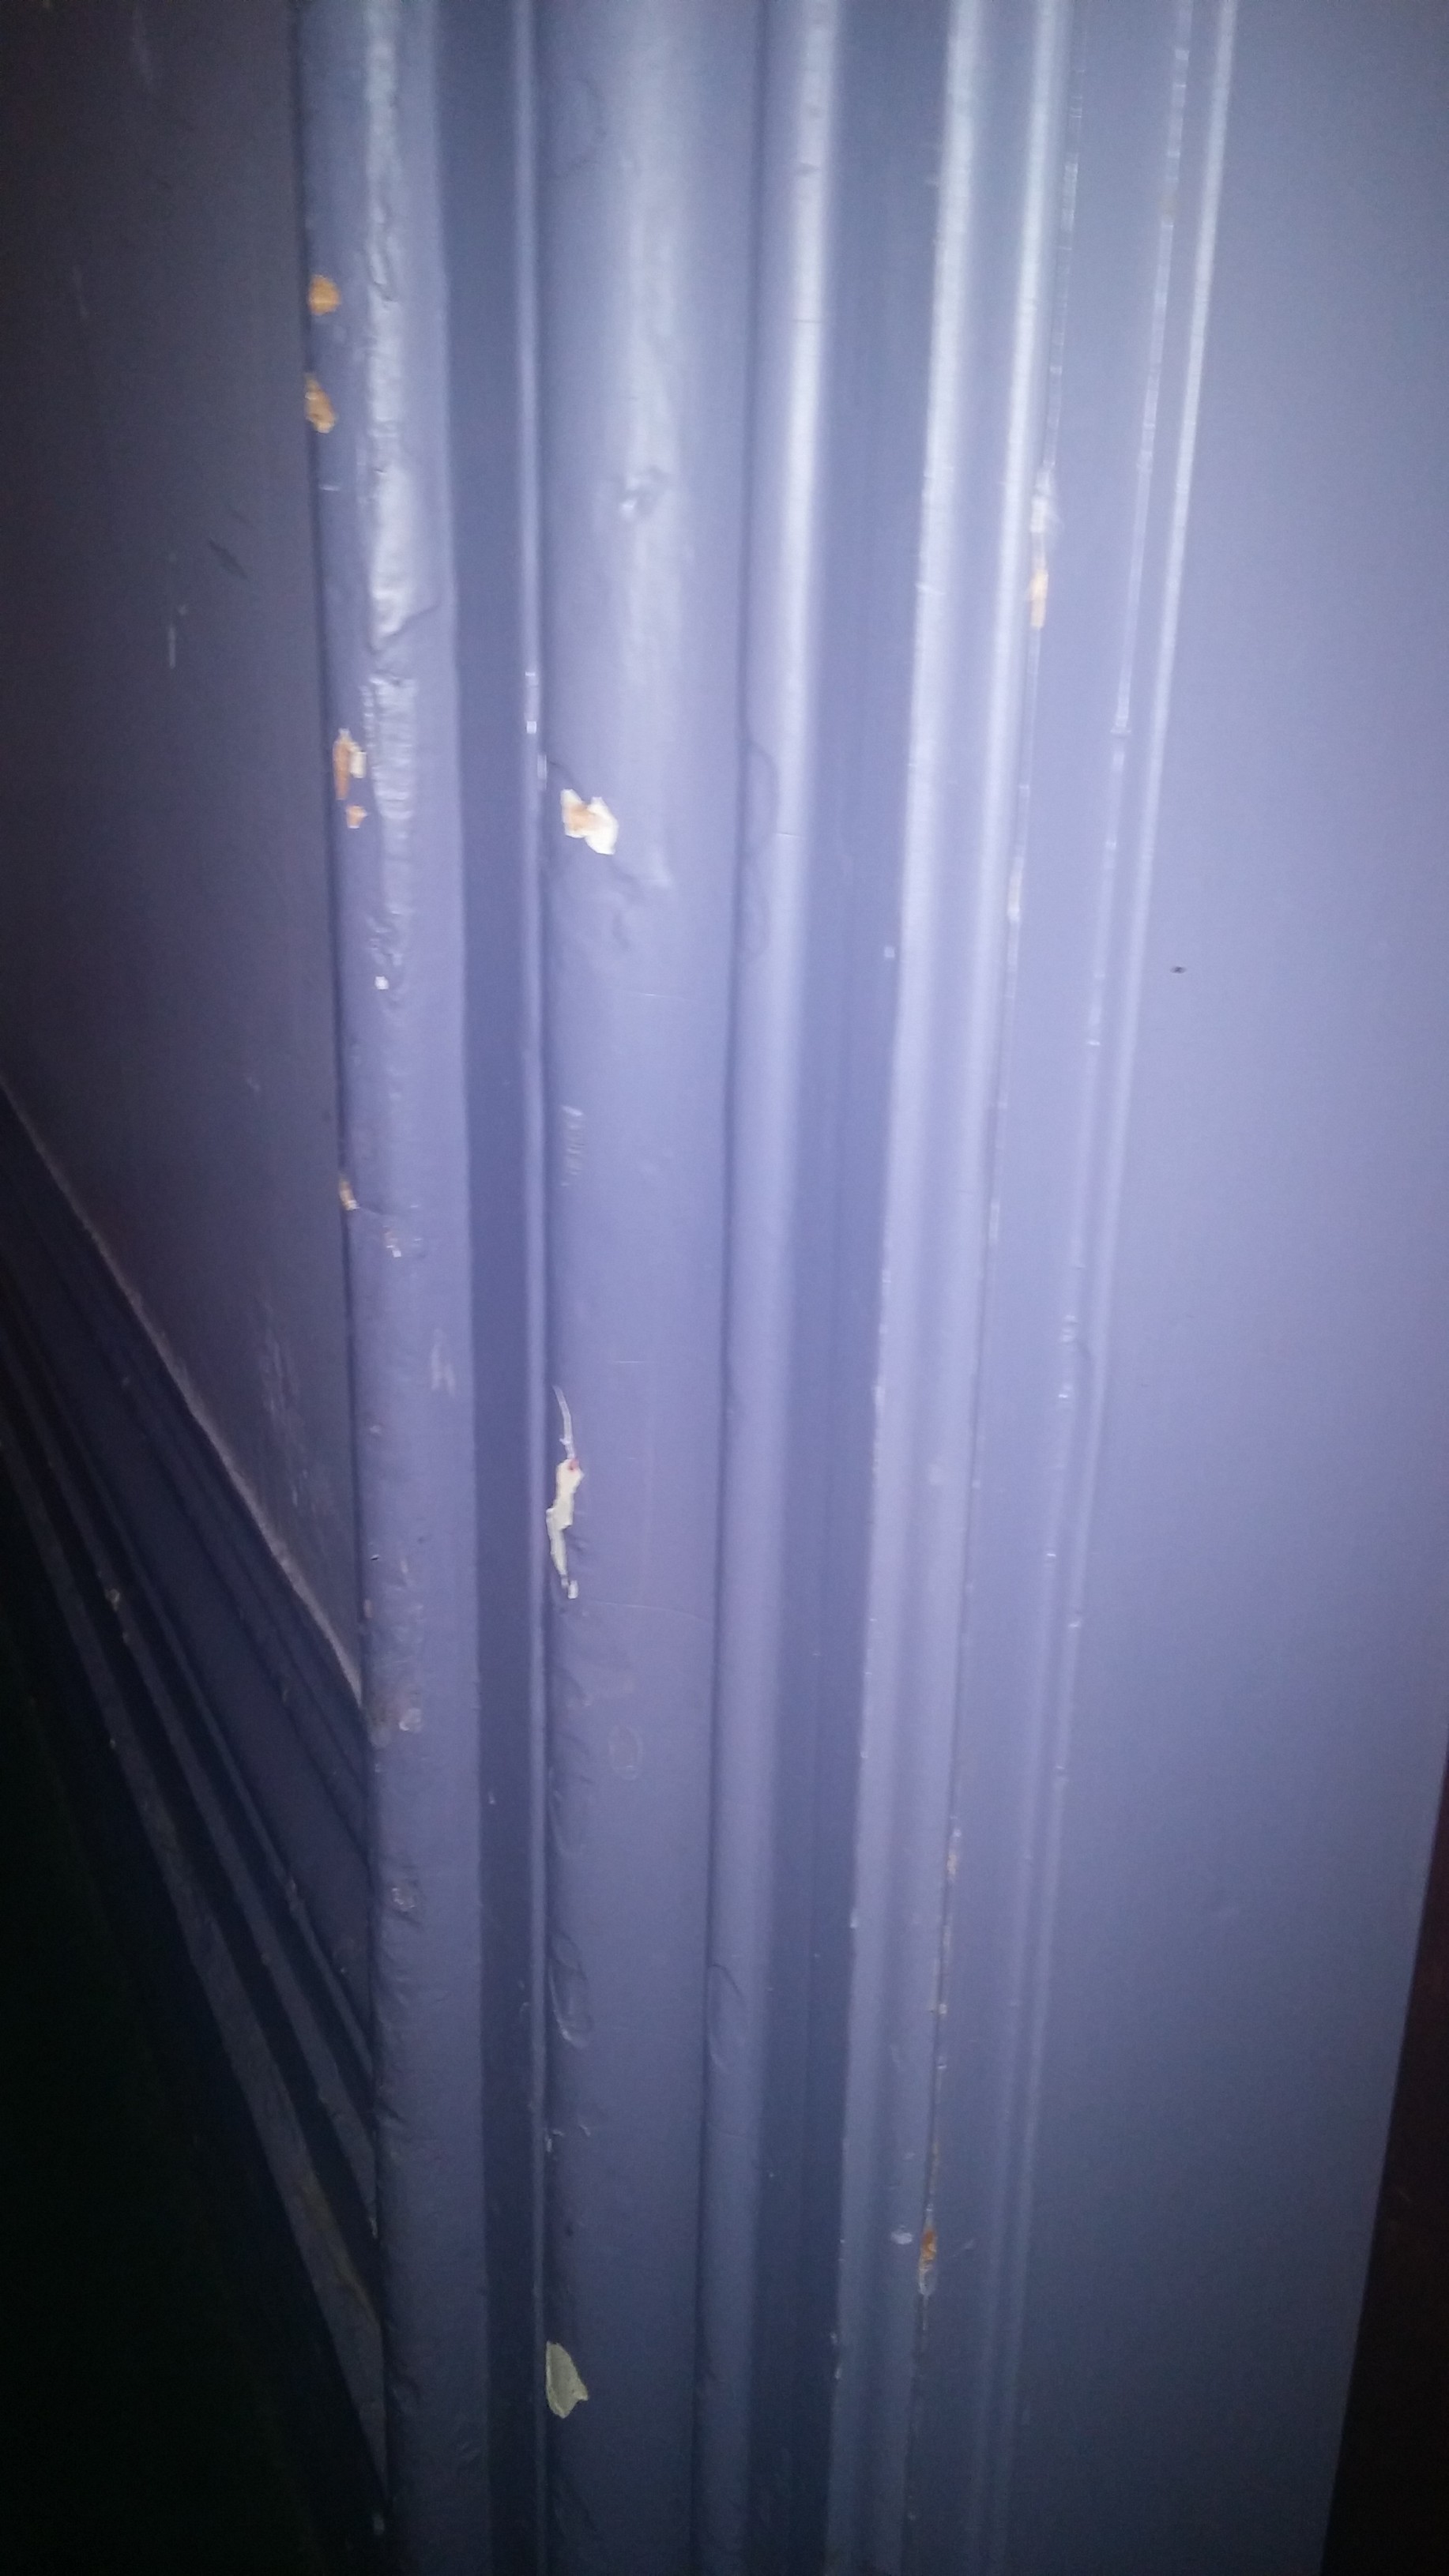
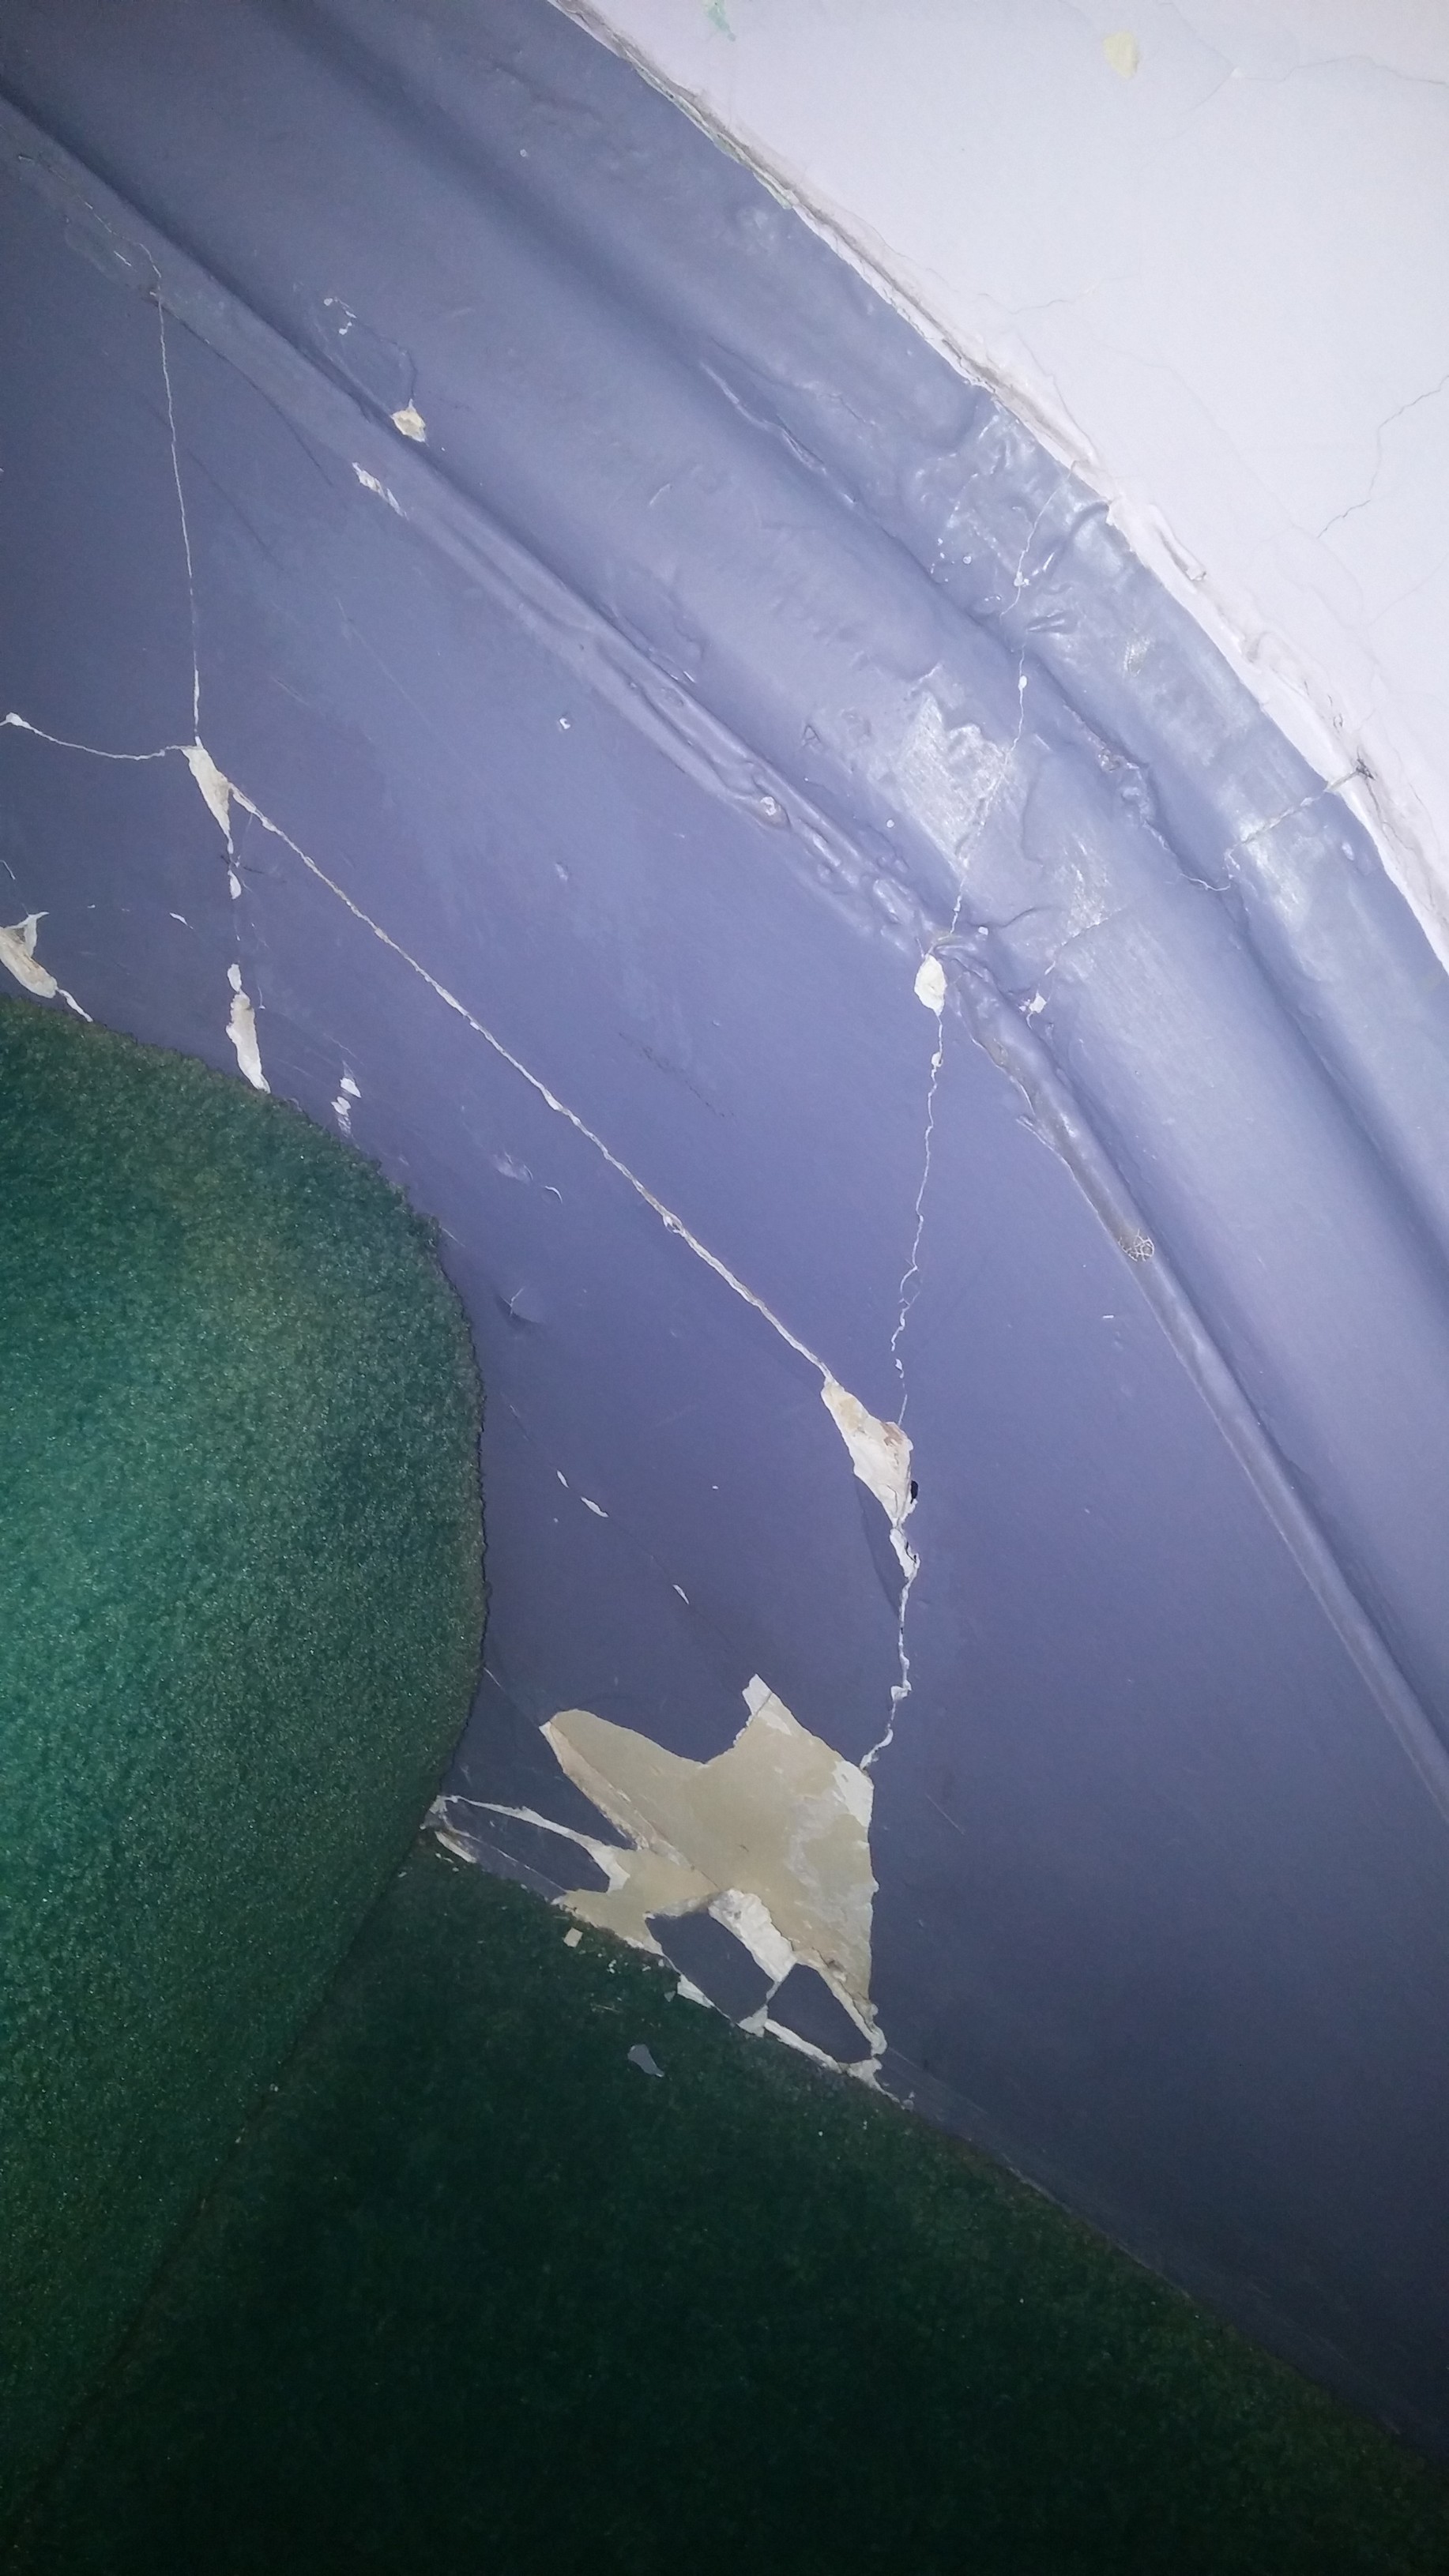
The crown moldings' design features our 33 Union Park, along with a frieze as a lower decorative border. The frieze, clearly added as a separate element, sports a lovely floral swirl we had never encountered before. We restored the frieze, which had crumbled in places. An entire 20-foot section had lost the delicate decorative portion, and our craftsmen recreated it by casting one of the intact sections. Small pieces in scattered areas along the staircase and landings had chipped off, as seen in the photos above, and were recreated as well.
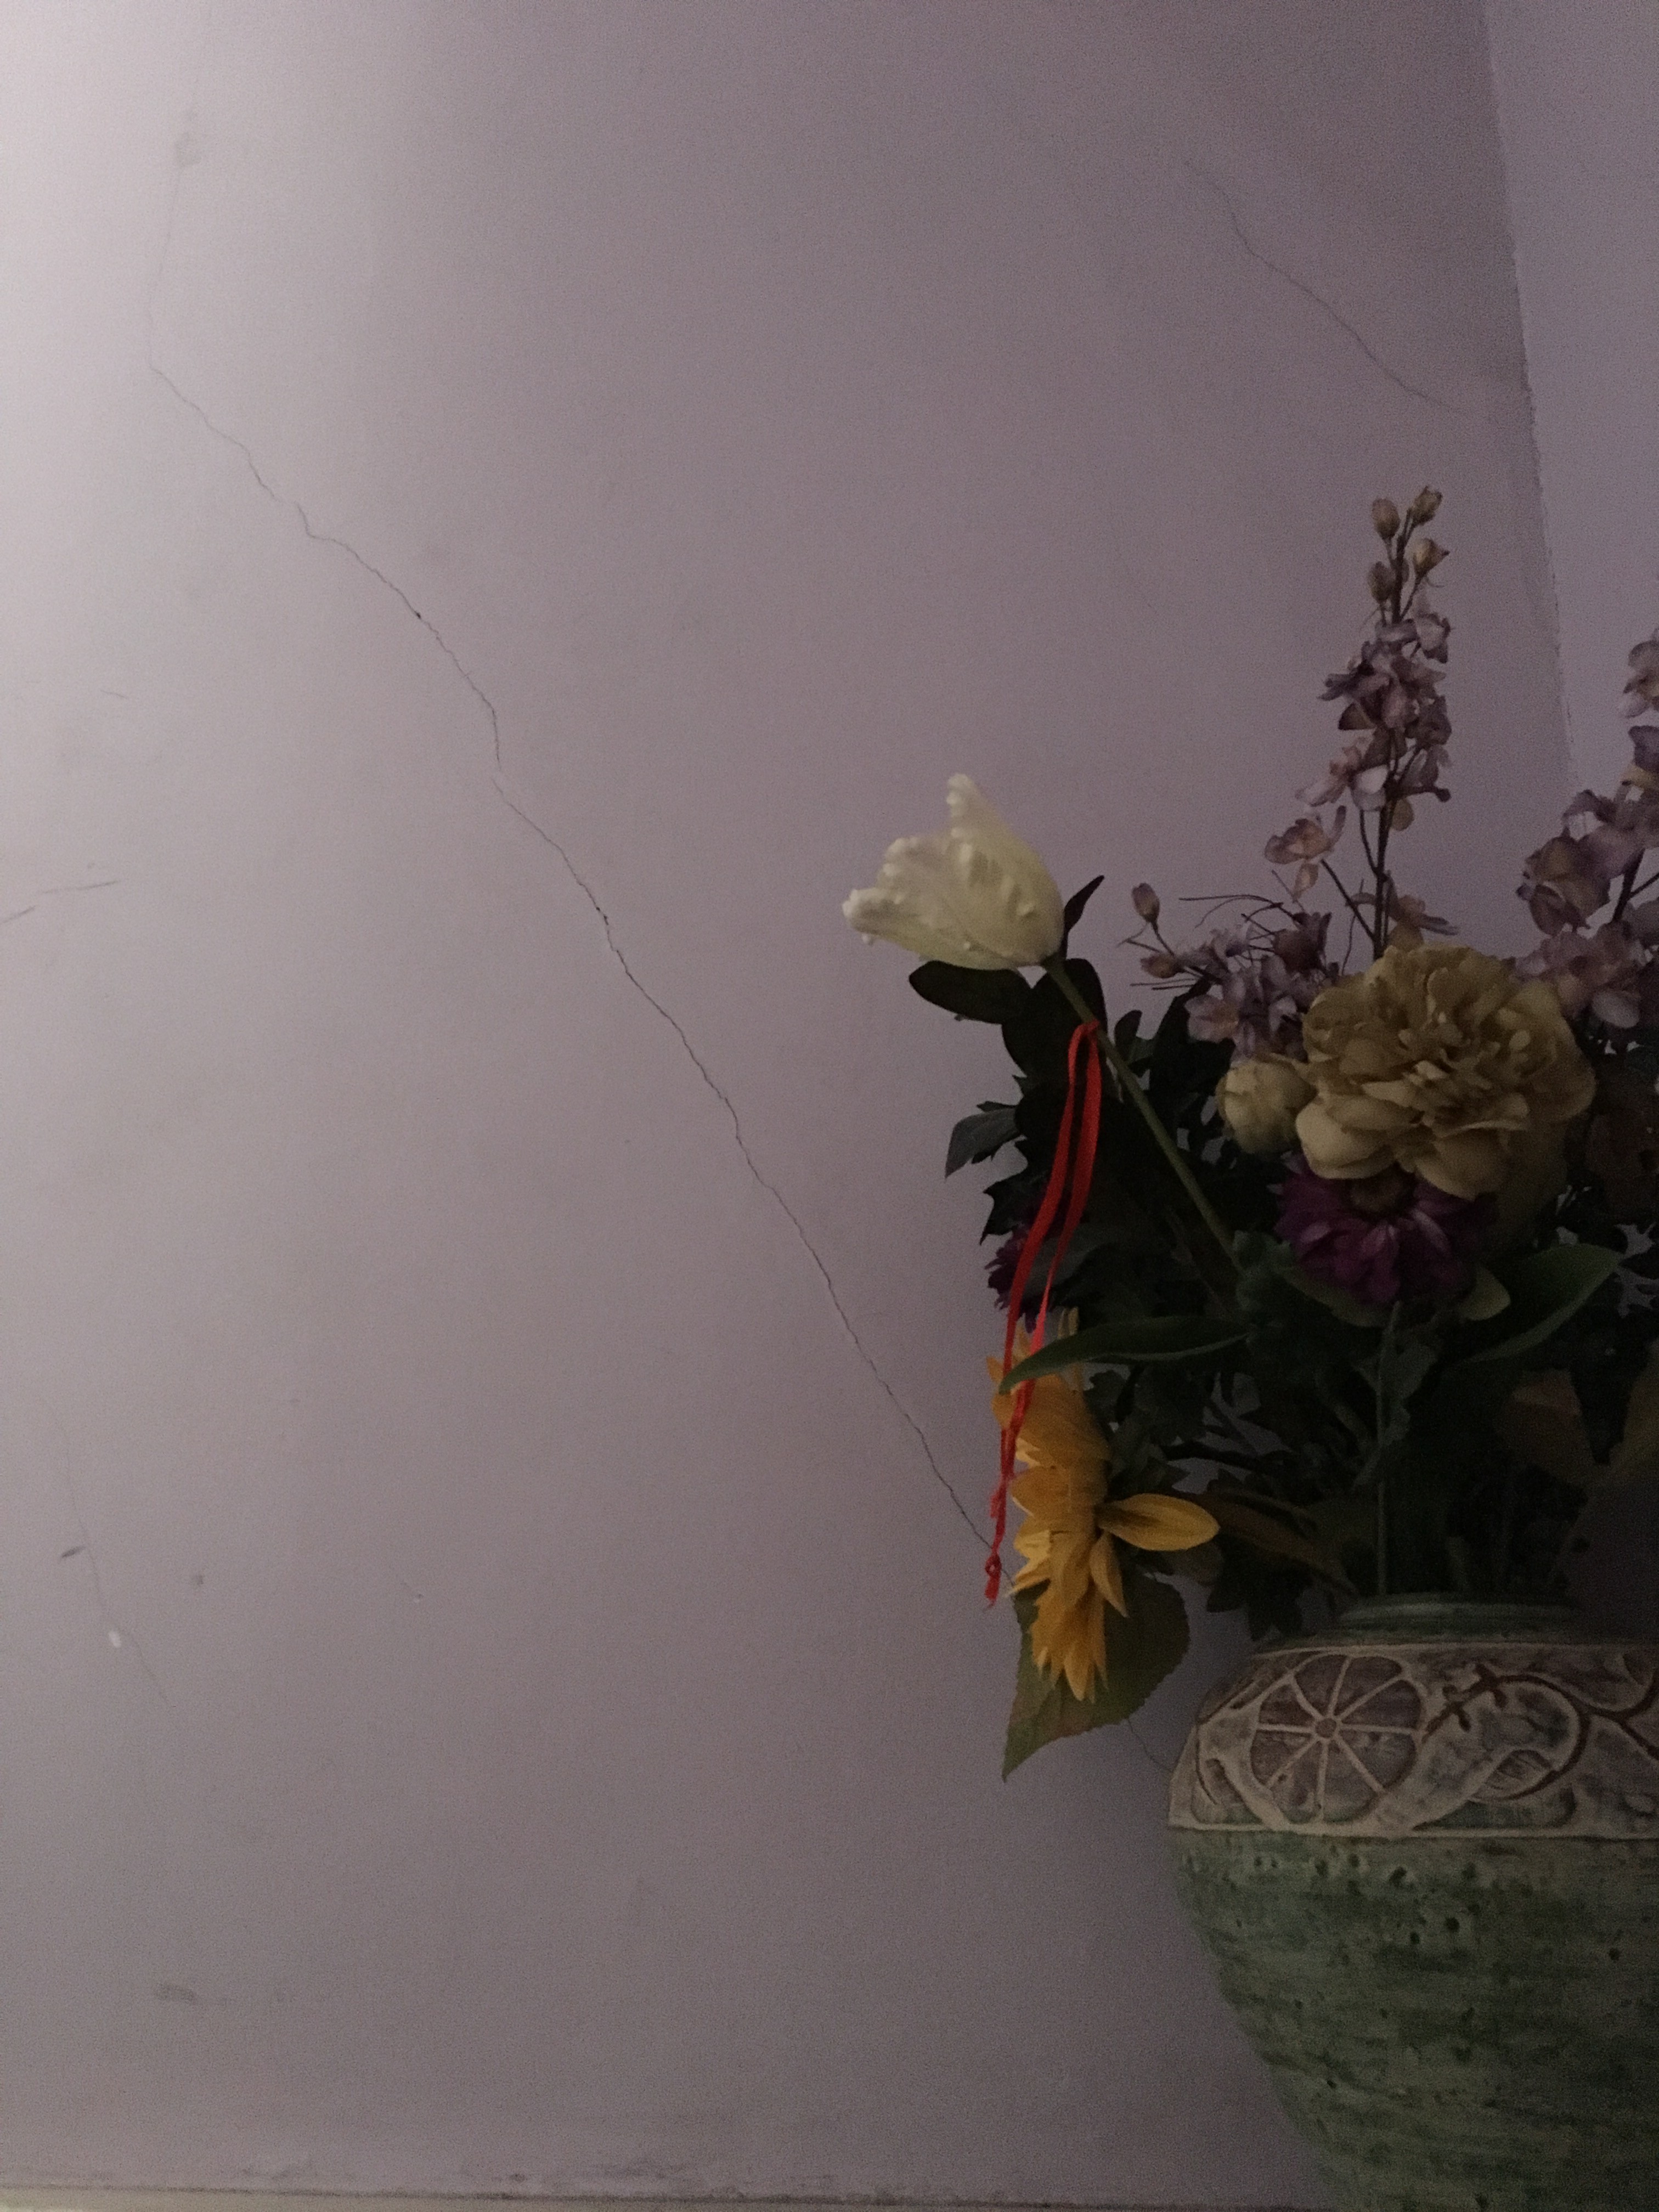
At first ostensibly in need only of some minor surface restoration, the lavender-color walls revealed major problems where large cracks were present. Entire sections had to be replastered. The ceilings were in decent shape, and only in need of minor patching.
With the exception of a few damaged areas, the purple baseboards and door jambs were in good shape, and only in need of minor cosmetic treatment.
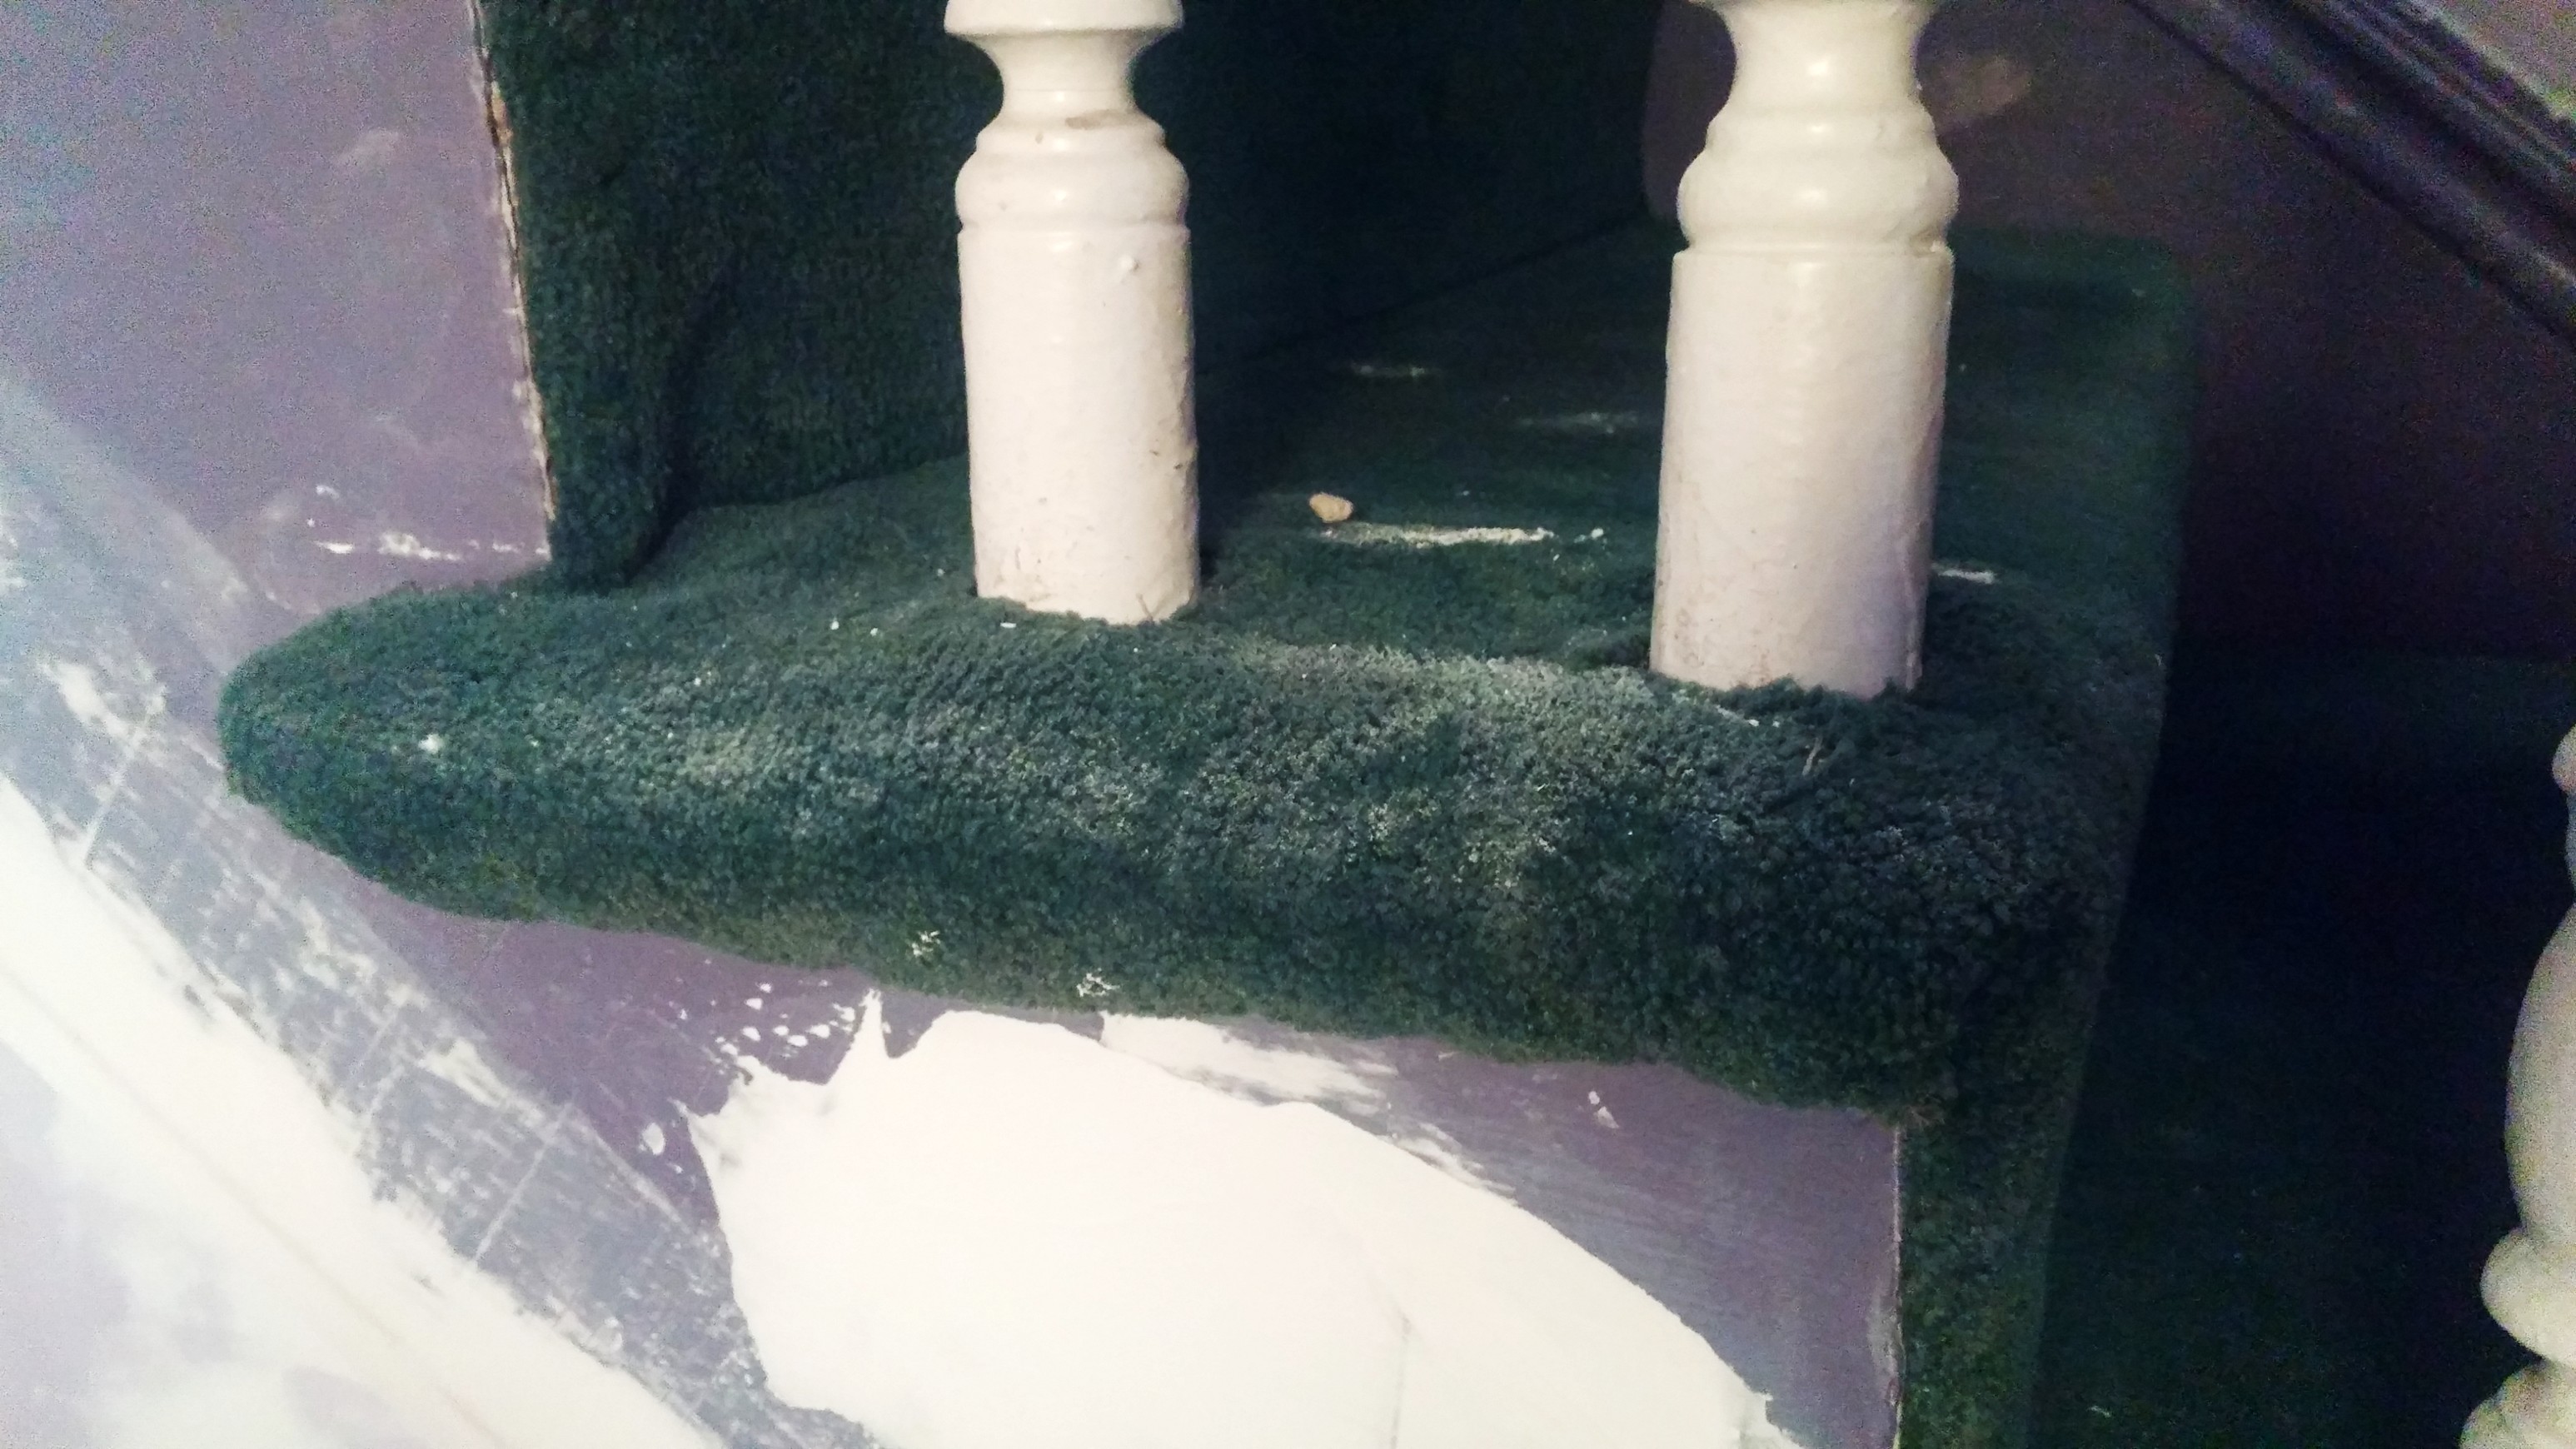
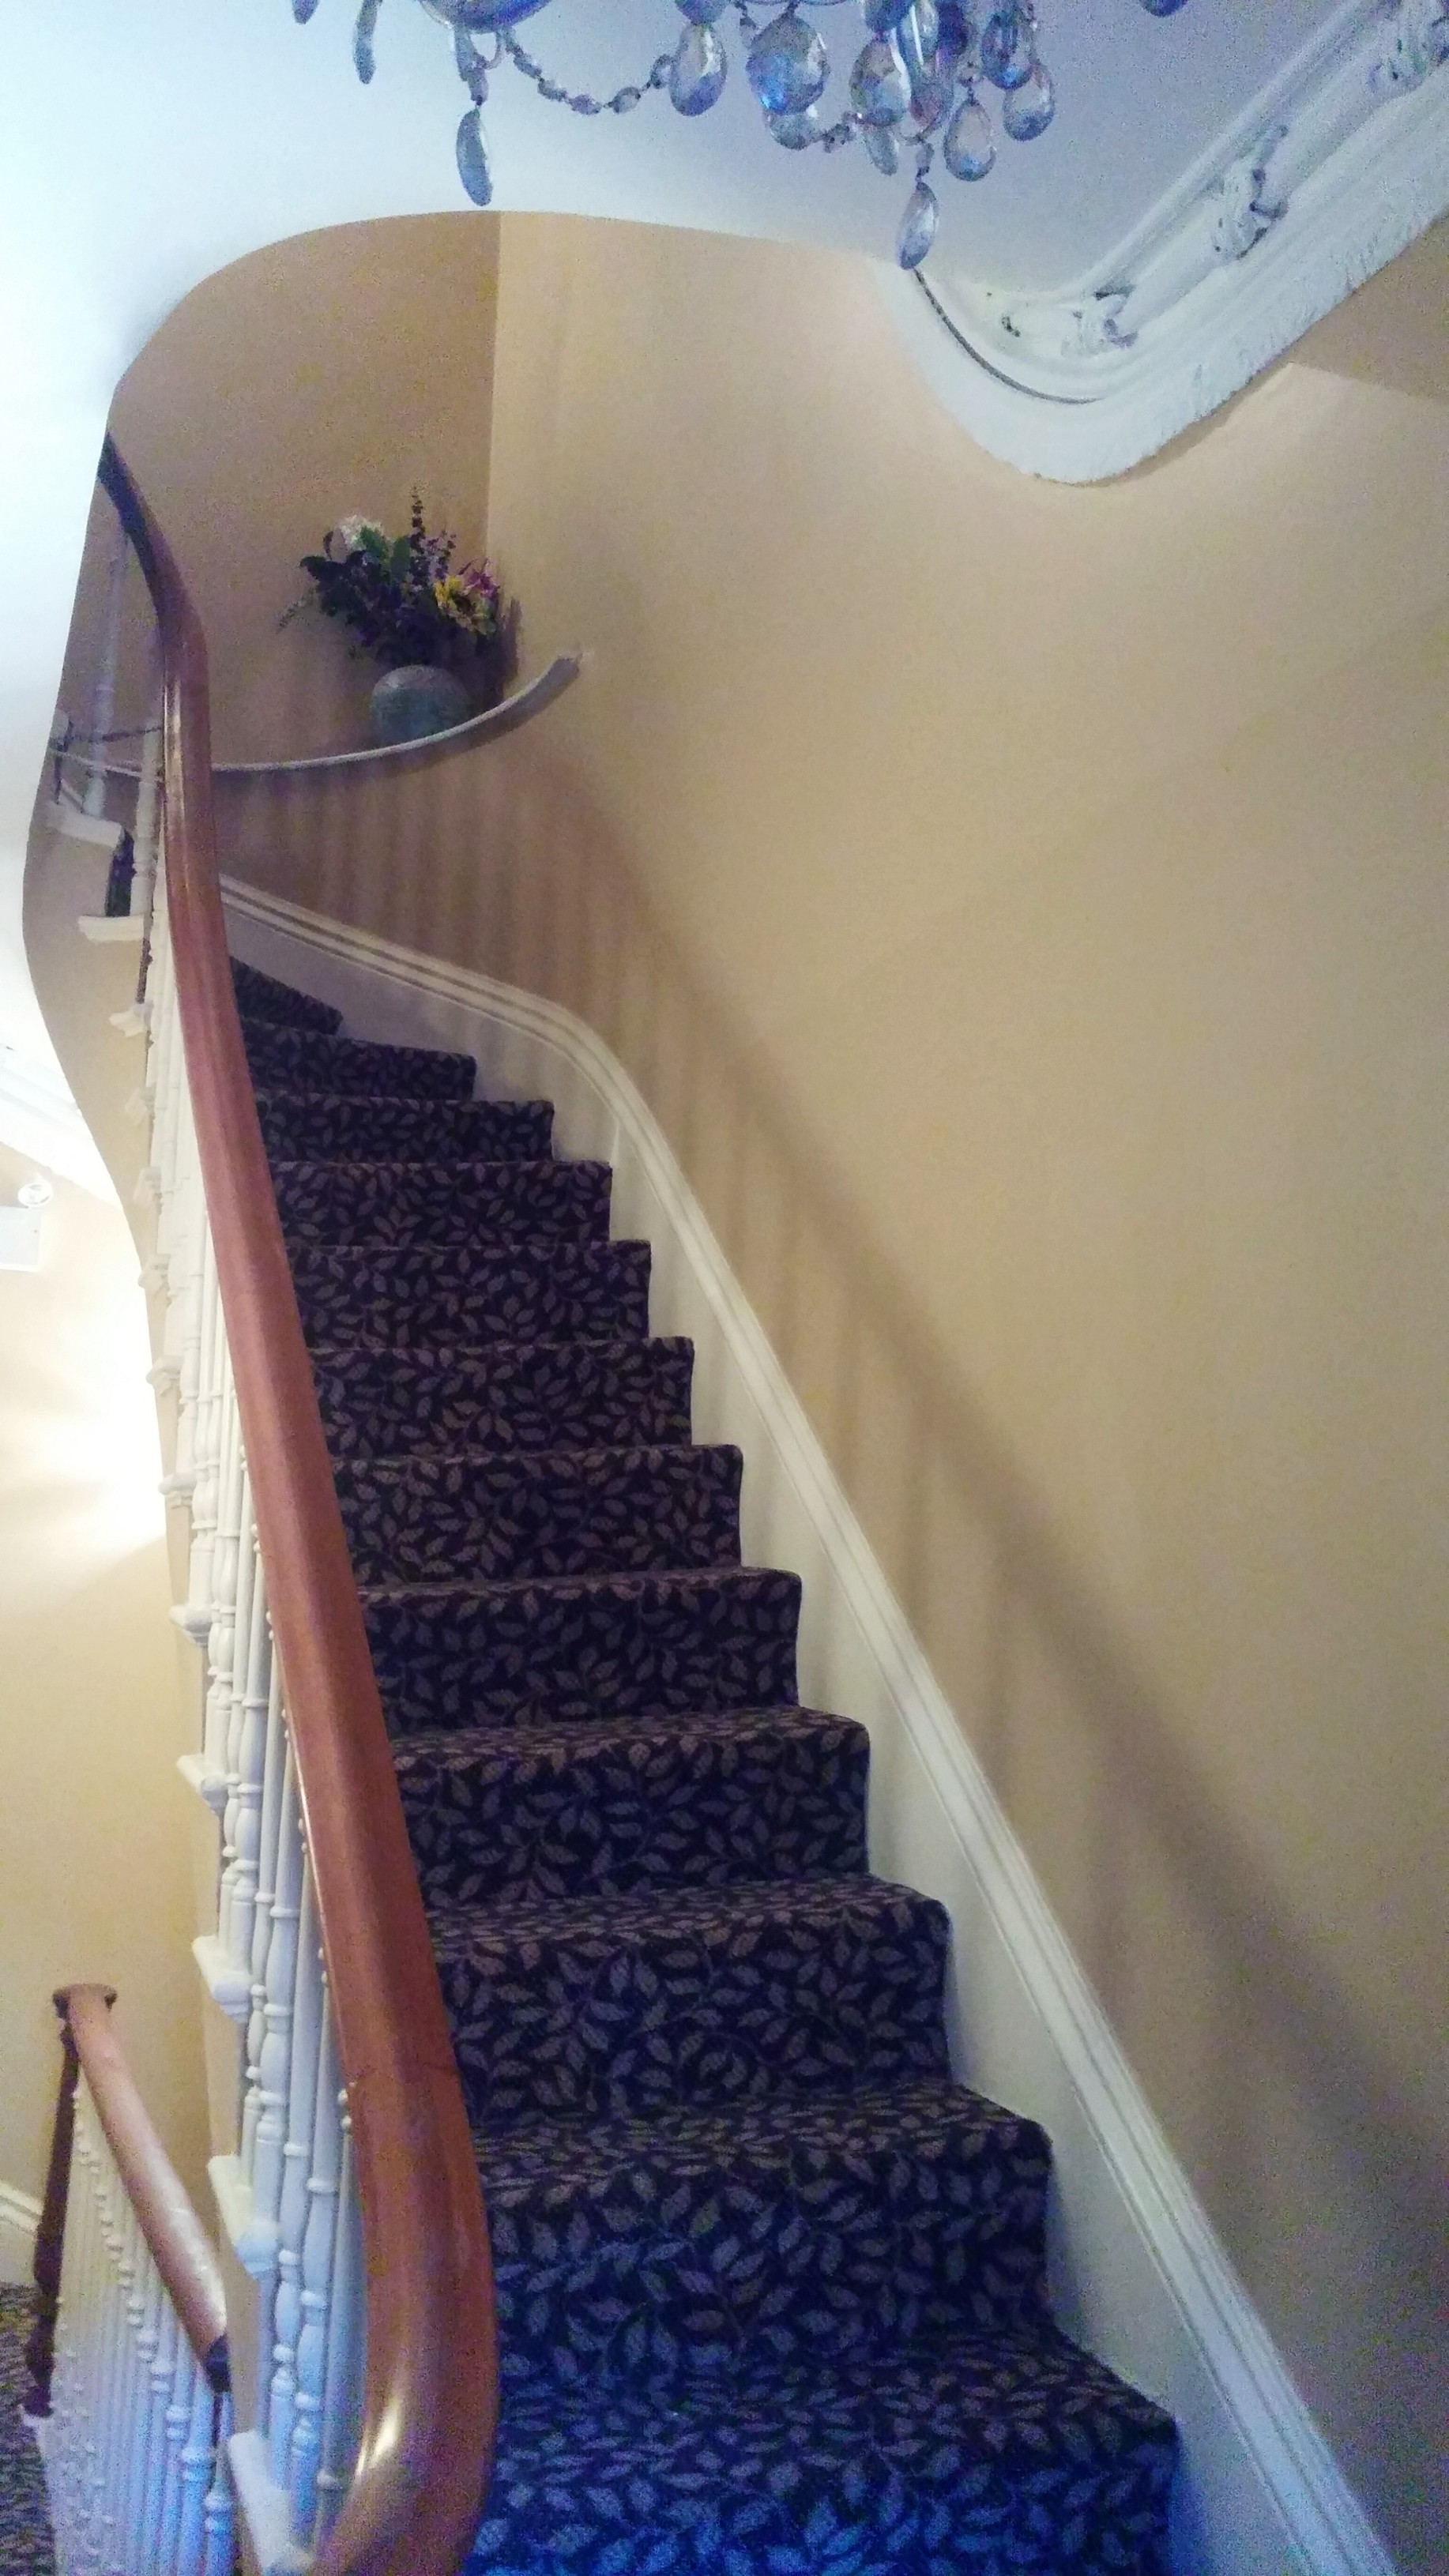
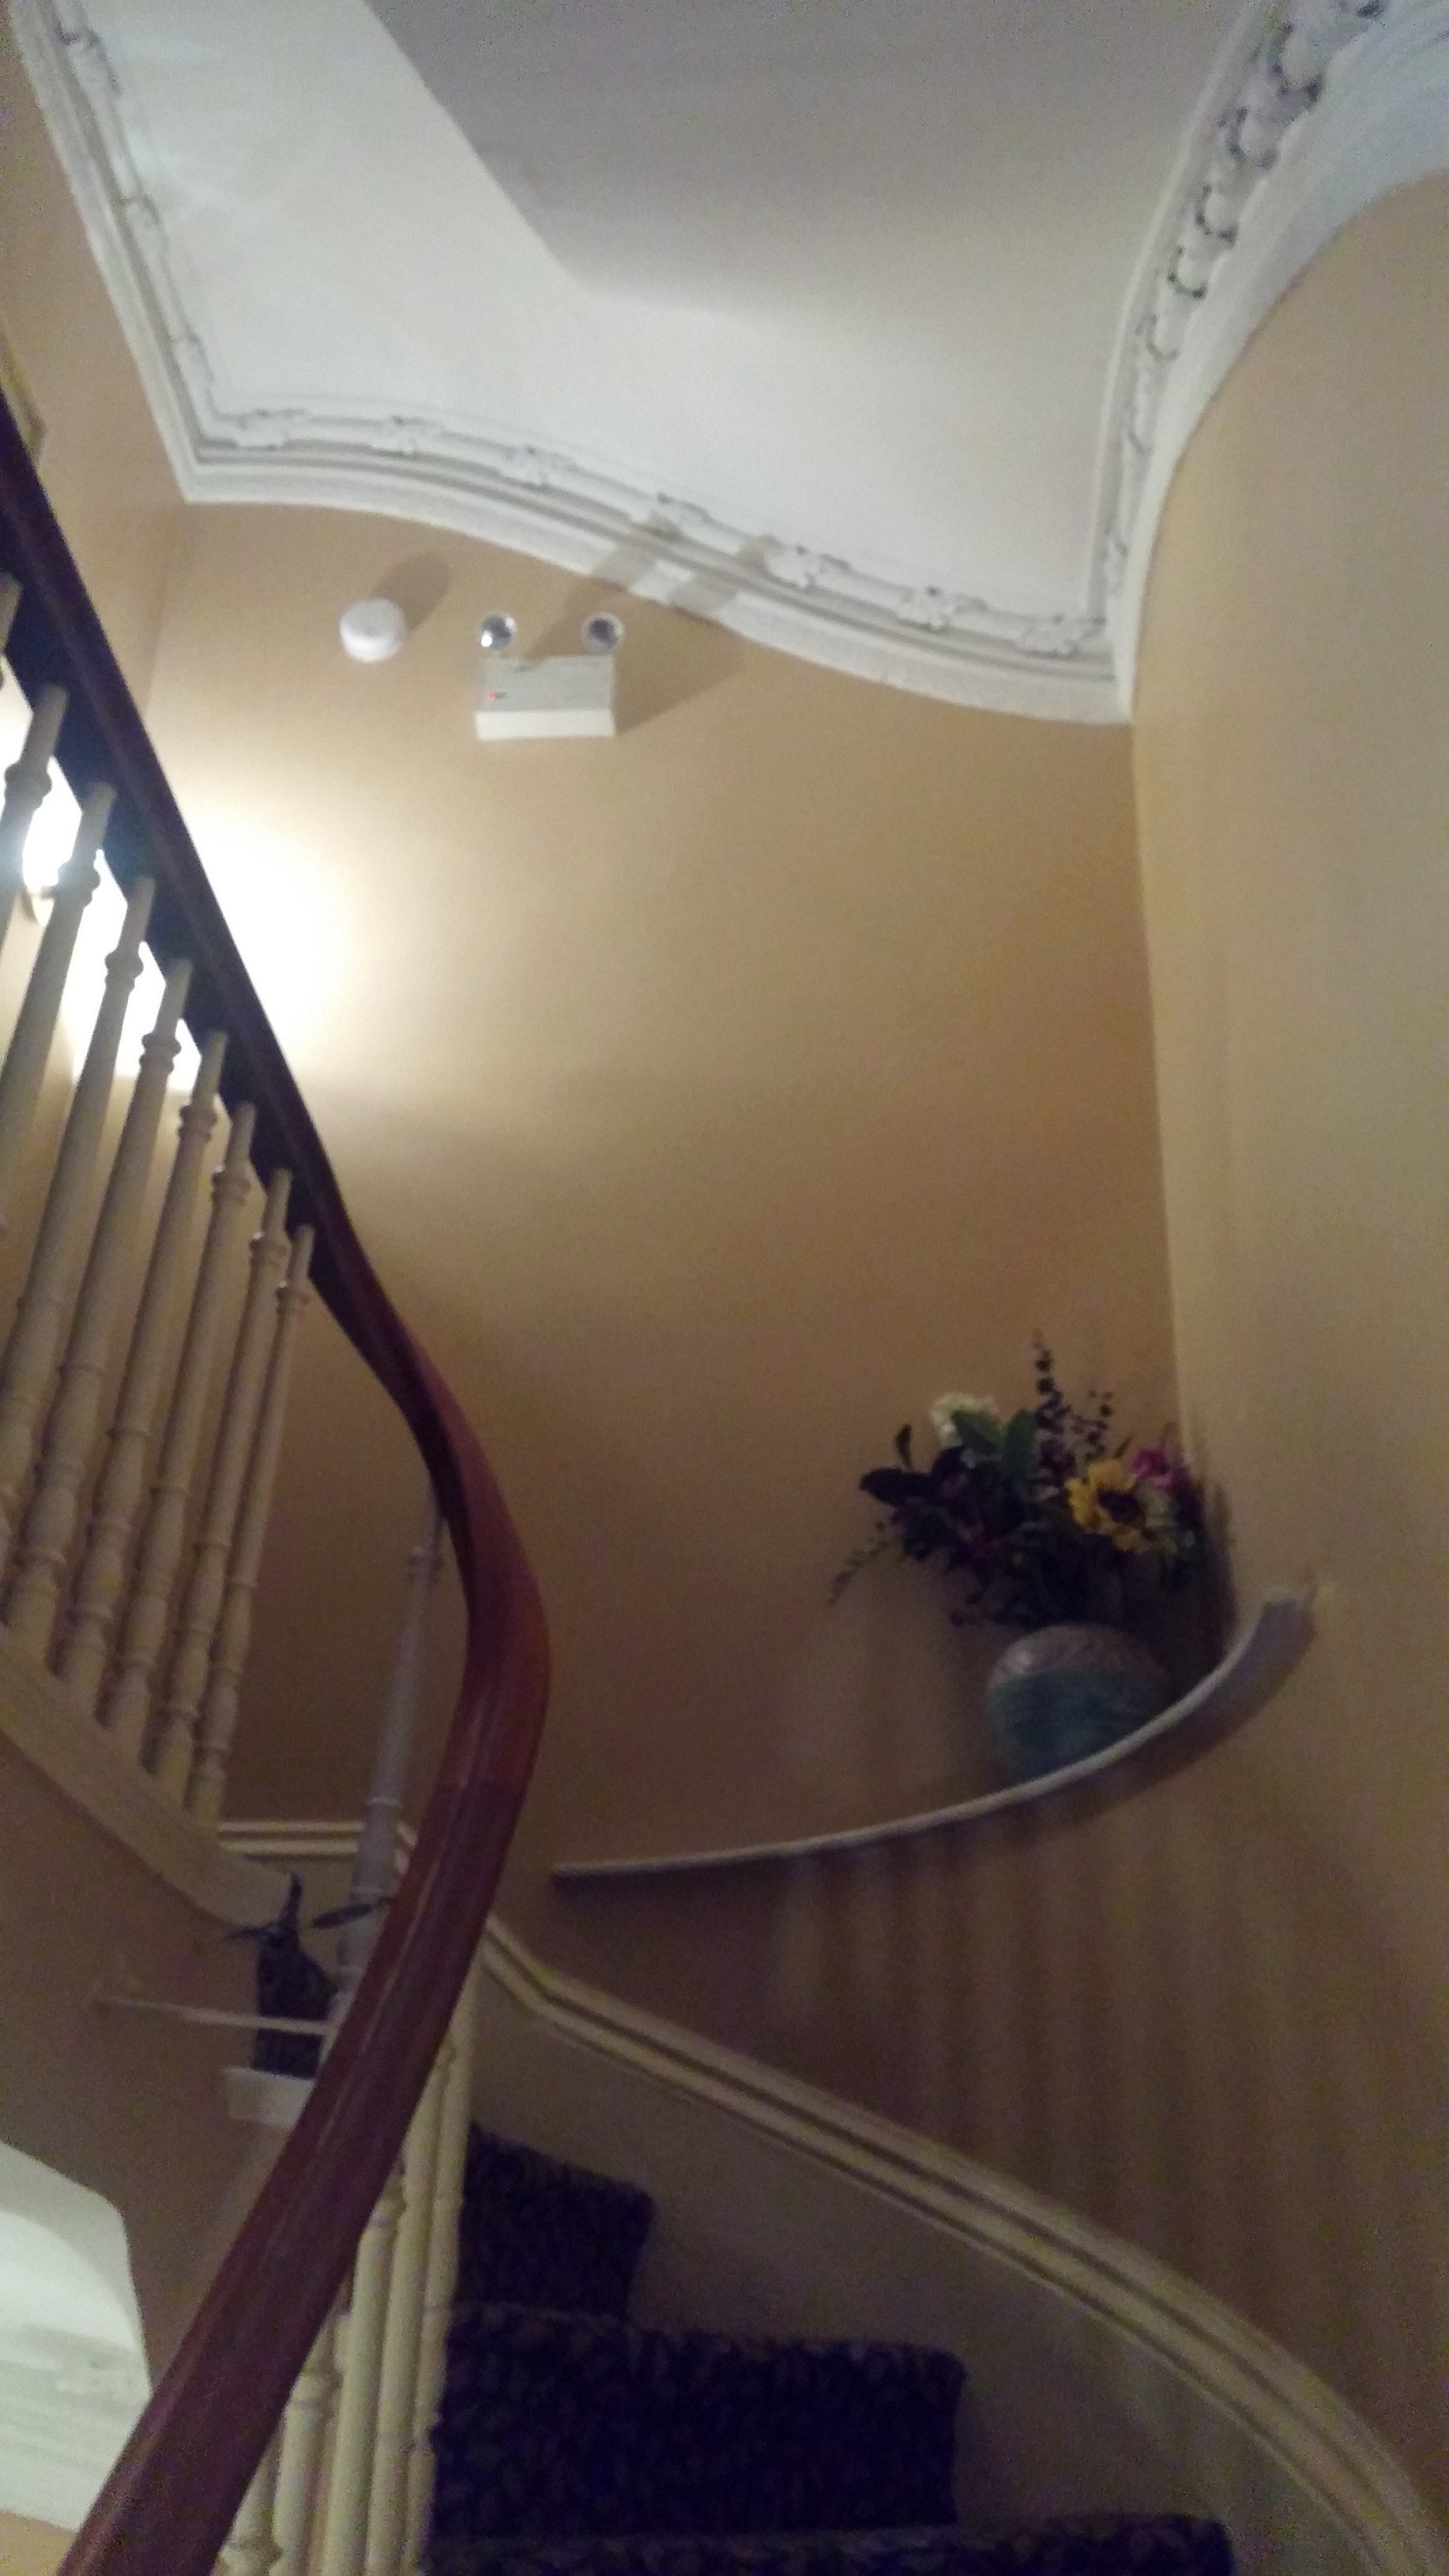
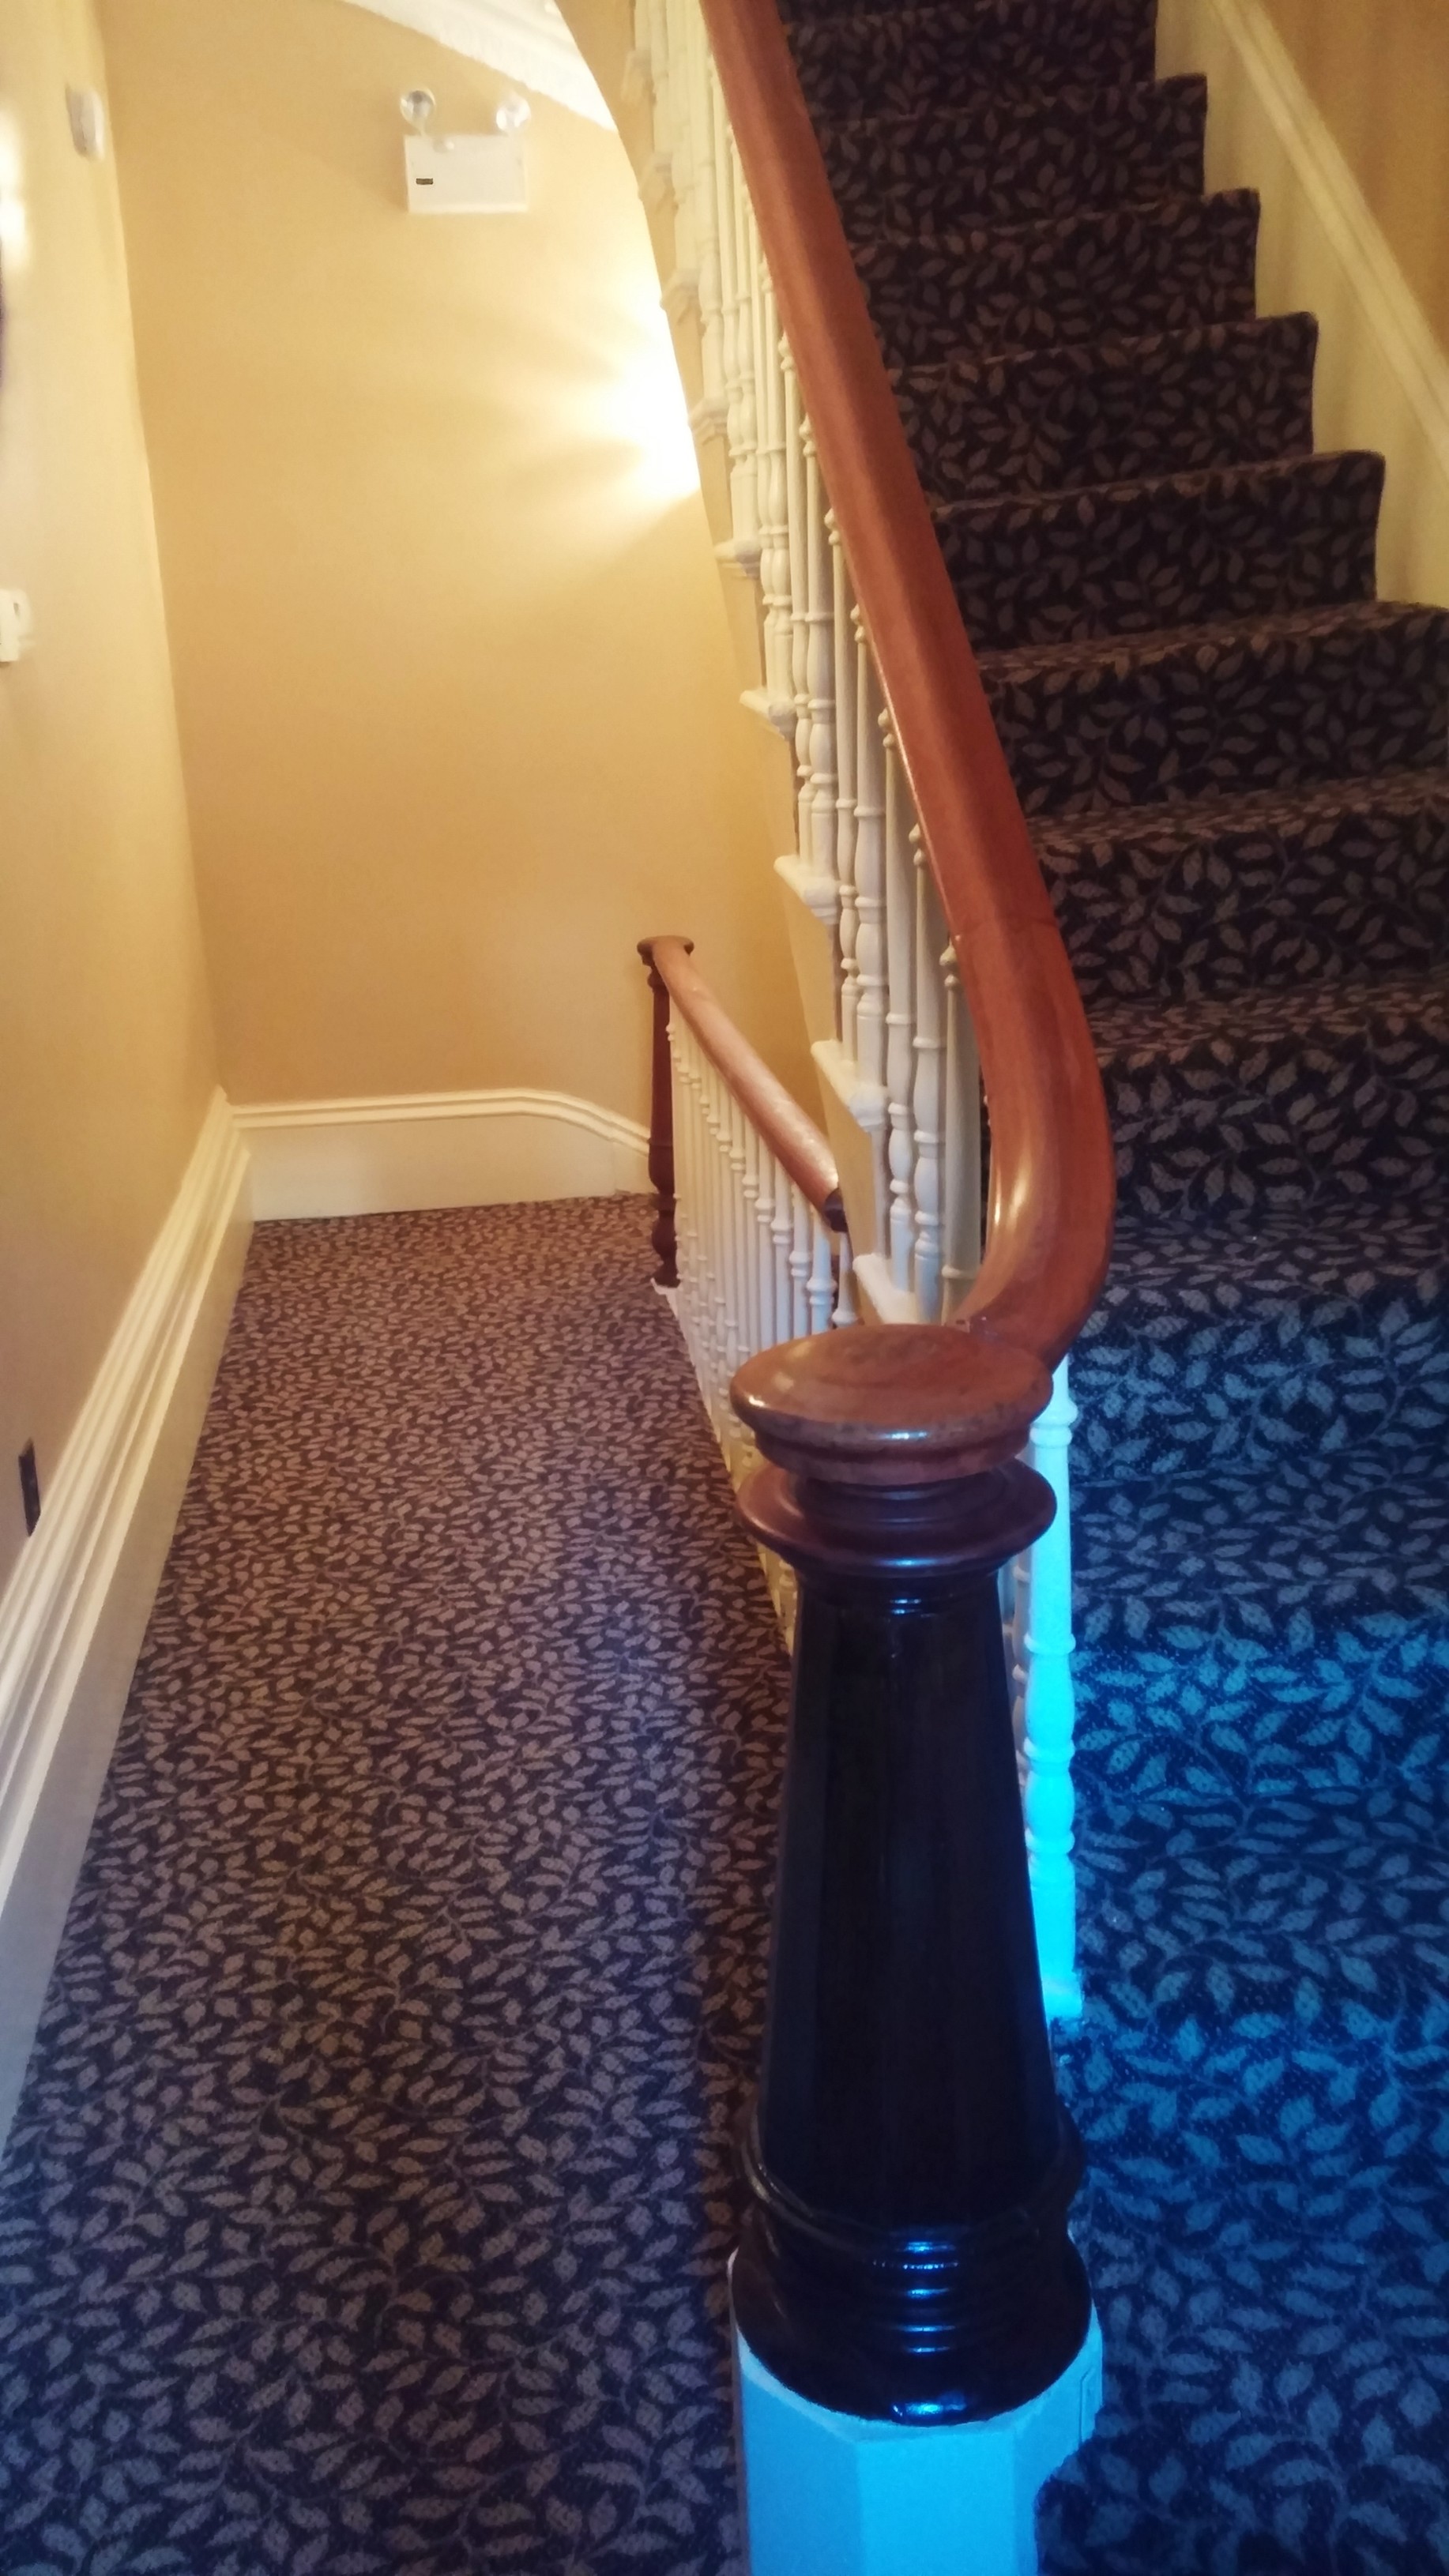
The railing of the extensive banister was sanded and stained to complement the beautiful walnut of the doors. The underside of the railing had been painted white, and was restored to its natural look. Loose spindles were secured in place. The large newel post on the main landing, also painted white, was stripped and brought back to its original appearance.
The old carpet had been wrapped around the side of each step and along each landing, secured by using hundreds of staples.

Upon removing it, the woodwork on the side of the treads revealed extensive damage and had to be restored.
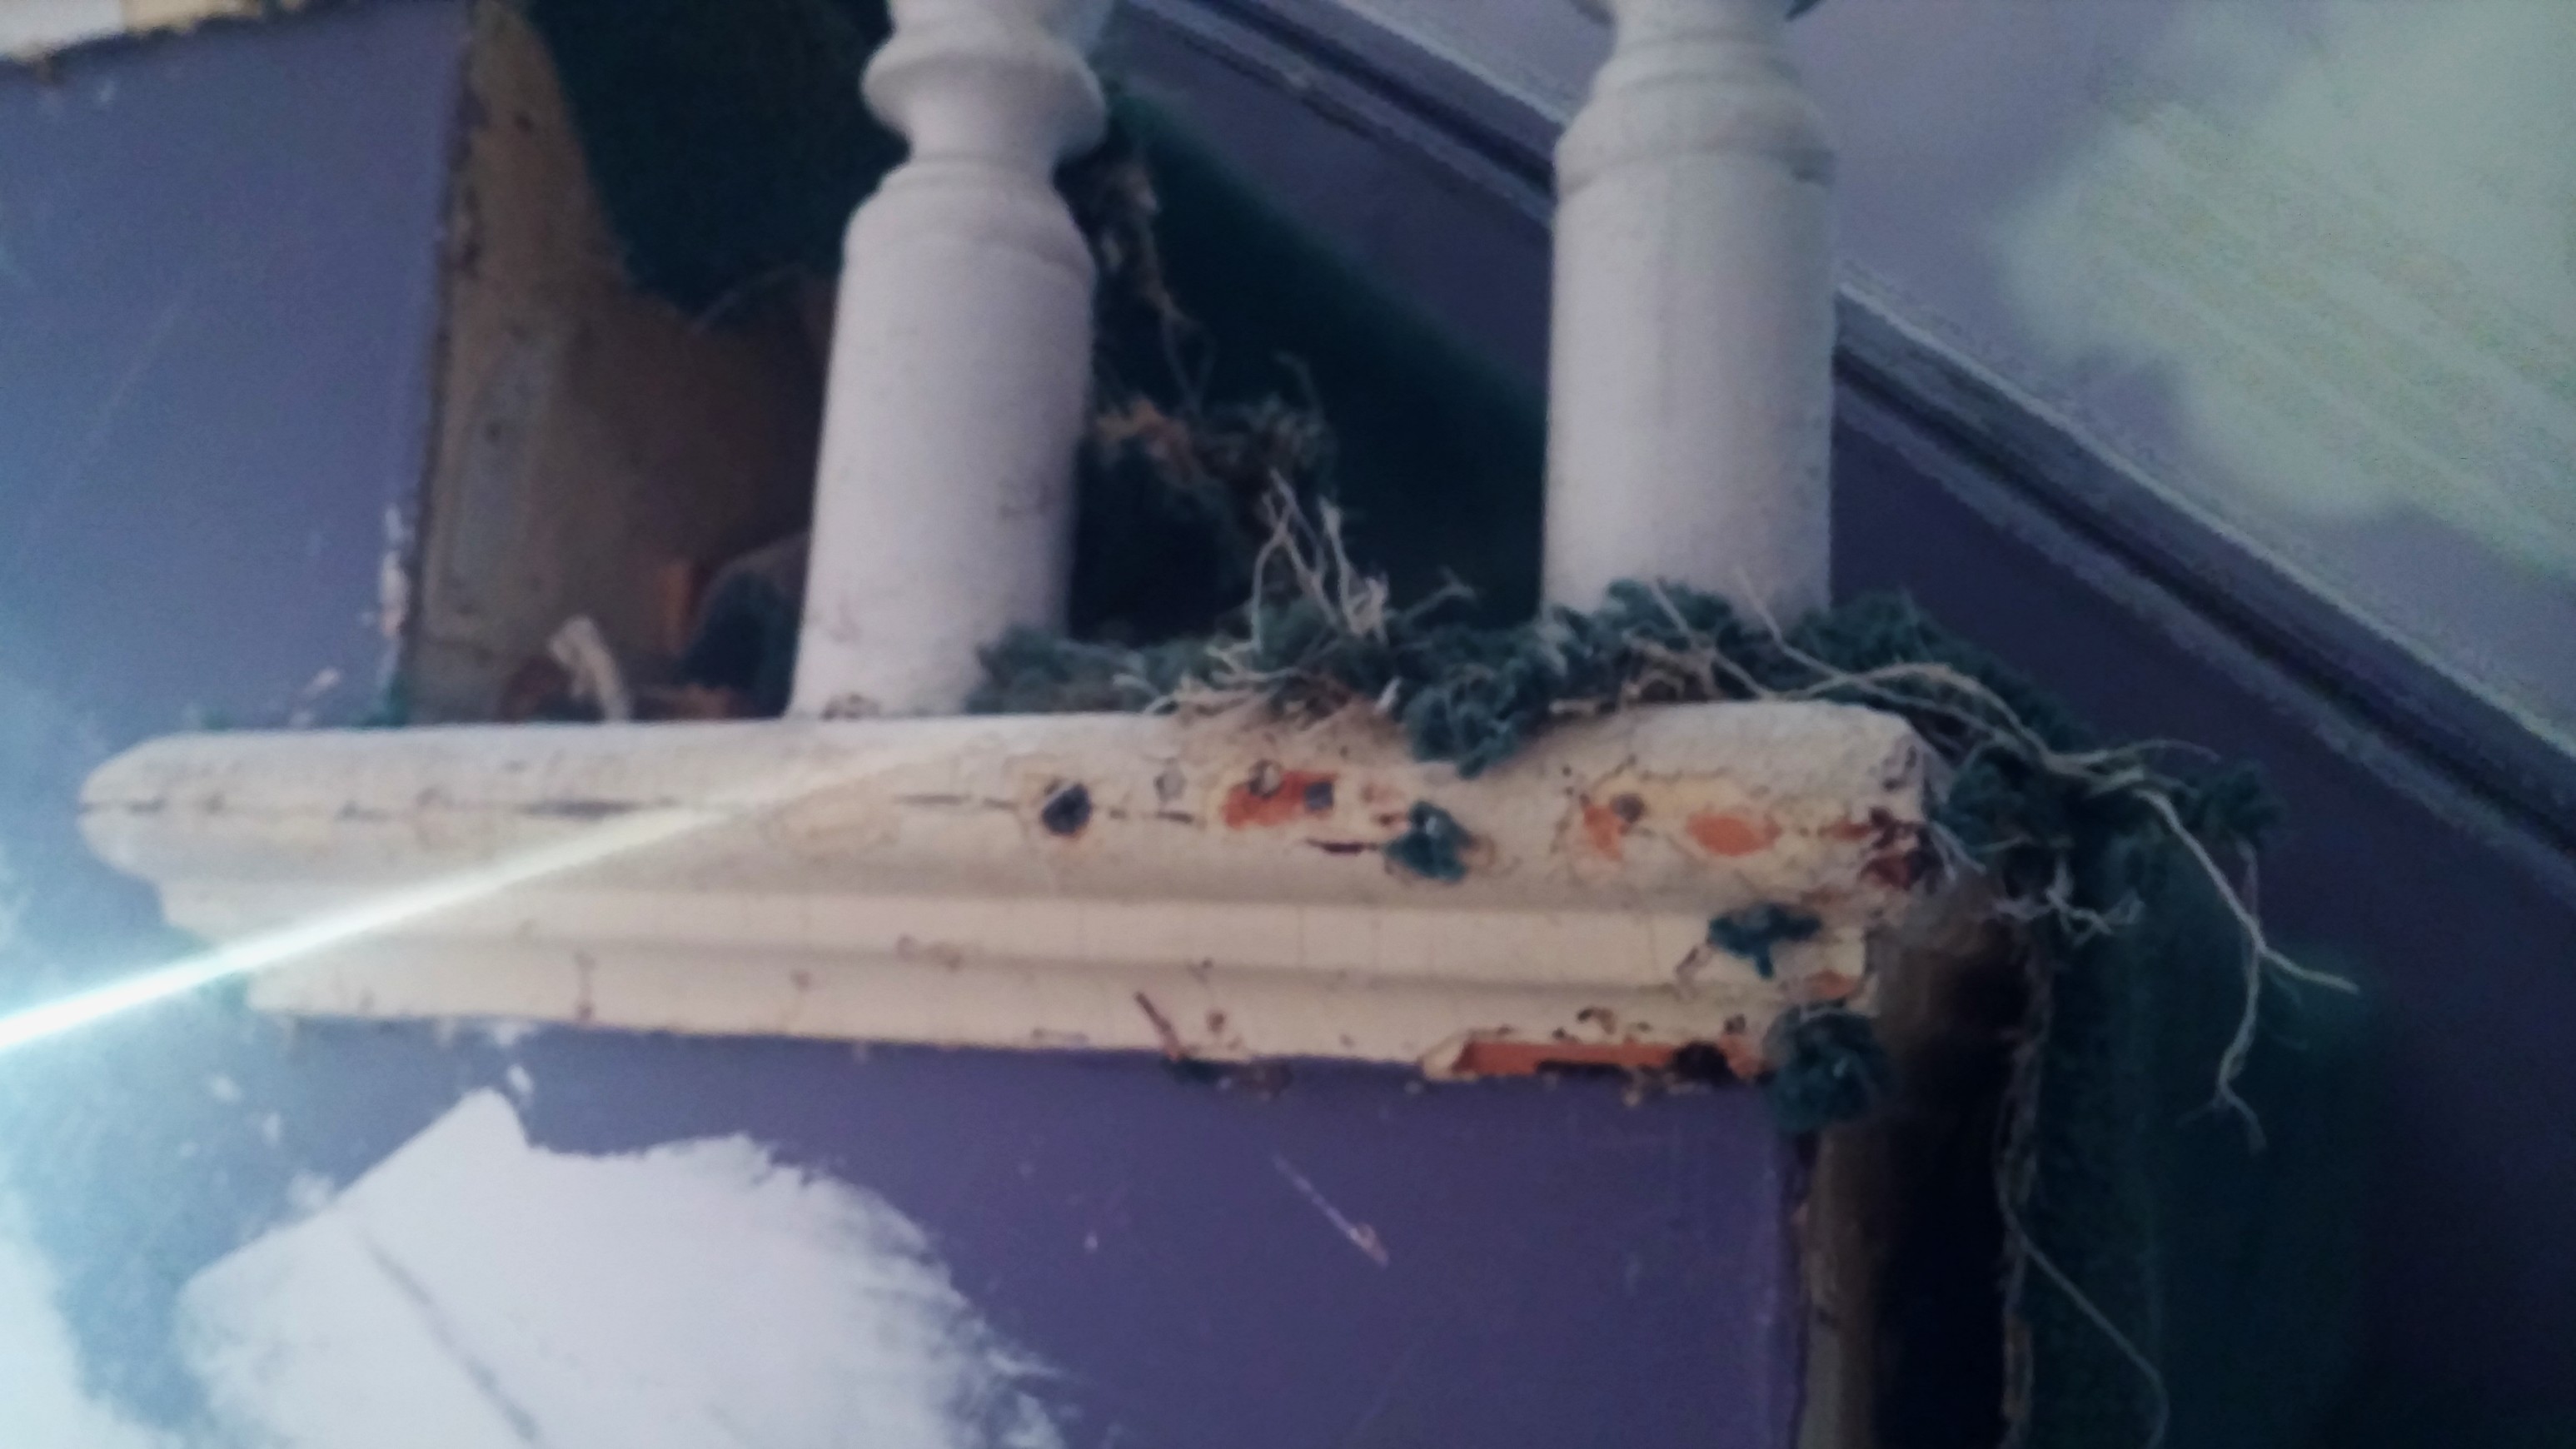
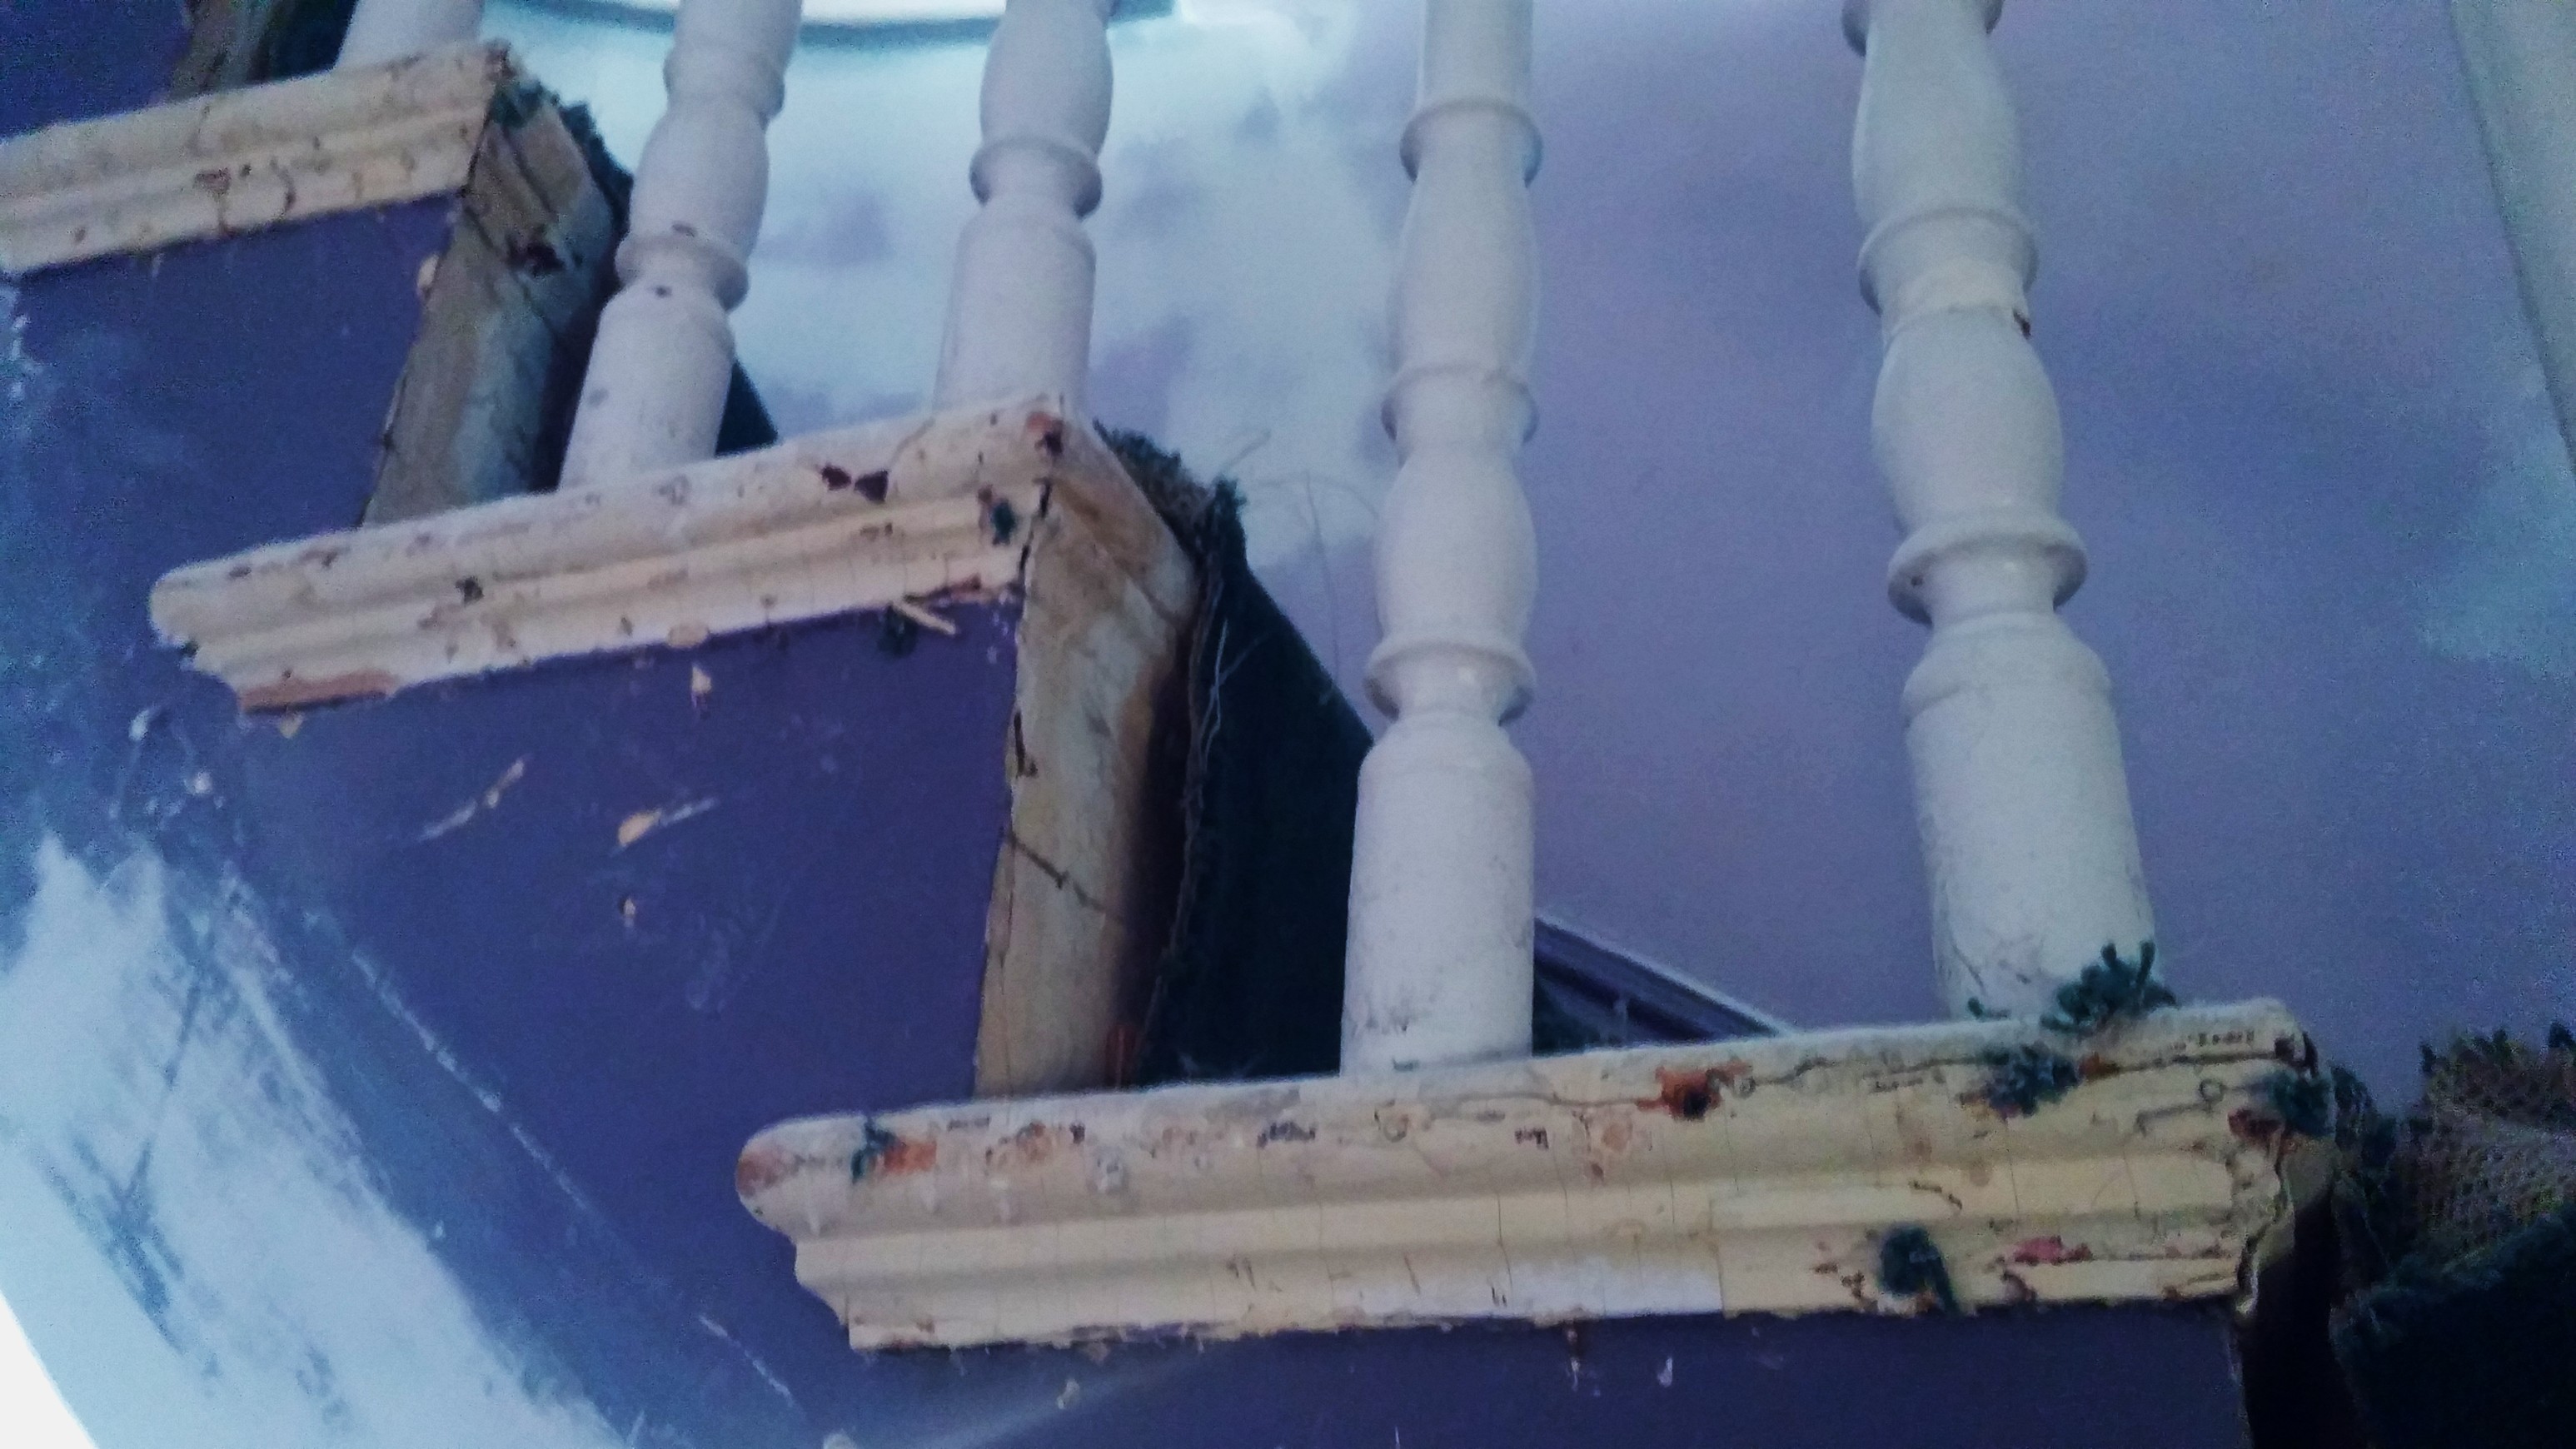
Some of the woodwork on curved sections of the staircase was either missing or completely disfigured by the aggressive stapling.
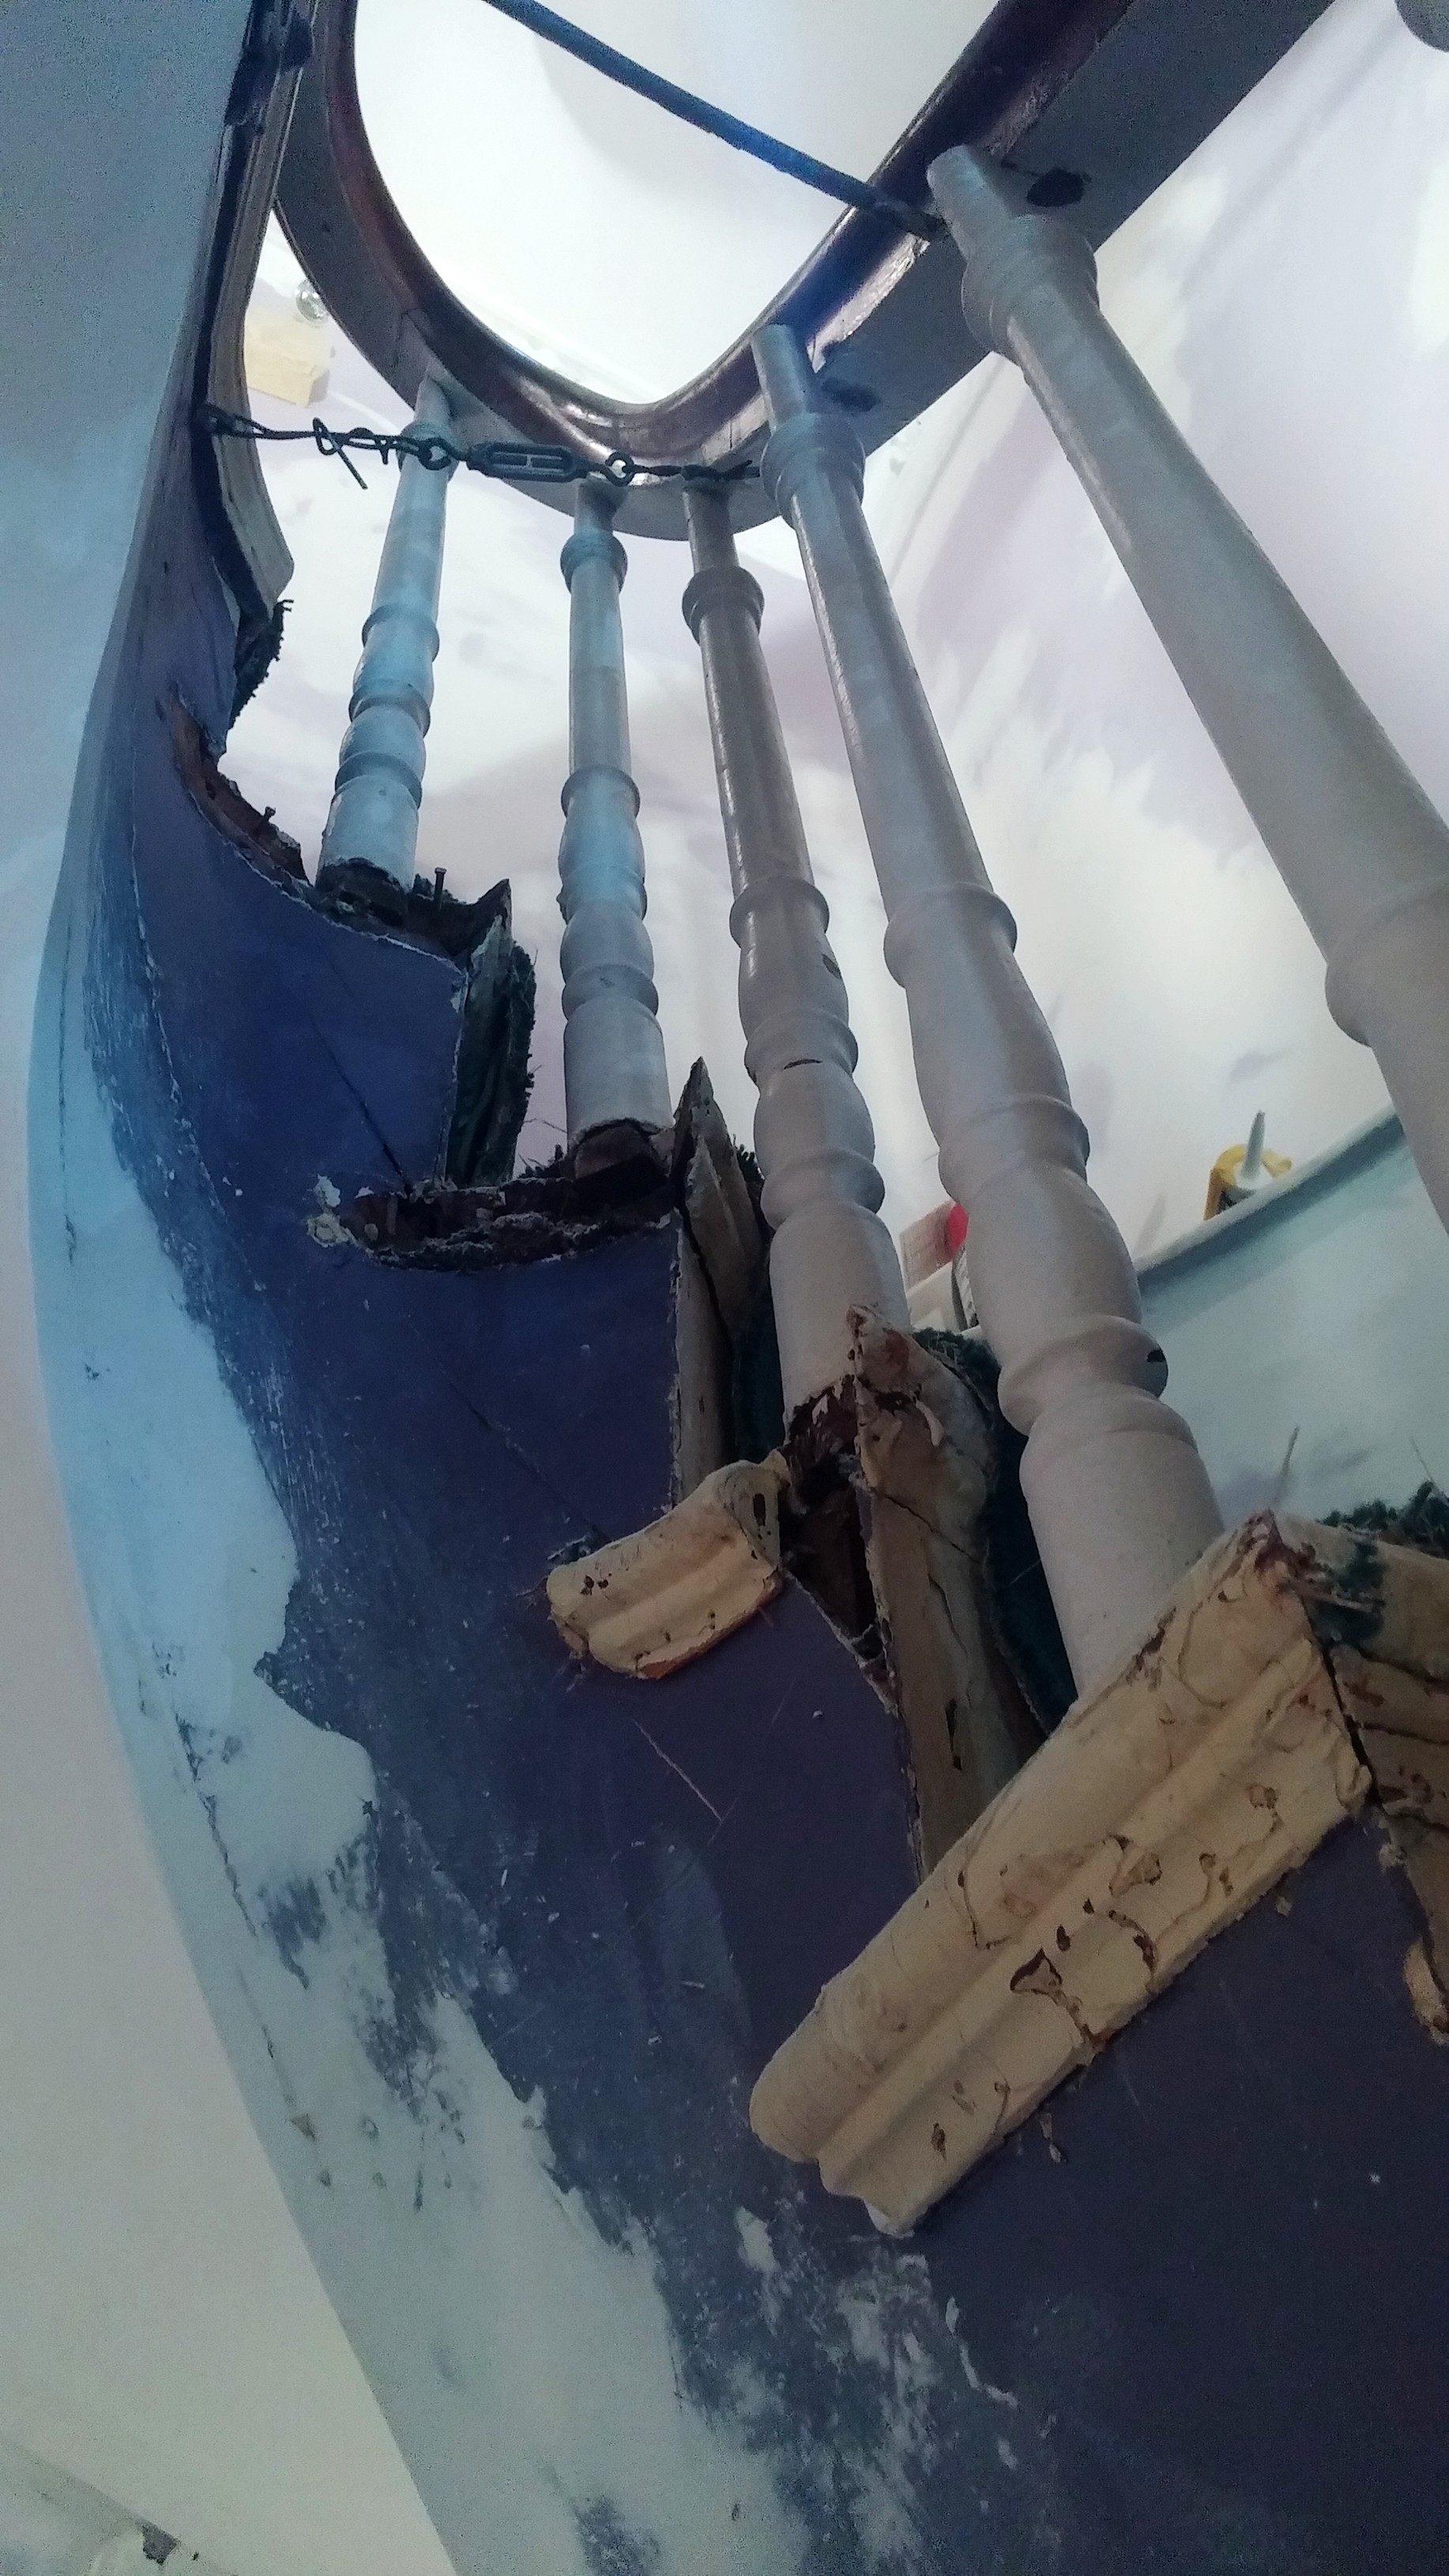
The profile consisted of a traditional one-inch half-round bull-nose for the upper portion, and a small 3/4-inch cove at the bottom. Our craftsmen patiently replicated each section, and all the damaged or missing pieces were replaced.
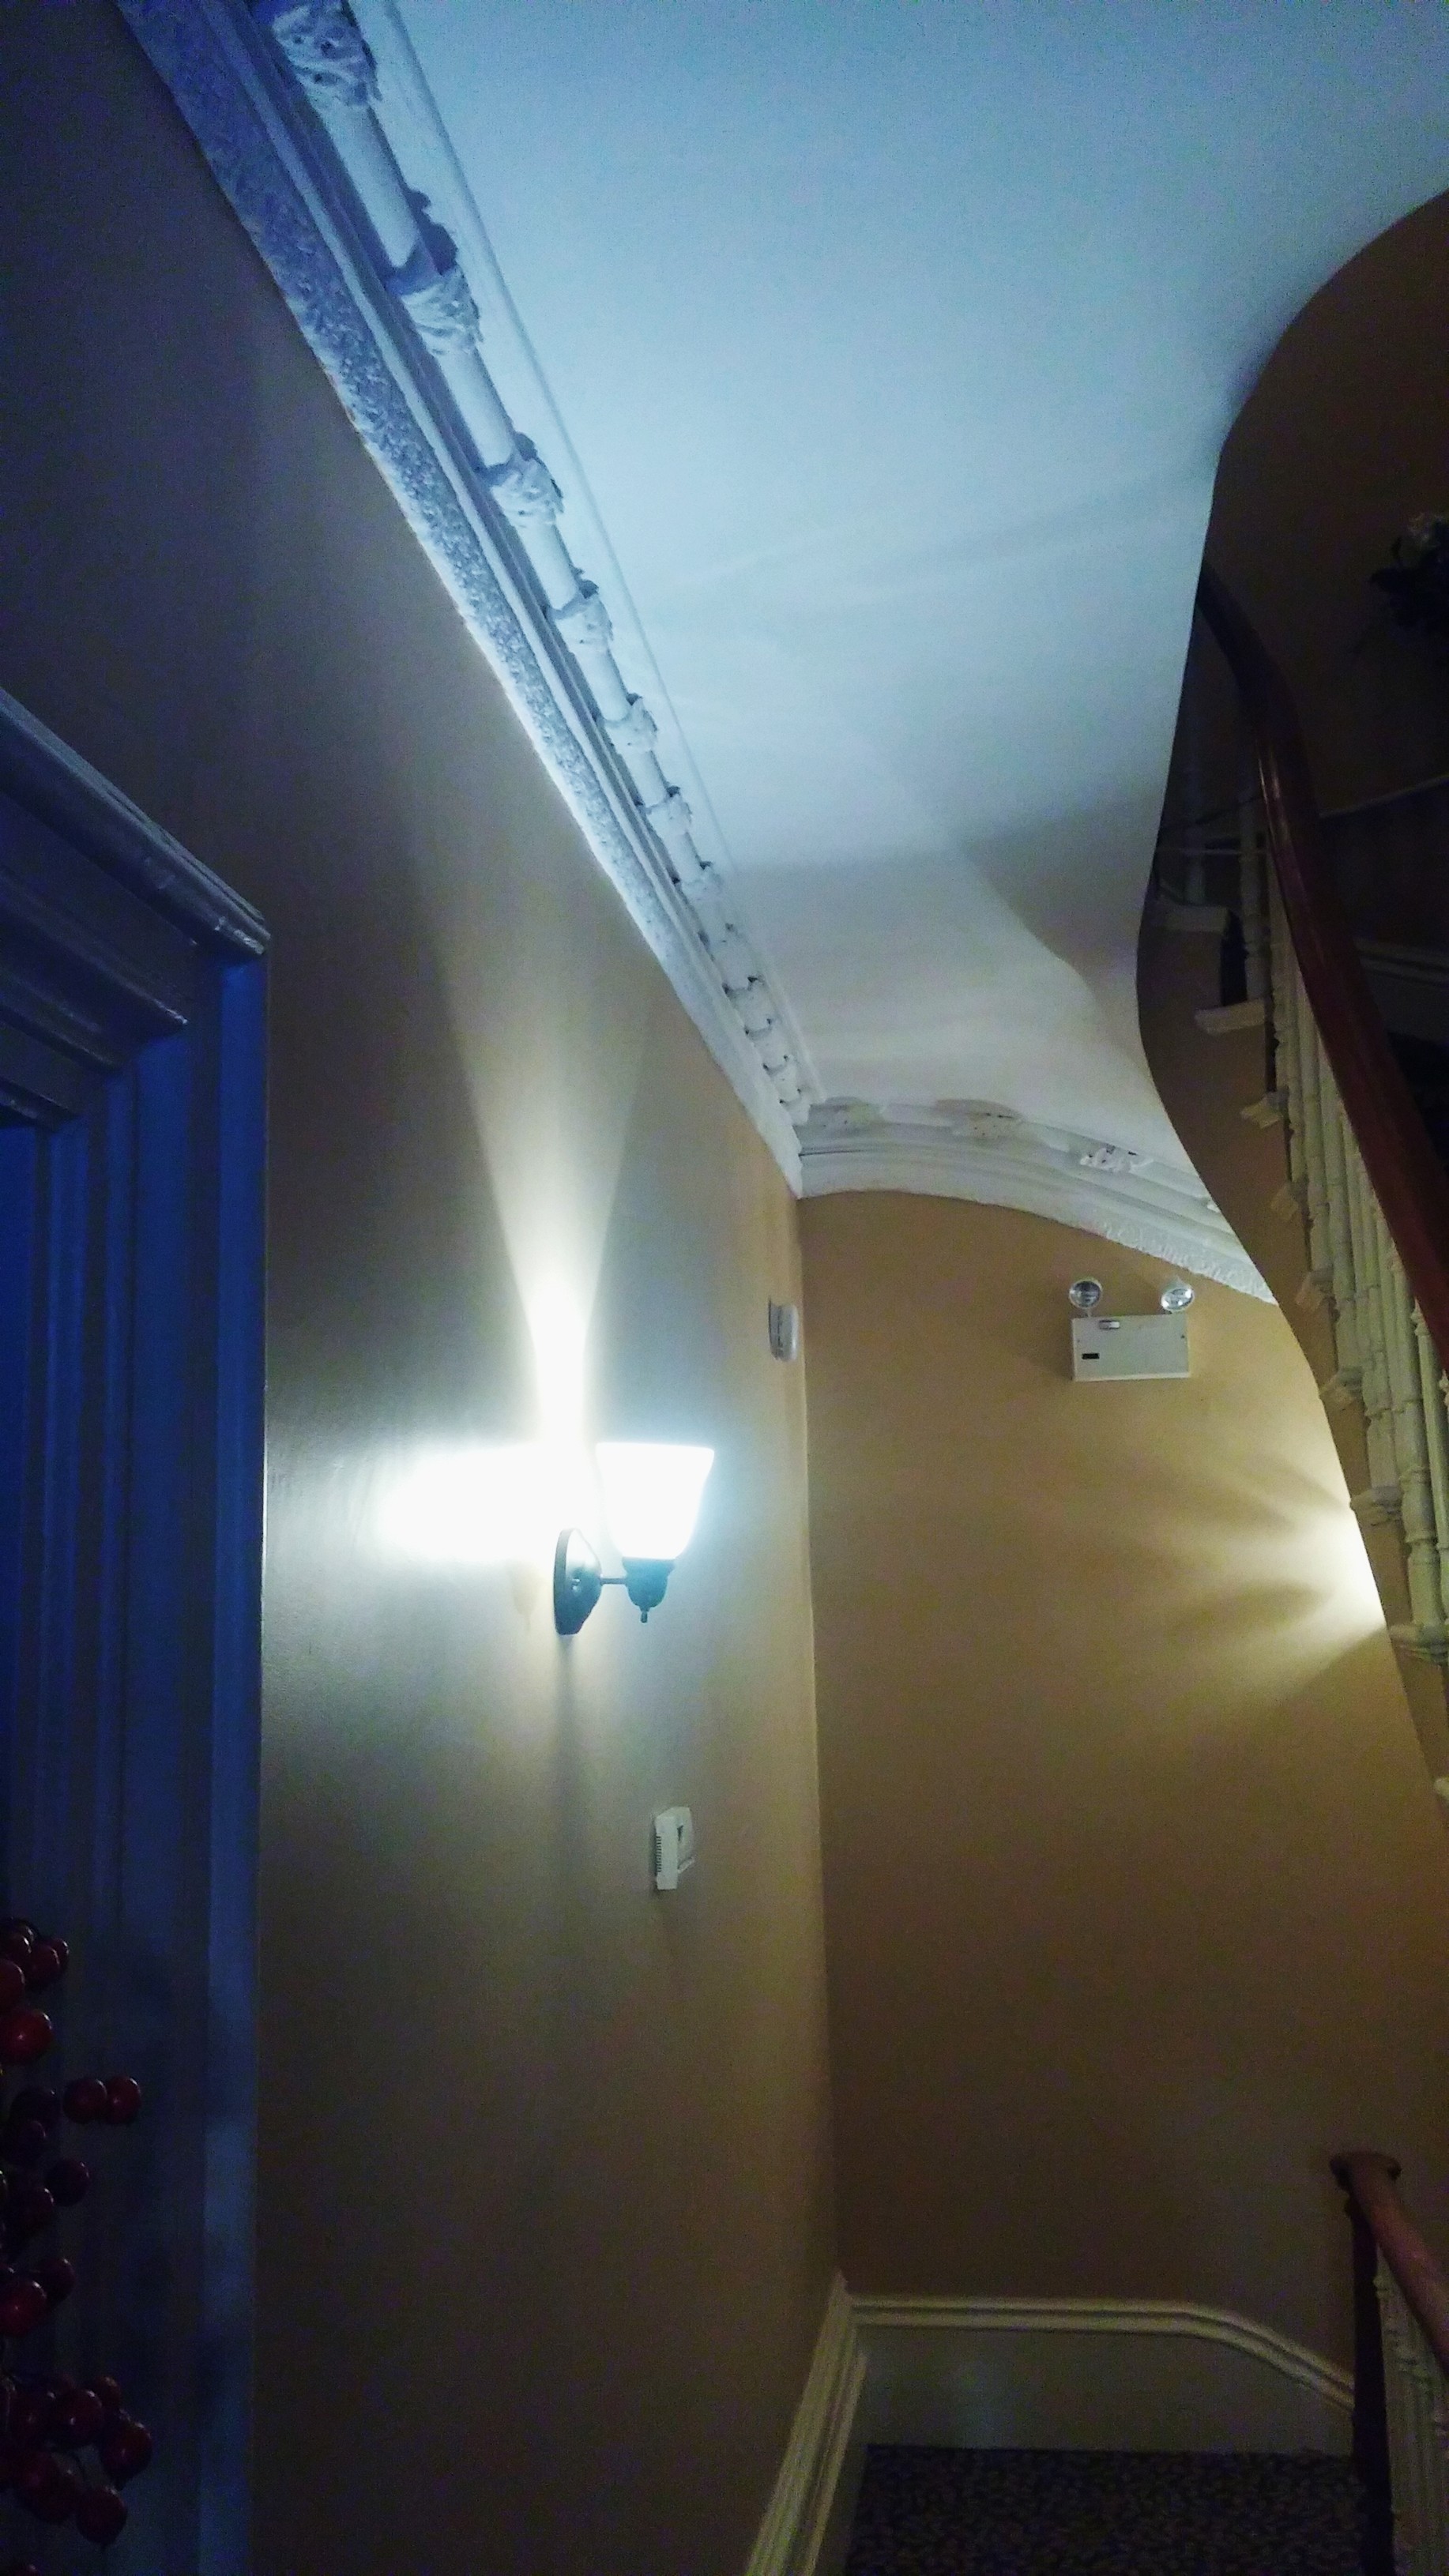
We directed the owners to choose among historically sensible color schemes. They finally selected a delicate yet whimsical leaf-patterned night-blue and tan carpet that evokes nineteenth-century elegance. It beautifully complements the champagne walls and custom-mixed off-white for the woodwork, both of which were created by modifying the tan color present in the carpet. The ceilings were painted a brilliant white to offset the darkness of the carpet. Here is the final result!
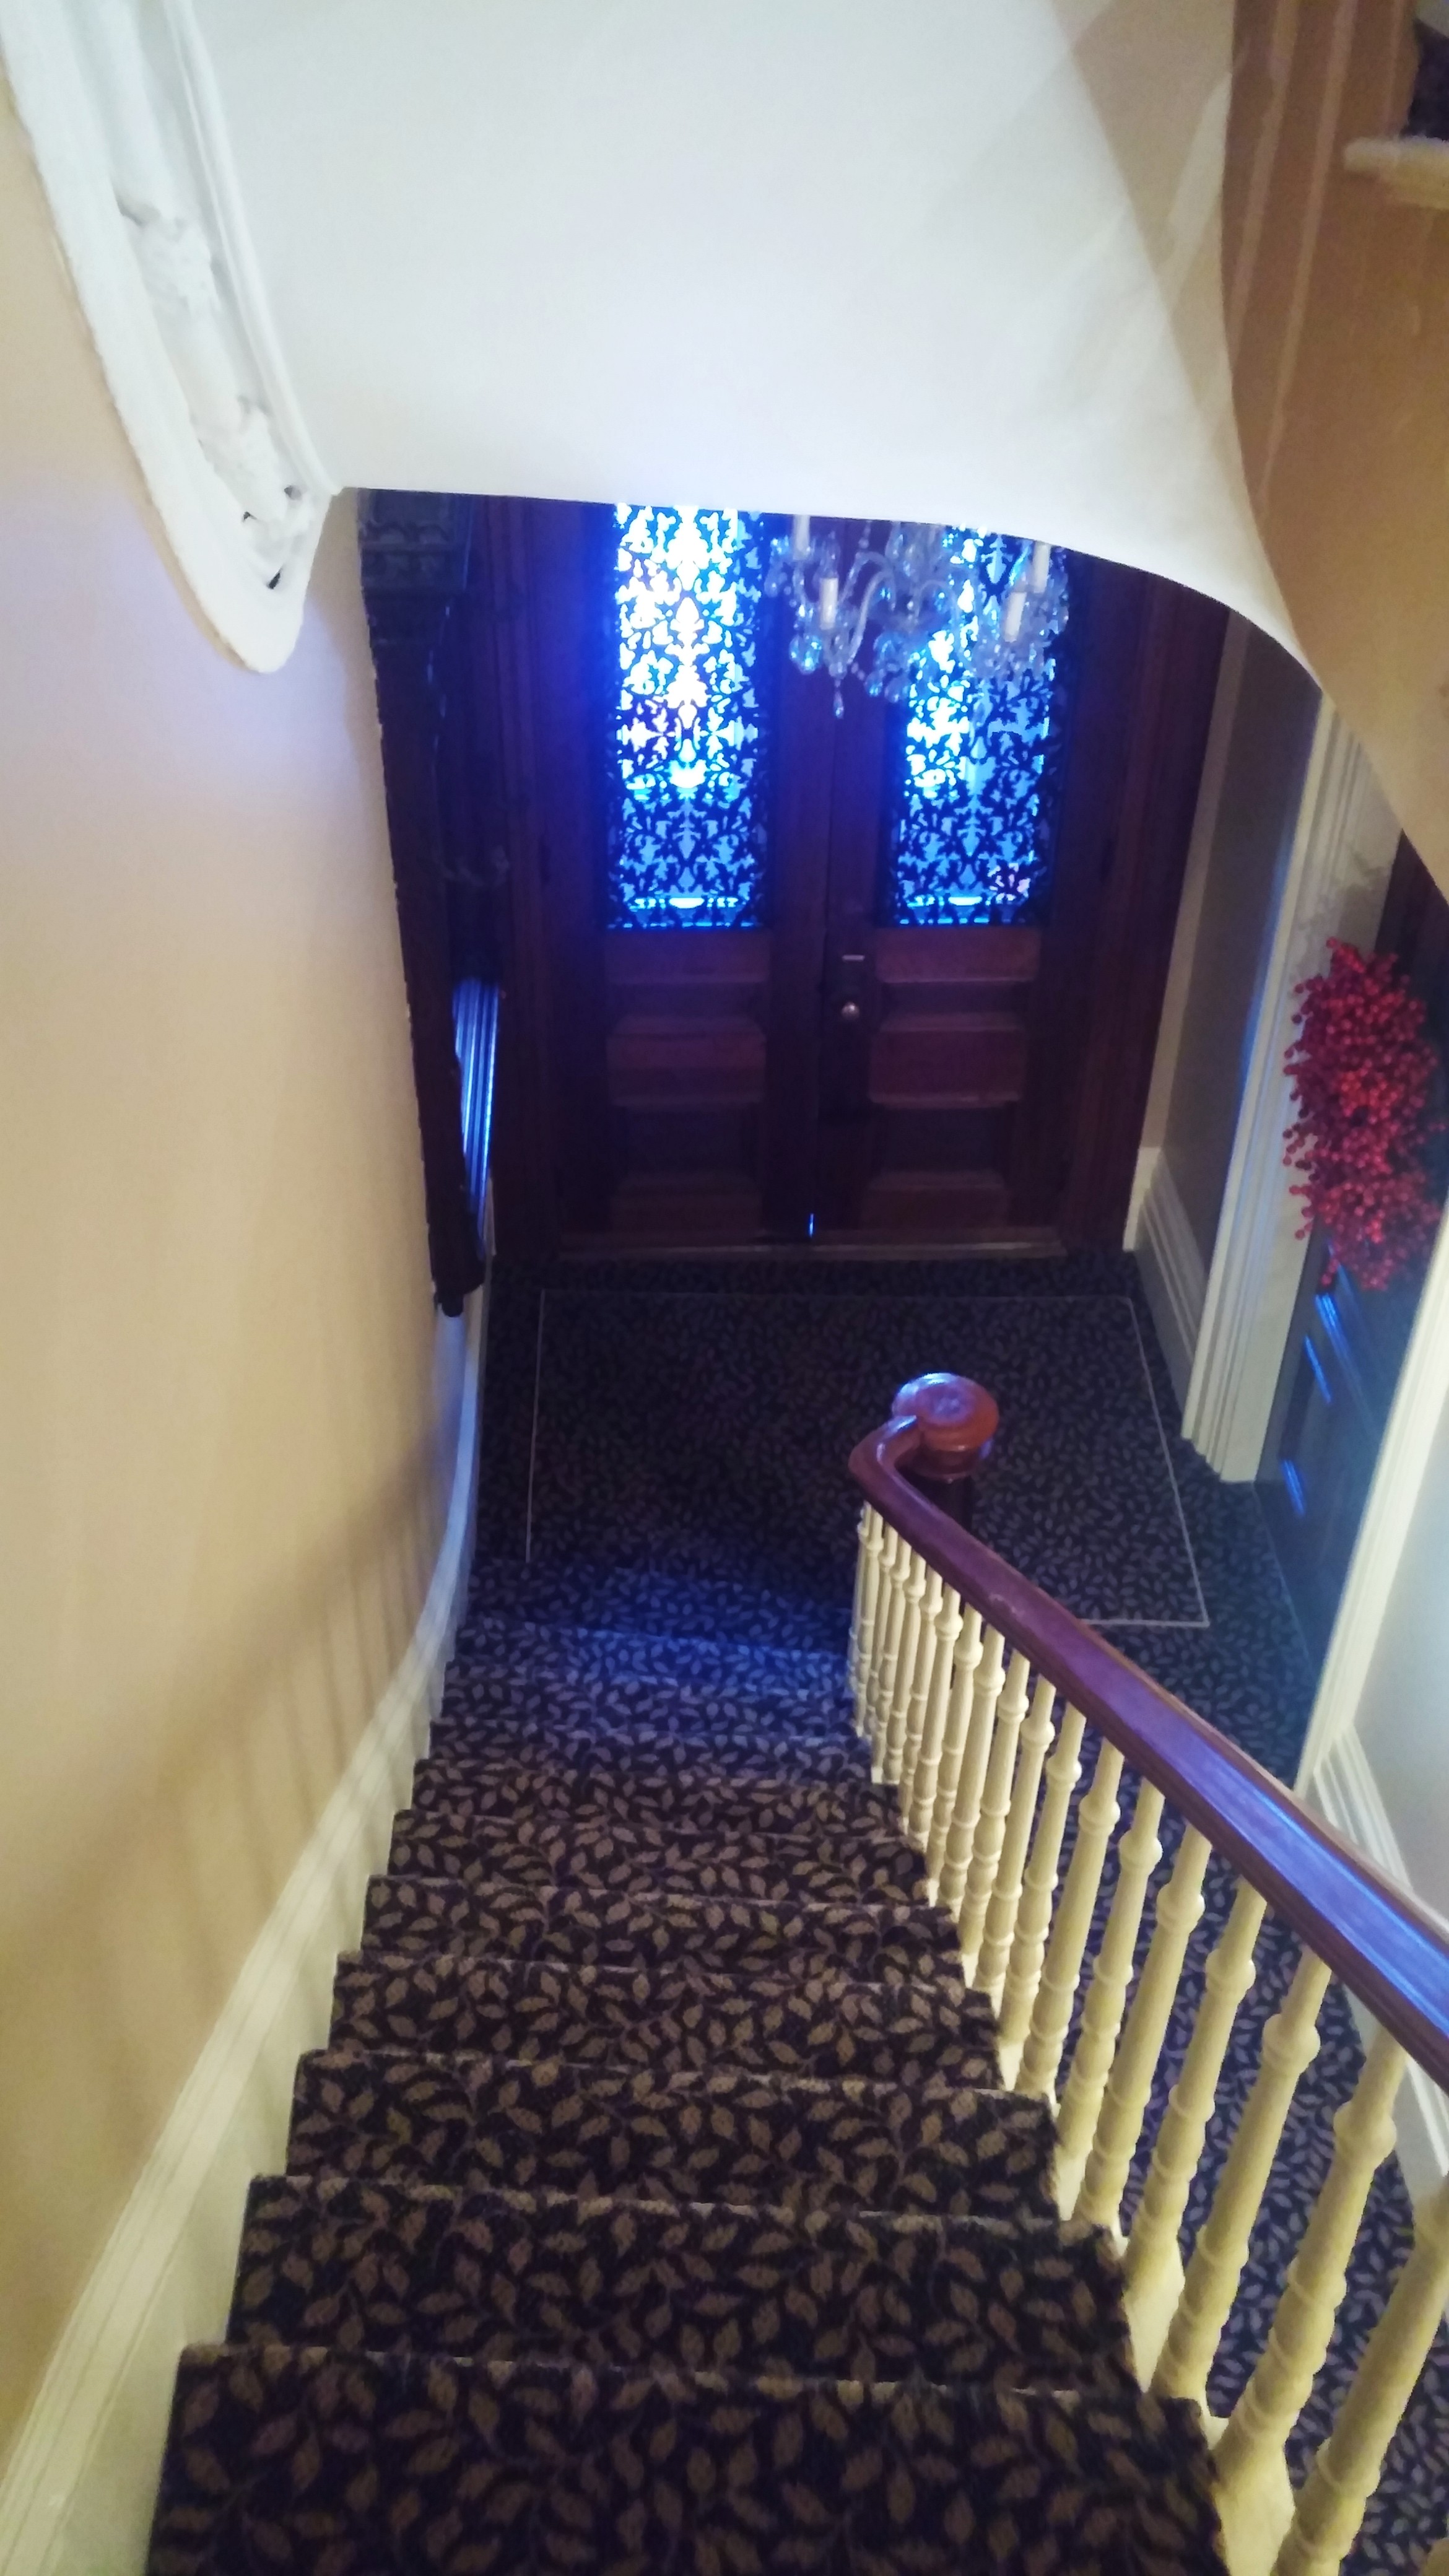
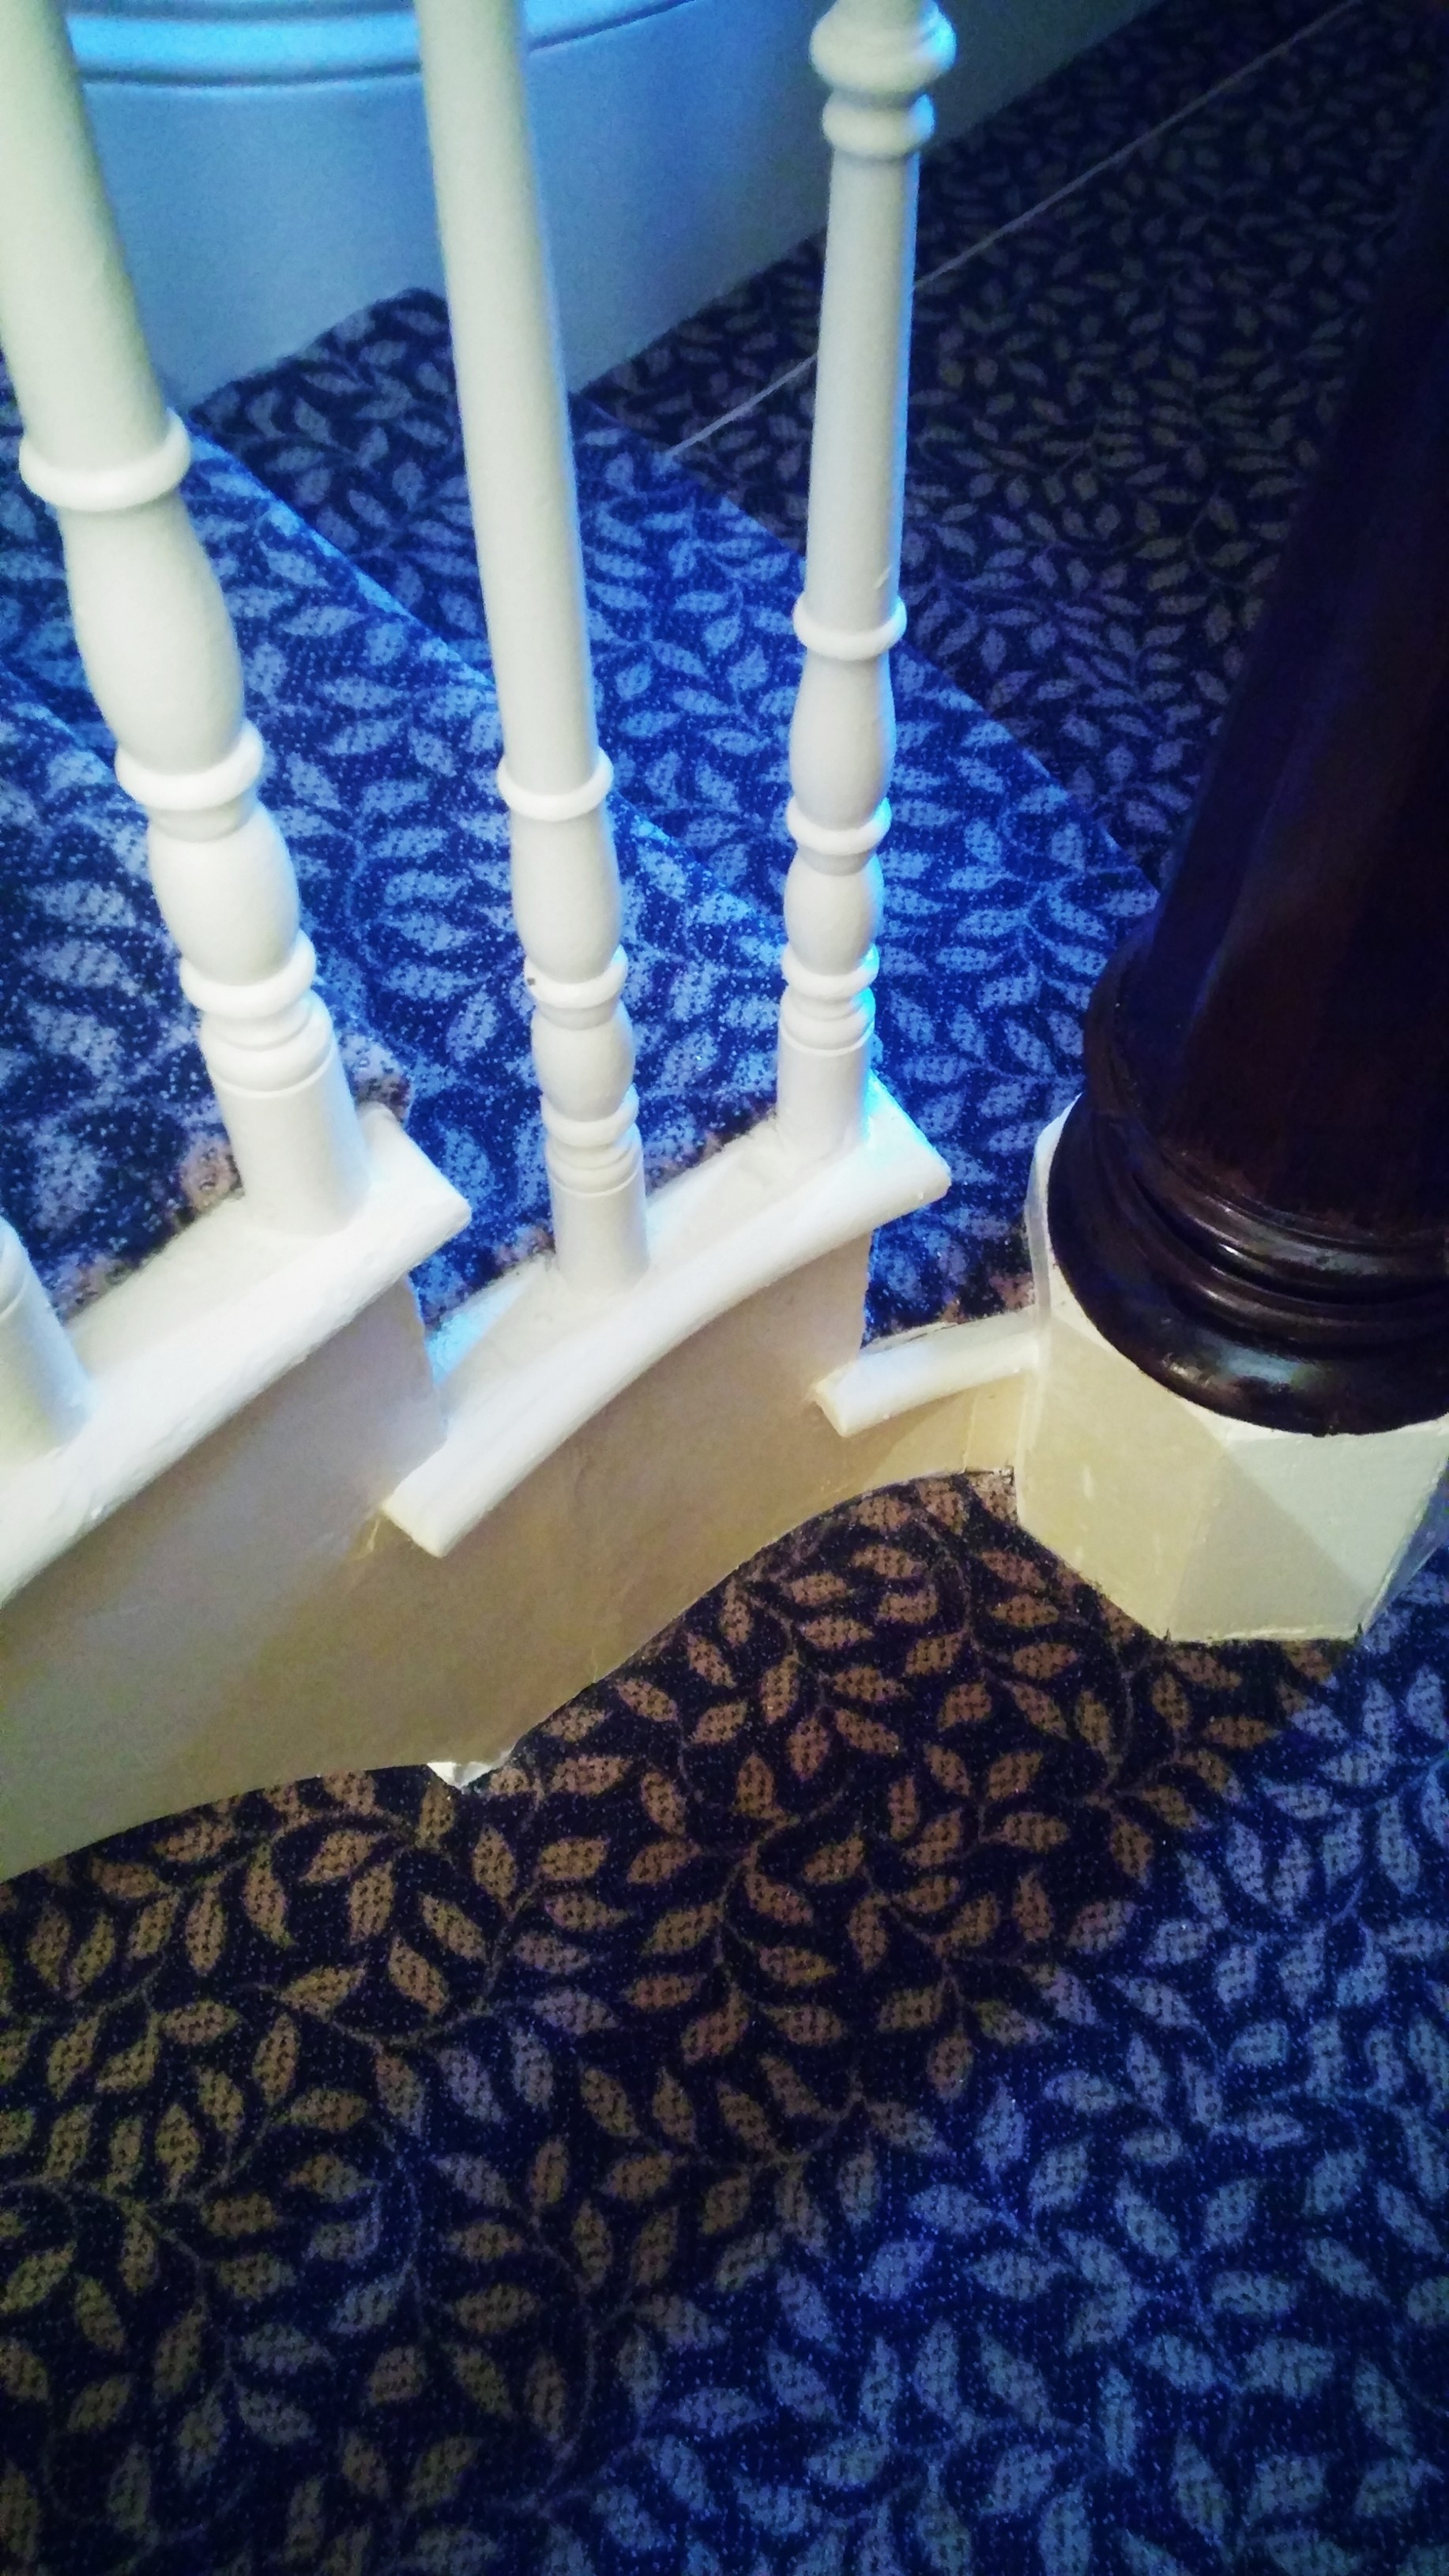


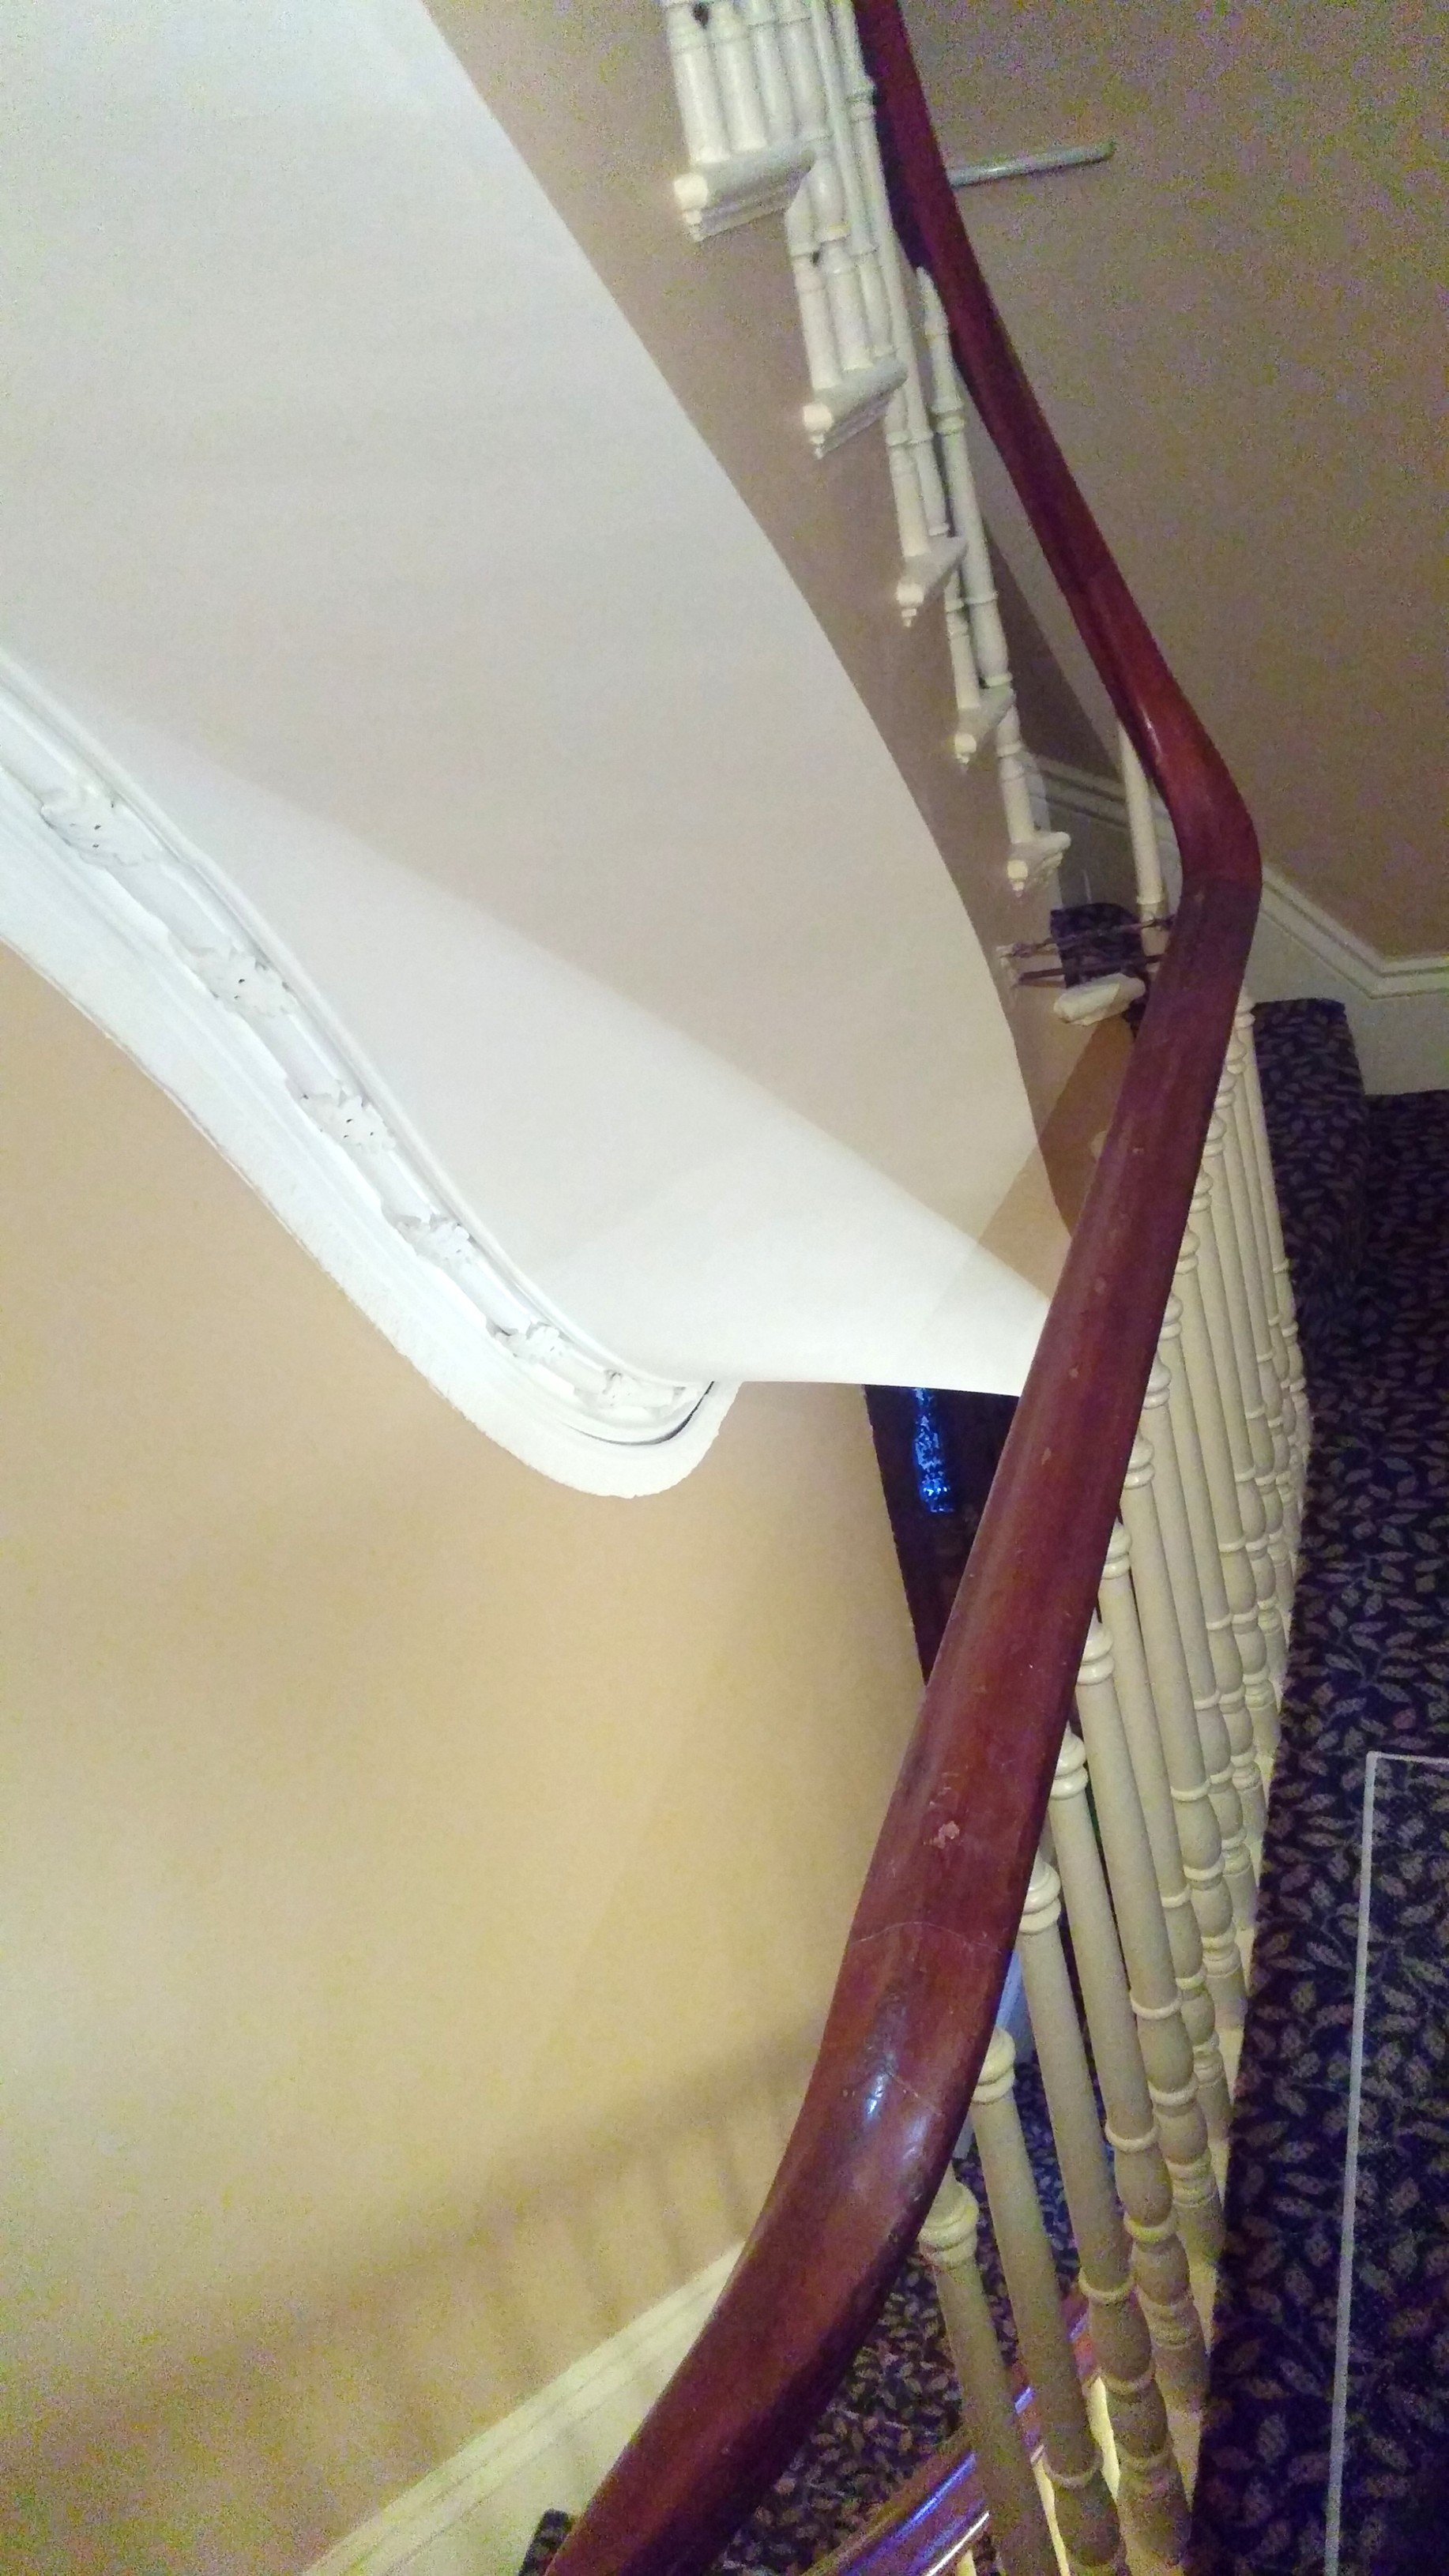
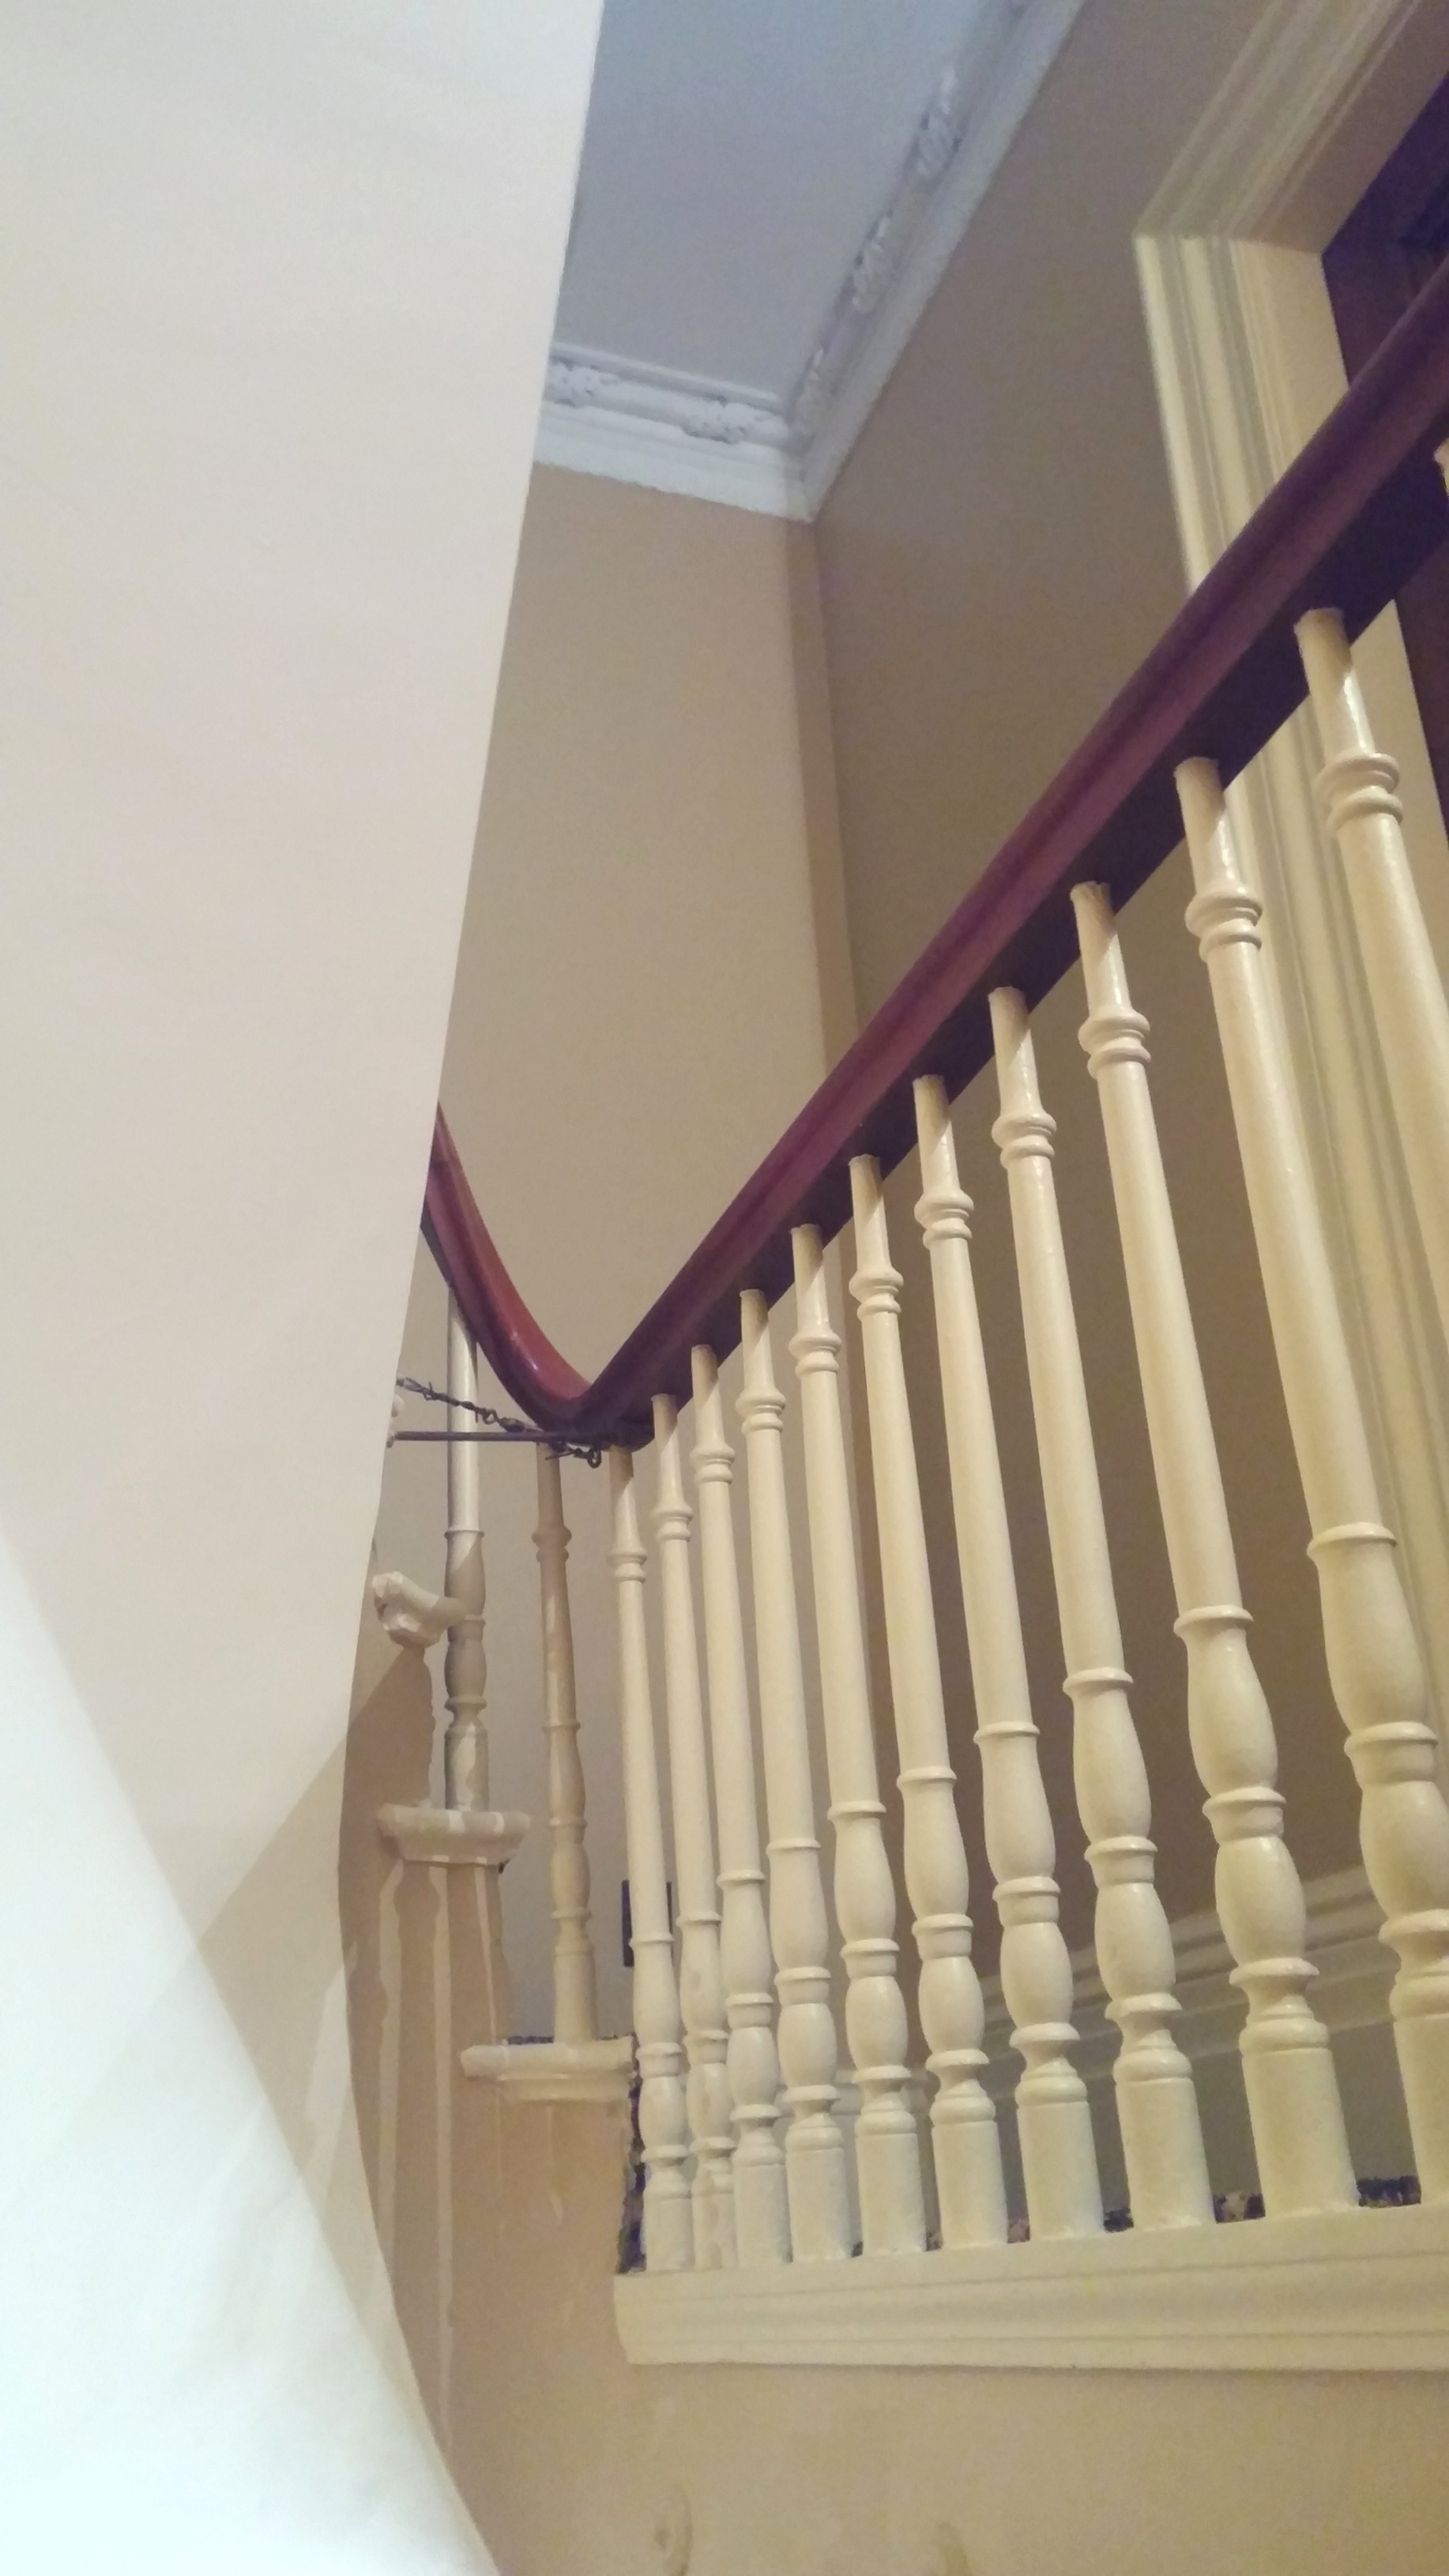
Just one last look at a detail of the staircase, before and after:
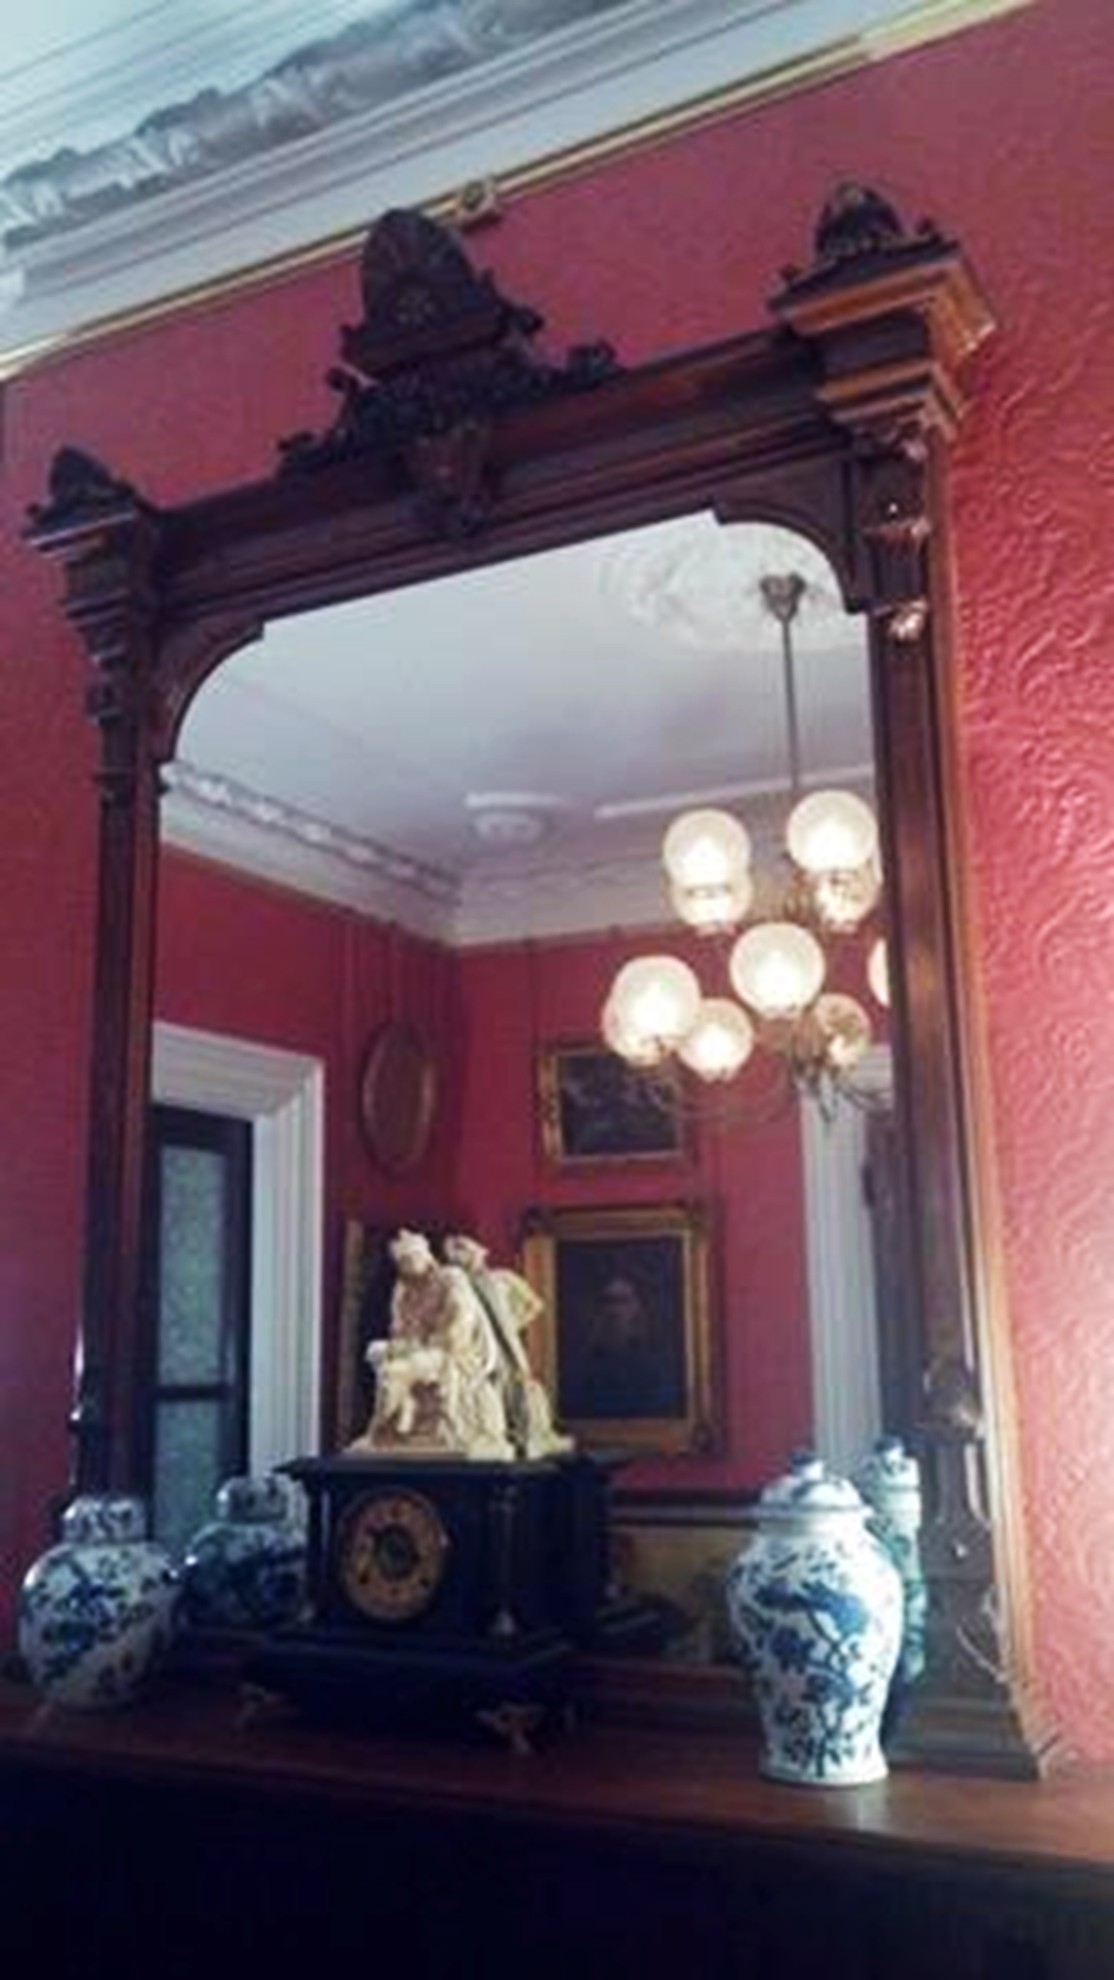
Restoration of Reception Room in 1850s Boston Brownstone
One of the jewels of our portfolio is the complete restoration of a reception room in an 1850s Boston brownstone. Owned by one of our most faithful clients, several of the projects featured on our website come from this gorgeous home. The room boasts twelve-foot ceilings, original woodwork, original mahogany doors and pocket doors (see their restoration) with original hardware, extensive ceiling plasterwork, and a mantelpiece we had already restored in 2013 by creating an elaborate insert and a new hearth (see the process).
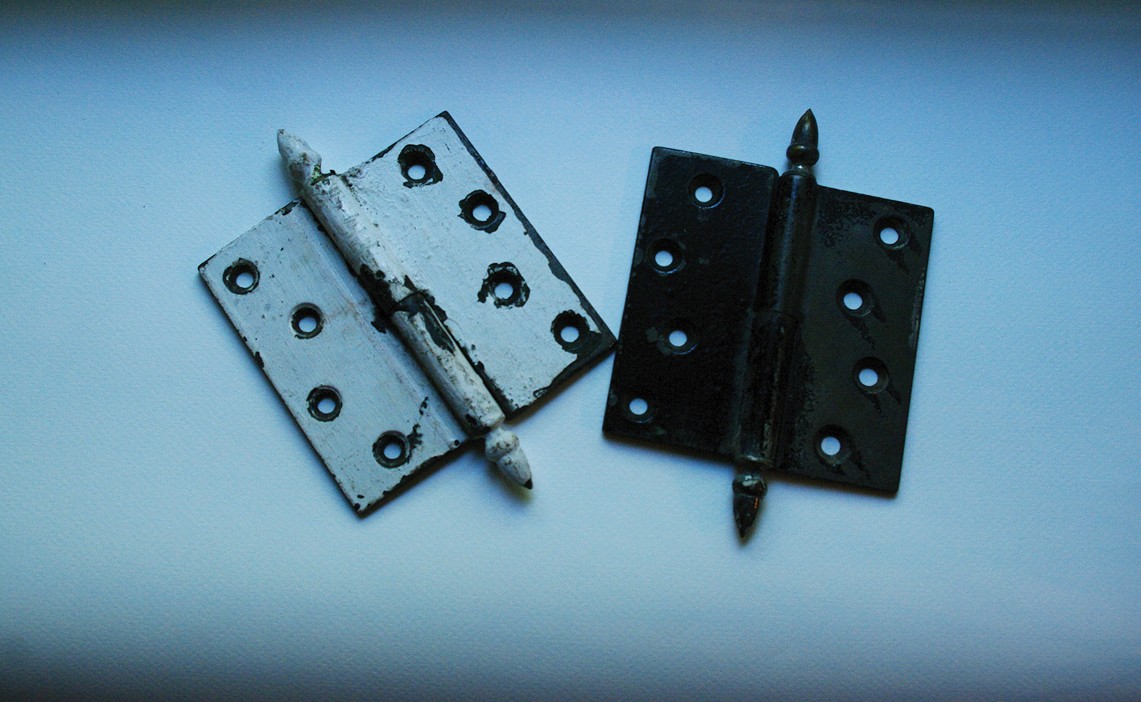
We restored the ceiling plasterwork wherever it showed relevant damage; and removed many layers of paint from the original doors and their black-enamel acorn-tip hinges, from the woodwork around the three doorways, and from the baseboards.
Embossed wallpaper in exotic-foliage or damask patterns was popular in Victorian Boston, especially in the late part of the nineteenth century (the grand entryway at the Gibson House is an example). We chose a splendid large-damask-pattern anaglypta paintable wall covering; we hung a dado paneling for the lower portion of the walls, also in embossed wallpaper; and created a custom-design chair rail in mahogany and delicate gold leaf, which divides the damask portion from the dado paneling. We painted the upper section in a lush antique-mauve color, and the dado paneling in a dark glazed gold.
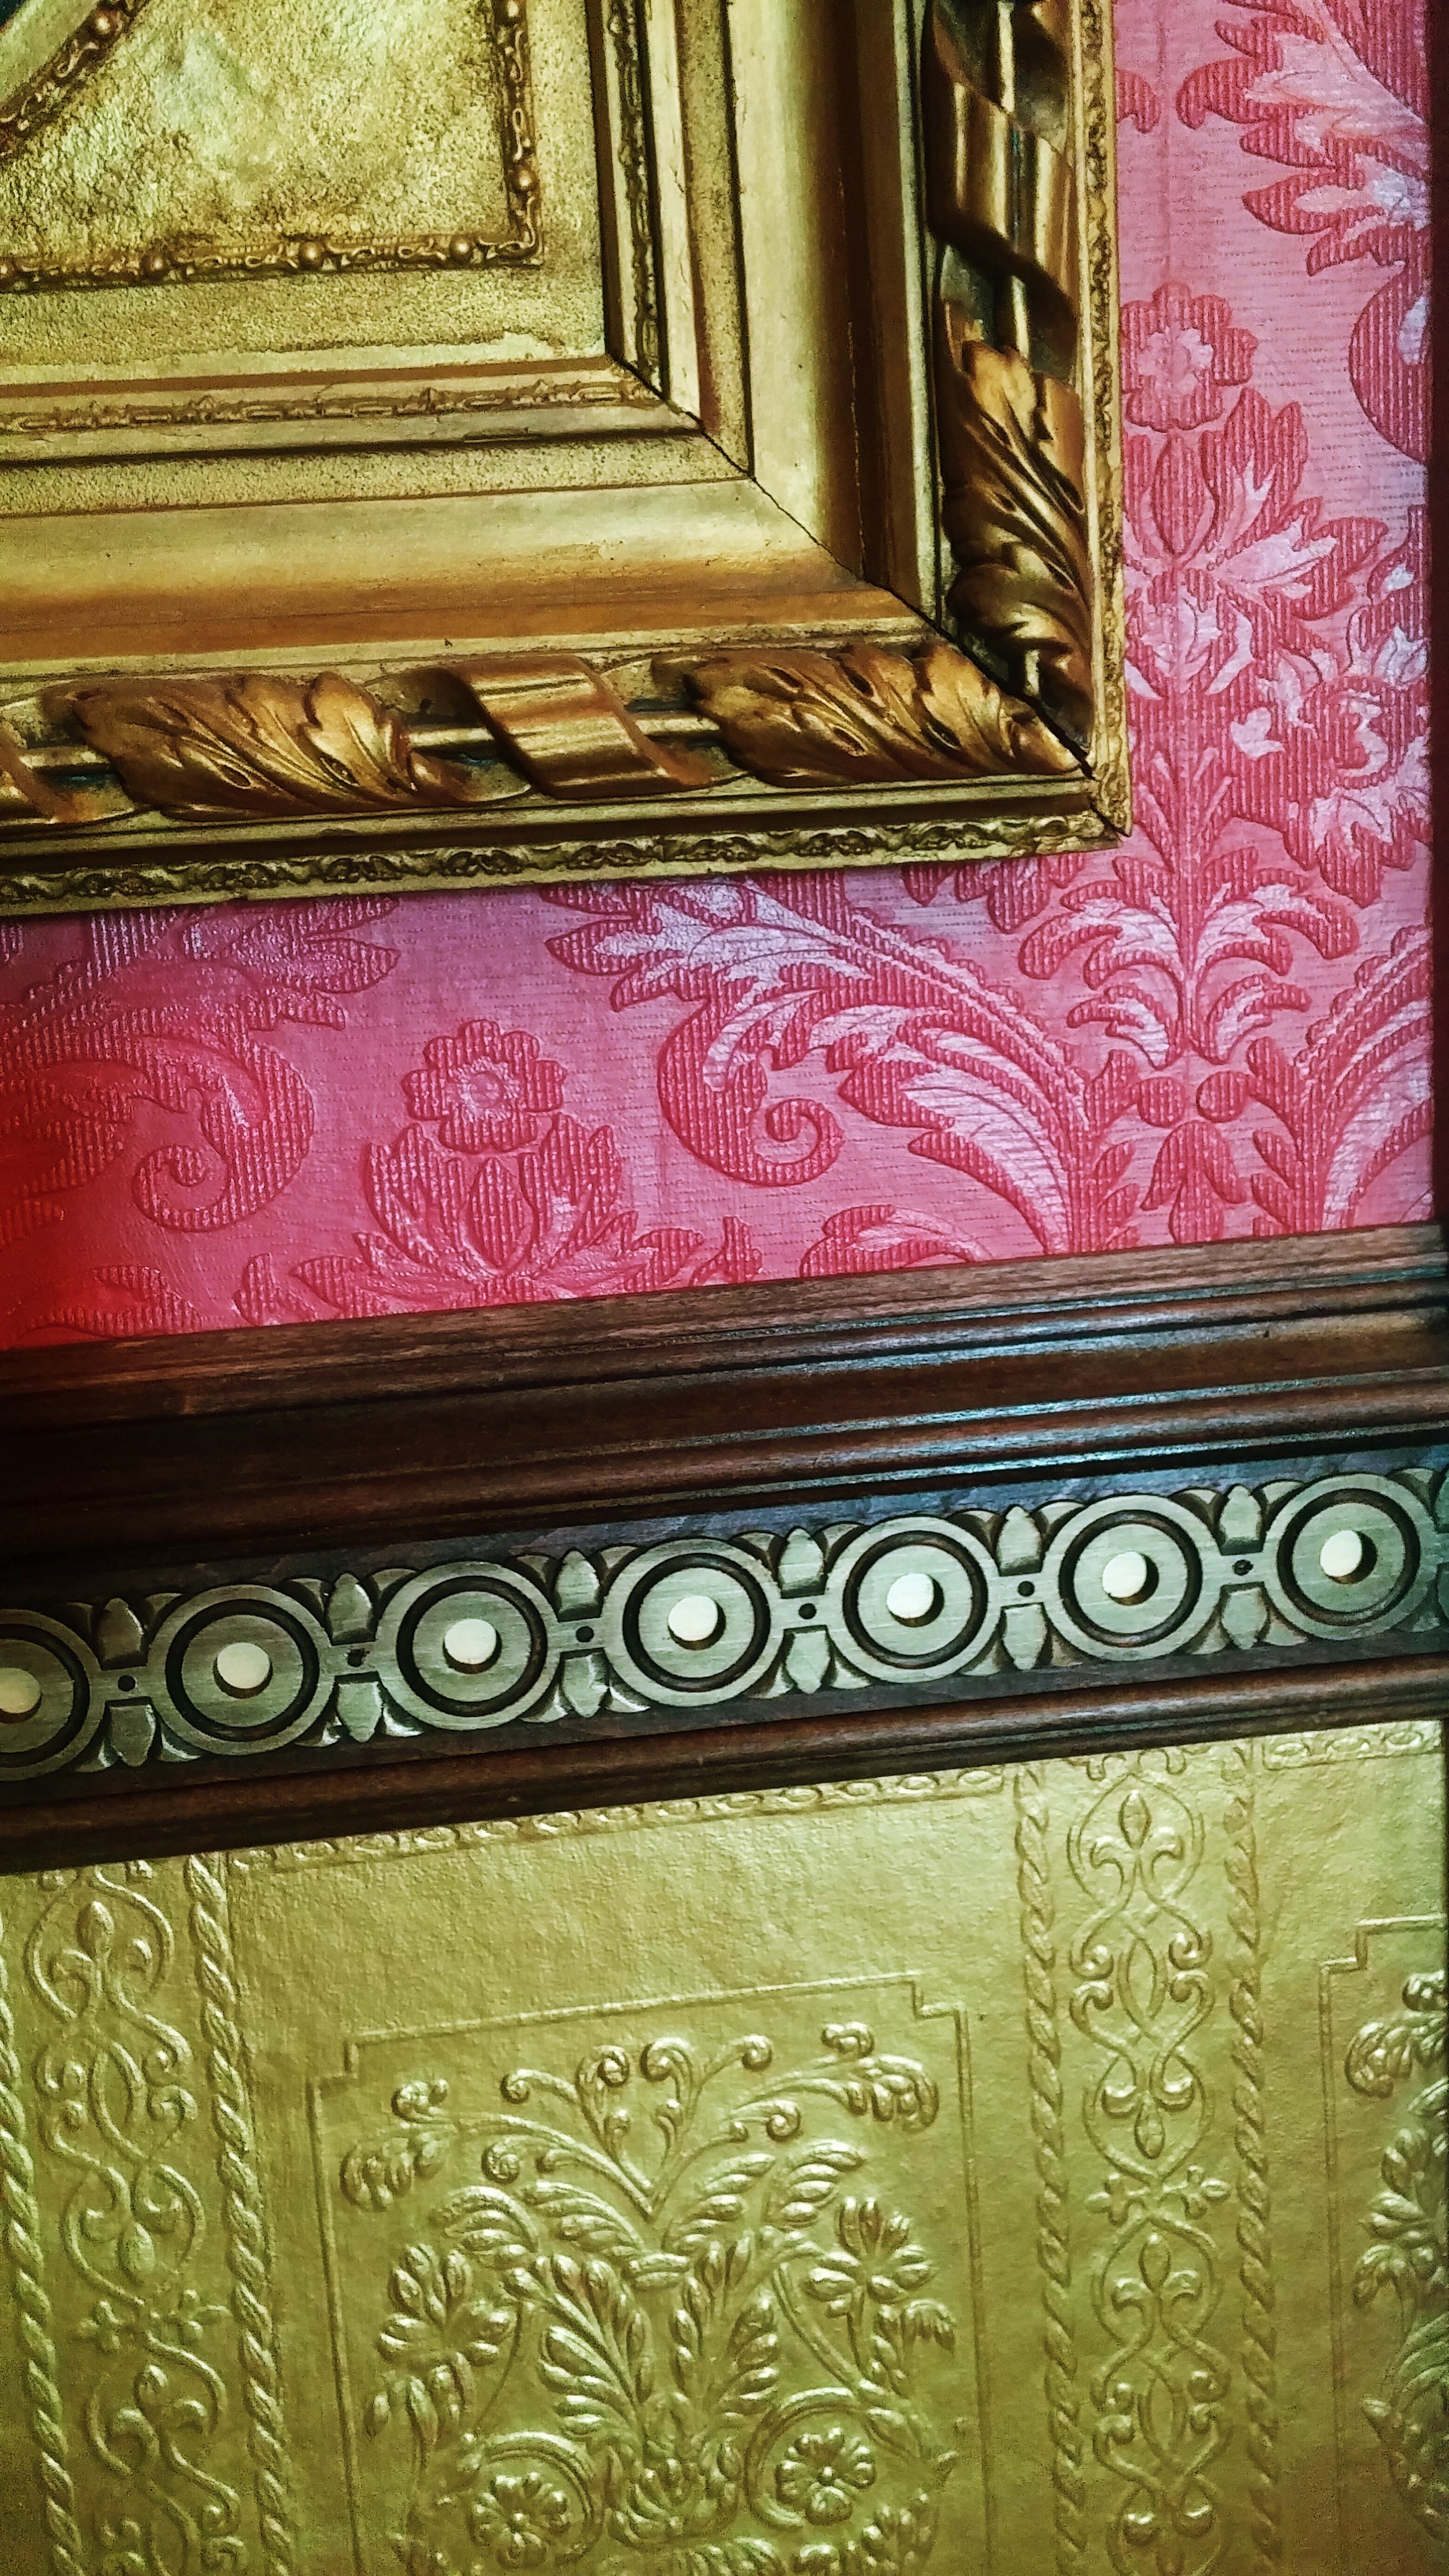
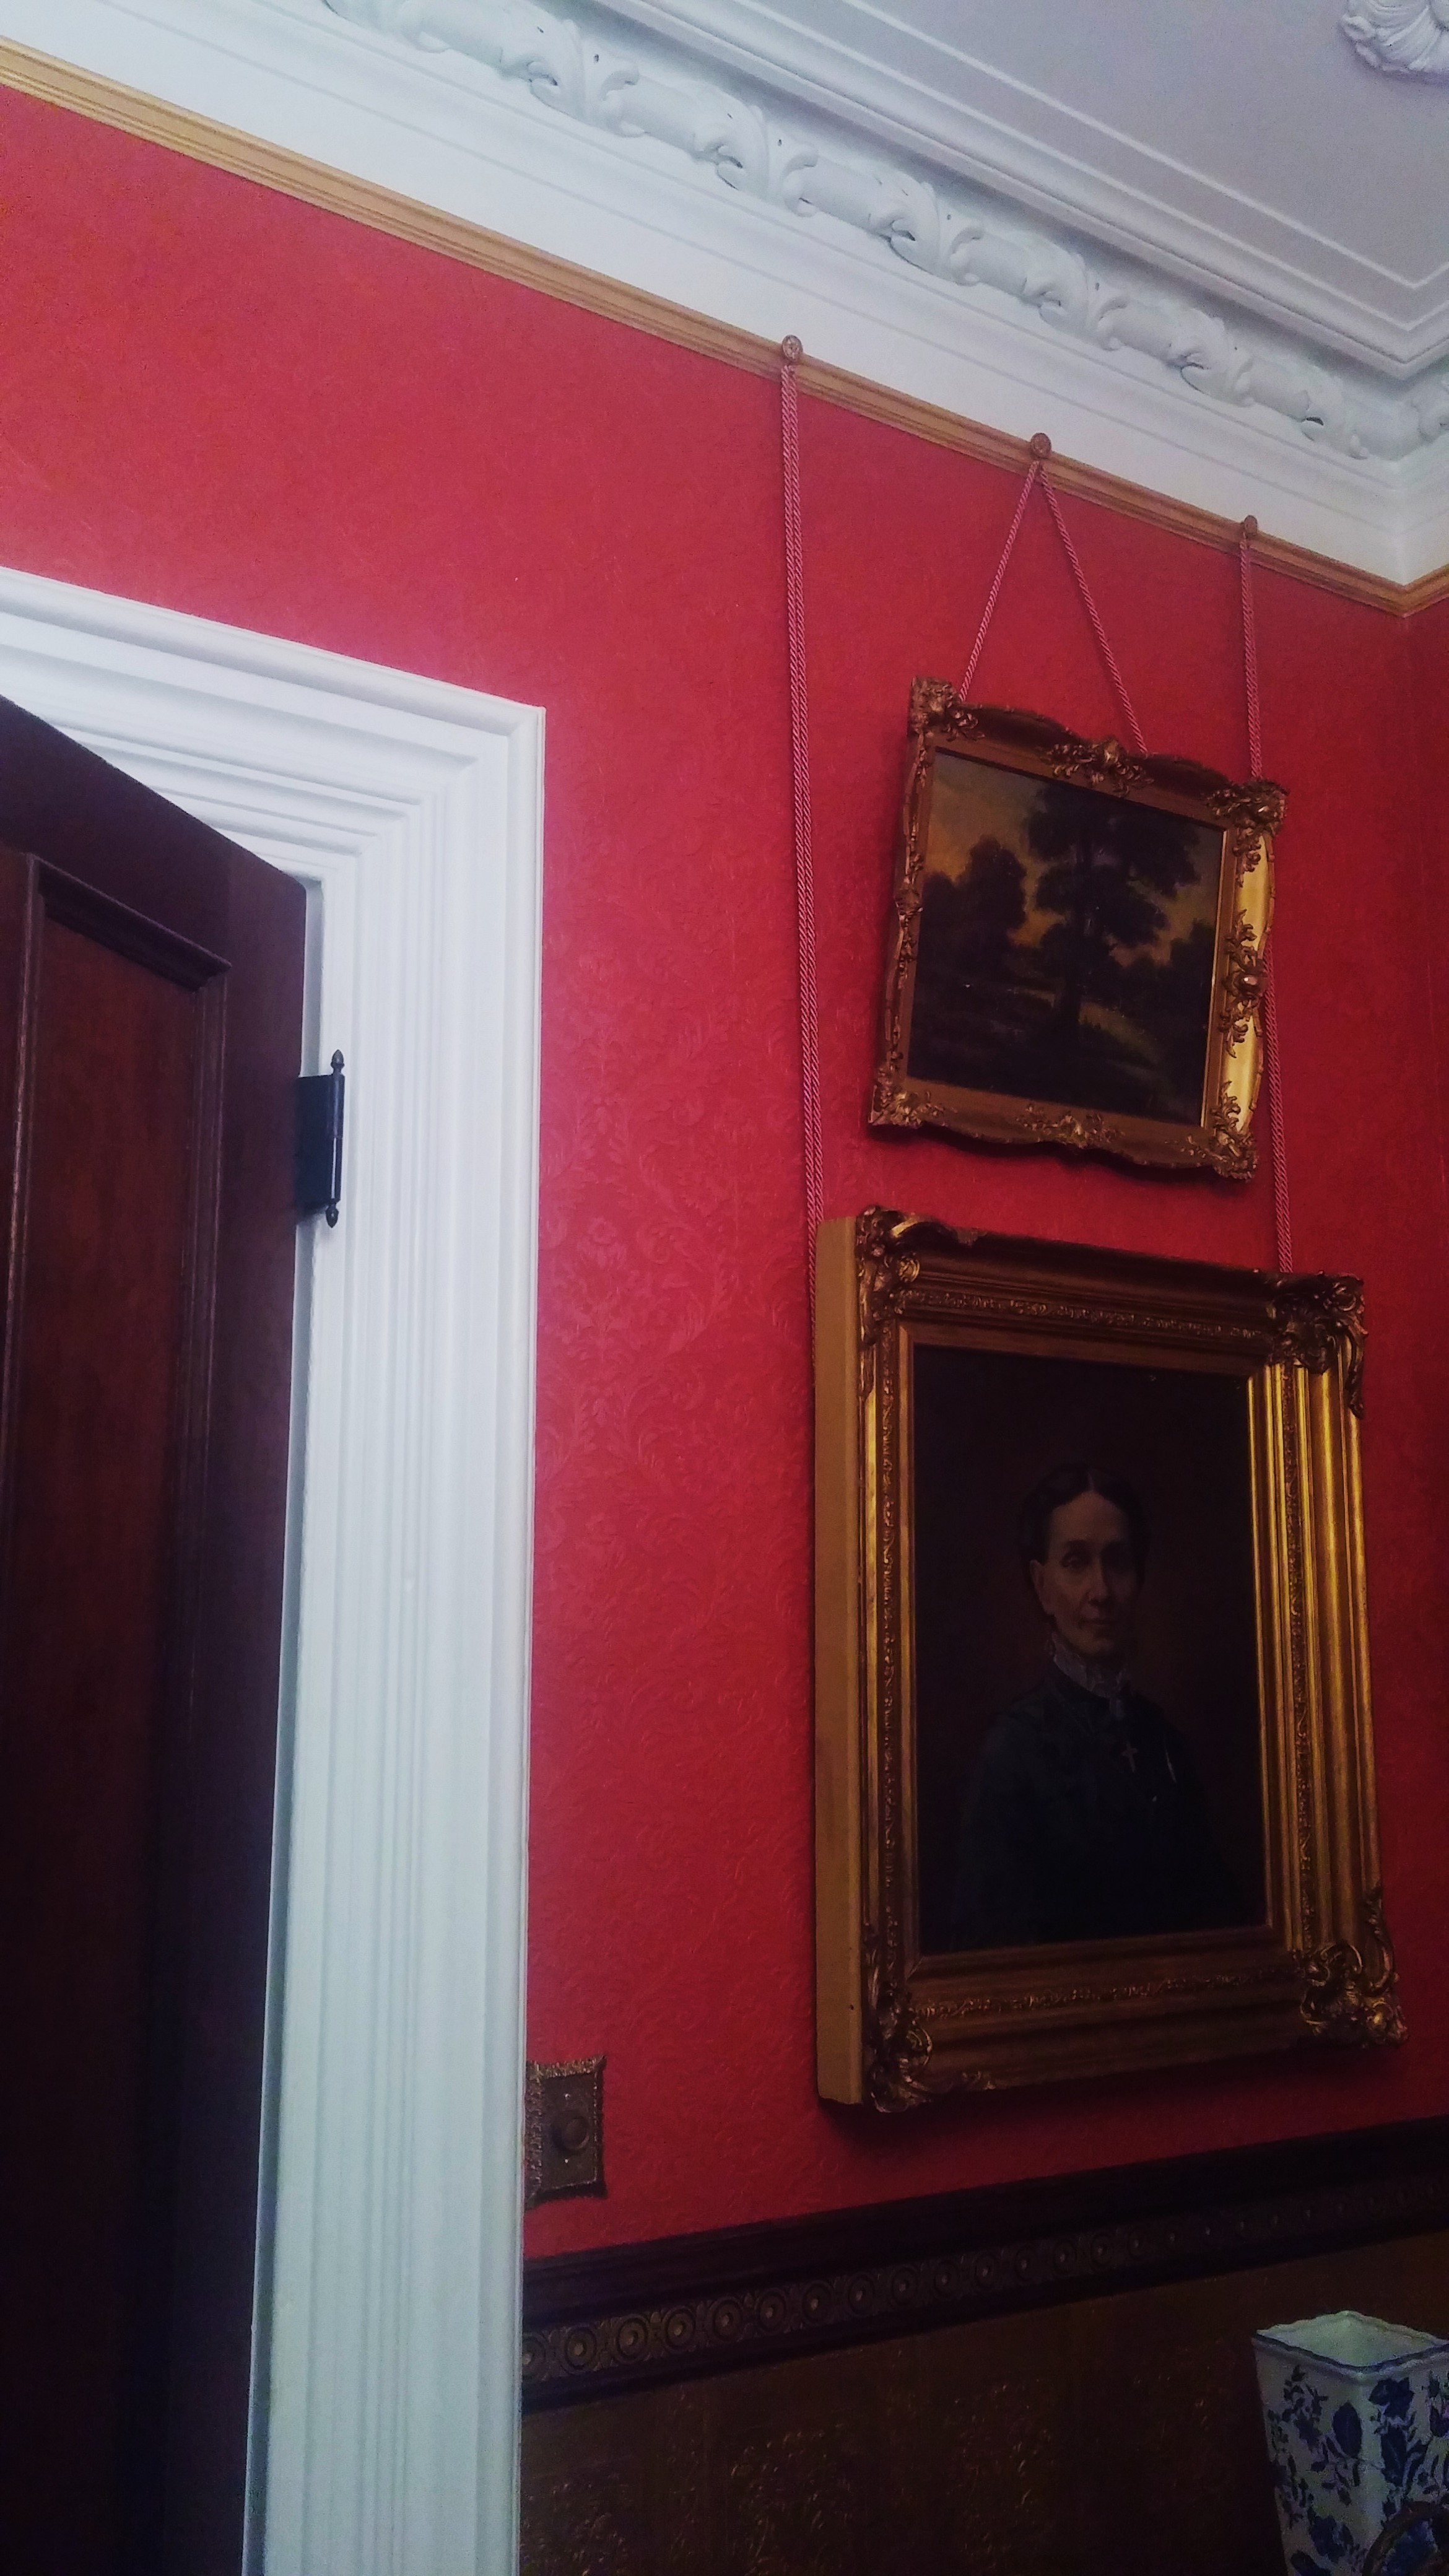
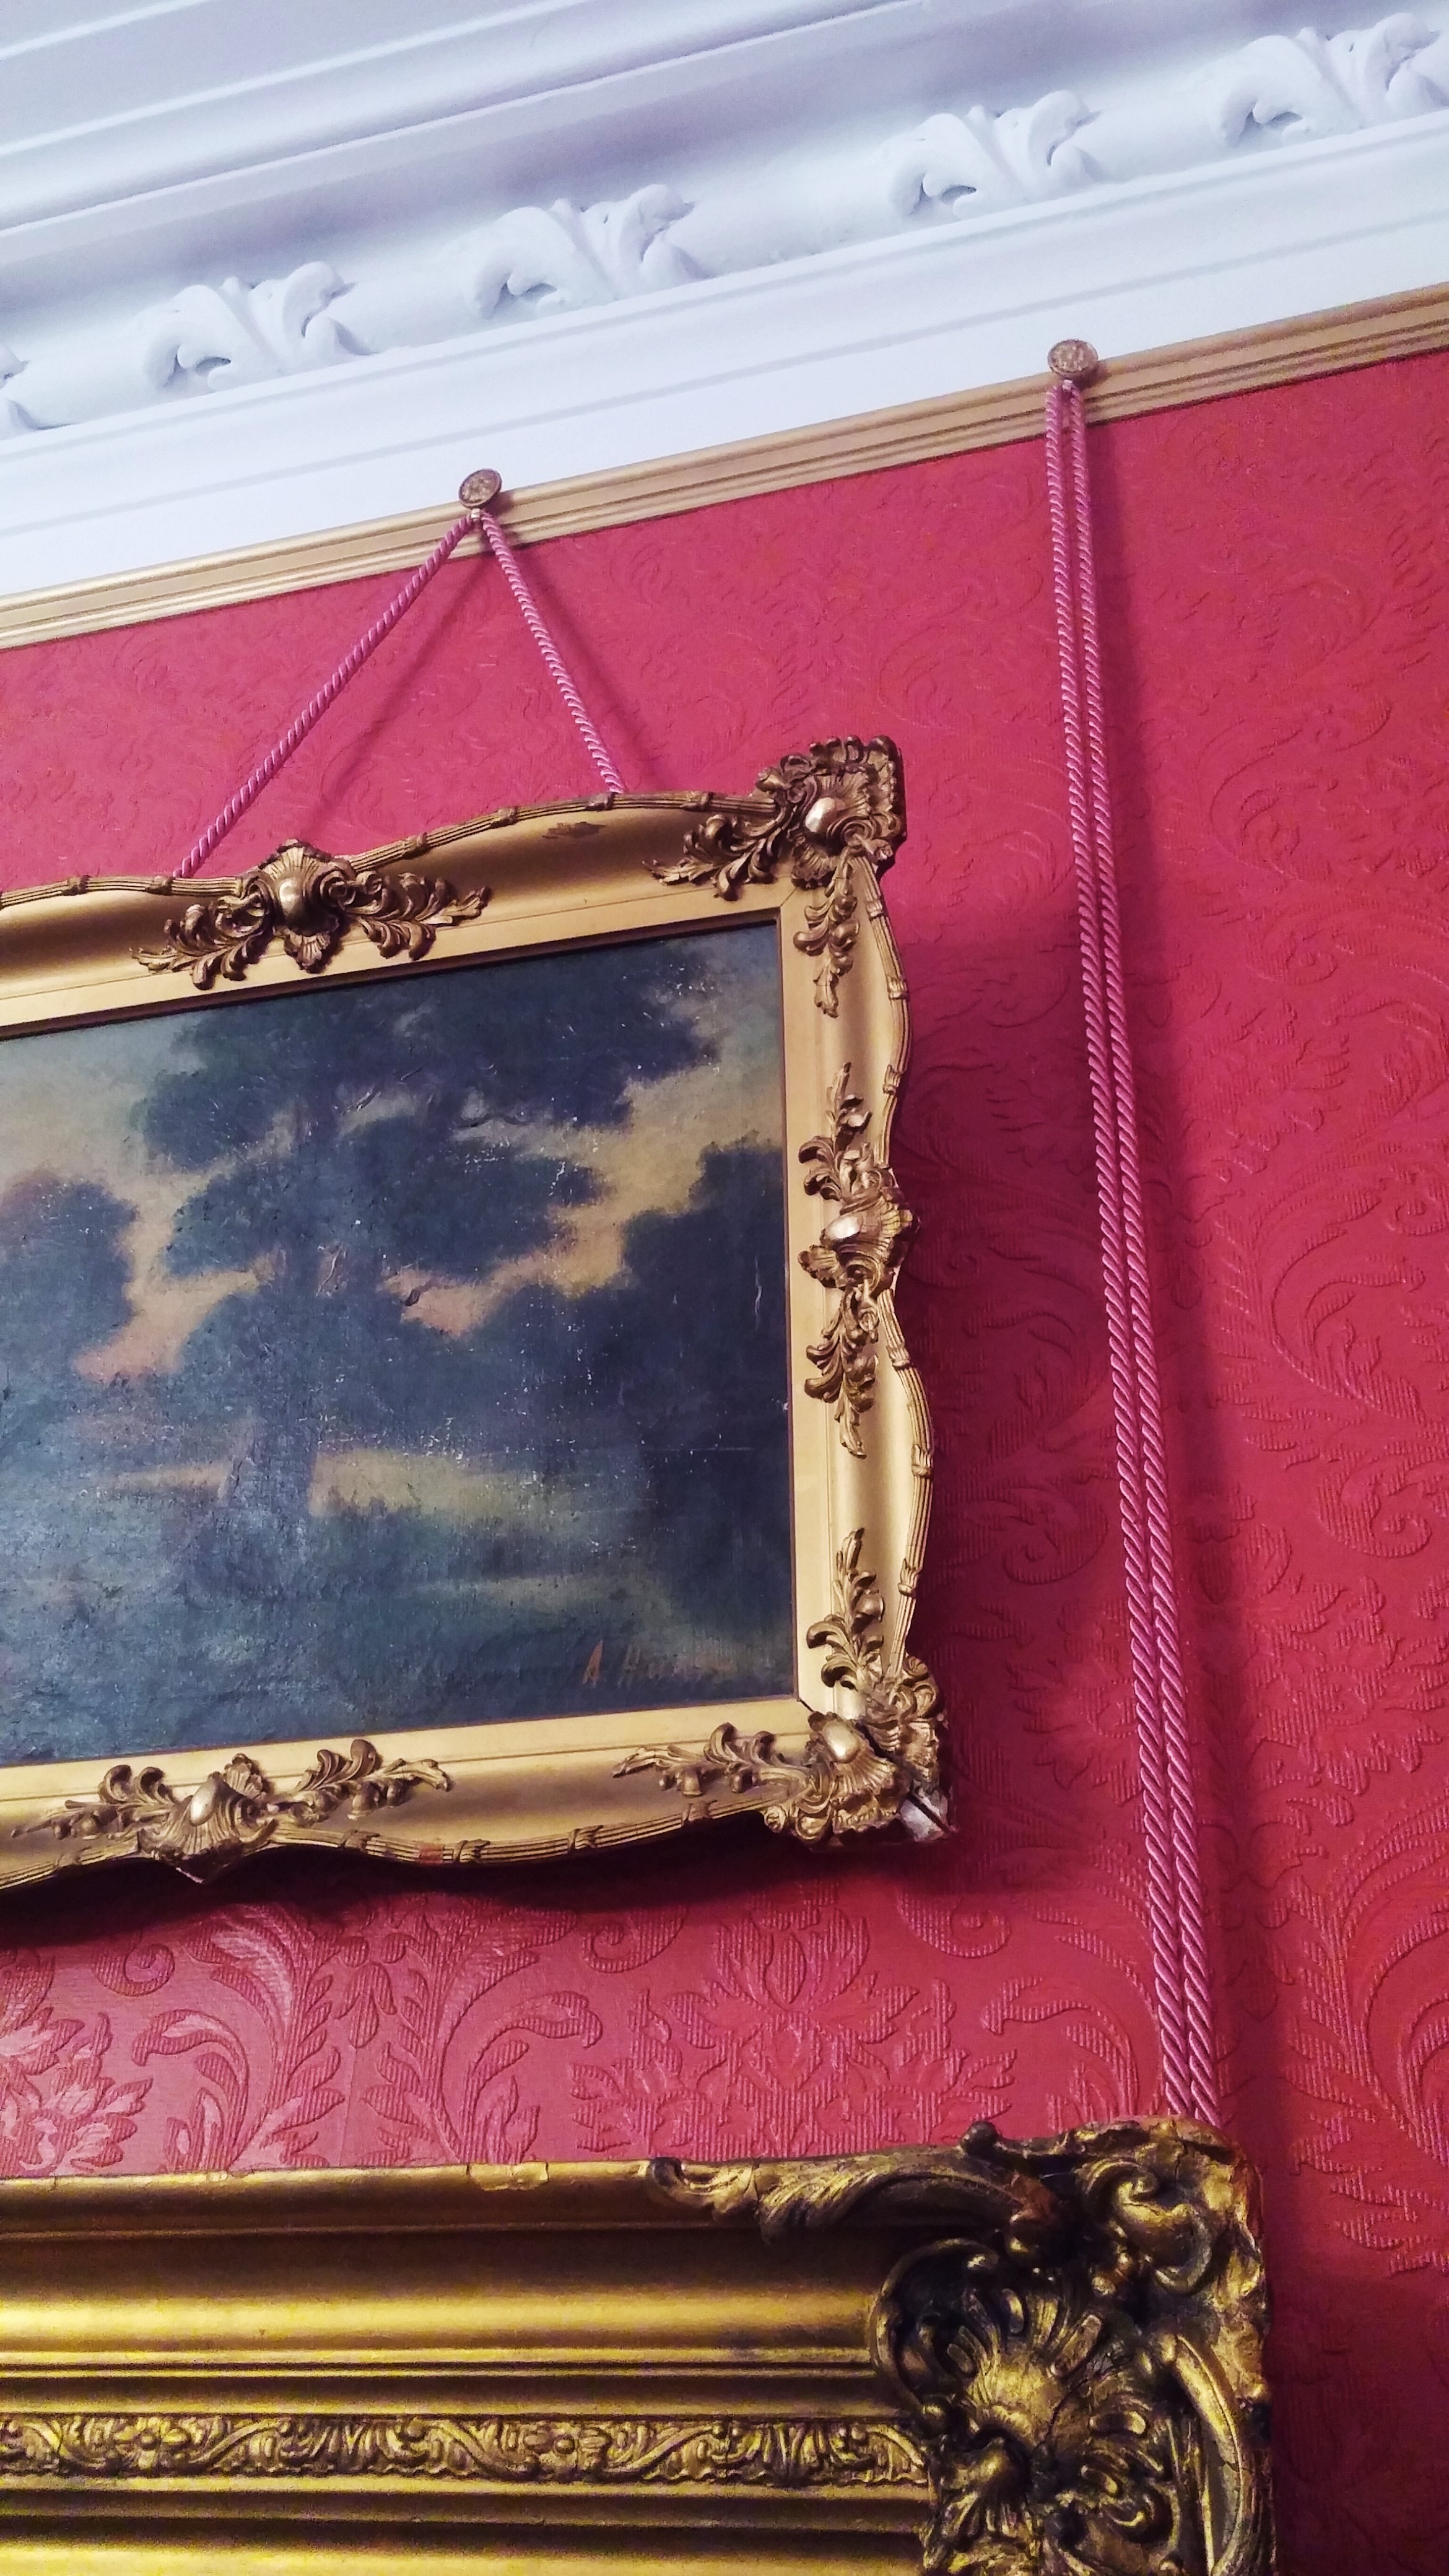
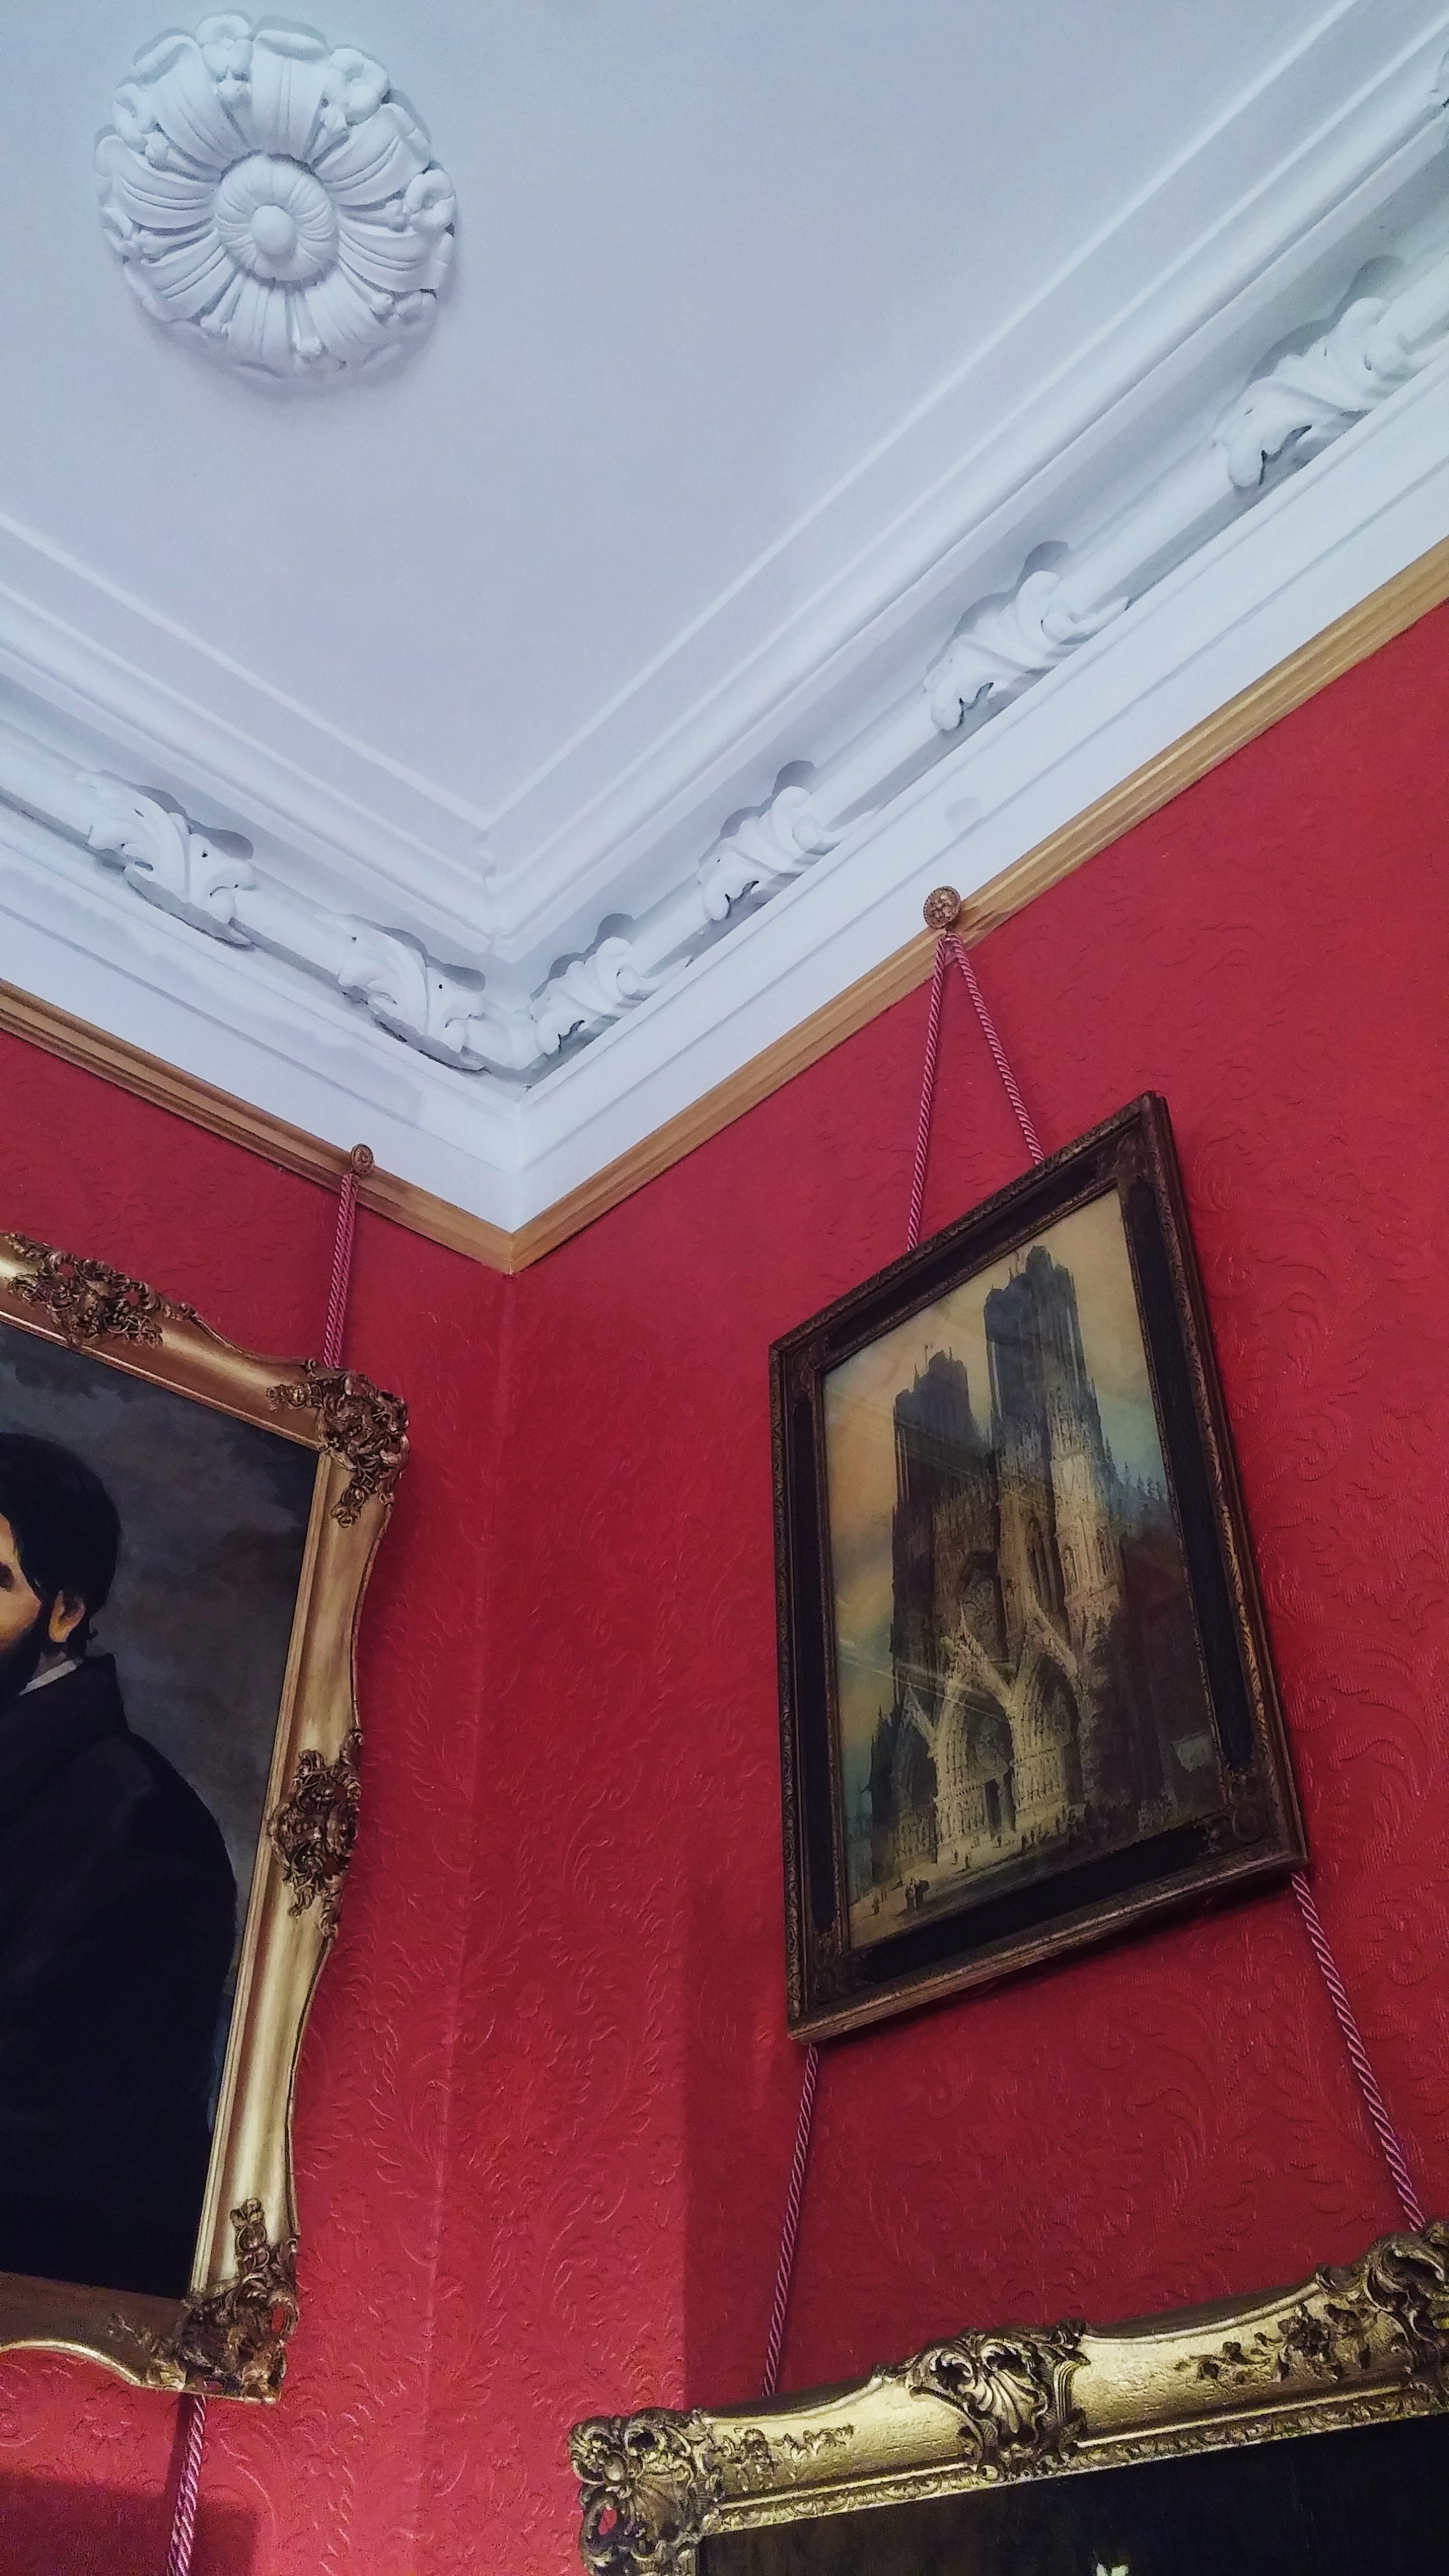
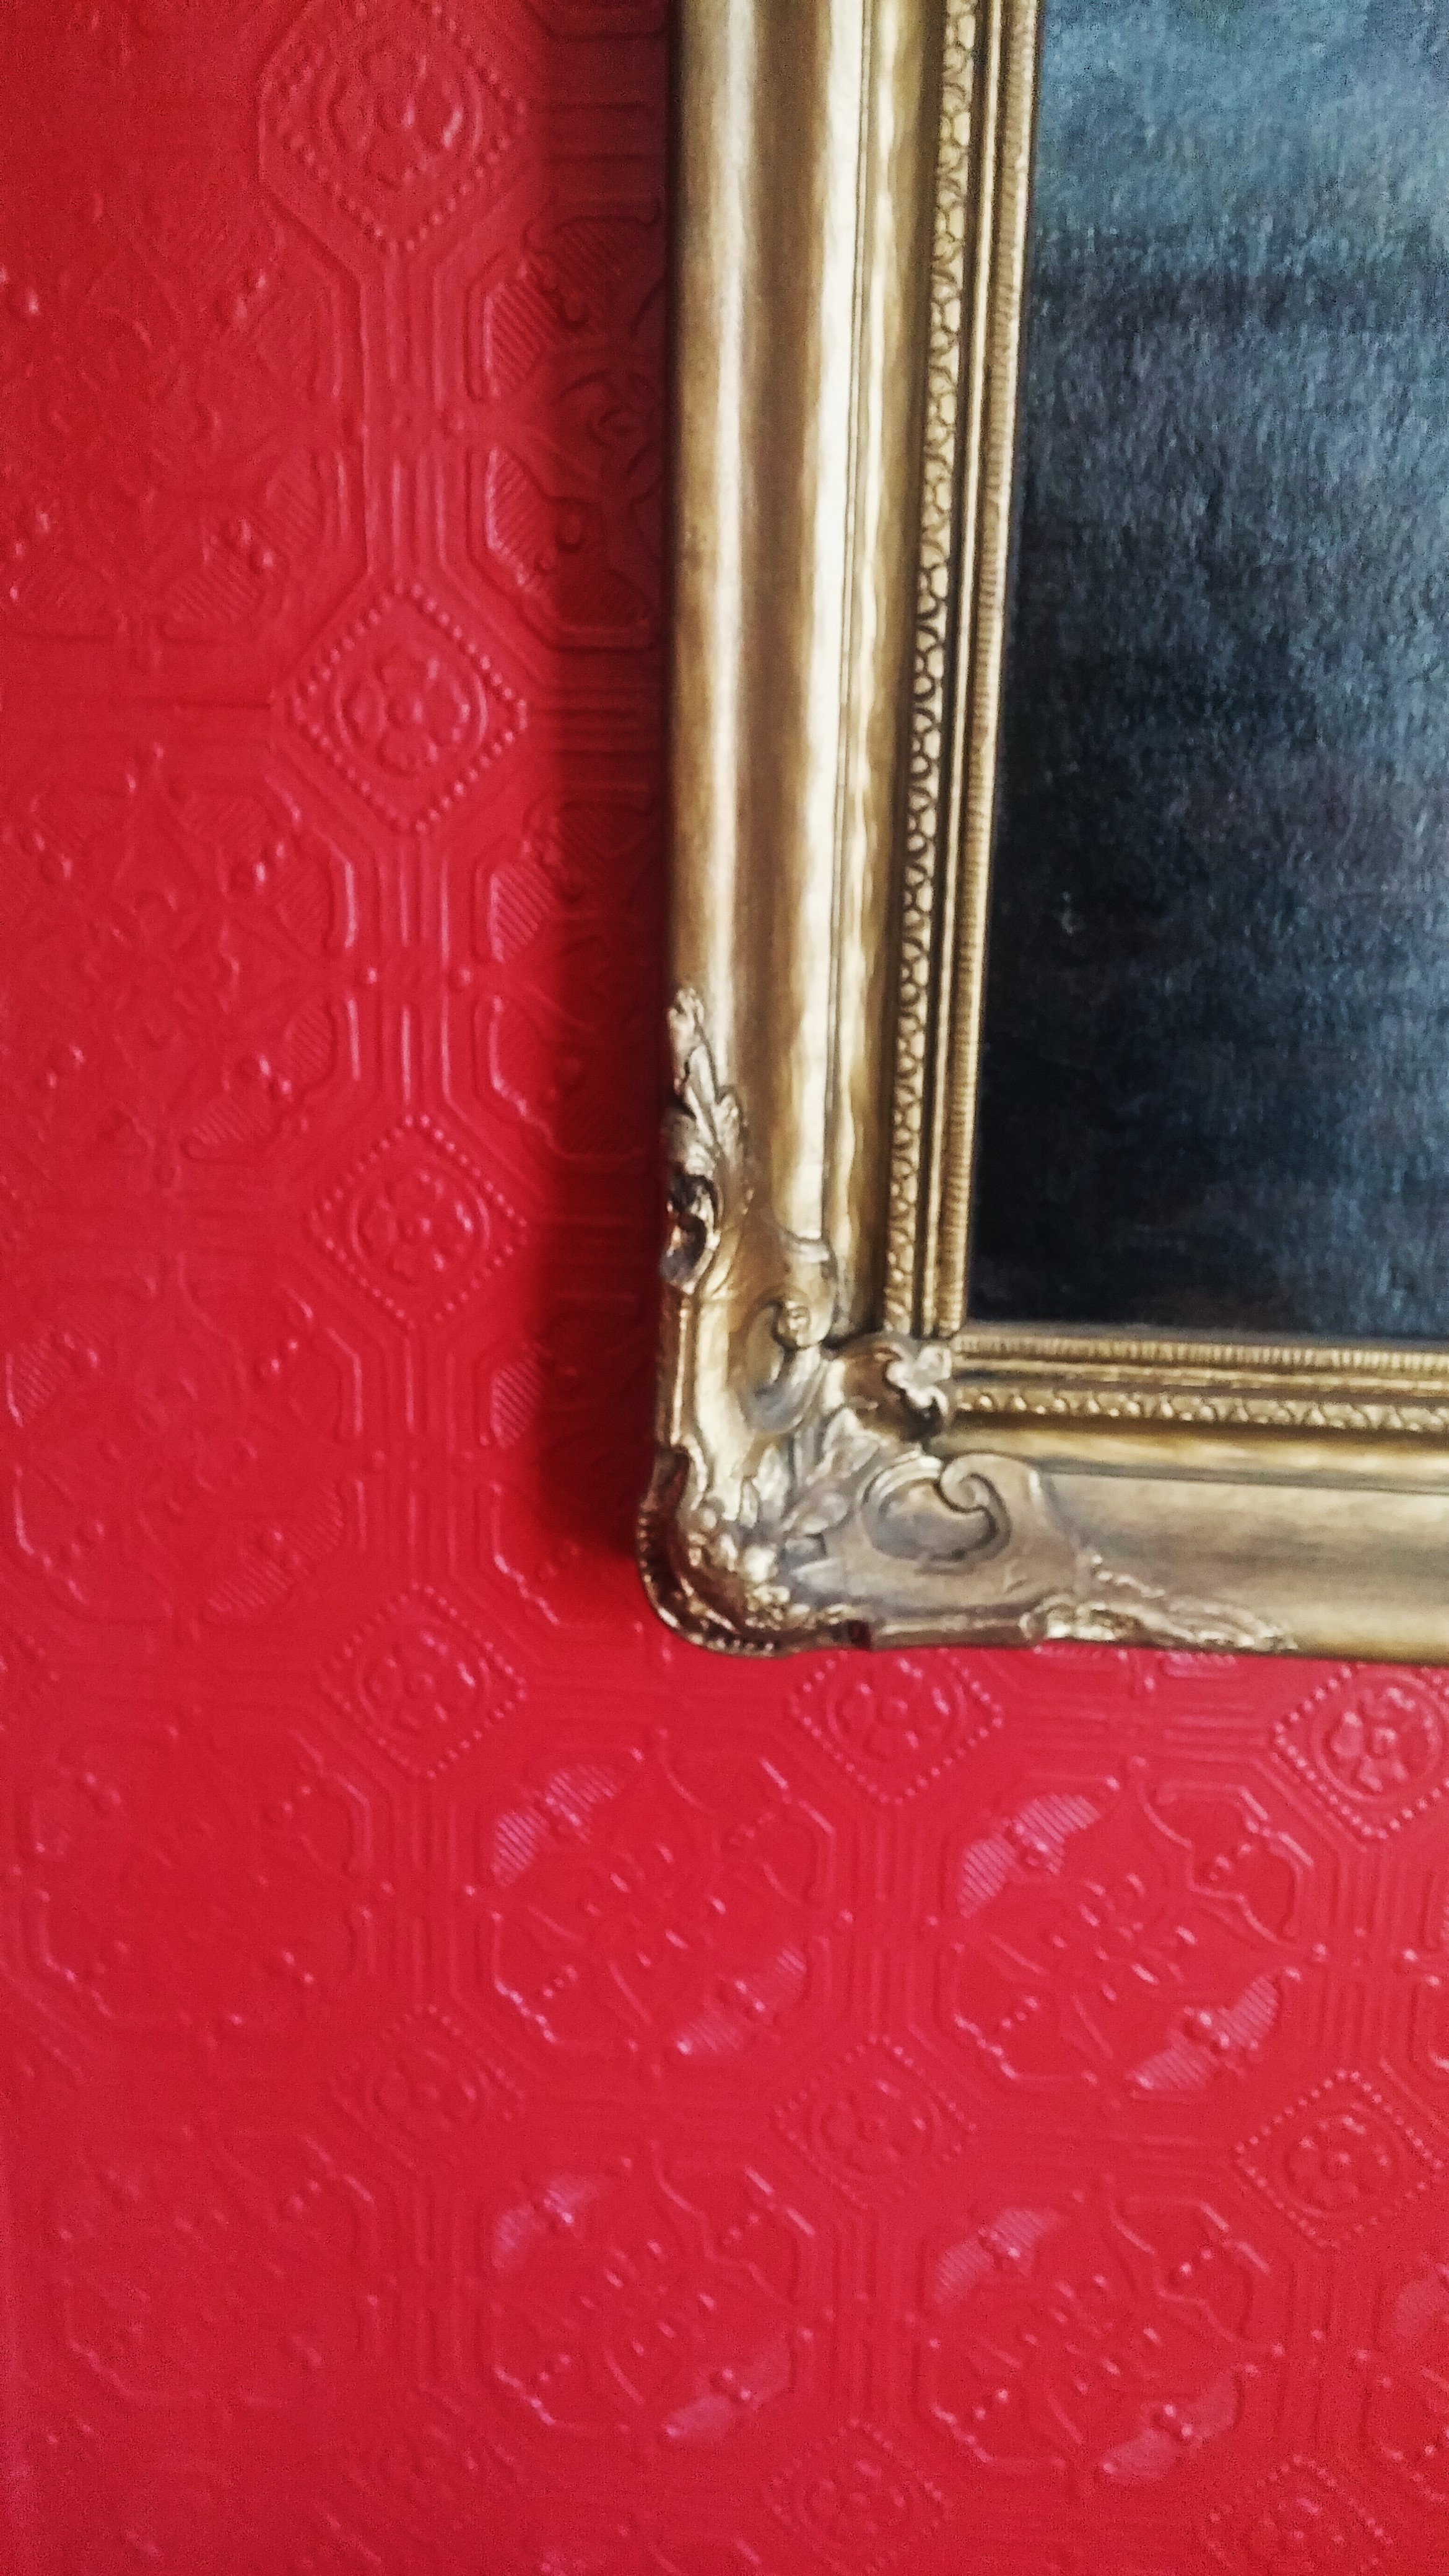
Our client owns a beautiful collection of antique prints and paintings. He wanted to display them in the room, and we recommended the nineteenth-century method of hanging from picture rails - decorative wooden strips that are usually installed right under the crown moldings, or under a wallpaper border or frieze. We created a gilt picture rail with decorative rosettes placed in the center of each wall.
Original nineteenth-century picture-rail hooks, featuring decorative rosettes, hold antique-mauve cords that support antique frames and artwork.
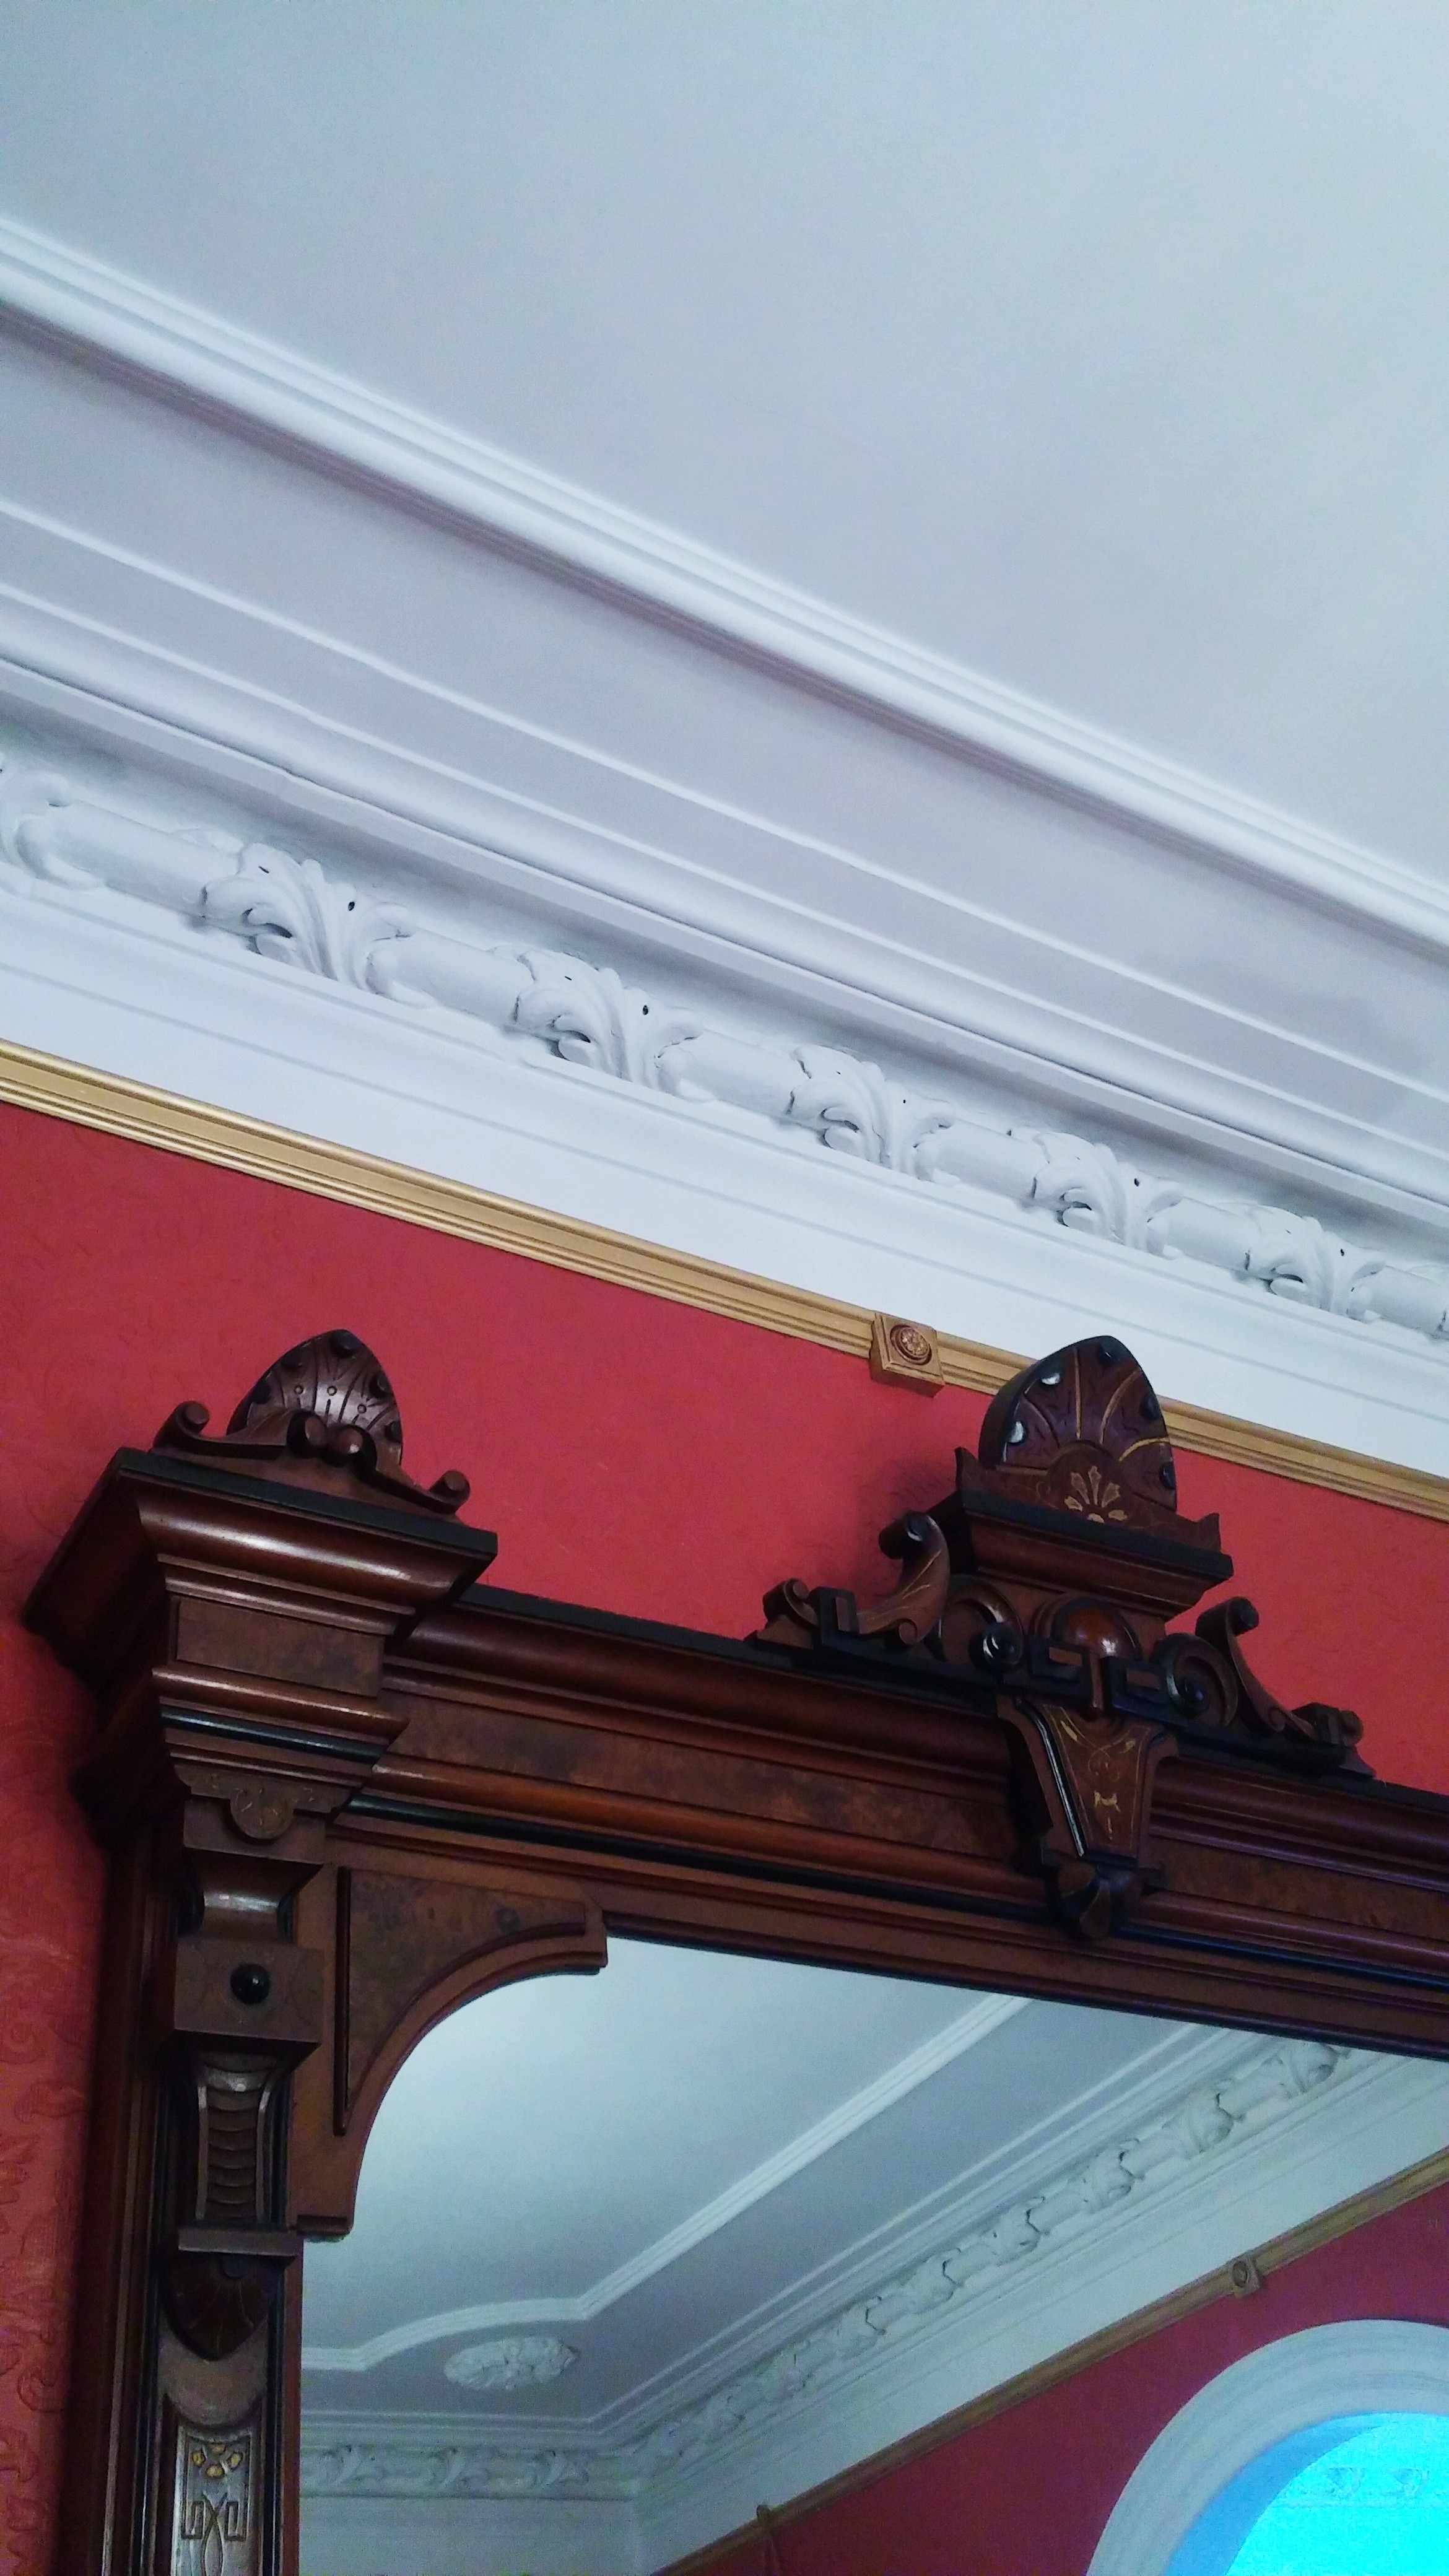
The fireplace mantel needed a more suitable, substantial mirror, one that should reach the crown moldings and propel the entire structure upward. Though elegant, the previous antique mirror (not original to the room) hung horizontally and did not underscore the grandness of the room. We found an 1870s six-foot-tall Boston-made walnut mirror on the west coast, and arranged to have it shipped. It took a couple of months for it to arrive. When we installed it, it was clear that it had been well worth the wait: it was the perfect choice for the room, from the way it seems to have always belonged to it, to the way it beautifully opens up the space in the way it reflects its new surroundings.
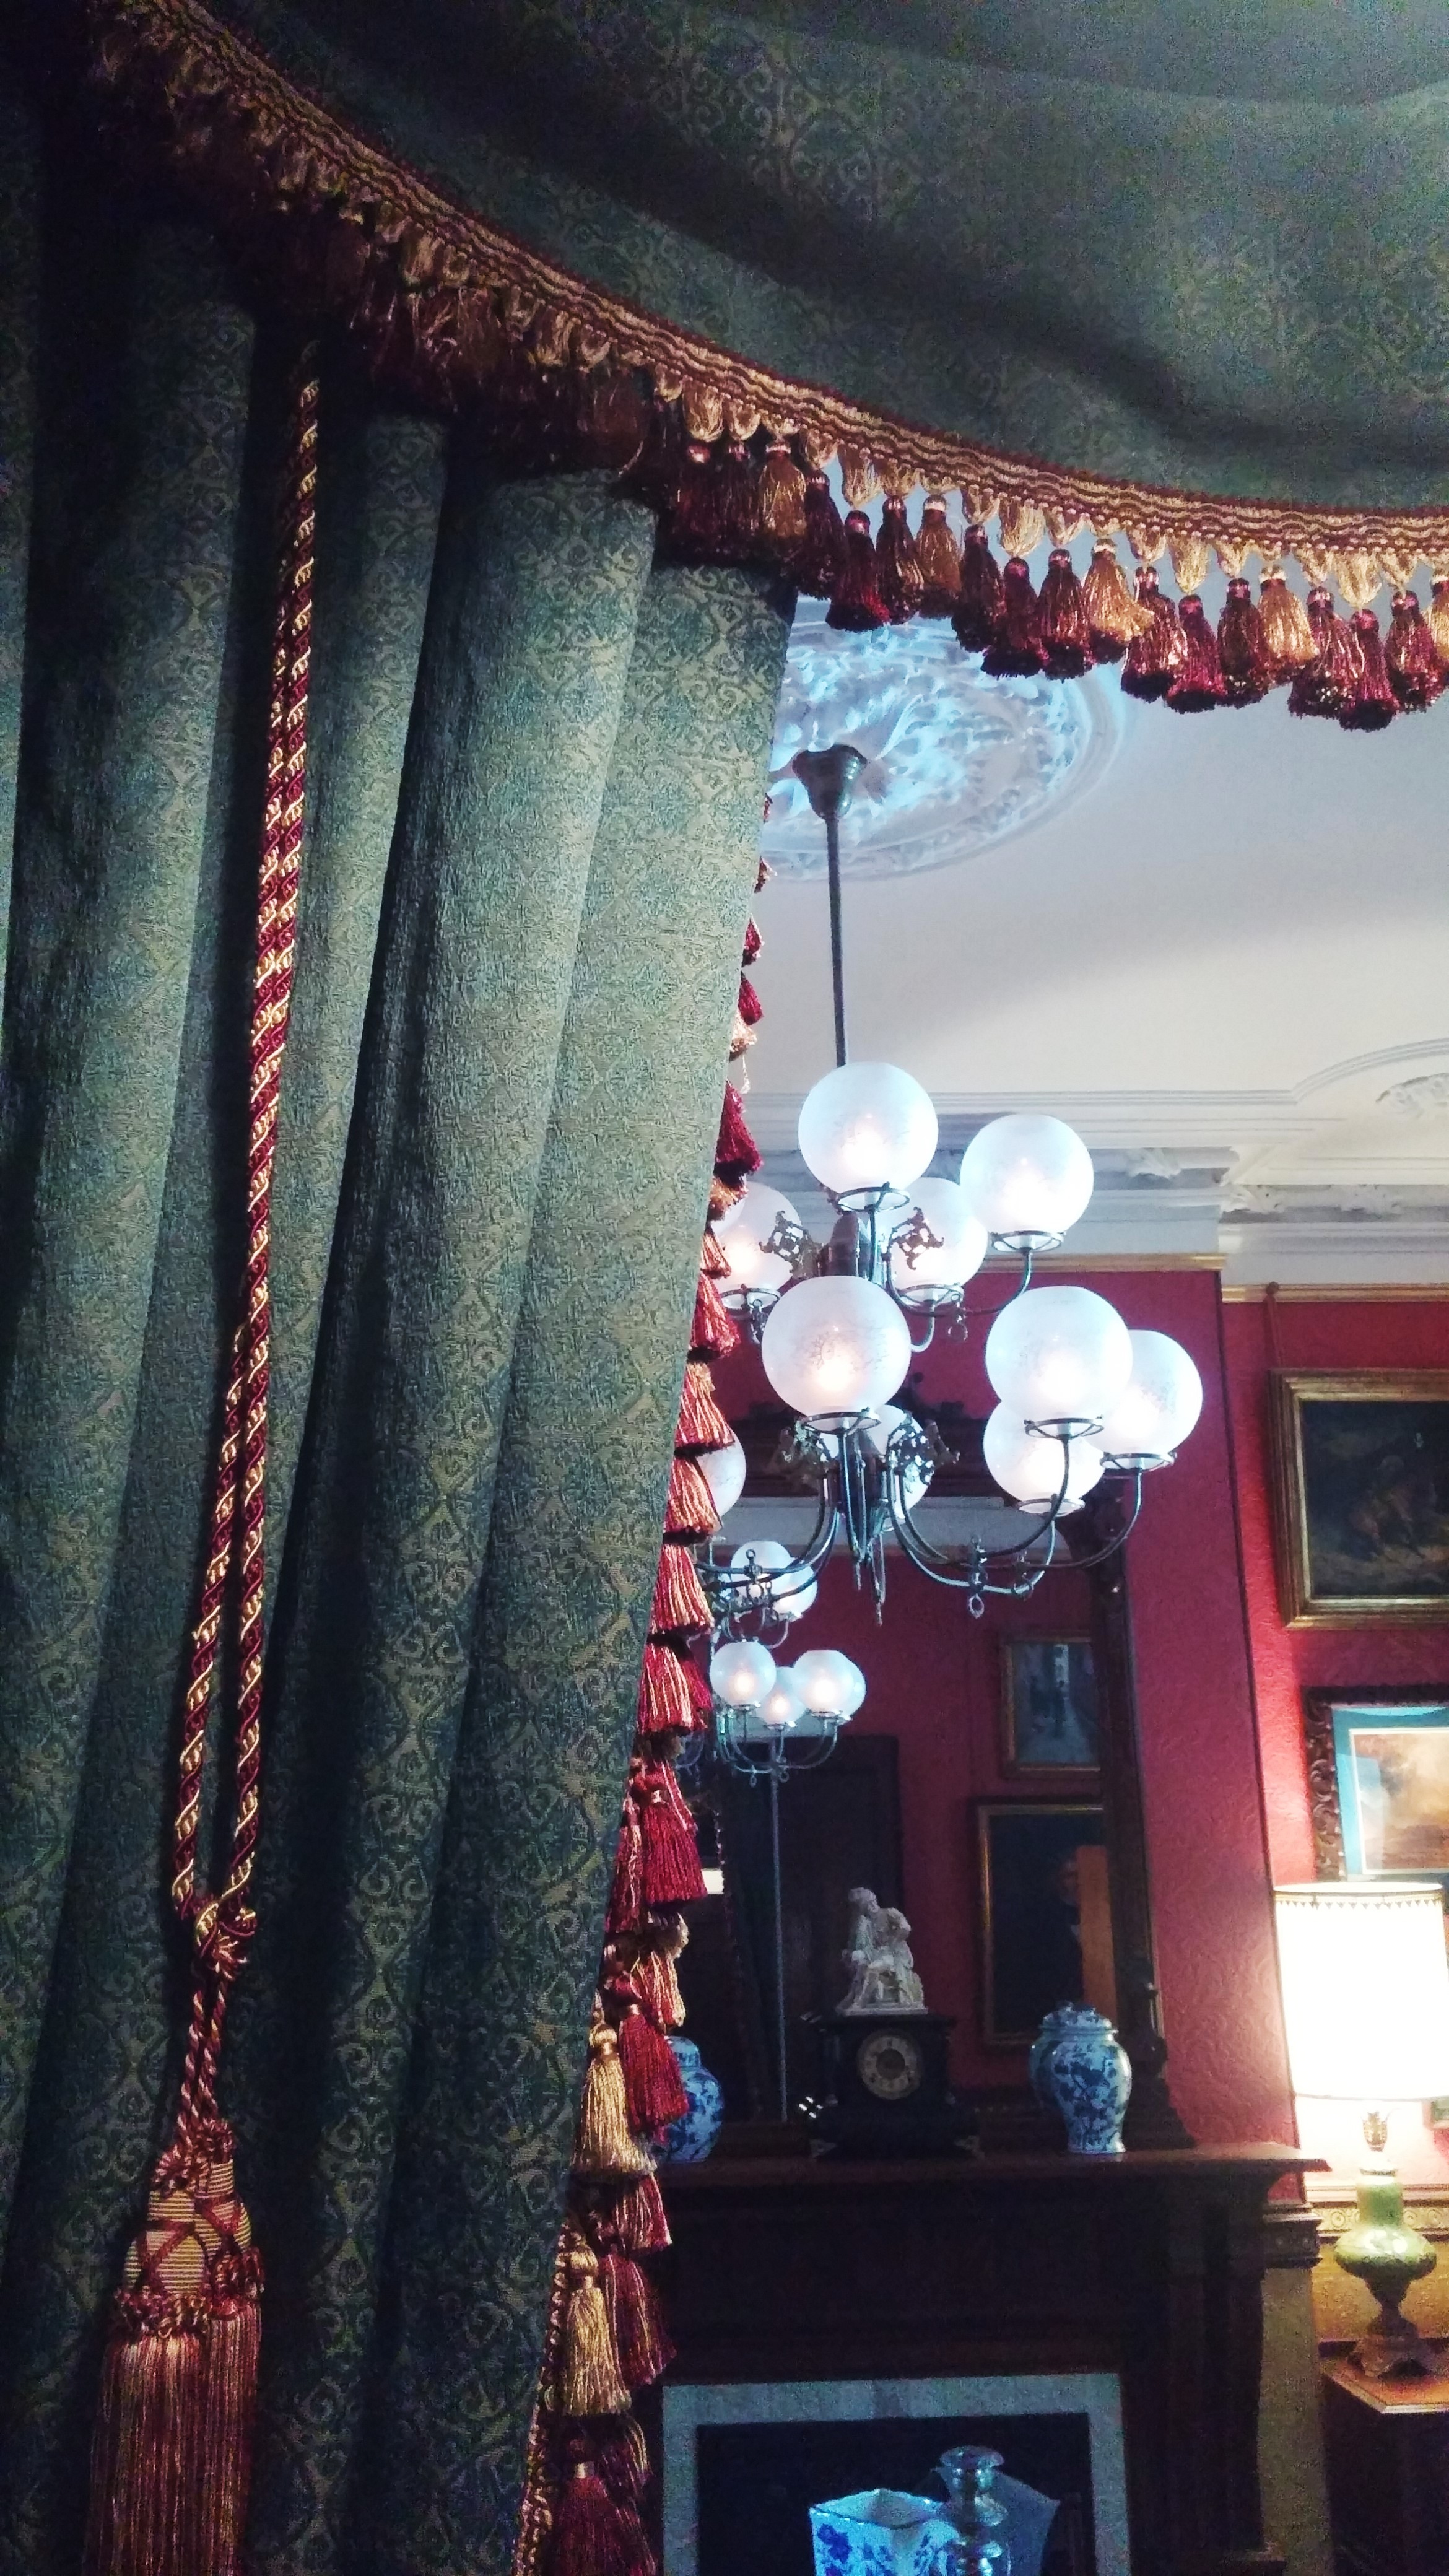
We completed the project by creating an elegant period-appropriate portière for one of the doorways.
Restoration of Vestibule in 1853 Brownstone
While strolling on the streets of the South End, we often look up and wonder what's behind the set of double doors at the top of the stoop that adorn the front of each home. Behind them, there's usually a second set of double doors. The two sets enclose a space called "vestibule," where visitors were ceremonially asked by the parlor maid to wait while the guest’s calling card was brought upstairs to the lady of the house. The maid would then invite the guest to walk through the second set of doors into an entryway that led to the main reception room where the visit would take place. In some of the most lavish homes, the vestibule was elaborately decorated with plaster crown moldings, elegant woodwork, and marble floors.
In this grand 1853 South End brownstone, the vestibule was originally rather simple. The small room boasts twelve-foot ceilings, elegant mahogany doors, and beautiful woodwork, but there's no trace of the same opulence that inhabits the reception rooms. Old Boston had already restored the small vestibule a few years ago, when it undertook the stripping of all the woodwork, badly damaged by decades of wear-and-tear. The filtering sunlight had alligatored the paint in many places. Removing the paint from the woodwork proved challenging: not only was the space constrained; milk paint had been used for the earliest few coats, and those who know milk paint know what it means. We applied milk paint remover, a powdered solution that immediately melted what heat guns and chemicals could not even faze. Some of the mahogany around the front door had been painted as well, and we removed the paint to restore its original look.
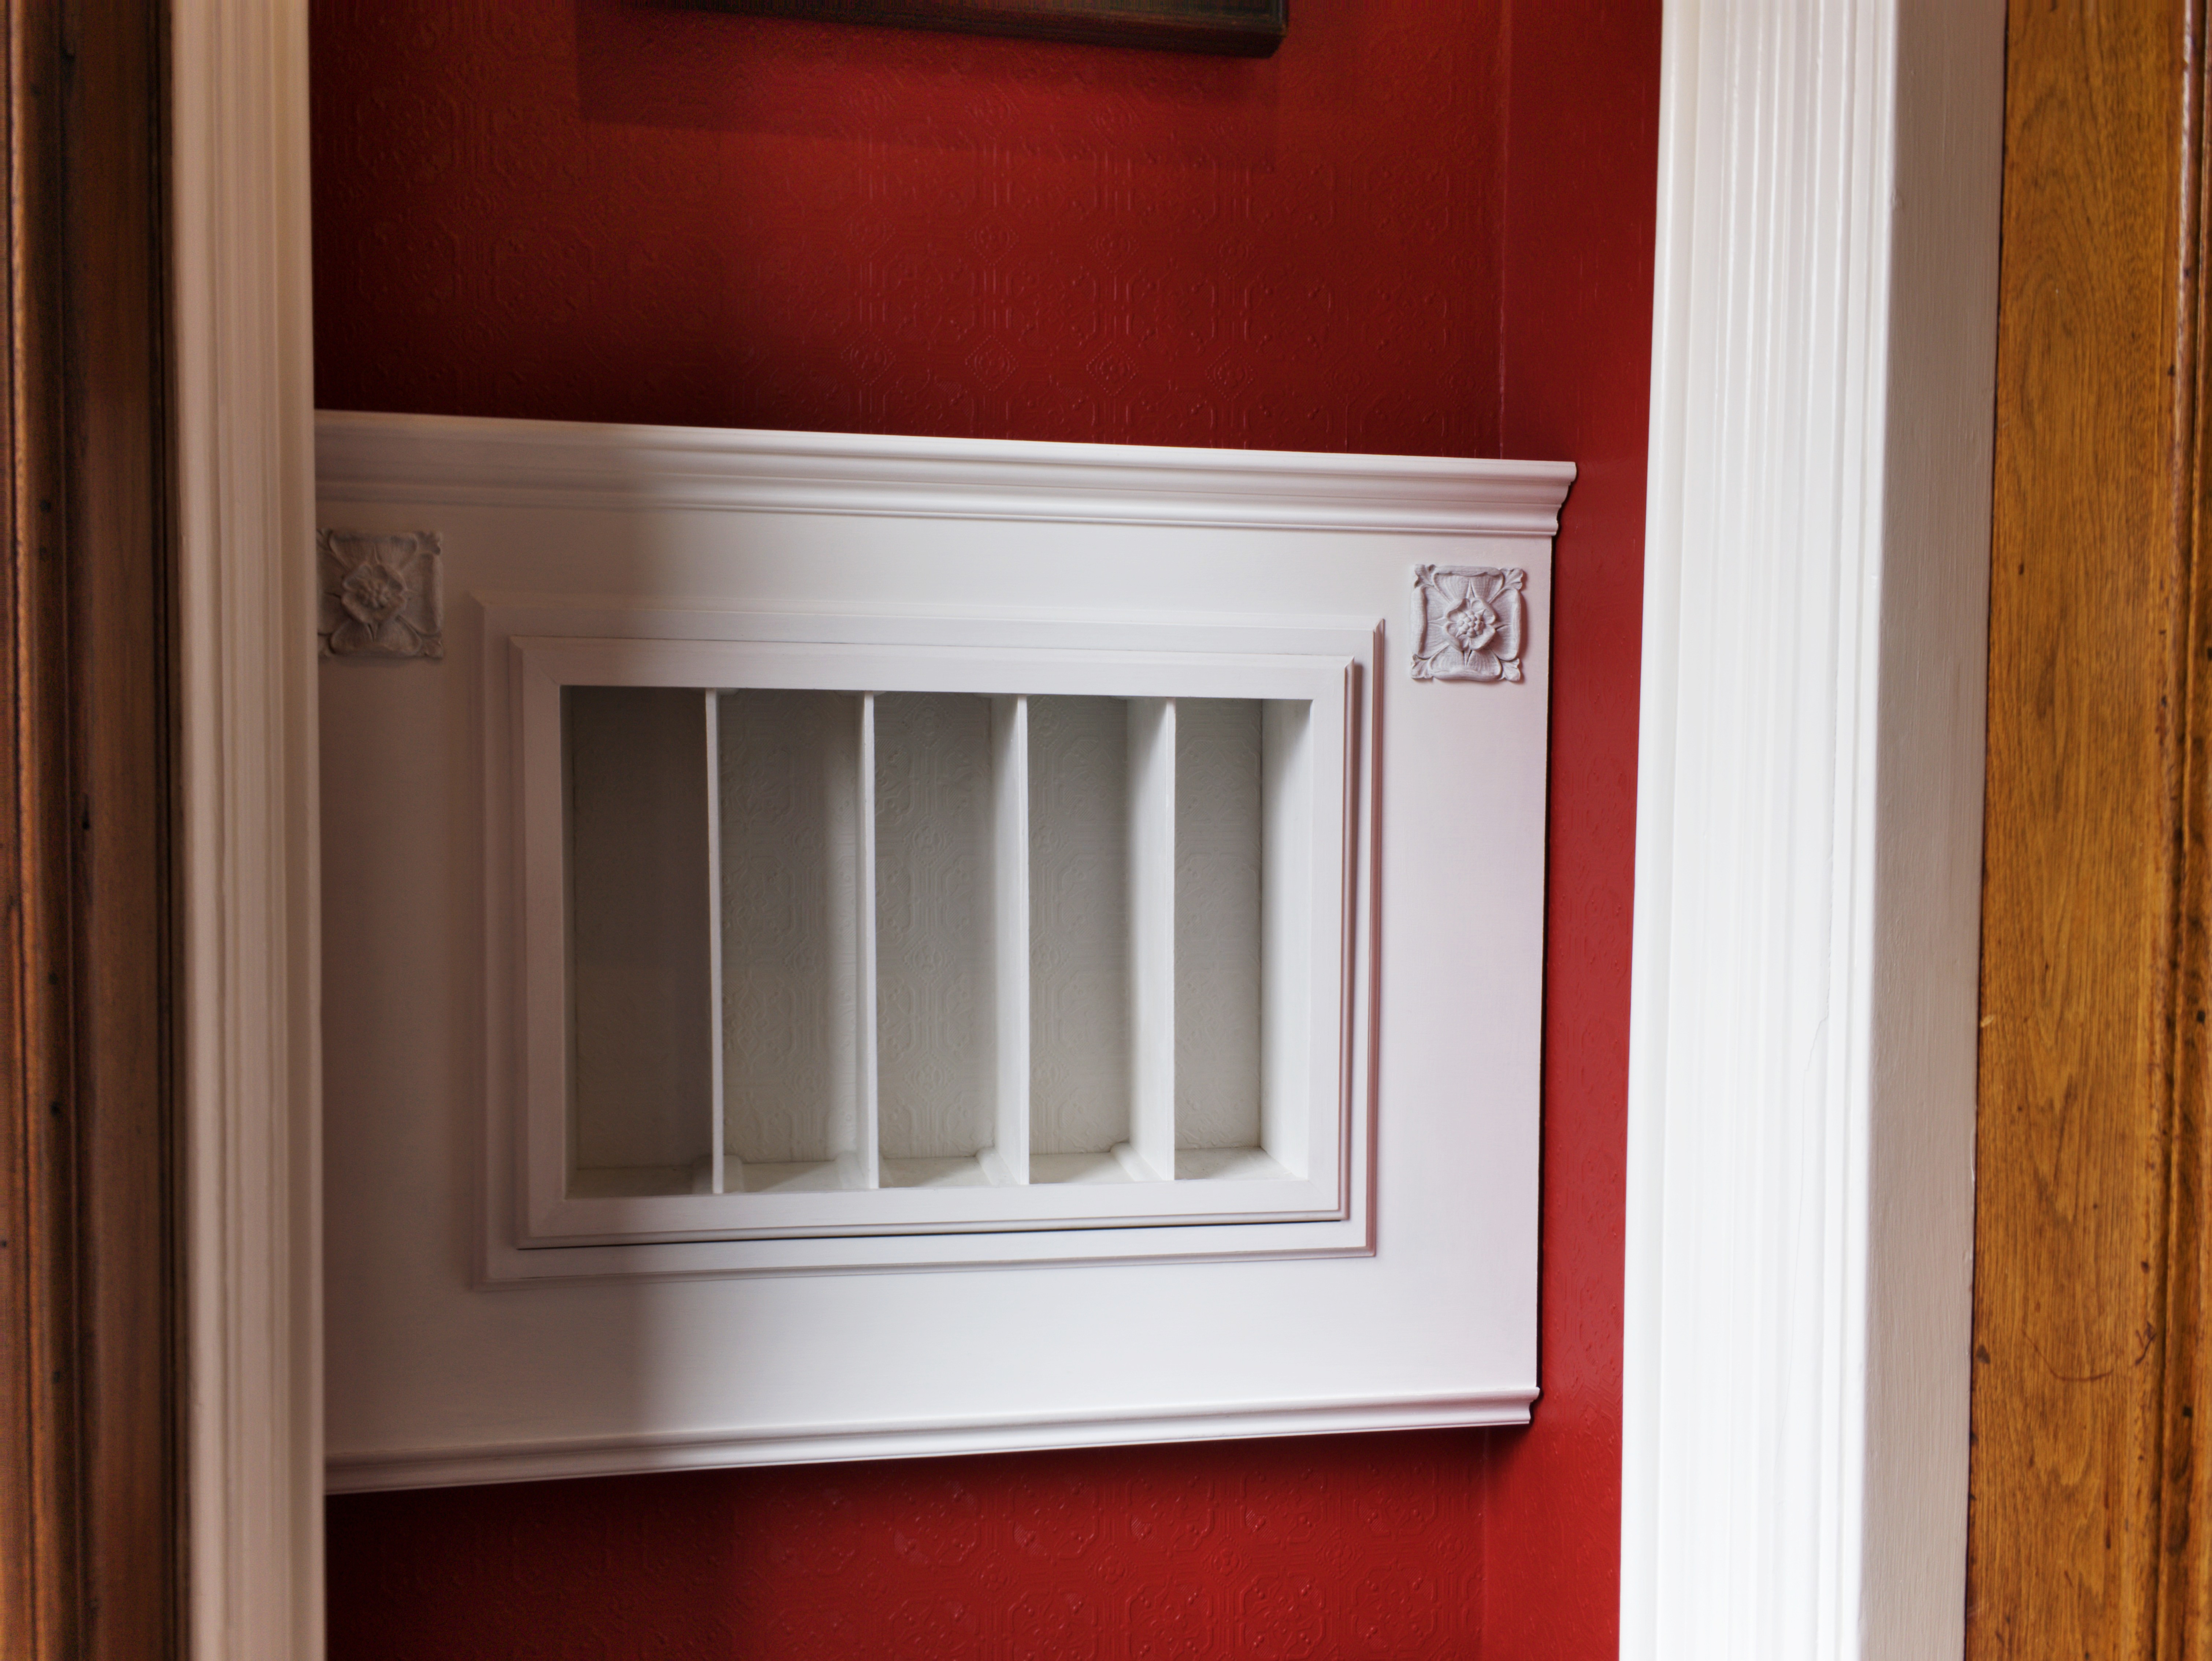
A couple of years ago, a bad leak from a second-floor radiator damaged the vestibule. We were commissioned to restore the room once again, this time updating it with a new mailbox, a picture rail installed right below the crown moldings, and new wall coverings.
We refaced the old mailbox, improving its design by implementing more complex lines, and by adding two ornamental carved rosettes.
The owners chose to retain the beautiful antique red they had selected a few years ago, this time painted over a beautiful embossed anaglypta paintable wallpaper. We recommended one of our favorite designs, called Derby. Its details are exquisite, and the pattern is joyous while being subtle and elegant.
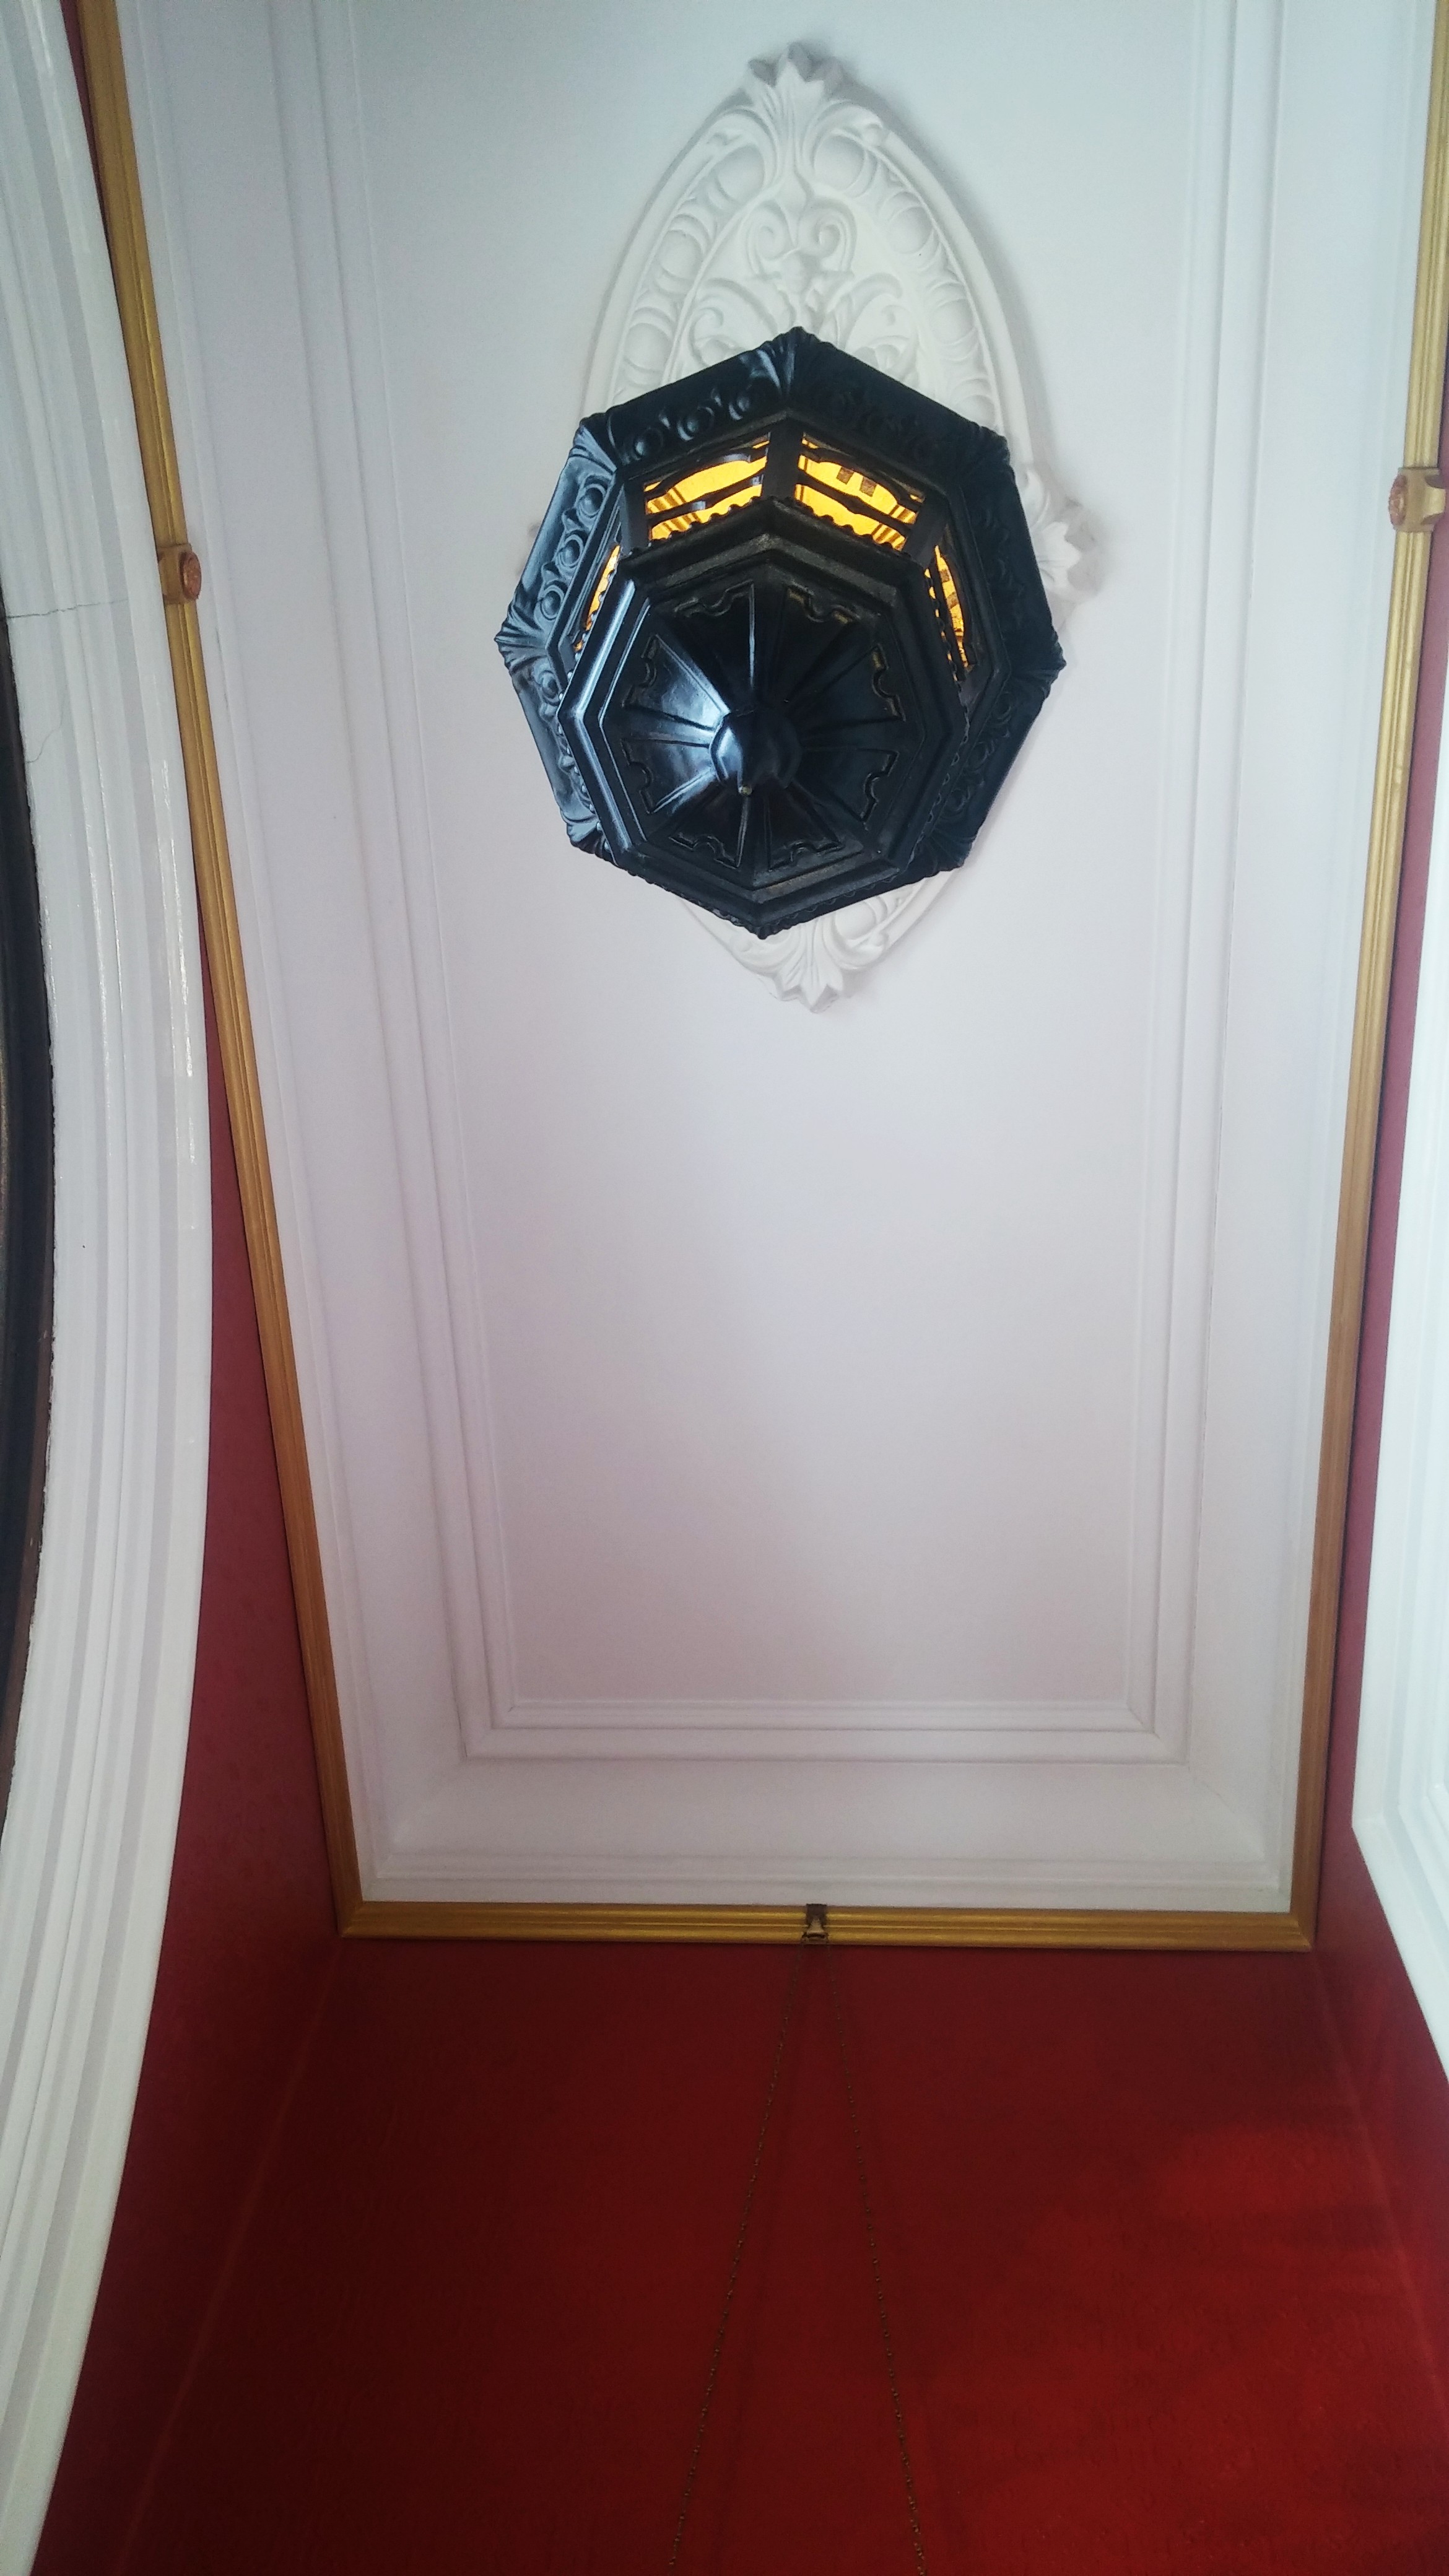
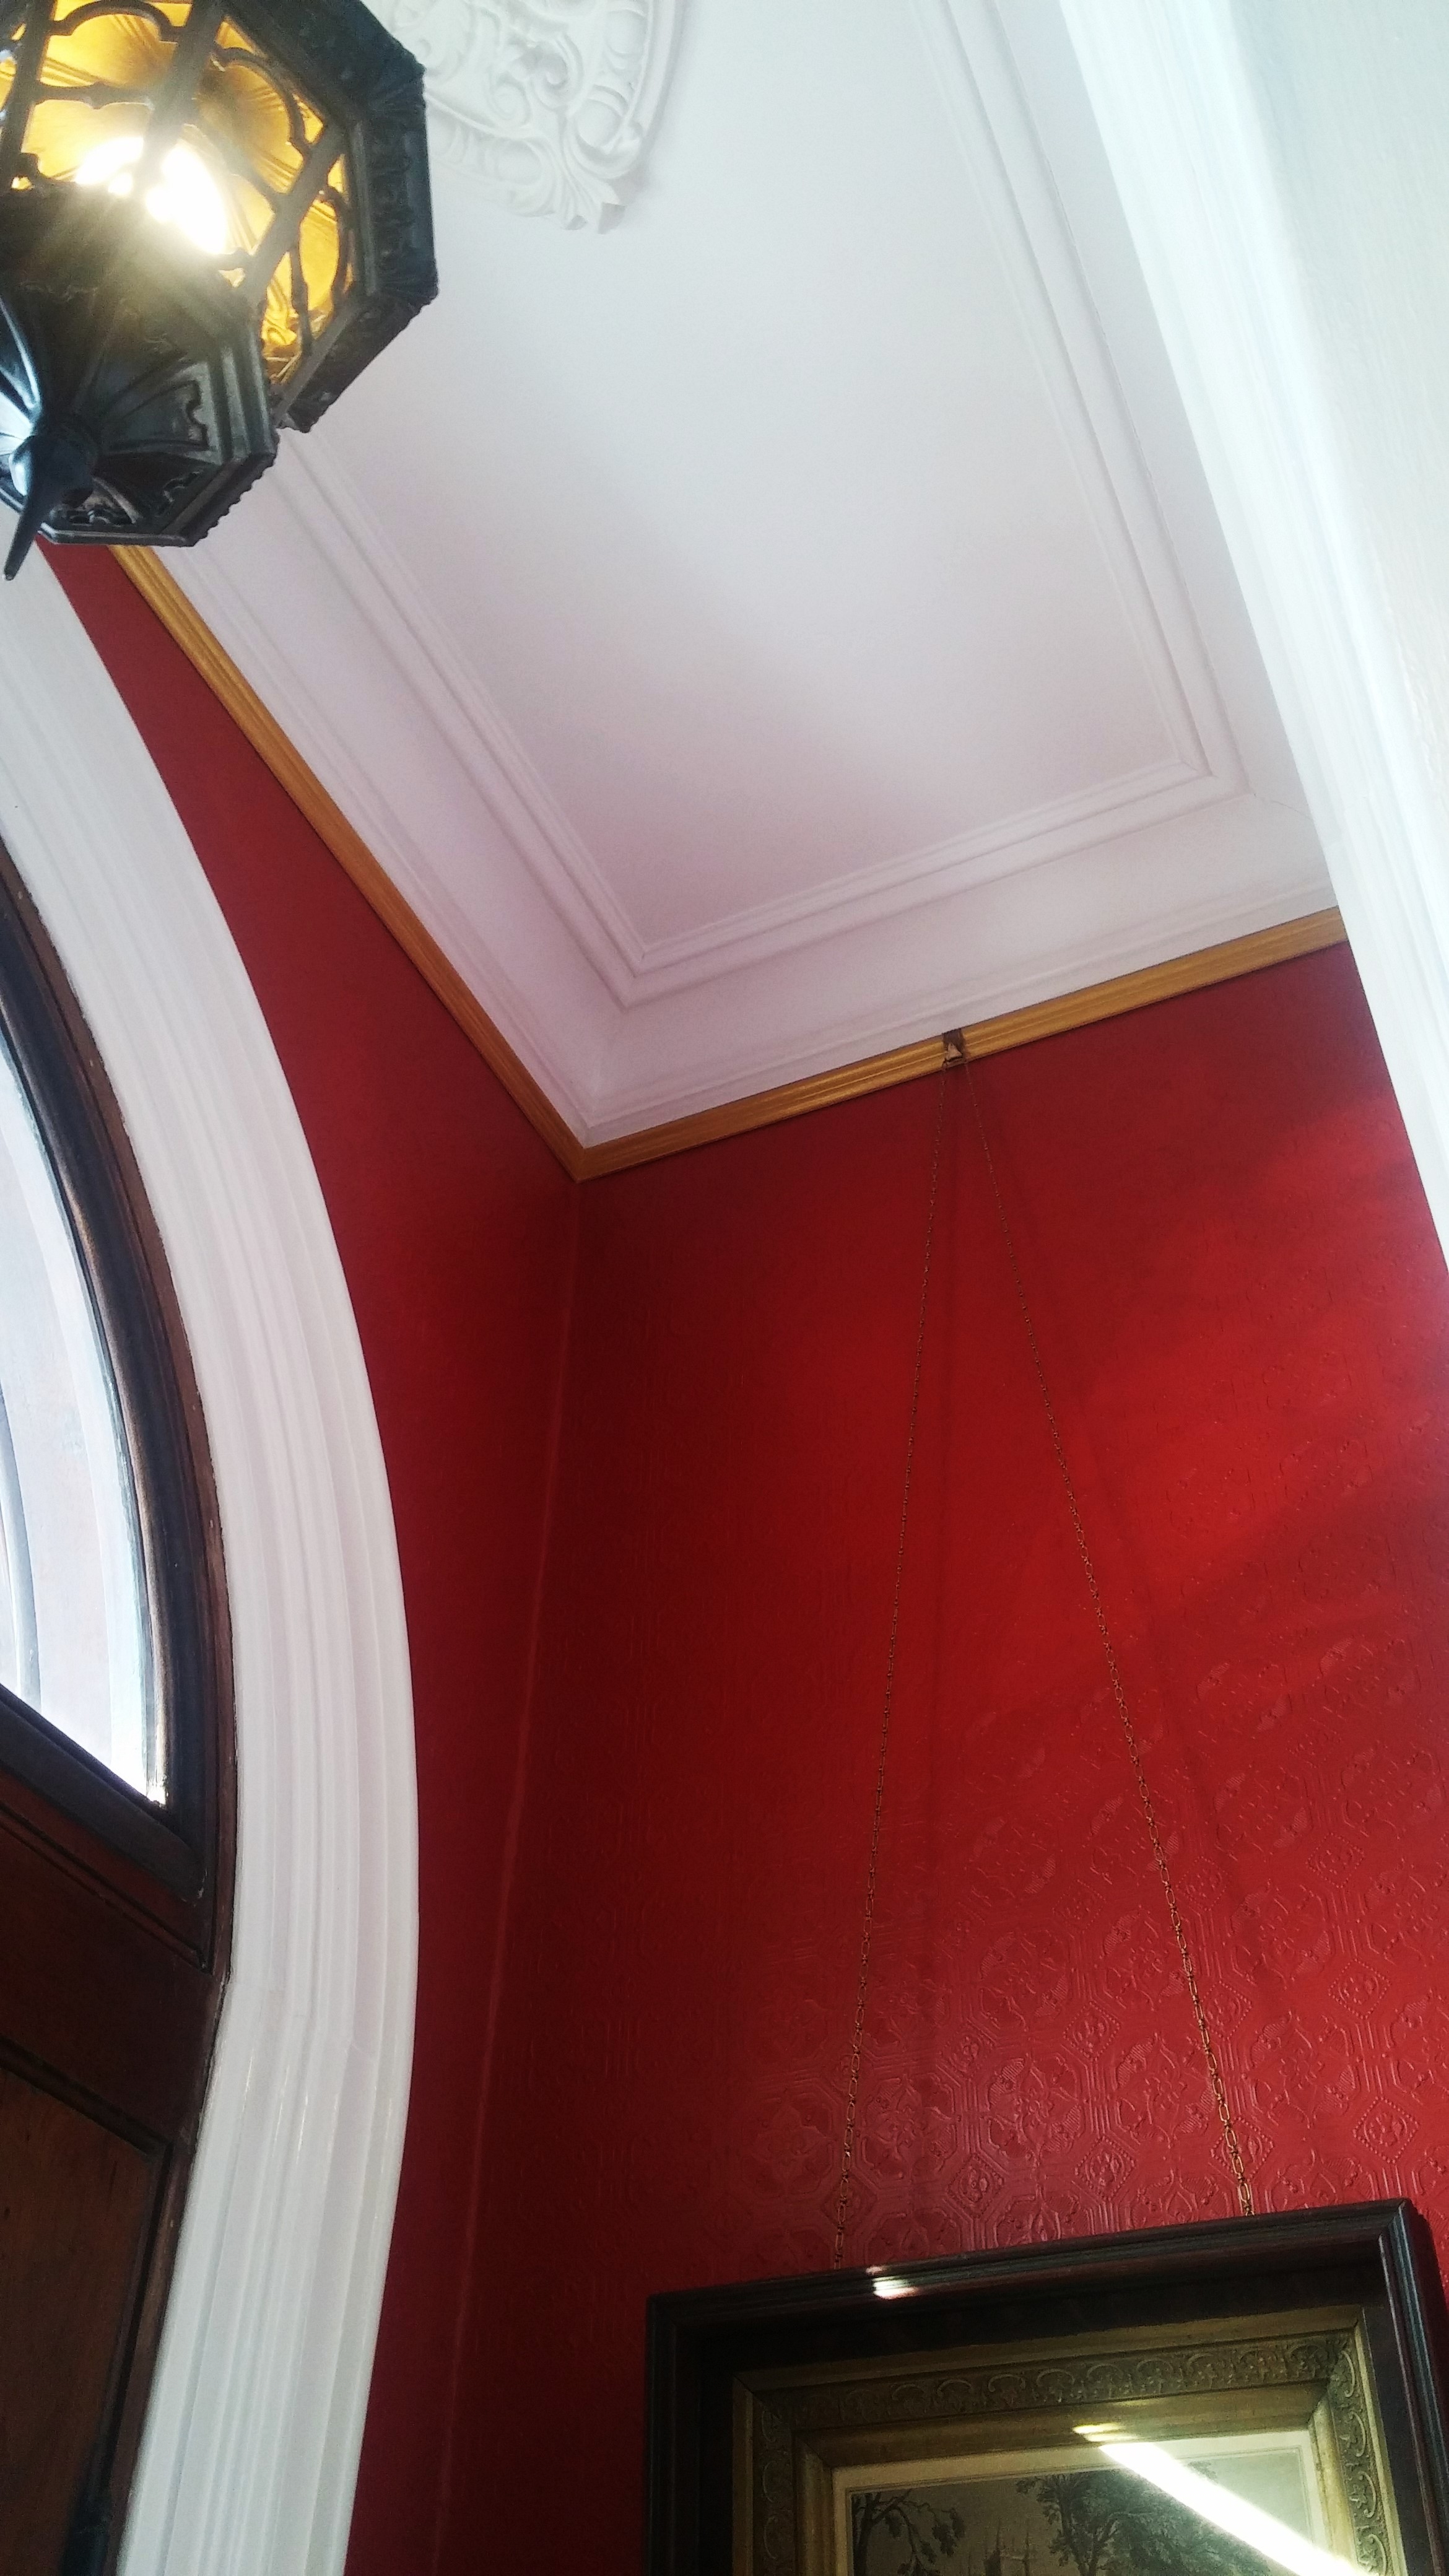
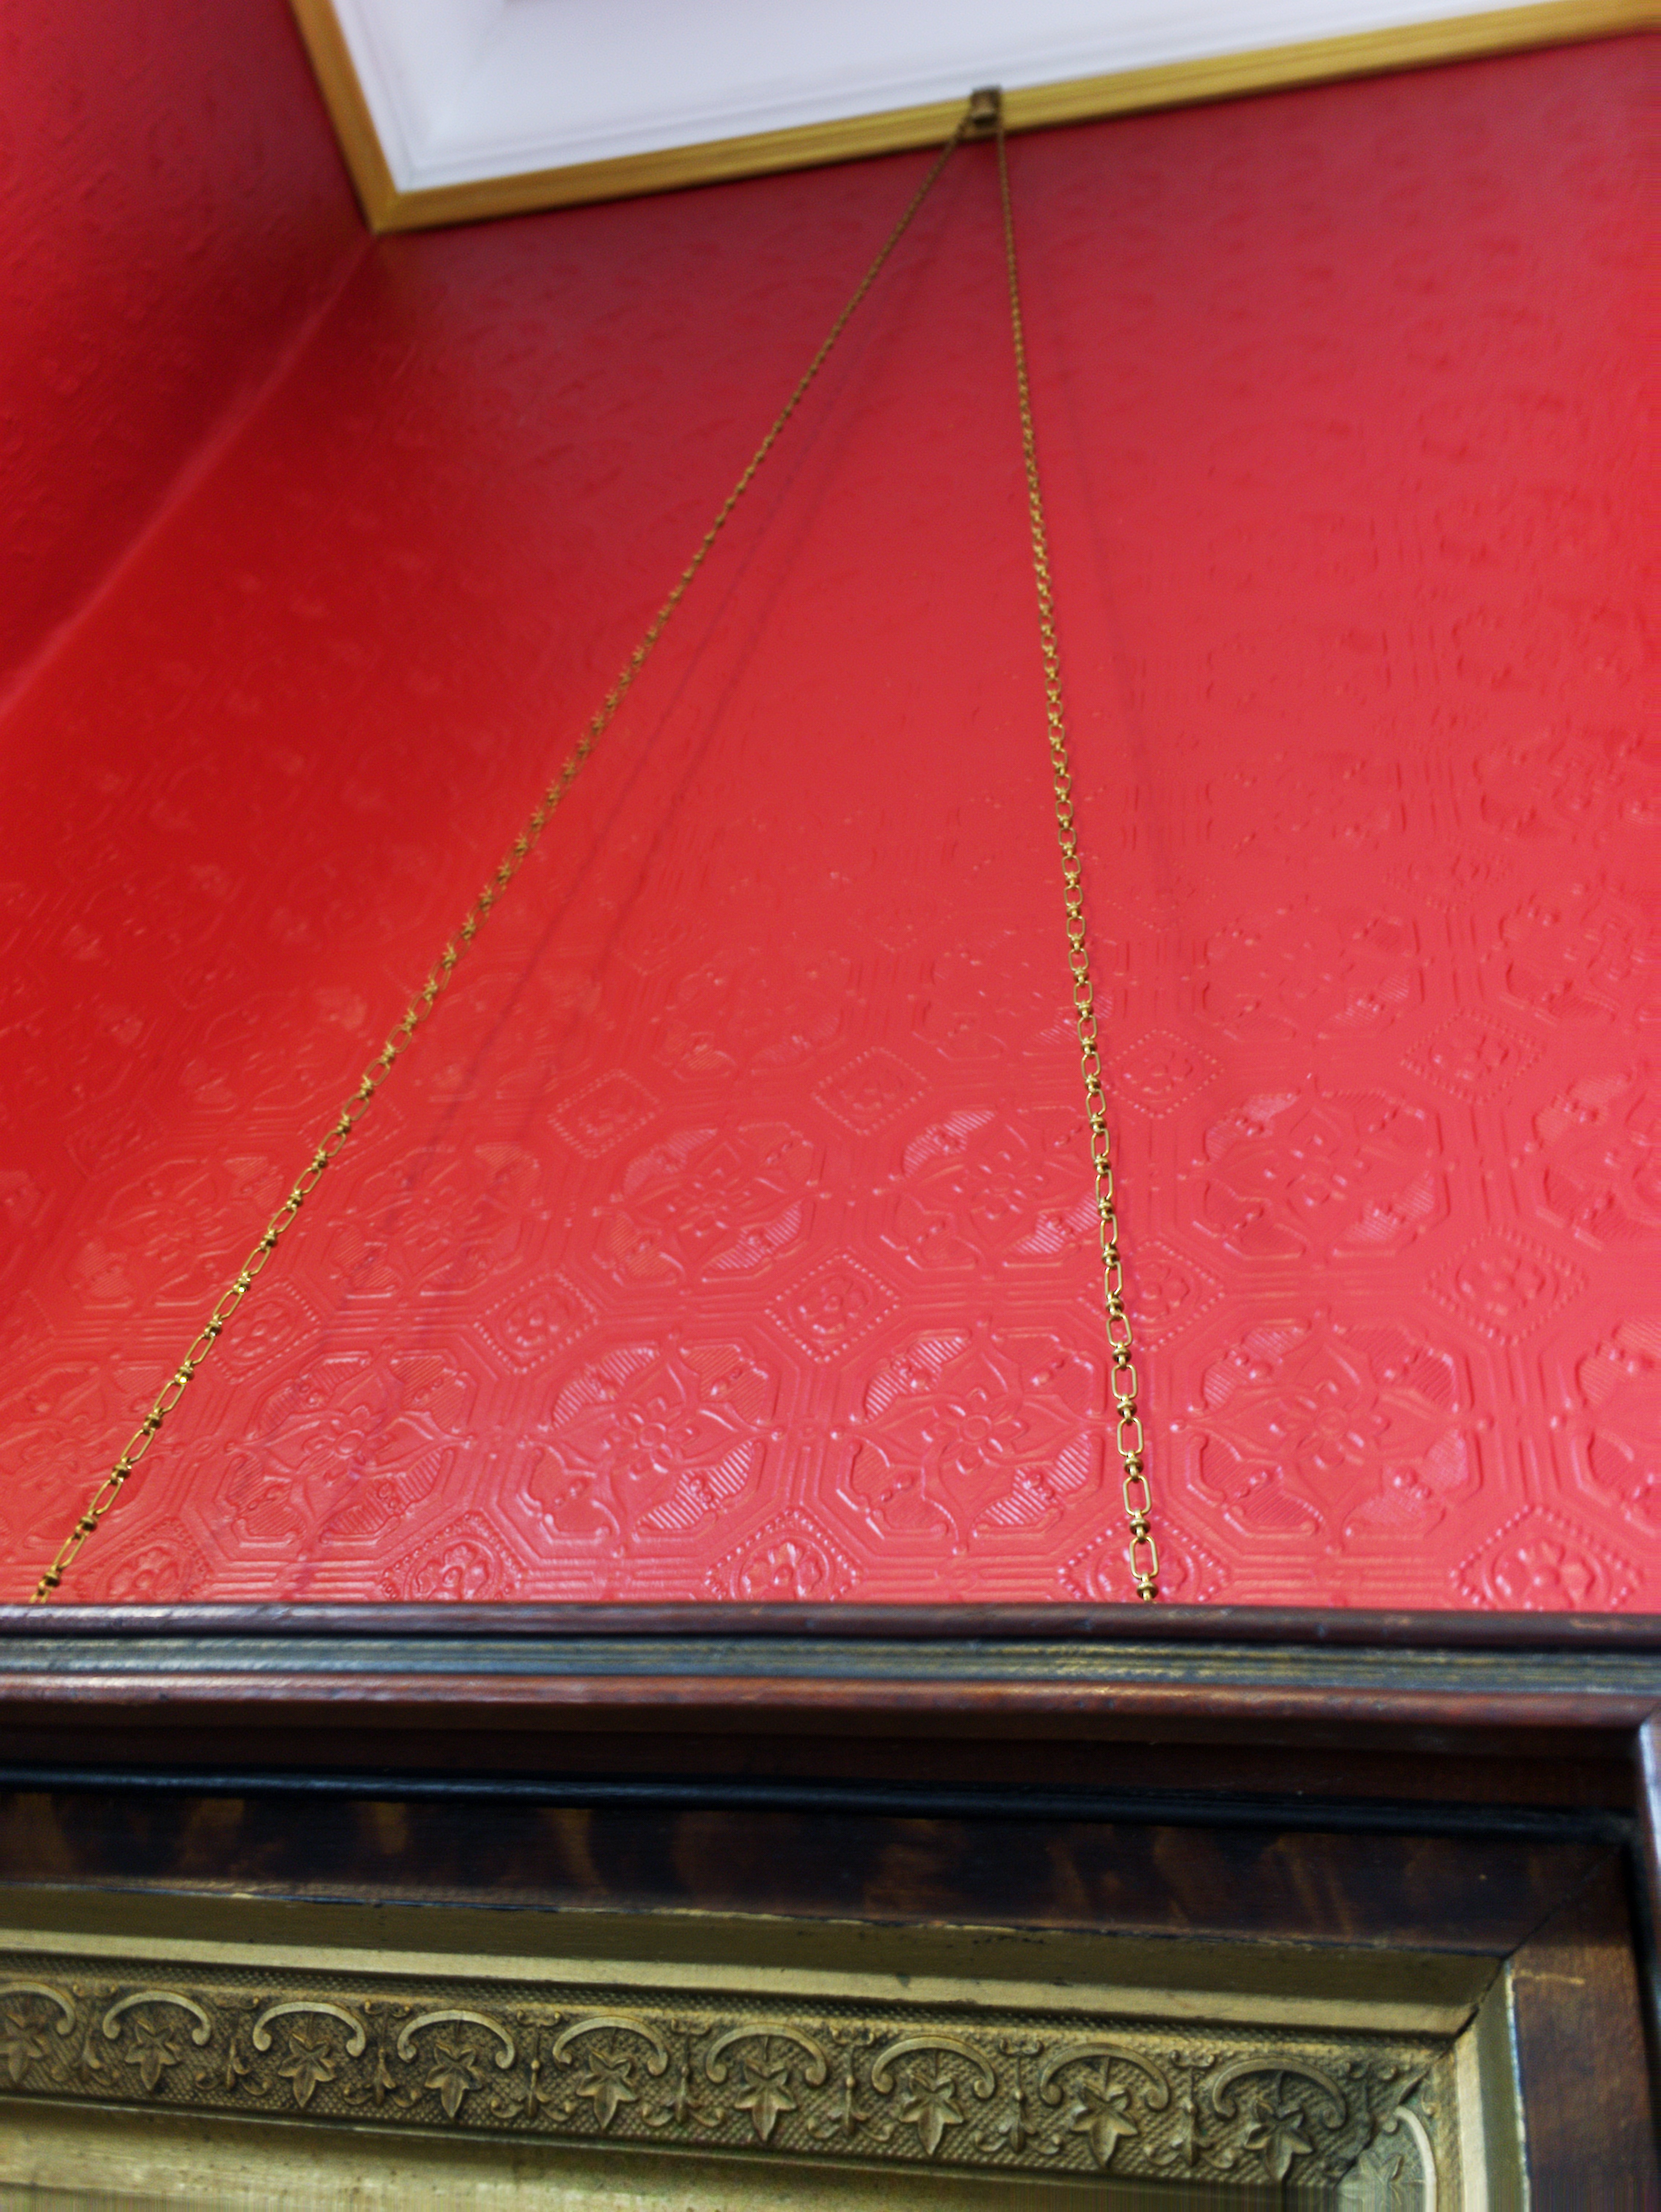
We then installed a gilt picture rail, from which artwork hangs by using antique picture-rail hooks and decorative brass chains.
Restoration of 1860s Fireplace Summer Cover
Fireplace mantels in Boston's Victorian homes often display the cast-iron surround that encloses the opening (conventionally called "summer cover"), but miss their original decorative inserts. By the end of the 19th century, fireplace flues were used as exhaust egresses for stoves, and the inserts no longer fit or served a purpose. Further, as summer-cover inserts were not used in the winter, oftentimes they were damaged or misplaced.
One of our new clients was looking for an original insert to fit in the surround of his 1860s Carrara-marble mantel. Several yeas ago, Old Boston acquired a piece that was salvaged from a now-demolished Boston home, and that was precisely the size of our client's fireplace opening.
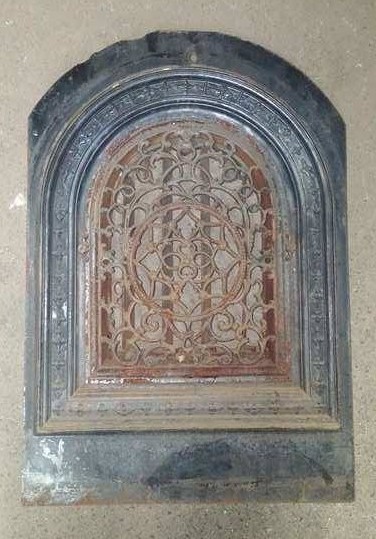
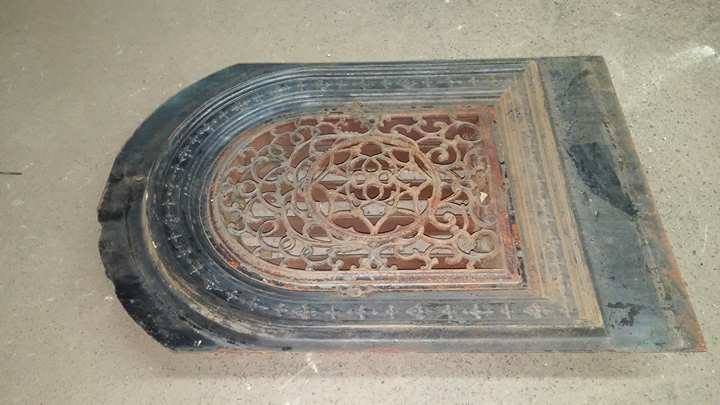
For decades, the insert sat in a basement - collecting dust, and rusting in the damp environment. Old Boston restored it to its original beauty. One of our craftsmen patiently removed dust and rust, and stripped the old chipping paint. Finally, the entire surface was given several coats of black enamel paint. The result is a new, stunning focal point for our client's living room.
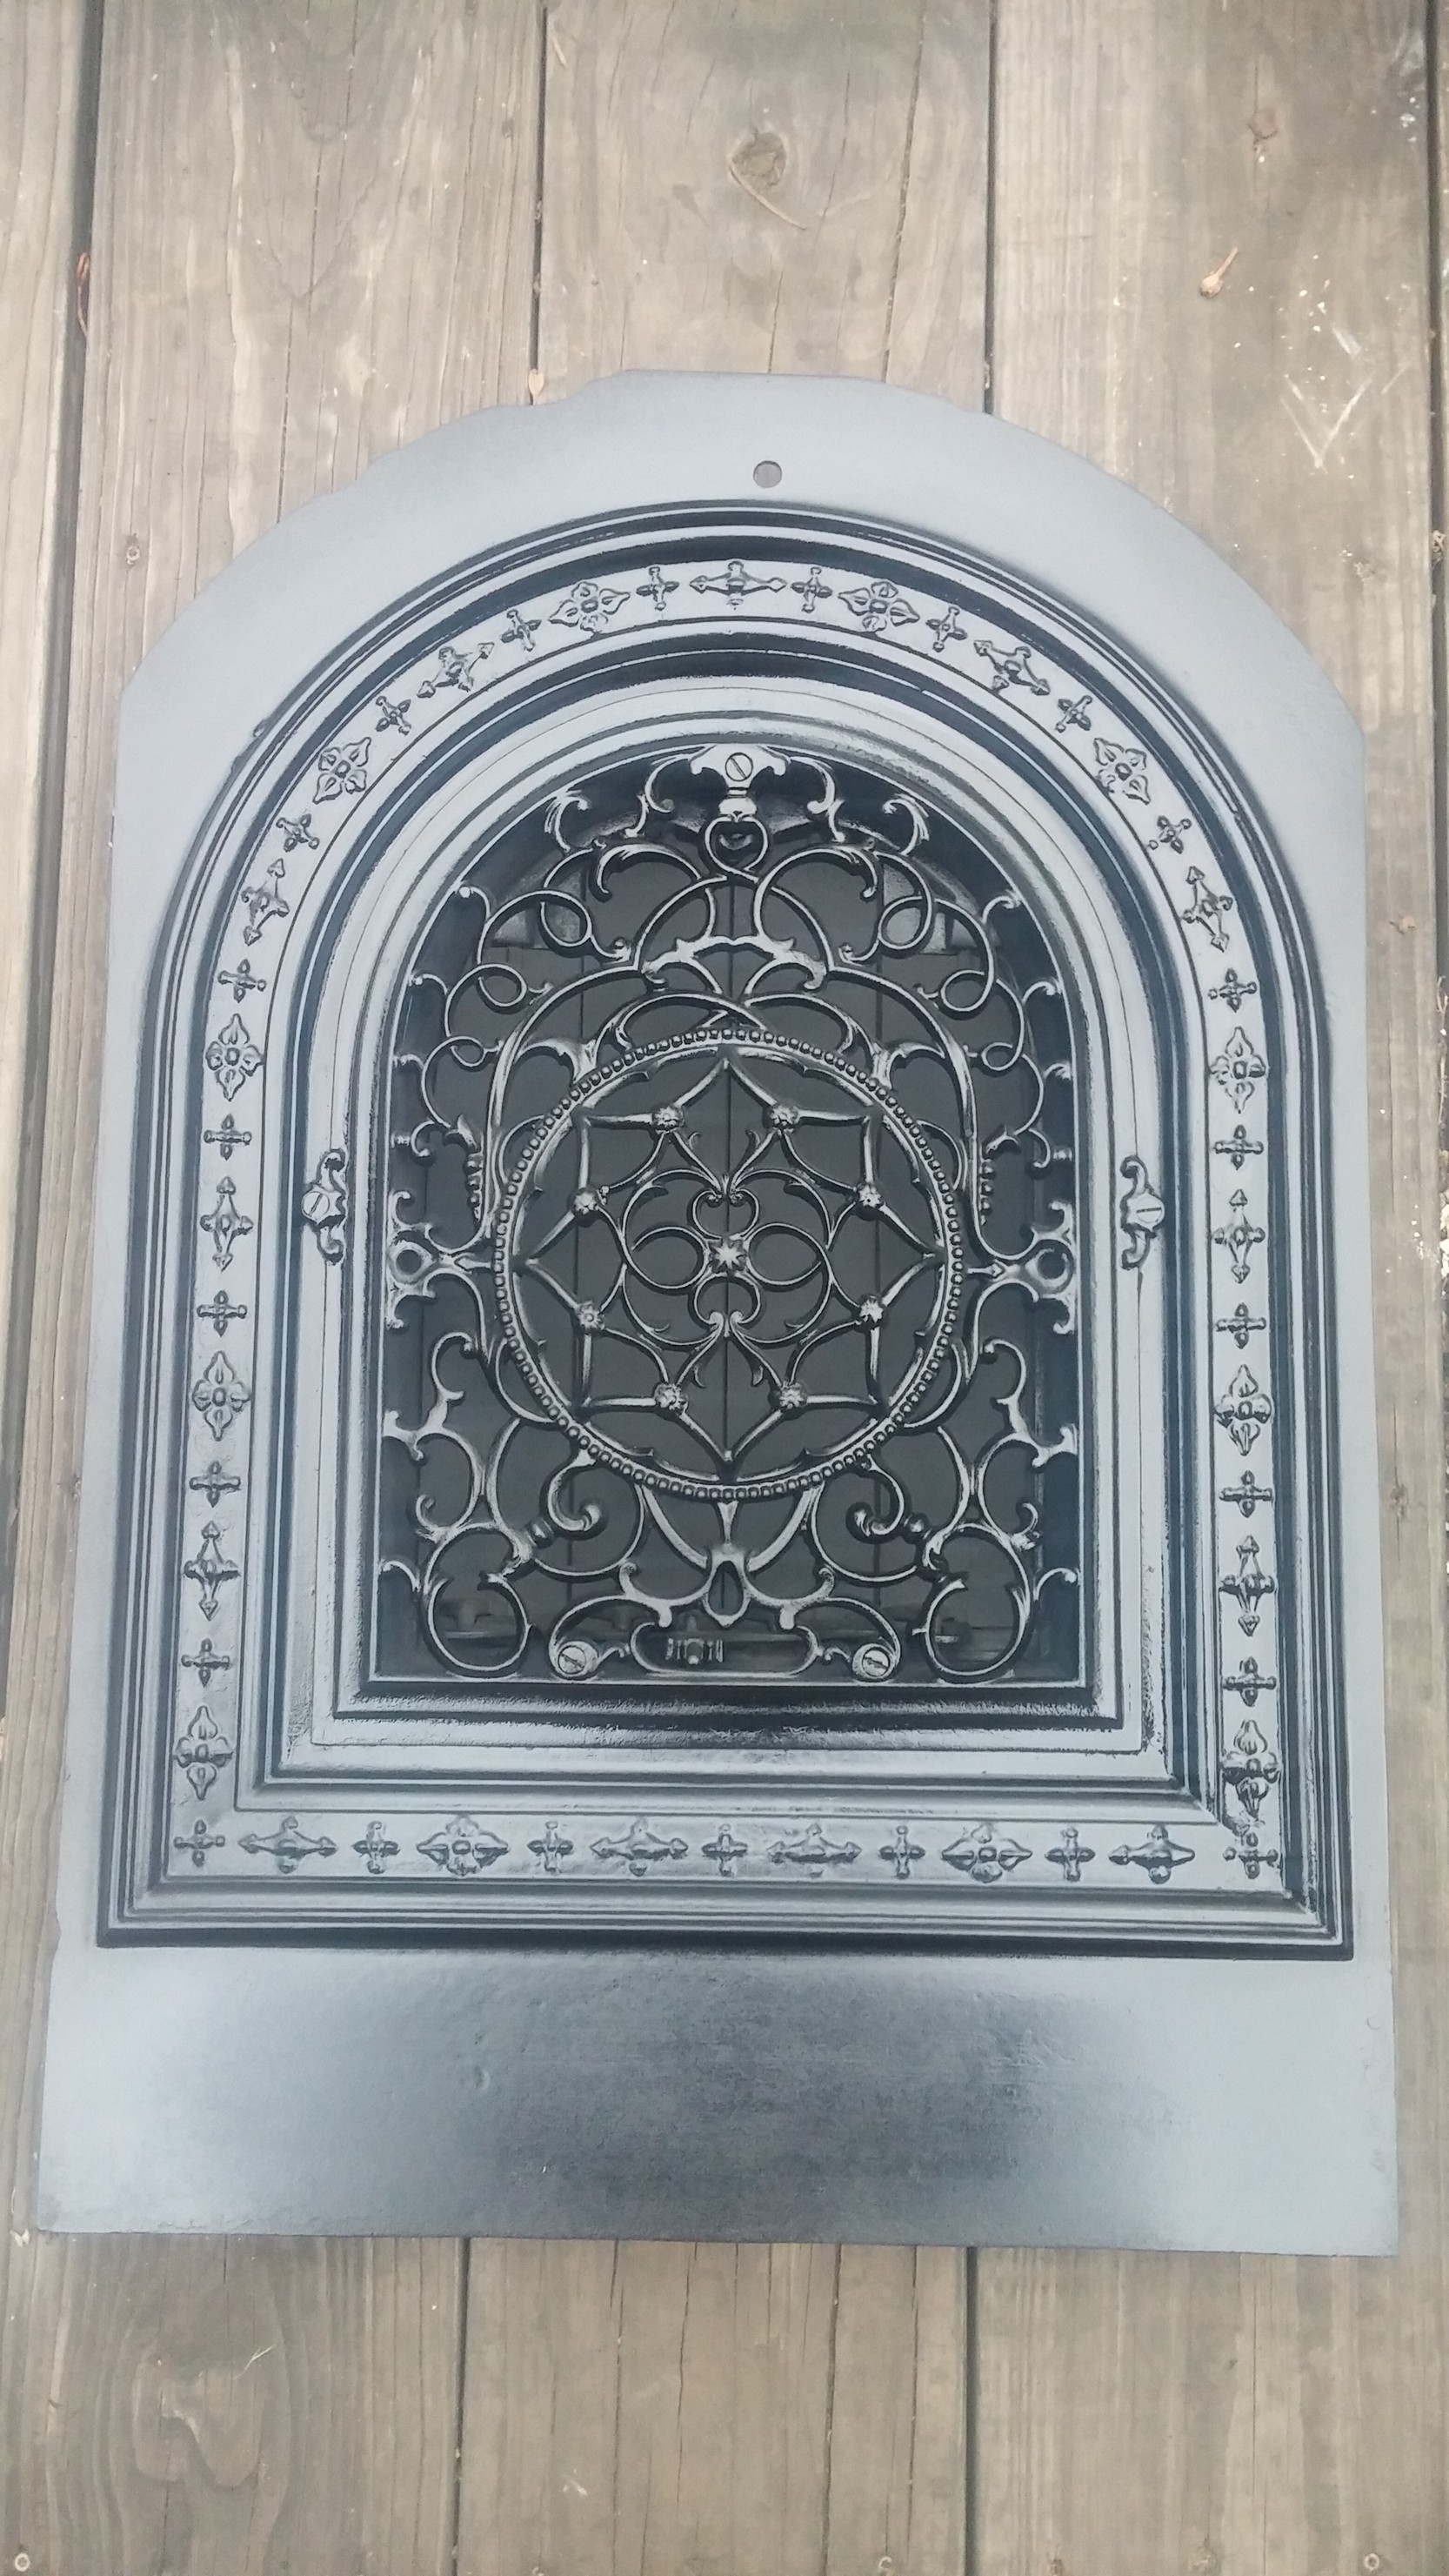

Once the insert was ready, we proceeded to clean and repaint the surround. It had been previously stripped with a wire brush.
We removed every bit of paint that had remained on the surface, and painted it to match the insert.
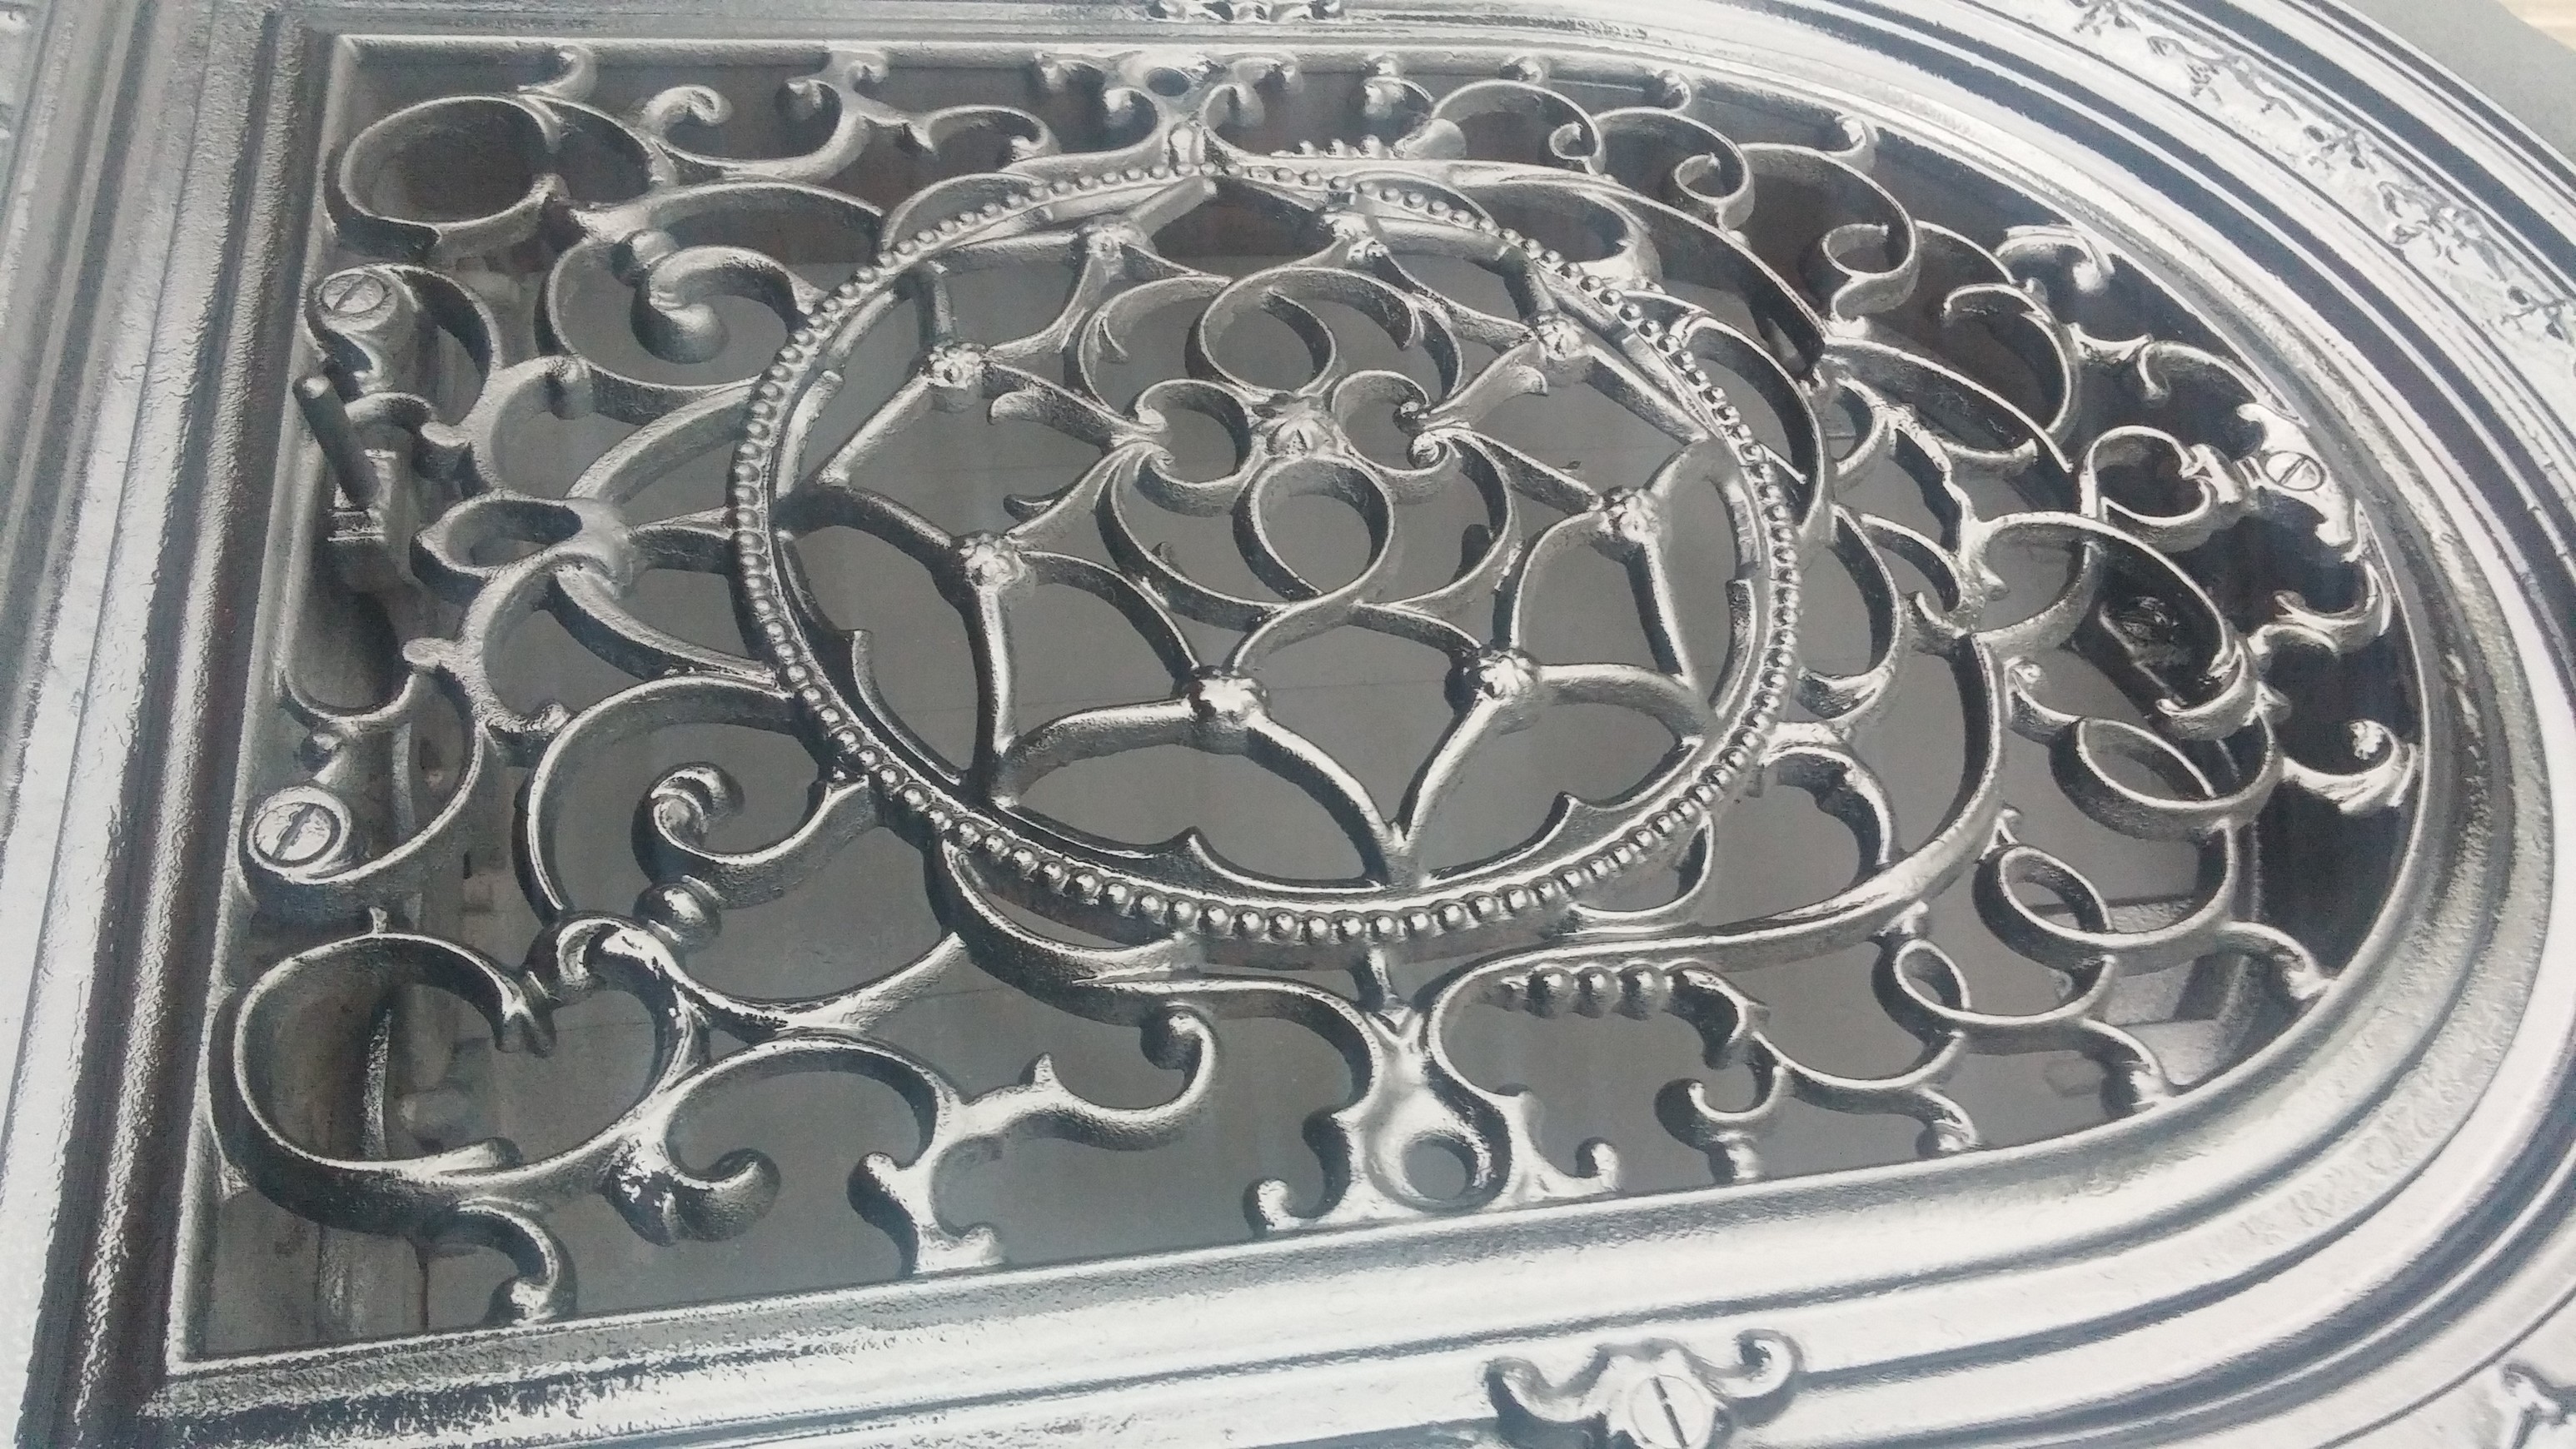
We then completed the project by installing the insert.
This is a working fireplace, and the summer cover will be removed whenever a fire will warm up the room in the cold Boston winters.
Building a faux fireplace mantel
Old Boston restores original fireplace mantels, but also builds custom-designed pieces such as the one we just completed at a newly renovated home in the South End. In this case, our client had something specific in mind - re-creating a fireplace mantel from a late-19th-century English home, of which she had a photo, for her faux mantelpiece. We faithfully replicated the mantel in the photo, with the exception of the design of the rosettes that adorn the top corners, which was added to the plain quadrants of the original design. The rosettes, as well as the plinths and the fluted columns, were carved by one of our skilled associates. The rosettes replicated the motif found on the fireback, the three-panel piece inside the firebox, which features one of our favorite textured wallpapers - Derby.
We began by building the nailers that will hold the entire mantel in place.
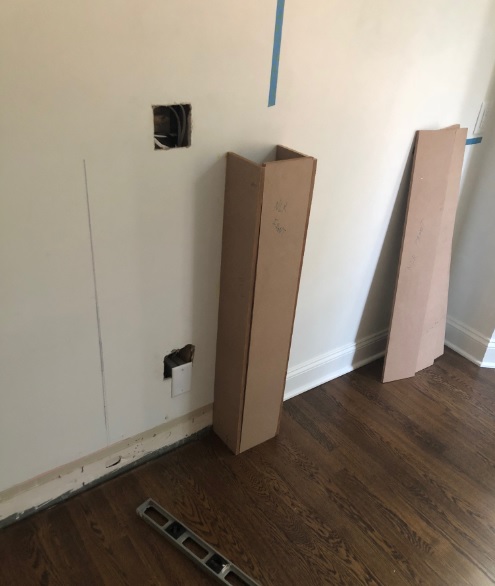
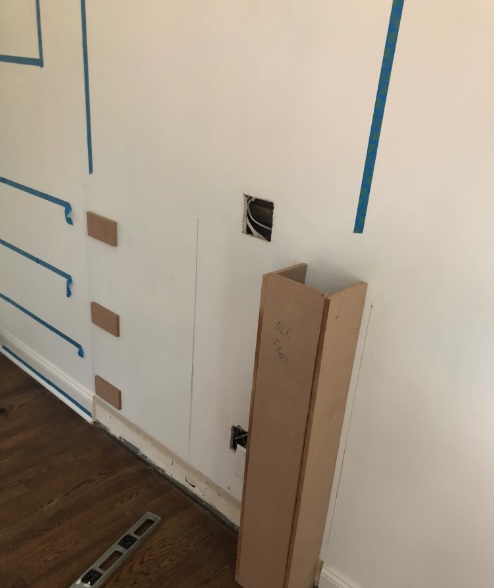
We then began to assemble the firebox, comprising the three-panel fireback; the floor, which covers the depth of the firebox; and the ceiling, which slants toward the back wall. The front panel, painted a satin black, was precut to host the antique cast-iron surround we purchased at a salvage place for the occasion, selected by the client.
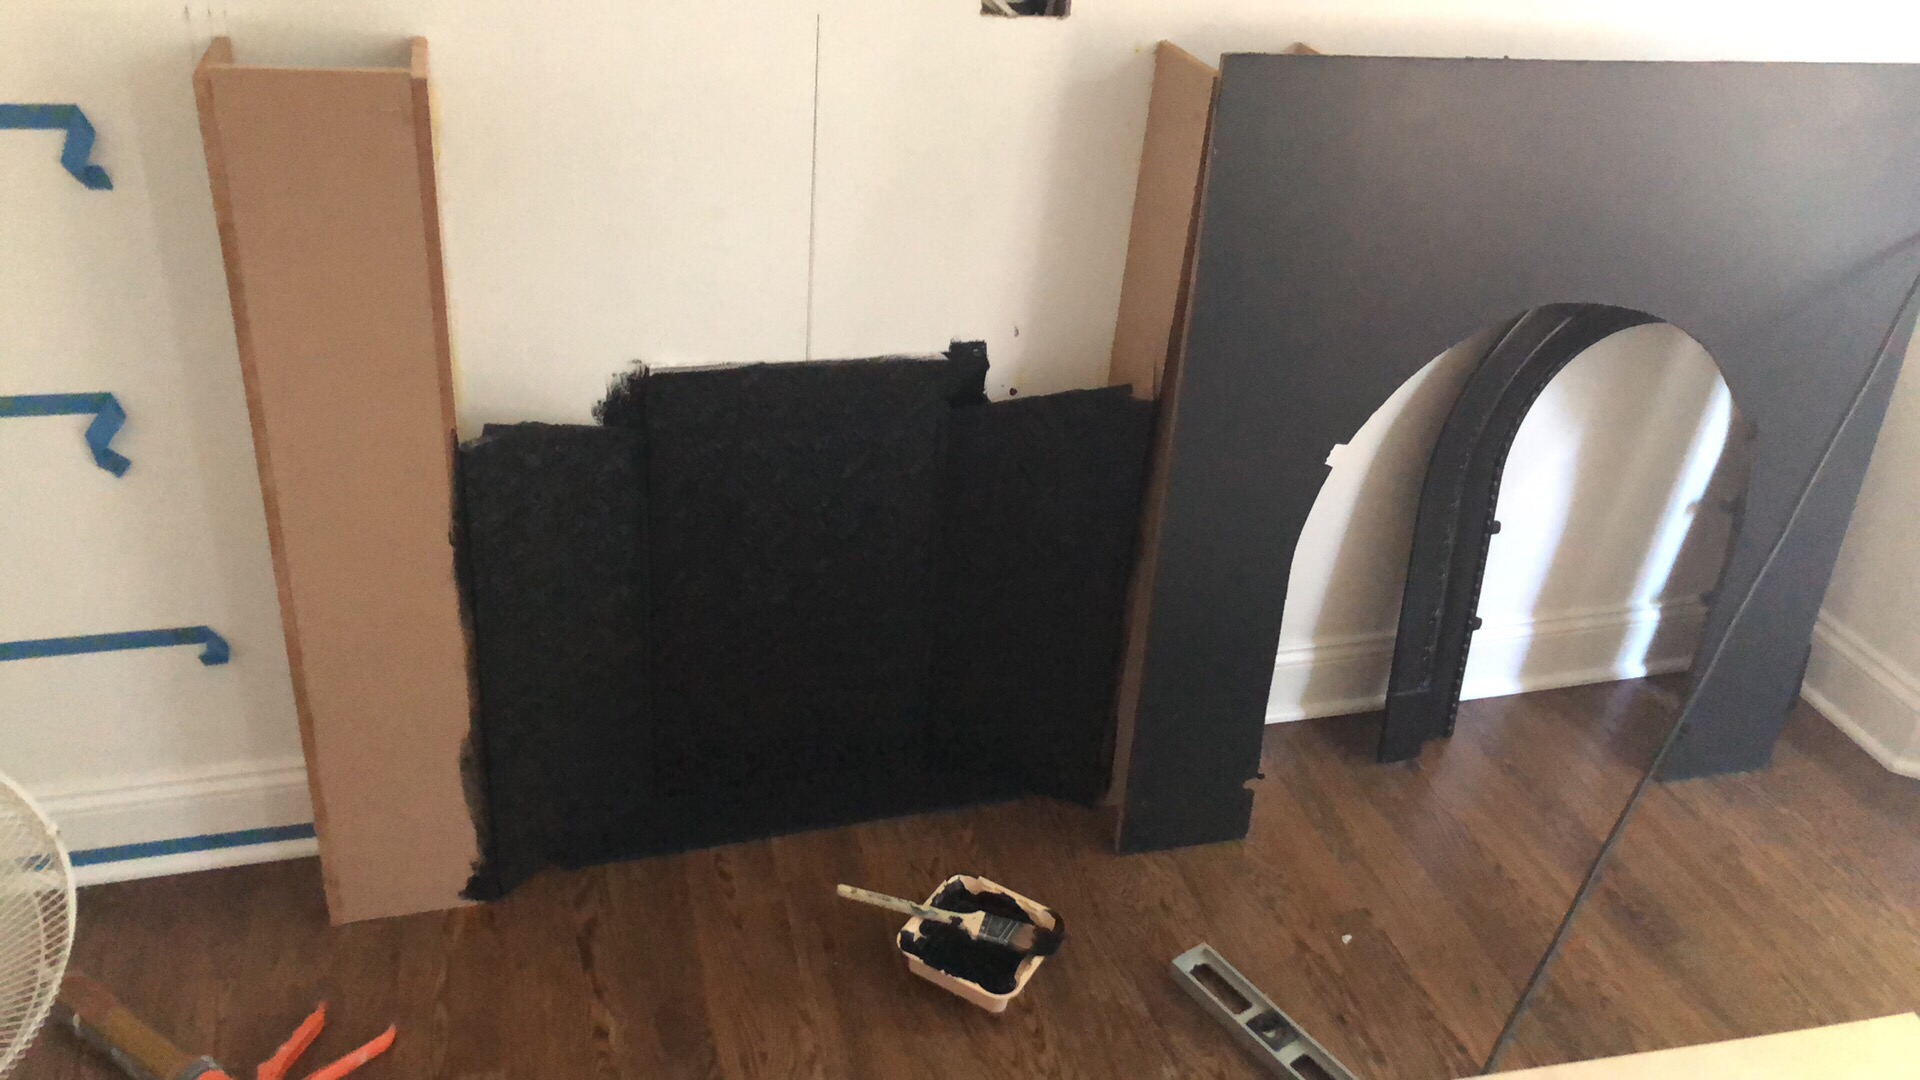
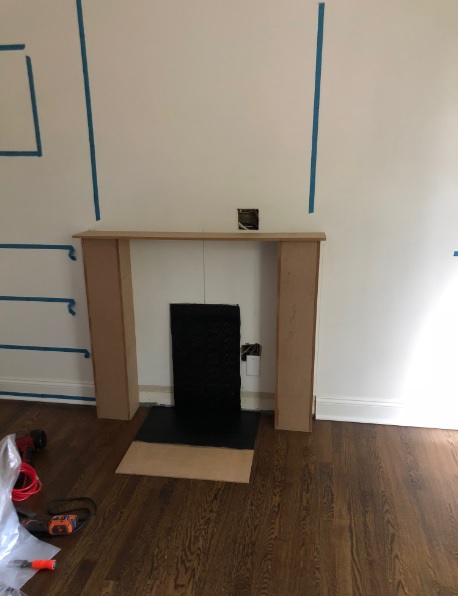
We continued by building the two pilasters, which rest against the front panel.
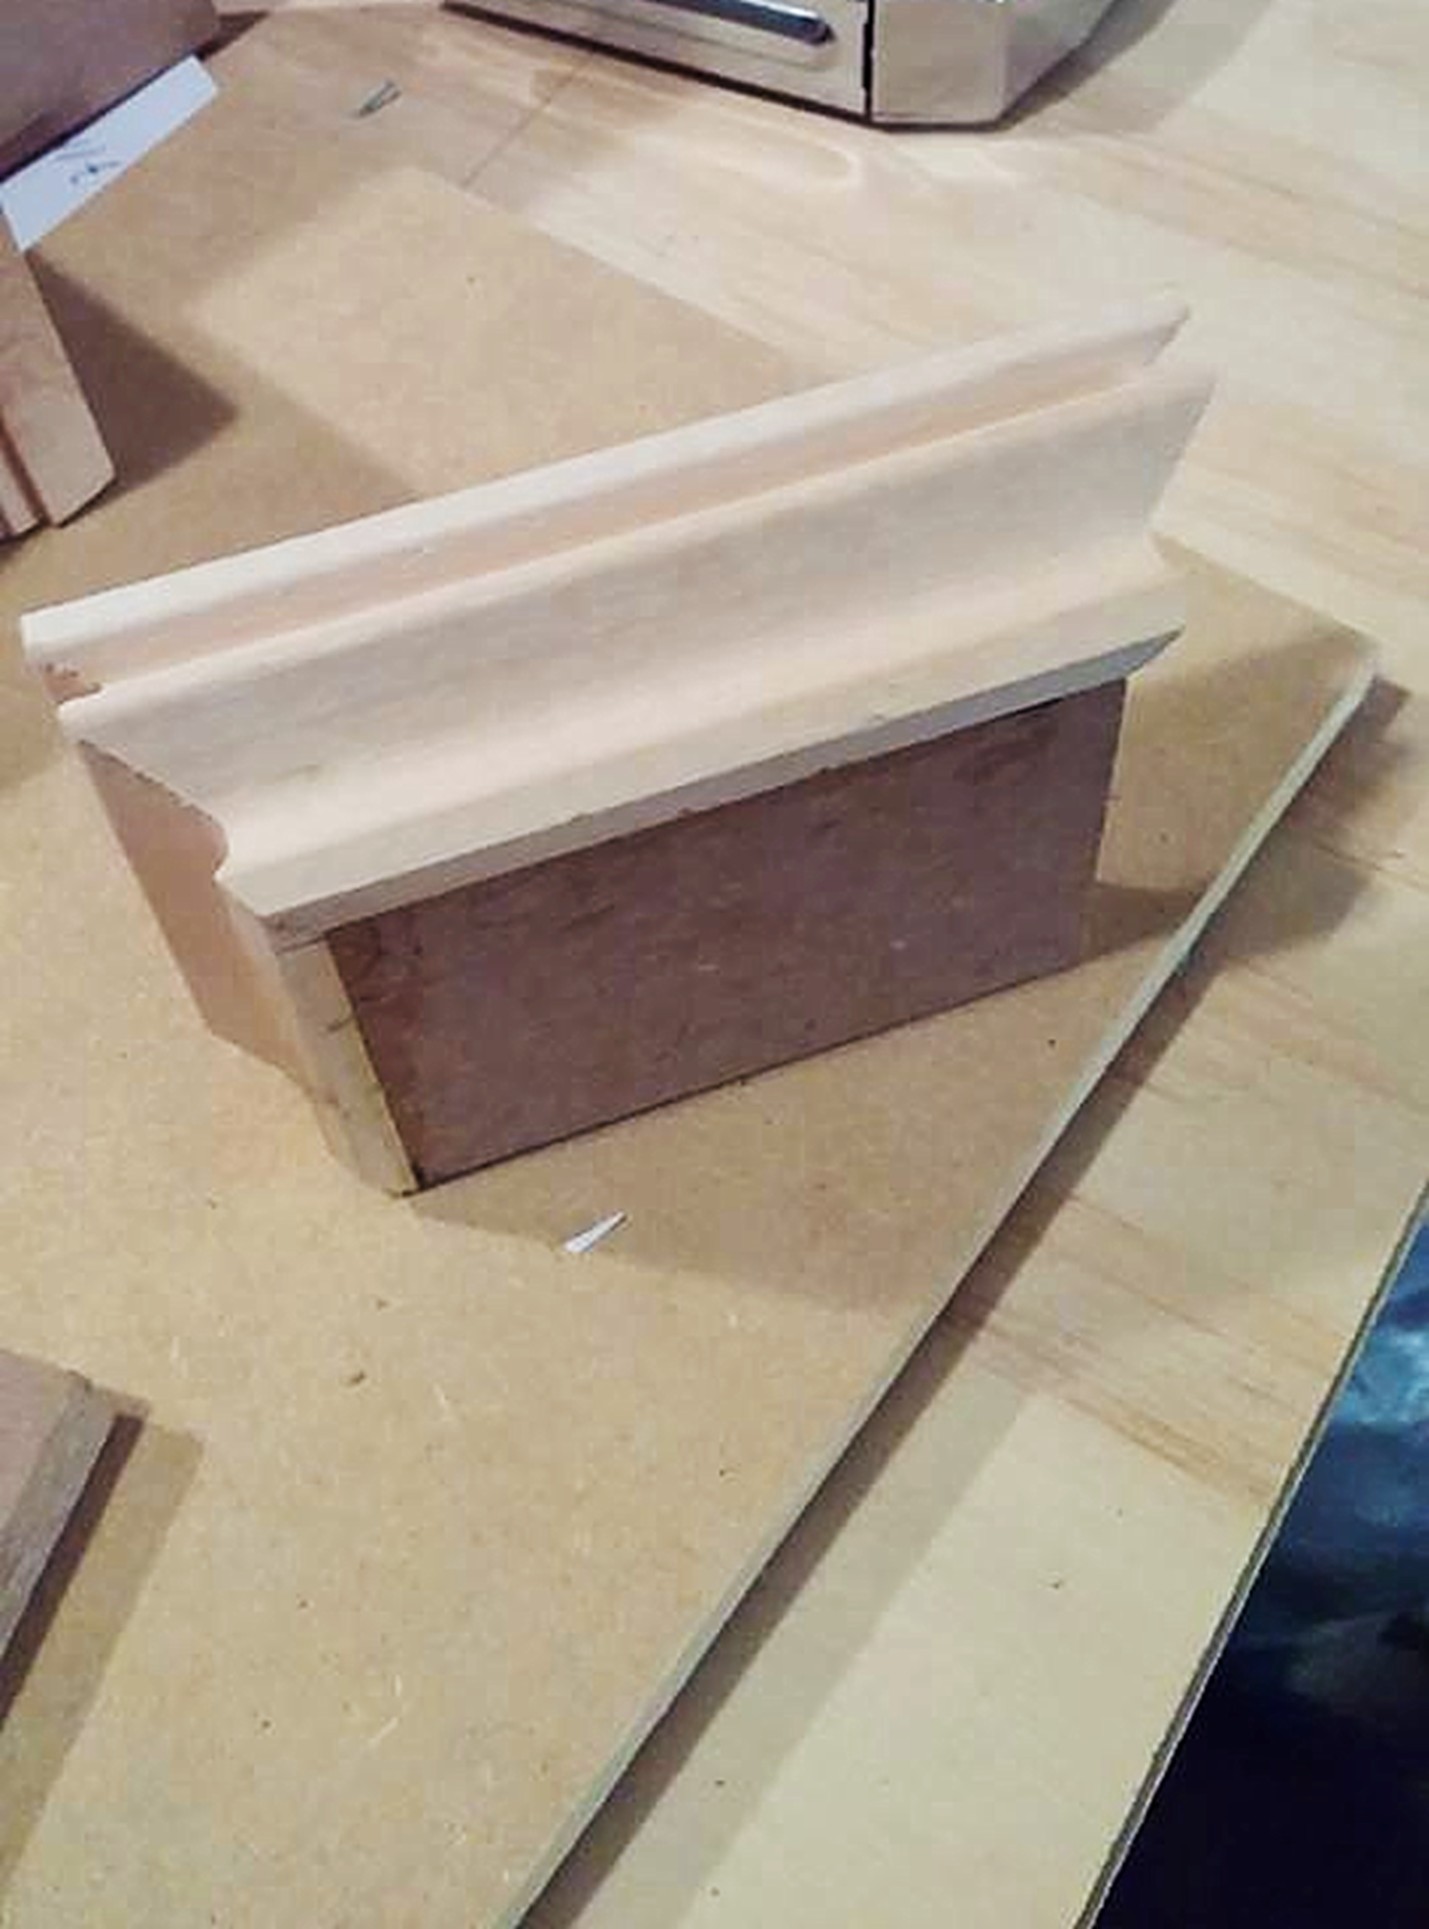
We created the top shelf and installed it. The shelf has a beveled edge and a slightly decorative trim to frame the bottom portion.

The last step involved the glueing of the carved elements, which arrived a few days after the main structure of the mantel was completed. They were custom-made to fit this mantel. As mentioned earlier, the upper corner rosettes feature the design found on the fireback. We glued all the pieces in place, and painted everything with three coats of semi-gloss white paint.
Restoration of a small room in a Victorian brownstone
One of Old Boston's most recent projects was the restoration of a small, windowless room in an 1850s South-End brownstone. At just 8.5' x 8.5', the room was created many years ago when the building was turned into condos. By closing off the staircase that led from the reception rooms to the lower level, where an informal dining room and the kitchen were originally located, the small room was carved out of a portion of the main landing. It first became a walk-in closet, then a nursery, and more recently a spare bedroom. Neglected for years, it finally received a complete makeover.
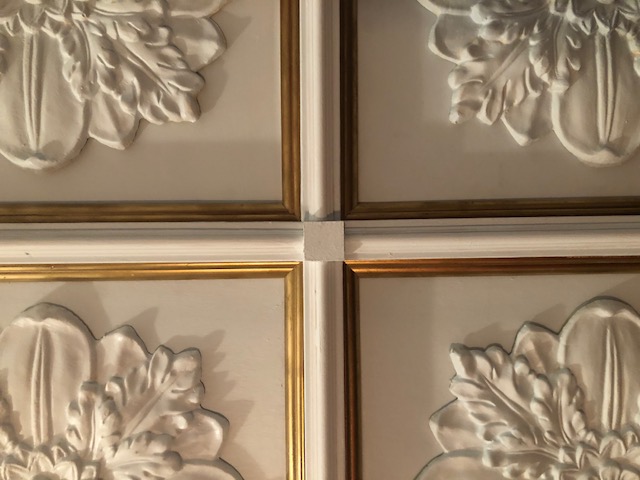
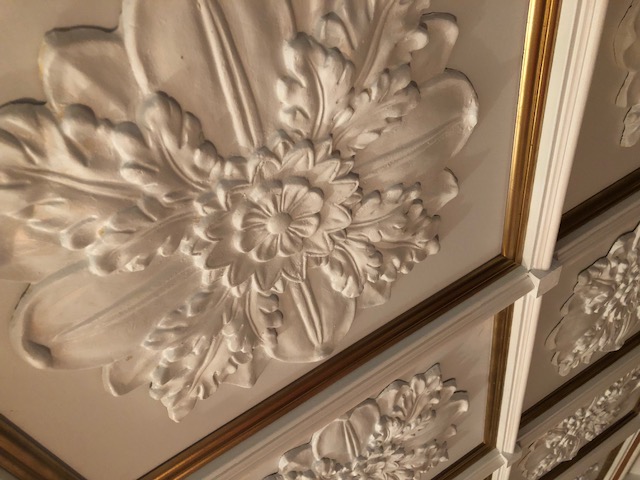
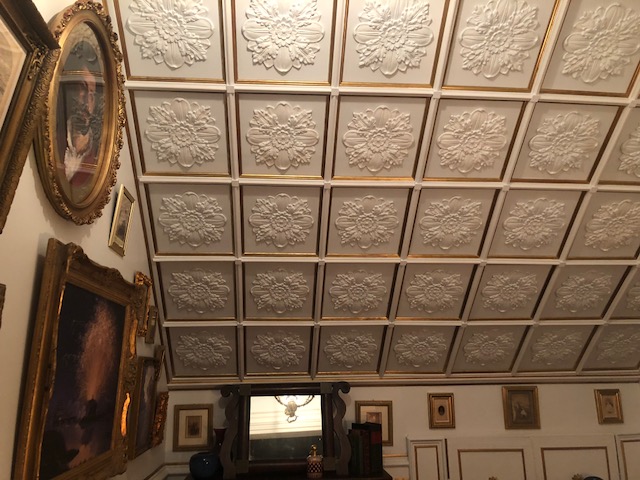
Old Boston created a coffered paneling that covered the sloped wall, installed to close off the space. We created large hand-cast rosettes to fill the gold-trimmed quadrants, which are framed by an elegant molding profile.
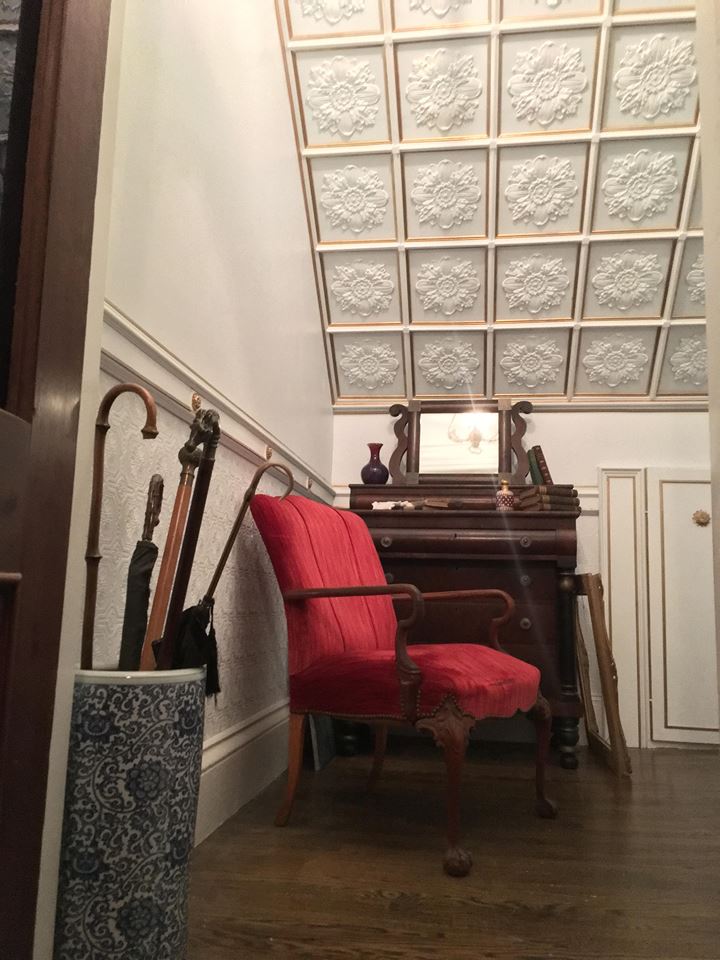
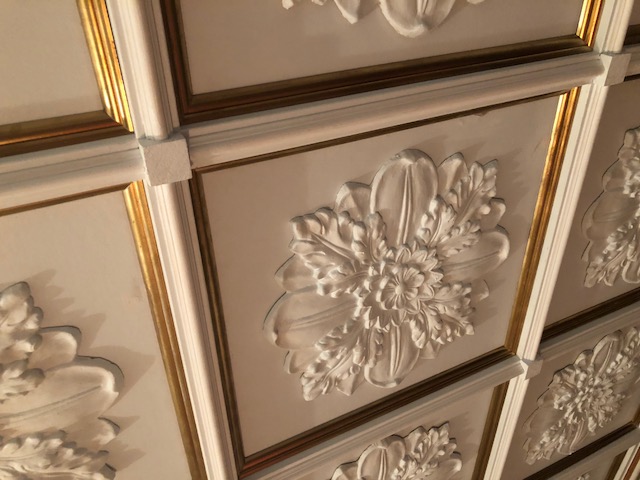
We also created a chair rail to frame the anaglypta wallpaper that constitutes the dado paneling on the bottom portion of the room. The rosettes evoke the design on the coffered panel.
The plaster crown molding, which curves right above the large mahogany door, was restored and completed by installing plaster leaves that evoke an acanthus-leaf scroll wrapping around the central dowel - an element found in other rooms of the home.
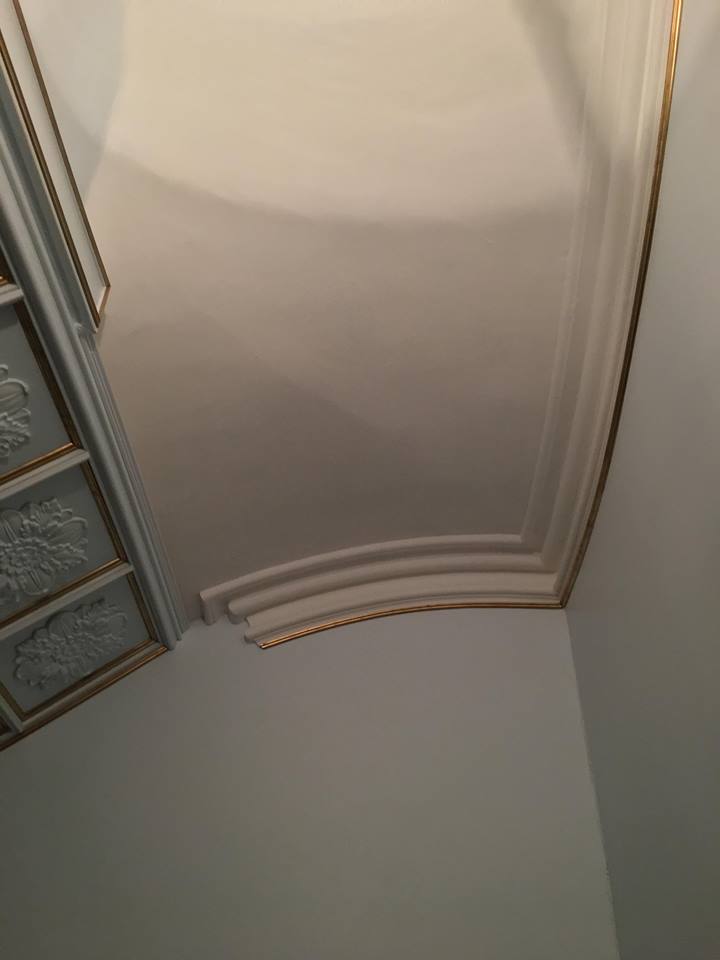
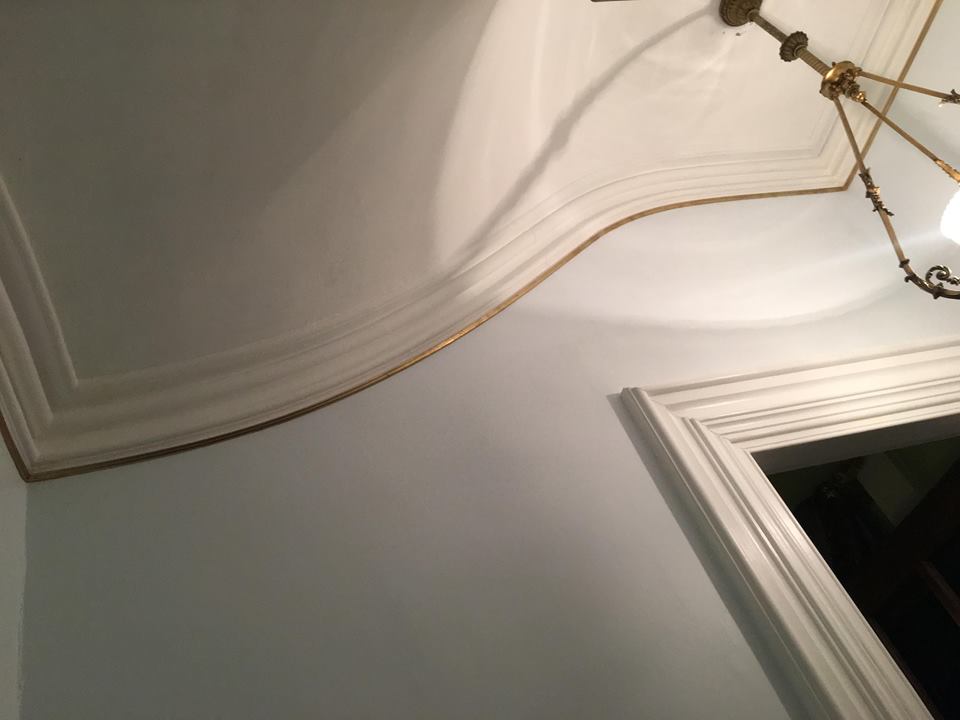

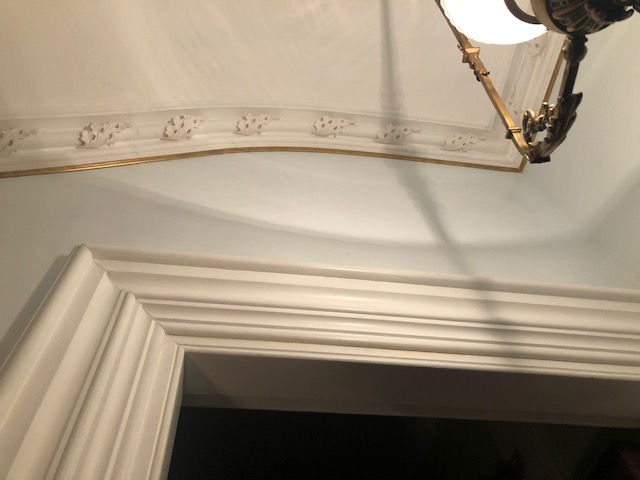
We then scoured dozens of salvage places to find a beautiful mid-19th-century brass light fixture. A true show piece, it casts a lovely, suffused light in the room.
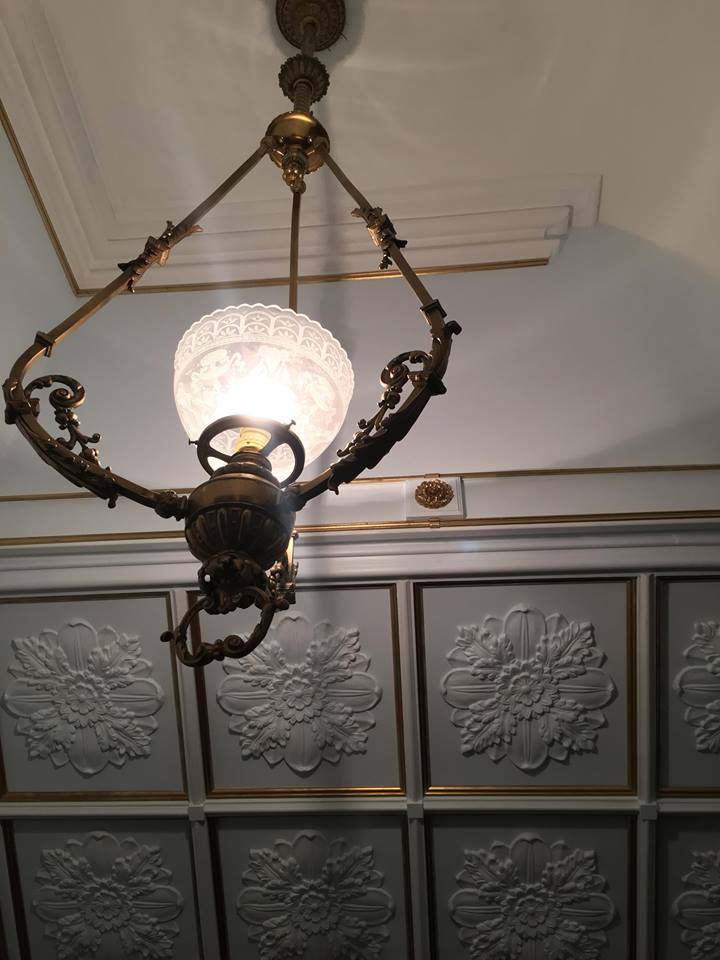
The room hosts an eclectic collection of antique lithographs, original paintings, and Victorian photograph portraits. Its furnishings include a late-19th-century daybed and armchair, and an 1830s diminutive dresser. It is currently used as a reading nook, as an occasional guest bedroom, and an intimate place to have conversations.
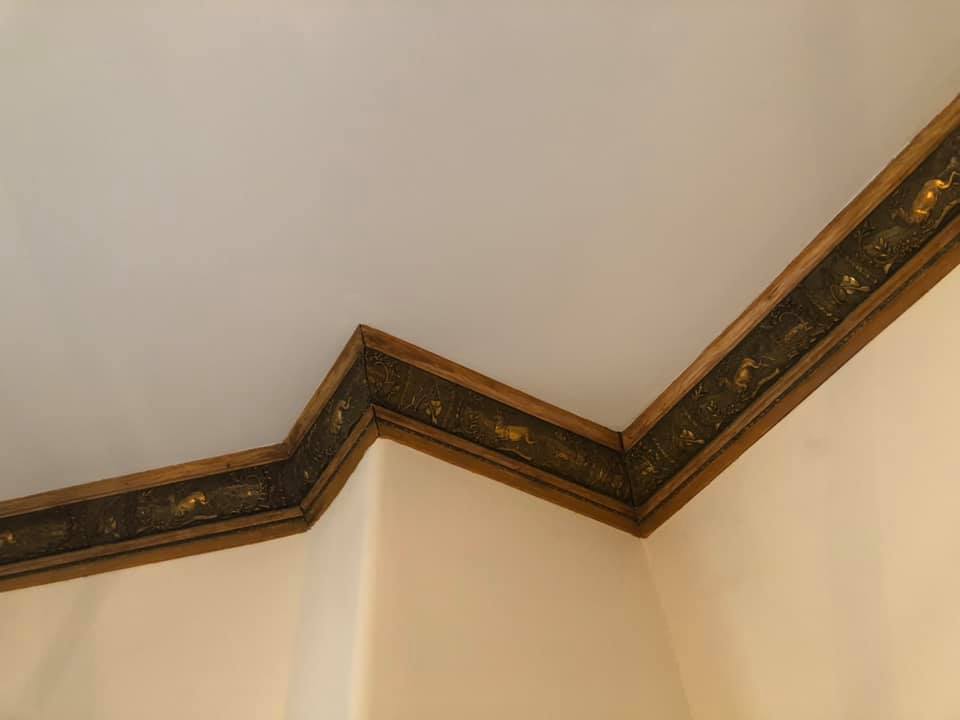
Restoration of hunting-motif crown moldings
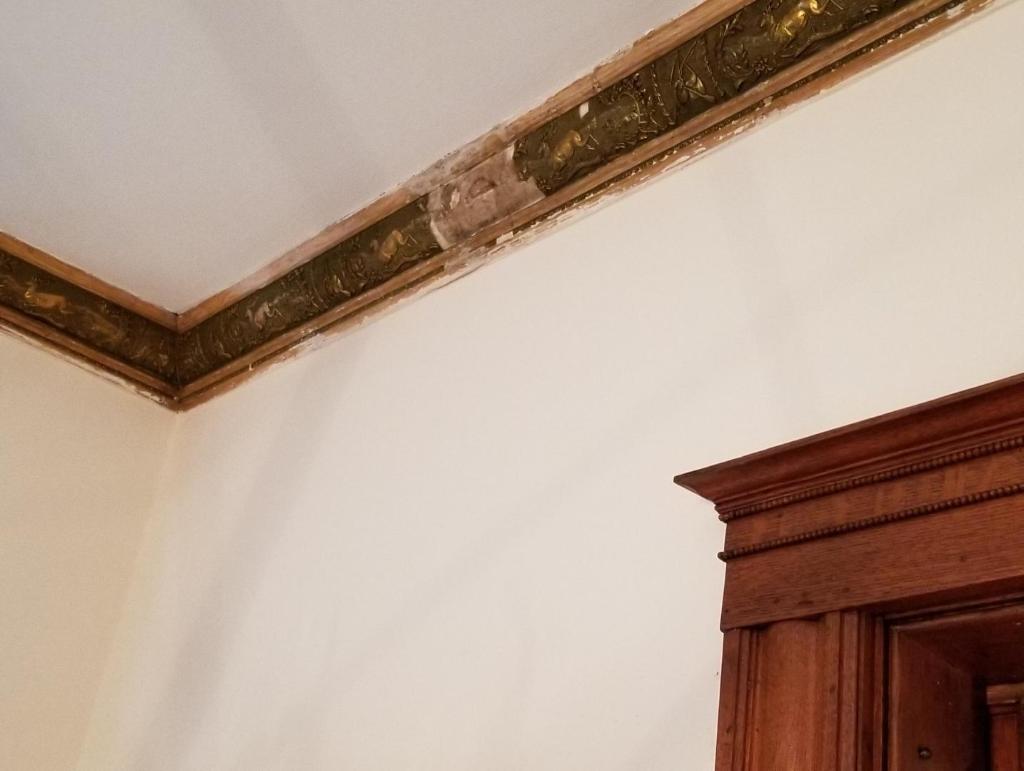
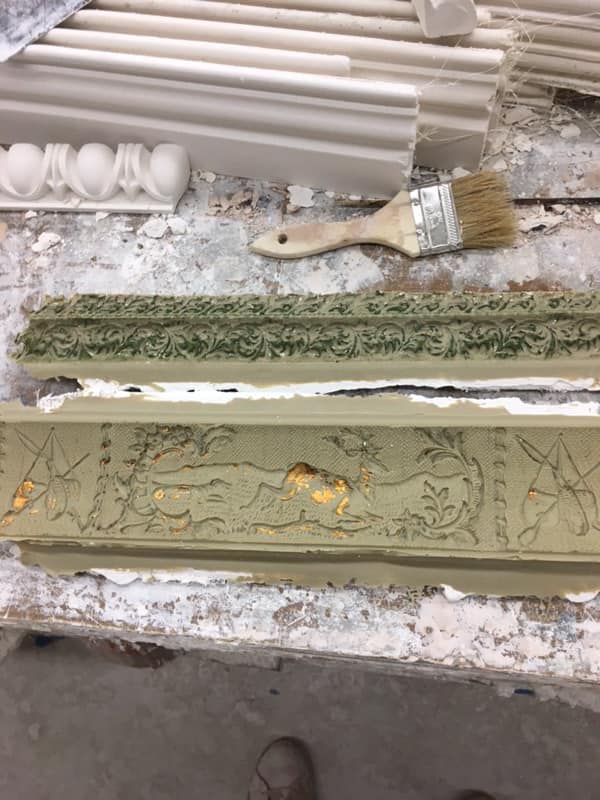
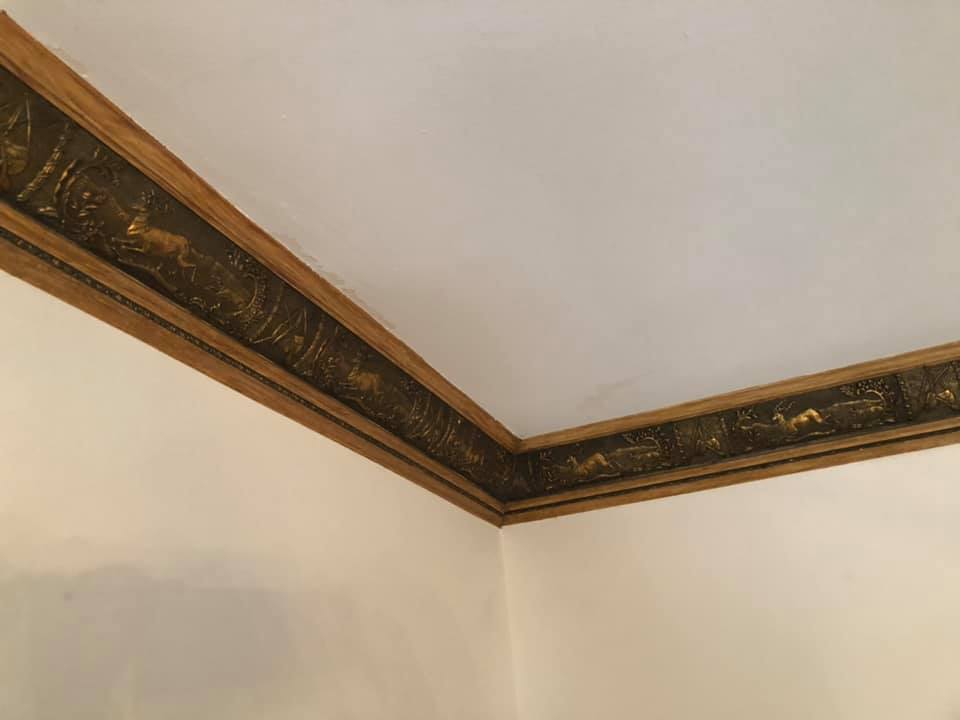
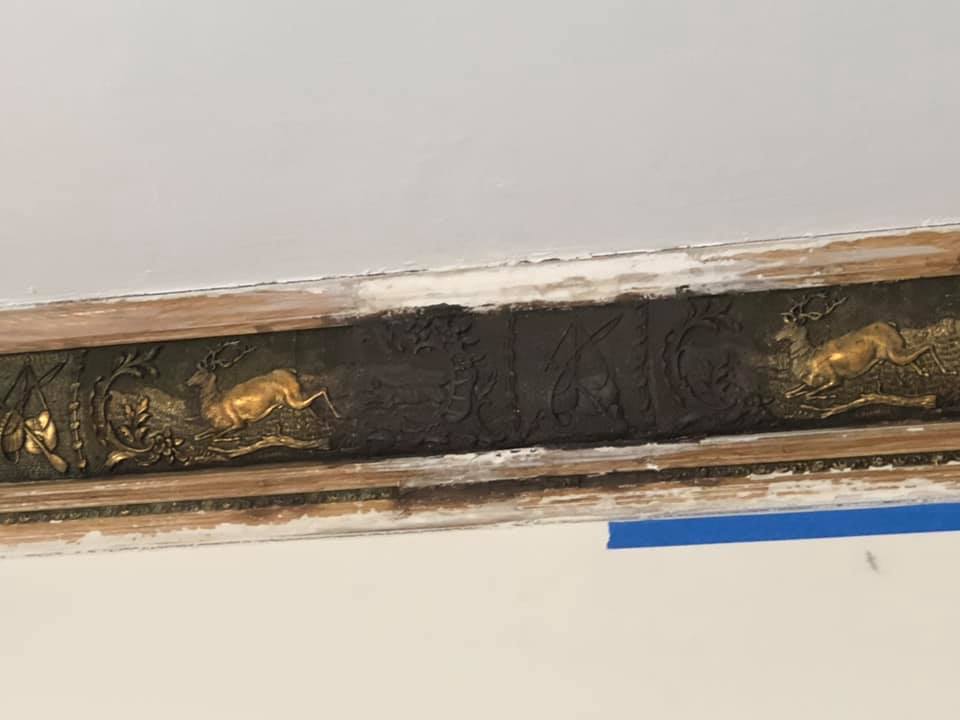
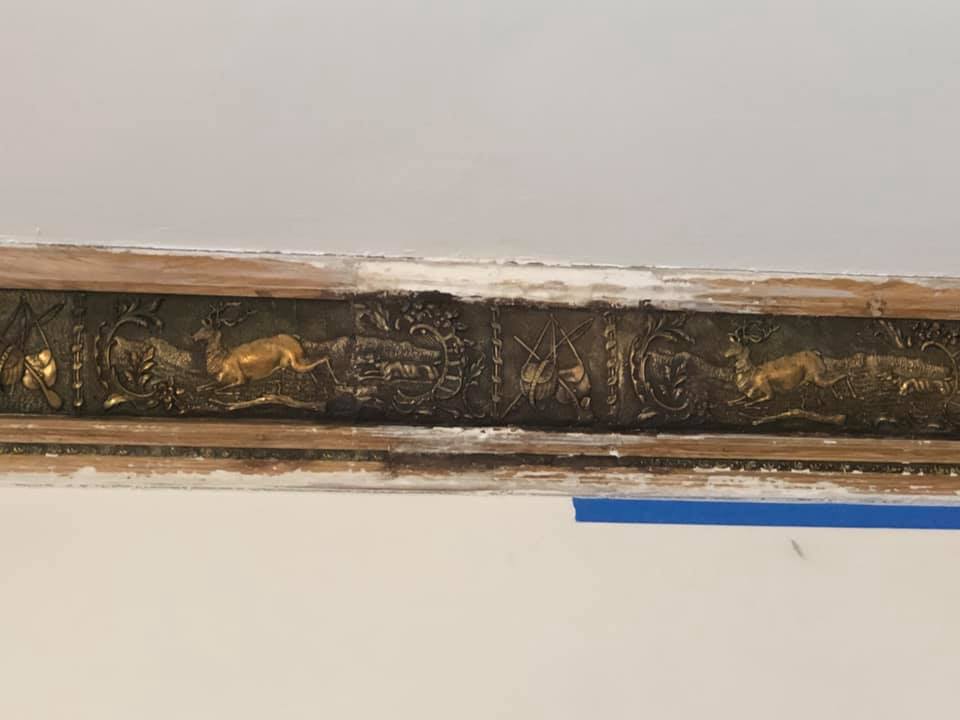
One of the most rewarding projects completed by Old Boston involved the restoration of the crown moldings in the hunt-themed dining room of an 1895 home in Belmont, Massachusetts. A forest-scene motif envelops the entire space: the fireplace and the radiator feature a bold design of leaves and branches; the wainscoting's lincrusta paneling evokes hunting elements; the plaster ceiling medallion, once likely painted in different colors, features floral elements; and floral themes in the stained-glass upper sections of each one of the three windows. Originally, the room likely featured wallpaper with appropriate patterns in greens, yellows, and browns to complete the effect. And, of course, the object of our restoration - the splendid deer-and-dog-motif frieze that runs the entire perimeter of the ceiling.
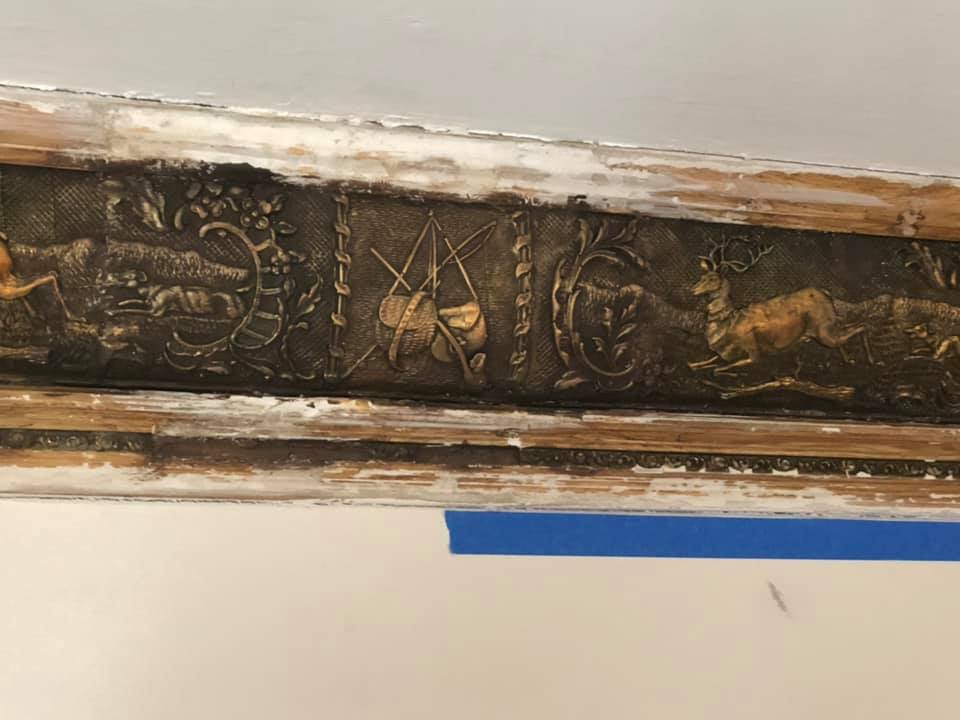
Much of the decorative surface was intact, but a serious radiator leak from the upper floor damaged a substantial portion of the frieze, which crumbled and fell. The upper edge of the crown moldings was damaged when previous owners installed a thin layer of drywall on the ceiling surface. Both bottom and top portions of the cornice were smudged by a careless paint job. The frieze was originally cast by using a composite material over wood, and fragments of various size fell off over time from different areas.
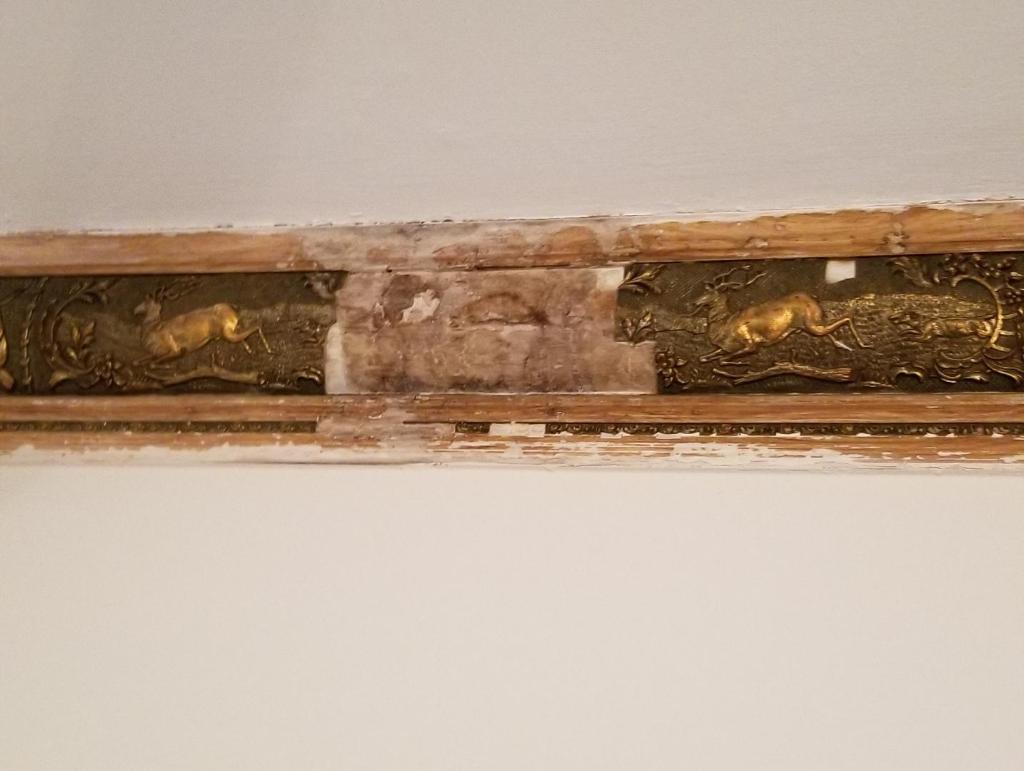
We began by casting a mold of the deer-and-dog frieze:
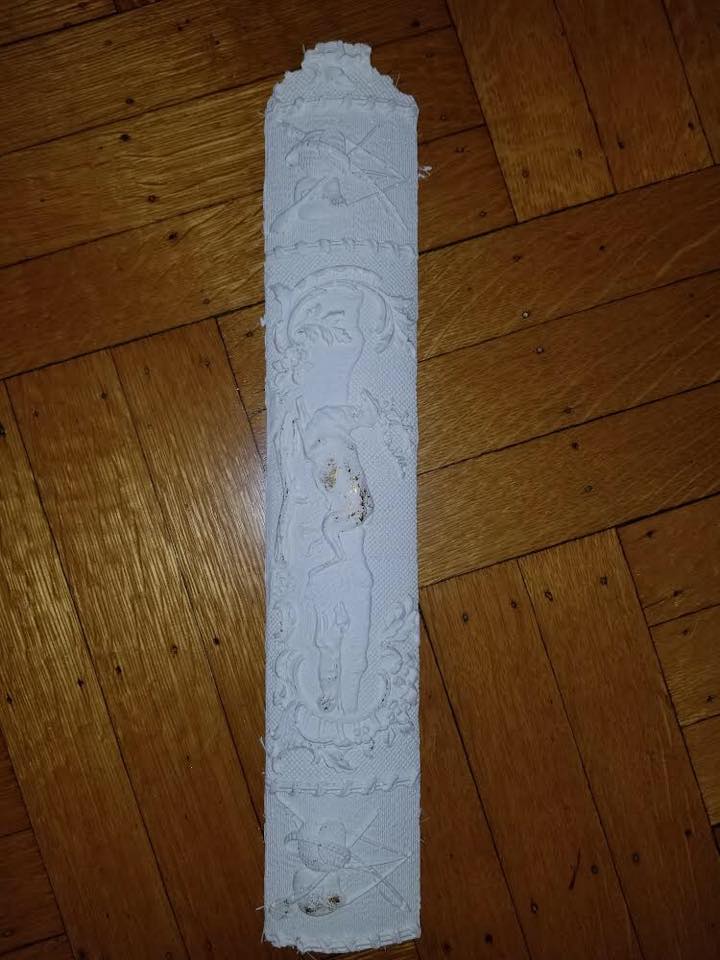
We then replaced all the damaged sections, and filled the missing pieces:

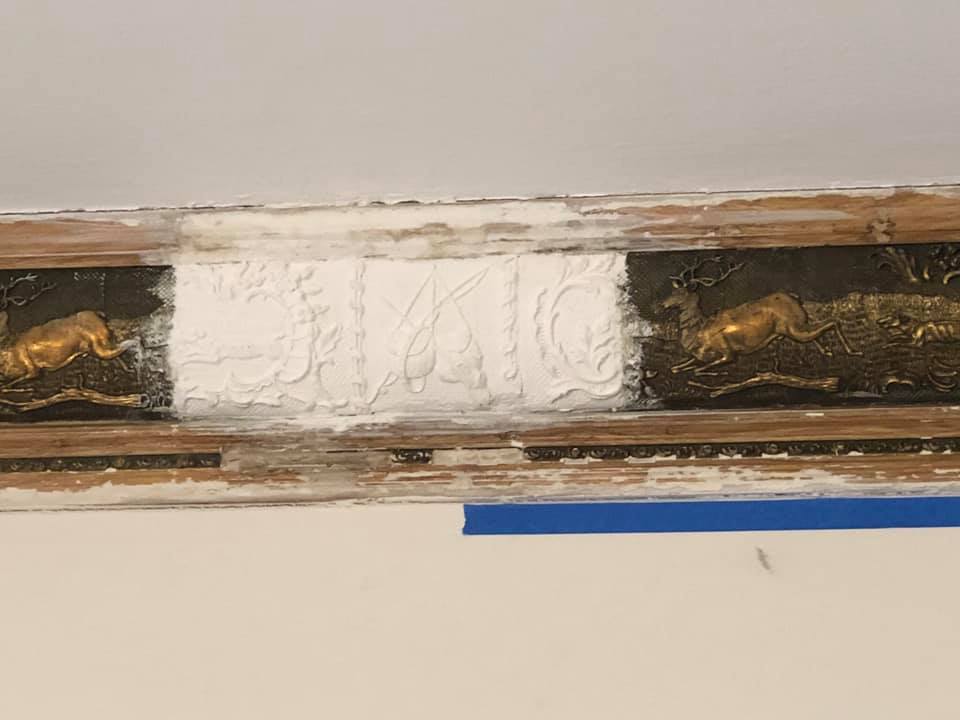
We began the long faux-painting restoration process by taping the edges of both walls and ceiling (what looks like a patch in the corner in the photo above is actually the restoration of a missing fragment of the frieze). Here is the same corner after the faux-painting process:
The large damaged section shown in the first two photos was completely replaced by using a portion of the cast frieze we created.
We began the faux painting process by filling the field color, which is a dark sage green:
We progressively applied the metallic effect to match the existing color, which is a yellow copper:
The trim was then faux painted to match the wood-grain effect. The following photo was taken at the beginning stages of the trim restoration:
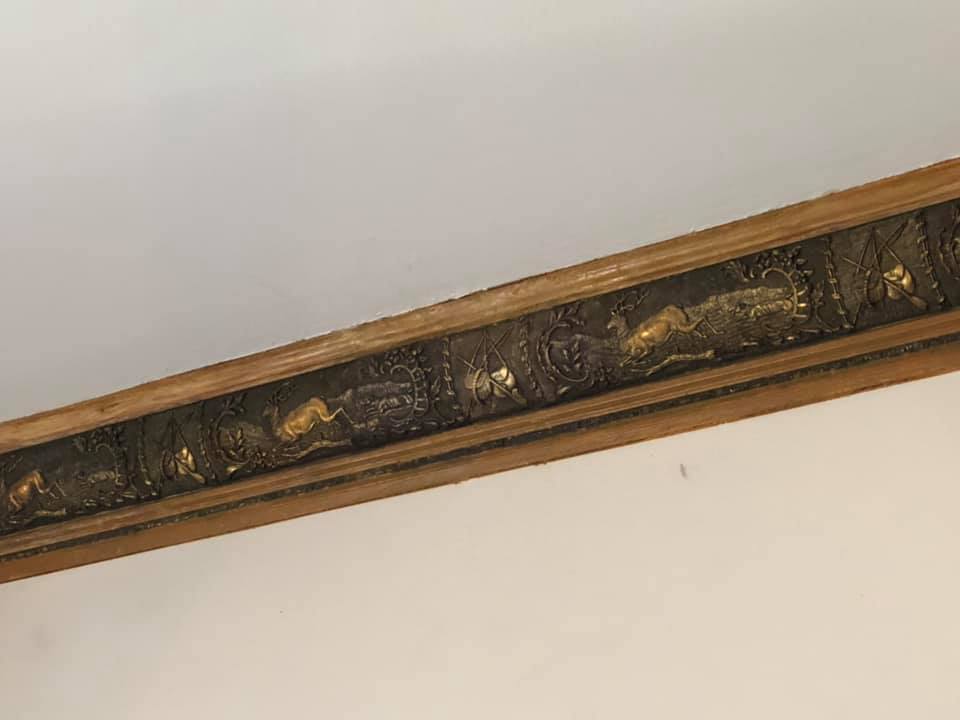
Here is the final result! The large restored portion of the frieze is seen in the far right of the photo below:
Custom-made Victorian-style radiator cover
One of the many smaller off-site projects commissioned during the quiet months of the pandemic was a Victorian-style radiator cover. Highly desirable, radiator covers add a touch of originality to a home, and do not diminish heat efficiency. They are perfect to cover old, unsightly radiators, as well as gain some shelf space to display decorative items and collections.
While not plain, the radiator our new piece was going to cover did not stand out as others early ornate pieces do. And even after painting it the color of the dado portion on the wall to make it blend in, it still looked out of place in the room. The fact that it takes up almost the entire wall next to the room's main doorway did not help. Since it could not be removed or relocated, the owner decided to have it covered. We suggested a Victorian design in imitation of a small bookcase. Made in mahogany, our new creation hides the radiator with a set of custom-made velvet curtains. A tassel trim applied at the bottom gives it an elegant look.
